


Likes
Comments
Share


@NurseGreen23
Follow
This girl is lookin great. She's speeding toward the finish with some of her pistils already ambering up. Smells wonderful.



Likes
3
Share


@French__flair
Follow
N'hésitez pas à me contacter si vous avez des questions!
Pour préparer votre solution, dans votre réservoir ou arrosoir :
Mettre en premier la base (Iguana)
Ensuite Ancient Earth
Et enfin les bactéries
ASSUREZ-VOUS D'UTILISER UNE EAU DE BONNE QUALITE (EC < 0,2) POUR DE MEILLEURS RESULTATS.
J'utilise un substrat non enrichi pour permettre le meilleur départ à mes plantes.
Il s'agit du Promix de Plagron, il a une EC proche de 0, c'est pour cette raison que je commence les engrais assez fort dès le début. Les plantes sont très gourmande sous LED haute intensité et l'enracinement est rapide.
J'arrose tous les 3 jours environ avec 2 arrosages à l'engrais et 1 à l'eau par semaine. Je n'attend pas que le substrat sèche complétement sinon ça réduit l'efficacité de l'arrosage, ça détruit la faune et éventuellement facilite la cristallisation des minéraux.
Au niveau du volume d'arrosage, il faut prendre en compte 1/3 de la taille du pot. Pour un pot de 1L je vais donc arroser environ 300ml. Pour un Pot de 10L je vais arroser environ 3L.
Il est important d'arroser doucement pour éviter que l'eau ne coule tout de suite au fond.
Il est important d'avoir au moins 15% de drain pour s'assurer d'évacuer tous les nutriments non consommé et faire la place aux nouveaux.
IL EST PRIMORDIALE D'EVACUER L'EAU AU FOND DES COUPELLES, c'est une eau qui est chargée en nutriments non consommé et on ne veut pas qu'elle remonte dans les pots car cela risquerait de créer des blocages.
Au niveau de la technique de taille de formation, je réalise tout de suite une FIM que je reproduirai dès que l'apex aura repoussé. La première FIM est la plus longue mais les suivantes sont très rapide car la plante s'habitue à la technique et cela la stress beaucoup moins. En général il faut reproduire la FIM tous les 3 à 4 jours en fonction de la vigueur. C'est une technique très facile à mettre en œuvre et ne demande aucun matériel. C'est aussi la plus rapide pour obtenir des buissons.
N'hésitez pas à me contacter si vous avez des questions concernant la FIM!
Je retire également les feuilles supérieur (pas toute pour éviter de ralentir la plante) qui cache les secondaires pour augmenter l'efficacité de la FIM sur la croissance des secondaires.
Likes
17
Share


@CanadianFillmore
Follow
Howdy growfessors! Welcome to week 7F in the 4x8 theatre. The ladies are hungry, I've been increasing their feeding and they still want more!
Defoliation performed, removed a lot of small dead or dying leaves from the lower branches.
Not much else to say, thanks for stopping by growfessors 👽🌳💚


Likes
7
Share


@CreatureCreator
Follow
Well, the drought stress in week 11 really fucked my plants up, but Twiggy recovered, while Zoey was hurt pretty bad. If I did nothing, I'm betting harvest would've been 25% more, and Zoey's buds wouldn't look so crappy, but overall, I was so happy with this grow! I was under a time crunch, so only did minimal veg for 4 weeks, topping once. Daily watering with 1.8EC mix that was pretty consistent. Kept pH between 5.5 and 5.8. Kept tight control on humidity and temperature up to mid flower, then kept air circulation on to keep room humidity around 55%
Things I'd do differently:
1. Veg longer - I'd love to try a mainline
2. Canopy control - wish I had spent the time on a SCROG screen, or at least a couple of rings.
3. More light sooner into flower. Waited about 4 weeks into flower before maxing out the light. Probably could've bulked them up significantly if I started earlier
4. Drought stressing - For Fucks Sake, keep a close eye on your plants, and the minute they start to wilt, get the water back on 'em!!!
5. Measure your run-off more frequently for salt build-up. Didn't have any problems, but it's a good best practice.
6. Set up proper closed-loop environment to allow for CO2 enrichment.
7. Set up a clone environment before you get to flower. Oops.
Things I was happy with:
1. VPD control system (heat, humidity) during veg and early flower worked flawlessly. Never any nute burn, and super healthy plants.
2. Sterilized soil and grow-room before starting - never had a single bug or any mold/mildew issues. Used a MERV 13 filter on the air intake, exhaust through carbon to crawlspace.
3. Coco/perlite mix - super drainage, low build-up, very healthy roots.
4. Power meter - neat way to measure what's really going into the grow, so when your wife complains about power usage, you can show her the real numbers.
5. Photone app on Android S20 - Knew where my PPFD was for optimal growth control.
6. REX-C100 PID controller for toaster oven - super tight temperature control comes in handy for decarbing as well as toasting oak for moonshine.

Processing
Likes
Comments
Share


@MOTB666
Follow
Girls still growing strong noticed some tips are starting to turn yellow raised light a couple more inches
Nutrient chamge 7/19 made it stronger since I broke my ppm reader and just gonna top off with calimag ph water throughout the week
More lst 7/21
Noticed the smell is definitely getting stronger and more of a dank aroma to it

Processing
Likes
13
Share


@Green_Blood
Follow
On the final few days of a 10 day flush.
Will be chopping down this week to harvest and hang dry.
Really excited to try this one. The smells in the room are unreal.

Likes
38
Share


Likes
6
Share


@Ninjabuds
Follow
My permanent marker plants are looking really interesting! The short and stocky one with the purple leaves is super vibrant. I love that pop of color against the green of the other plants. It's a little different from the taller plant, which has this really cool stacked-up look to it. I'm curious to see if those stacked-up leaves will change color too.
The past few weeks have been so beautiful, watching the plants grow and change. It's amazing how something so small and fragile can turn into something so strong and vibrant. Now that they're getting ready to bloom, it feels a little bittersweet. I'm so excited to see the finished product, but I'll definitely miss having them around while they're growing.

Likes
2
Share


@OGgrows
Follow
some defoliation this week.buds continue to fill throughout this week. slight increase in flowering and growth feeds. good week everyone 🙏💚🌱

Processing
Likes
13
Share


@GeOMaTTiC
Follow
Figured I would start a part two, since GD doesn't go further than 32 weeks. I only have about 6-8 weeks left, so this won't be a long one, but it will be detailed.

Likes
43
Share


@MadeInGermany
Follow
Hey everyone 🤗
It's getting full of buds 😍. When you open the tent, an extreme smell of gelato wafts through the room 😍.
They develop super fast, look beautiful and hardly stop :-). Next week I'll go down a bit with the Ec.
I wish you a lot fun with the update, stay healthy and let it grow 🌱👌
You can buy This Strain at :
www.Zamnesia.com
☝️🏼☝️🏼☝️🏼☝️🏼☝️🏼☝️🏼
Strain
Gelato clone from mother (Zamnesia )
☝️
Genetics: Wedding Cake x Gelato x Gelato 33
👍
Vega lamp: 2 x Todogrow LED CXB3590 COB 55 W
1 x Sanlight S2W 62 W
💡
Flower lamp : 2 x Todogrow LED CXB3590 COB 55 W
1 x Sanlight S2W 62 W
💡 ☝️
Grow Aero System : Growtool 0.8
☝️
Fertilizer:
Canna Aqua Vega A + B , Canna Aqua Flores A + B , Rizotonic, Cannazym, CANNA Boost, Pk 13/14, Canna Cal / Mag, Canna Ph - Grow, Canna Ph-Bloom
☝️🌱
Water:
Osmosis water mixed with normal water (24 hours stale that the chlorine evaporates) to 0.2 EG. Add Cal / Mag to 0.4 Ec Ph with ph- to 5.5 - 5.8
💦 💧

Likes
6
Share

@BasedBuds_89
Follow
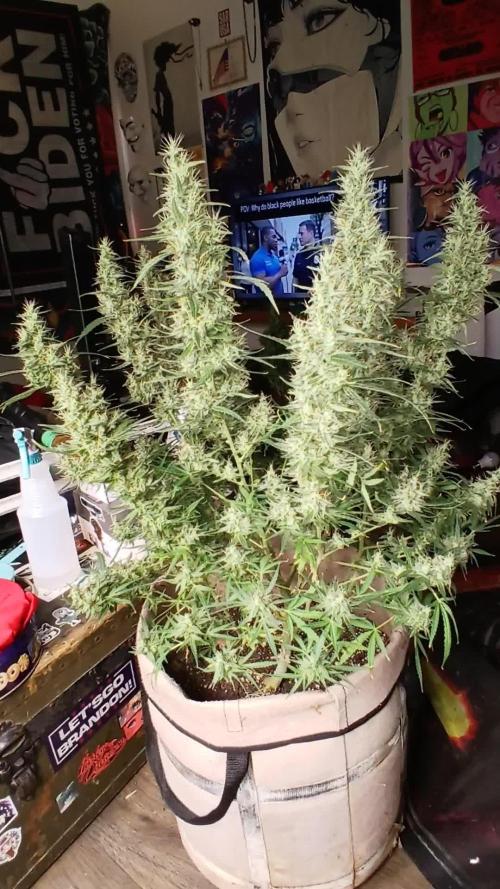
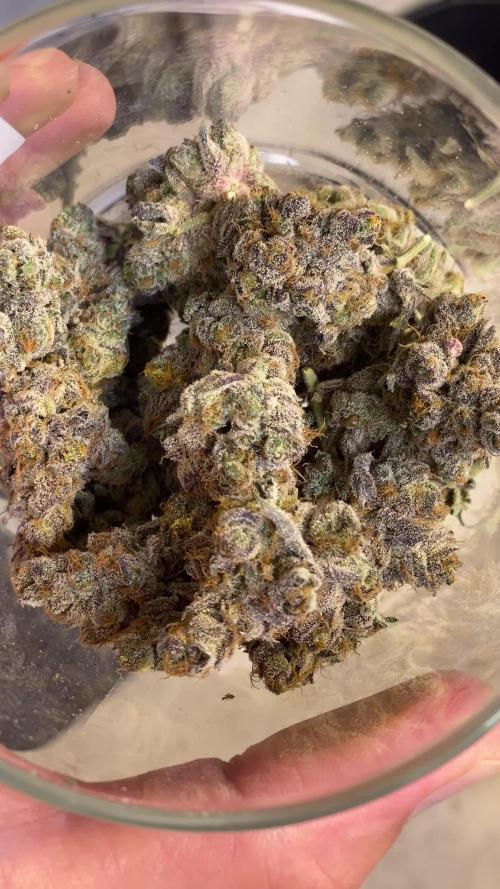
This girl is still doing her thing, there are a lot of white pistils and she just keeps on swelling up. I can't wait to see the yield off this girl.


Likes
36
Share


@nonick123
Follow
Día 122 (30/09) Riego con 750 / 1.000 ml H2O de osmosis
Día 123 (01/10) Riego con 750 / 1.000 ml H2O de osmosis
OnionOG #1 huele cada vez más a tierra húmeda, y sus cogollos son duros como pelotas de golf! ⚾
Día 124 (02/10) Riego con 500 / 1.000 ml H2O de osmosis
Hace 35 ºC de temperatura ambiente! Que barbaridad!
Día 125 (03/10) Riego con 750 / 1.000 ml H2O de osmosis
Hoy bajan las temperaturas 25-26 ºC, más normal para estas fechas
Día 126 (04/10) Riego con 750 / 1.000 ml H2O de osmosis
Día 127 (05/10) Riego con 750 / 1.000 ml H2O de osmosis
Las plantas empiezan a doblar sus ramas por el peso de los cogollos! 💪 🚀
Les aporto sujeción con cañas de bambú y cables de sujeción
Día 128 (06/10) Riego con 1 / 1,25 litro H2O pH 6,5 + Kelp Hidrolizado 0,3 g/L
Locura de día con 37 ºC y un aire caliente asfixiante!
💦Nutrients by Lurpe Solutions - www.lurpenaturalsolutions.com
🌱Substrate PRO-MIX HP BACILLUS + MYCORRHIZAE - www.pthorticulture.com/en/products/pro-mix-hp-biostimulant-plus-mycorrhizae

Likes
3
Share


@GrowmieDeLaStreet
Follow
Quite a sad run to be honest, but it's all due to bad decisions on my side.
I decided to top her and even though she seemed to take it well, it might have triggered something. She also was a stretcher with such a large inter-nodal space that I didn't find necessary to defoliate anything and I didn't remove any budsites. The result was a ton of small popcorn buds. And to not help, I waited way too long before giving her nutes, thinking I could do all the run without using any but even when I started giving her some, the schedule was close to being improvised.
I would normally have given her more time to flower but a space problem in the tent caused me to chop her down prematurely, still with a majority of cloudy trichomes and some amber ones.
I would definitely redo some stuff but she still outputted some very decent flowers, effect and taste wise because let's be real, they look terrible, almost like seaweed.
I'd love to retry this strain.
Likes
63
Share


@Chubbs
Follow
420Fastbuds
StrawberryGorillaAuto
Week 1 of Veg
What up grow fam. These 3 have sprouted amazing with no issues. All 3 had popped after 48hrs of being in the soil. Still misting the top soil with my sprayer to keep the soil moist but will start regular manual watering of 500ml every other day this week.
All in all Happy Growing


Likes
15
Share


@tokesly
Follow
Flush ended two days before the darkness period. Decided on a 48 darkness periods though some prefer 24 or 72. The darkness did help trichomes reappear at the tops of the canopy. Going for a longer dry of 10 days, best temperatures are 60-70F to preserve the terps with 50-60RH. This has been an amazing experience, definitely putting in more passion into the next run.

Likes
27
Share


@RDWCGrowing
Follow
6/13/2023
Week 10- Day 1 of Flower (Day 131 overall) (Day 70 of Flower)
Auto Pilot Day 6.. Checked the Trichomes and the bud density and both are looking good.. Definitely needs a little more time for the Trichomes to be where I like, so based on my check I think we are still looking right around the end of the competition 22June to be done and ready for harvest. I do like that the fade is coming in the leaves nicely, so my chart I think is dropping off the Nitrogen exactly like it is supposed to.
6/14/2023
Week 10- Day 2 of Flower (Day 132 overall)
Auto Pilot Day 7.. Decided I would take some contrasting pics today with my light up to 100 and my light all the way on Dim. I hope you enjoy the pics.
6/15/2023
Week 10- Day 3 of Flower (Day 133 overall)
Auto Pilot Day 8.. Decided to take a look at the Trichome's today and Check to see where they are at and honestly if I might ho ahead and start my flush tomorrow and harvest on Sunday.
6/16/2023
Week 10- Day 4 of Flower (Day 134 overall) (Day 74 of Flower)
Today I pulled an Armageddon however instead of darkness they are going to get 48 hours of light. The reason why they are going to get light instead of dark is when I was taking out the netting a lot of the buds were so heavy they fell over and exposed some areas I really want to get some light to... so 48 hours of light at 40% while I watch what should be a beautiful final fade as the plant eats up the last Nutes. If anything goes wrong I can abort take the photos and cut so will pay really close attention to how it is looking over the next 48 hours.
Added 30 Gallons of PH only Water.
Reduced Lighting to 40% removed program time off. 48 hours of light.
6/17/2023
Week 10- Day 5 of Flower (Day 135 overall) (Day 75 of Flower)
I had someone tell me that a few growers had done as I did and Gone Armageddon on the plants. Filling it with PH only and said the plants did not respond well and they were taken out of the comp at the very end because they felt like the pictures just wouldn't come out right. Even though I did go Armageddon, The PPM is at 353PPM with the residue of what was left in the buckets after draining as well as what I am getting from the TAP so I think they are doing good but I am checking them every few hours to see how they seem to be doing and I think they are doing good still and are on track.
I also started prepping the area for the pics tomorrow
T-24 Hours until Chop
6/18/2023
Week 10- Day 6 of Flower (Day 136 overall) (Day 76 of Flower) (Harvest Day)
What a day.. what a day.. what a day.. as I was setting up and trying to figure out how I was going to get my pics #3 stems started breaking, it fell over and other stems broke.. So no really stunning competition photo for her, she had such a nice purple fade.. #2 stayed up in the Tent so that is the one I had to go with to submit for the contest. I wet trimmed them as they went into the tent and they took up three rows hanging in tent. I also decided I wanted to try some so I put a little in the freeze dryer for a 48 hour smoke test.. I will weigh it and add that to my total weight for the plants when it is all done.

Likes
2
Share


@SolitudeCorners
Follow
Vanilla Zoap
Genetics:
Vanilla Cheesecake × Zoap (by Lit Farms)
Yield: Total dry flower yield: 198g
Aroma & Flavor:
Dry buds: Sweet, creamy vanilla aroma with light fruity-soapy notes from the Zoap lineage.
It has a clean, dessert-like scent—like baked vanilla goods mixed with floral soap.
Smoke is smooth and creamy with a mild fruity aftertaste. Very pleasant and easy on the throat.
Structure & Growth:
Medium-sized plant with moderate branching.
Leaves are light to mid-green, and buds are fluffy and light-colored. faded to black in the late flowering
Visually attractive flowers—great bag appeal.
Recommended Use:
Ideal for flower consumers who enjoy smooth, sweet-smelling buds.
Perfect for joints or blunts—mellow, relaxing experience without being too heavy.