Likes
1
Share
@OGMeow07
Follow
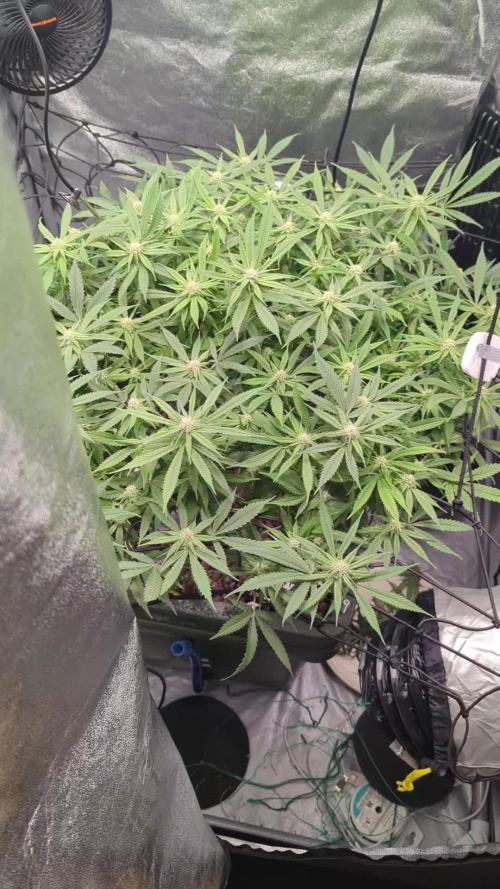
Everything is supercropped to able for them to fit but i adjusted my led light and stick the thing into the ceiling 🤣
Likes
11
Share
This week I present the HARVEST of GODFATHER OG Autoflowering #1. The second plant is another monster, and I'll introduce it to you shortly. The plant has a slender appearance, due, as mentioned, to a longer-than-average transition period between vegetative growth and flowering. It almost seemed like it wouldn't flower, but then, perhaps due to genetics or the addition of Power Buds to stimulate initial growth, the plant produced beautiful flowers, nice height, and a good overall result. This plant's flower is a bit airy, but not bad at all. Pot and Soil - This plant was grown in a 20-liter airpot with Plagron BiloLight Mix organic soil. Lighting - A Zamnesia Phytonaut 480W LED lamp, used from mid-flowering onward, allowed fruiting. We achieved a PPFD (photosynthetically active photon flux density) between 800 and 1200 μmol/m²/s, with cycles of 24, 23, 20, and finally 18 hours. Z https://www.zamnesia.io/it/14526-lampada-led-per-coltivazione-phytonaut-480.html (National link in case Google doesn't work) Growing system: Zamnesia Ecosystem, fan, extractor, and grow box, all made by Zamnesia. Trichhomes: We let the plant mature longer than usual to bring out its indica characteristics; this time, there are numerous amber trichomes and beautiful red-tipped trichomes. Feeding: Grown with Plagron Official, a 100% organic base fertilizer, and all recommended additives. Visit www.plagron.com for grow cycle calculations, product selection, and general information. All nutrients are available on the Zamnesia website. Also check out the live substrate and the fantastic new Zammi product line. You can find this excellent strain here: https://www.zamnesia.io/en/11102-blueberry-crumble-auto-zamnesia-seeds-feminized.html (Google it if the link doesn't work; it's a national link) You can find this excellent strain here: https://www.zamnesia.io/it/14330-godfather-og-auto-zamnesia-seeds-femminizzata.html (Google it if the link doesn't work; it's a national link) Terpene // Caryophyllene, Myrcene, Limonene Parents // Alpha OG x XXX OG x Ruderalis Genetics // 60% Indica / 40% Sativa THC // 26% CBD // 0-1% Climate // Mediterranean Resistance // Mold Resistant Taste // Aroma // Sweet, Fruity, Spicy Pine Diesel Effect // Relaxing, long-lasting, body high, calming Zamnesia Description - Godfather OG Automatic by Zamnesia Seeds is the autoflowering version of one of the most potent OG strains on the market. With 26% THC, a rich terpene profile, and a full flowering cycle of 9-10 weeks, this indica-dominant hybrid is ideal for growers seeking fast, aromatic, and intense results without compromise. Godfather OG Auto is the result of a cross between Alpha OG, XXX OG, and Ruderalis. This blend retains the potency of the original OG while incorporating the speed and autoflowering potential of Ruderalis. The 60/40 indica-sativa balance ensures fast and reliable yields. Every hit delivers the classic OG bouquet: sweet fruity notes, fresh pine, wood, and a subtle diesel aftertaste. The smoke is dense, aromatic, and satisfying, perfect for lovers of bold, complex flavors. Compact and discreet, Godfather OG Automatic is perfect for small spaces, balconies, or grow tents. Indoors, it can reach a height of 100 cm with yields of up to 450 g/m², while outdoors, it reaches 120 cm with a potential yield of 150 g/plant. All this in just 9-10 weeks from seed to harvest, with feminized seeds for maximum reliability. "The best that nature has to offer" www.zamnesia.com
Processing
Likes
24
Share
Day #72 - Decided to release the beast! made the hooks loose in order to prevent any stunt. plant has already acquired the desired shape. Day #75 - Did some LsT
Likes
6
Share
@BudXs
Follow
Super busy with a move and a big garden reno. Sorry, this is the only update for this week
Likes
1
Share
Really big stretch! Doubled in height in a little over a week. Pre flower sites all over as she is getting ready to do her thing. I may have finally duplicated a successful effort.
Likes
9
Share
Vamos familia vamos actualizar la segunda semana de floración de estas Kritical. Es una variedad sencilla amarillean un poco por una carencia de magnesio que solventare con los productos de Agrobeta ya veréis cómo recuperan. En las fotos podréis comprobar que 3 de 6 sufren bastante la carencia de magnesio. Agrobeta: https://www.agrobeta.com/agrobetatiendaonline/36-abonos-canamo Mars hydro: Code discount: EL420 https://www.mars-hydro.com/ Las maximas de temperatura no superan los 26 grados y las mínimas no bajan 20, así que no me puedo quejar. Los niveles de humedad también son los correctos van entre 50%/65% de humedad relativa. Por supuesto el Ph lo estamos dejando alrededor de 6. Hasta aquí es todo, buenos humos 💨💨💨
Likes
21
Share
5.23 F60 5.27 F65 - Everything has been going well this week. The plants went through a feed cycle that should carry them through flower no problemo. Started with the AACT Tea, then a bokashi drench with Fish Shit from Fishheadfarms and plain water from here on out. They are drinking quite a bit. 1.5-2 gallons a plant every 3ish days. The terps in my tents smell out of this world. The ScrOG and 3x3 are like a candy store. Passion Berry has mango/guava citrus terps while Deadstar v2 has strawberry watermelon terps. The 4x5 is much more varied, but in general the sweet pink dominates with it's grape candy terps and the dread bread cuts through with it stanky gassy lemon while the prayer pupil smells like moth balls and a bit of GMO. Very lucky to get to experience this much variety. 5.29 F67
Likes
23
Share
March 12, Day 71 my Sea Of Green is now a Sea Of Buds 😄 Tomorrow I will collect the three plants closest to the poster that seem to be mature. Next week I will collect the last two gorillas (excluding the two plants with a photoperiod predominance) because they seem to need a little more time. March 13, Day 72: I wanted to make a video or a video to show you the defoliated plants ready to be cut, but when I removed them from the SOG they no longer had the support of the nearby plants and the branches could not support the weight of buds. I'm not complaining, in fact I didn't think I would get such a big harvest. For the same reason I only cut and put to dry two plants, I don't have enough space in my dryer that is only 50x50x120 Centimeters. However, I made a video with Harvest and a video with the new layout of the plants in my SOG. Now in my sea of buds there are three gorillas left, two cheese in advanced bloom and two photoperiodic gorillas and the margin there is a Cheese that has just started to bloom. I realized that I can make only one harvest page for each variety, I thought it was possible to create one for each plant, so I will edit the diary for the final harvest, when I will also collect the last three gorillas in my secret garden. Thanks to everyone for the views and likes 😉
Likes
12
Share
Me enamoro cada minuto de esta planta .
Processing
Likes
84
Share
SATURDAY: Today I mixed up 5g of nutes for my bloomers and douched them. I'll let them dry completely for 2-3 days, then flush them a bit with a little boomerang and calmag. I ordered a Gorilla lite-Line High CFM kit last week and received it today...fits my tent poles perfectly. This really works to keep the tent walls from collapsing in too far, and I was able to use one pole to rig a shelf to put the fan. That freed up a good bit more floor space. Yesterday, I ordered a 4 x 4 Vivosun tent and inline fan, and a 1500w (5 x 300w COBs)..this tent will be for vegging autos to put into the flowering tent as others are harvested, as well as a place to veg photos that I encounter before they are moved outdoors. I'll probably end up ordering another of the same lights, but for now I have a few supplemental lights I can use...blues and daylights. I'll drop a few WW's or CC's as soon as that stuff arrives so they are big enough to occupy flowering tent space in a few weeks. SUNDAY: I spun everybody around and misted with spring water a couple times throughout the day and formulated my plan for ventilation of the new tent which should be here Tuesday. I plan to hook the exhaust from my 4' x 5' tent as fresh air intake in the top of my 4' x 4'. By doing so, all that good CO2 that is exhausted from the flowering tent will rain down over the veg tent inhabitants before being exhausted from the bottom of the tent. I don't think heat will be a problem in the new tent with so much less light, so I'm optimistic that it will work just fine. I may even route the exhausted veg tent air back into the bottom of the flower tent, giving the girls another shot at the CO2 enriched air....we'll see... MONDAY: Got the room ready for the new tent which will arrive tomorrow, misted, rearranged, and whispered sweet nothings to all the girls. Tried out my new macro lens...need practice.. TUESDAY: Mixed up 7.5 gallons of nutes for the bloomers...ceased open sesame and began beastie bloomz. Assembled my new 4' x 4' Vivosun tent and set up its ventilation and lights. I implemented my idea of exhausting the semi-cool/CO2-rich air from my flowering tent into the top of the veg tent. Only needed 5' of flex duct, so it's got great airflow..no need for another intake fan...yay! Tomorrow I'll get the 6" x 6" x 6" 'Y' duct and connect my 6" booster fan to it. The booster fan will still be sticking into the flower tent, drawing 70 degree a/c air into the tent via direct flex duct connection, but will now be mixed with the exhausted air from the veg tent. I'm probably gonna keep the ventilation in both tents running once I've got a fully closed-loop system. The only reason I was shutting down the ventilation was so that CO2 would build up for 4 hours, but even if it gets exhausted from the flower tent, whatever the veg tent inhabitants don't consume will find it's way back to the flower tent in under a minute...and so on, and so on.. I spent a while putting together a lighting schedule that will allow me to decrease temperatures while still keeping optimal color spectrums and maintaining good light intensity. Had to empty the tent so I could get to everything...what a pain! --------------------------------------------------- FLOWERING TENT Timer #1 --- exhaust, intake (digital timer) on - 6:15am off - 2:15am Timer #2 -- primary blurple light (manual timer) on - 6:30am off - 10:30am on - 11:30am off - 3:30pm on - 4:30pm off - 6:00pm on - 6:30pm off - 8:30pm on - 9:30pm off - 2:00am Timer #3 -- all 4 daylight cobs (manual timer + power strip) on - 6:00am off - 12:00pm on - 12:30pm off - 6:00pm on - 6:30pm off - 2:00am Timer #4 -- all 4 overhead reds, sub-canopy tubes, side strip lights (manual timer + power strip) on - 1:00am off - 6:30am on - 10:30am off - 11:30am on - 3:30pm off - 4:30pm on - 8:30pm off - 9:30pm Timer #5 -- all 4 miracle LED (flowering) in corners, corner, daylight supplemental (manual timer + power strip) on - 6:00am off - 10:30am on - 11:30am off - 3:30pm on - 4:30pm off - 8:30pm on - 9:30pm off - 2:00am ---------------------------------------------- VEGETATIVE TENT Timer #1 --- primary light and exhaust (manual timer + 3-way splitter) on - 6:00am off - 2:00am Timer #2 --- blue supplementals (manual timer + power strip) on - 2:00am off - 6:00am on - 10:00am off - 2:00pm on - 4:00pm off - 8:00pm Watching temps closely.... ------------------------------------------ WEDNESDAY: My new lighting schedule seems to be working..high was 87 today, and it dropped into the upper 70's last night...schweet! I'm pretty confident that when I get my ducting in on Friday and have the closed-loop ventilation for the two tents completed, that it will drop the temp even further and I'll not be wasting so much precious CO2...and then I can ADD MORE LIGHTS and begin with renewed heat mitigation efforts!!! I'm really wanting to pump up the deep reds and maybe far reds during their 4-hour "nighttime" ...maybe more low-wattage sub-canopy tube lights, too. I guess that the girls really loved the Beastie Bloomz...much fattening happening... It was so nice being able to move Kushpialidocious into the new veg tent...more space, better canopy penetration. THURSDAY: Spun everybody around and misted with spring water..soil still moist. Temps held pretty much...86-87 all day..i changed the overhead light timer a bit so it kicks on a half hour earlier and as a result temp climbed to 89-90 for about 15 minutes, but quickly dropped to 85 when the 4 COBs turned off... when the big blurple and 4 miracle leds in the corners ( + the extra 40w daylight supplemental in my darkest corner) turned off 15 minutes later, it quickly dropped to 79.....15 minutes later...74...15 minutes later...72!!! "By Jove, I think he's got it!" I might actually be able to harvest these fuckers with all terpenes intact.👍 On second thought.😎..I'm gonna dial back the reds a half hour again (and maybe the 4 COBs), because I'm going to try switching out the 40w Sansi bulb for my extra 100w Bridgelux/Epistar 3500k COB light. (MORE POWER!) I really don't think it gets very much, if any, hotter than the Sansi 40w. I'm really hoping to keep it below 90 at all times and as close to 70 as possible at night (red zone).. new temperature test will be tomorrow. It will also be the first run with the closed-loop ventilation system in place...all ventilation will remain on at all times in both tents, and based on my rudimentary calculations, my 2 x 6" inline fans and the 6" duct booster can move enough air to circulate through both tents about 240 times per hour. I figured that like this: The 3 fans move 1,010 cfm. The two grow spaces total 252 cu ft (4 x 5 and 4 x 4) There is just over 12 feet of ducting involved in the loop, which is about 6 additional cubic feet. Correct me if I'm wrong...I'm not an HVAC guy.. The A/C kicks on, on average, every 12 minutes, so there will be a regular supply of cool fresh air injected into the mix as well. My hopes are high! (and so am I) One other interesting thing is that the addition of the 4-5 gallons of frozen water in jugs makes the substrate temp stay in the lower 70's all day long..I'm hoping the roots at least get the signal that "Winter is coming." FRIDAY: Well, shit. My closed-loop ventilation system didn't work quite right...evidently, I should have studied up on calculus. Rather than the negative pressure in both tents that I expected, both tents swole up like they were snakebit..(positive pressure?)..and temperatures in both tents started to rise...no pinche bueno. I'm sure it's my math that's off..., for example, I didn't account for the fact that the flowering tent has a carbon filter which decreases the cfm's considerably, and the intermittent flow of central air is a variable that I am also uncertain how to factor. So....I scrapped the idea until I can achieve truly equivalent intake and exhaust in both tents. HOWEVER...I did discover a trick that I will dub a "heat siphon," which is a definite improvement, but only in the veg tent. When I disconnected the flex duct from the 6" inline fan(exhaust) in the veg tent, I had intended to stub it off for now. I noticed that there was considerable "back-flow" caused by the duct booster intake fan in the flowering tent. So, the duct booster draws air from the a/c register, AND from duct which I've placed in the veg tent immediately above the light. I moved the 6" inline fan in the veg tent to to top of the tent and connected a 3' piece of duct to it that is also placed immediately above the one side of the light, so heat from the veg light is ejected into the room and partially drawn into the flower tent where it is mixed with cool a/c air, carbon scrubbed, and sent to the veg tent raining the unused CO2 down over them at about 85 degrees, which is considerably cooler than the normal tent temp. It's still not perfect.. Because the flowering tent is absorbing some of the heat drawn of the veg tent light, I'm up 3-4 degrees on average in the flowering tent, which is not what I was hoping for at all...it's now hitting 92 degrees in the flowering tent at some points during the day, and hovering at 79-80 at night, so I'm gonna have to revise the lighting schedule again..
Likes
16
Share
@Dunk_Junk
Follow
28cm vertical growth this week! Almost doubled her height!!!!!!!! Powering through flowering :-)
Likes
97
Share
Blütetag 58 Hey Freunde, ich hab heute spontan geerntet (leider etwas zu früh), aber jetzt kann ich mich auf Weihnachten konzentrieren und die Trichome waren fast alle milchig, also halb so wild und die Lemon Cherry wär eh nicht mehr fertig geworden. 🤓 Für den ersten Run nach über 10 Jahren bin ich relativ zufrieden, vor allem in der kurzen Zeit! 🦊 Die Bilder sind Leider nicht wirklich gut geworden, war ohne Lampe leider zu dunkel, aber ich mach nochmal welche wenns getrocknet is! Ich wünsch euch und euren lieben schöne Feiertage und frohe Weihnachten! 🎄💚
Processing
Likes
33
Share
✋Wk 7: Will the size difference begin to fall in line with the predictions, and rearranging the wind. 👉 This week is Day 48 thru Day 54 total. (Feb 16 thru 22). Today (day 54ttl) the 1 gallon plant is at day 21 flower and the 3 gallon is at day 9 flower. 👉 This week has shown some interesting things. The 1 gallon plant is still ahead in the physical timeline, and has also started to demonstrate how the smaller pot is limiting its size. The 1 gallon has been ahead of the 3 gallon plant in size and stature, until this week. The 1 gallon has stopped stretching and is beginning to develop its flowers. I was worried it would continue to get bigger and may become an issue vertically as well as horizontally. The 3 gallon plant has grown a few inches and isn’t really stretching up yet, but it is growing overall in size. It’s a big dome of leaves right now. Its main cola is same height as a couple of the secondary branches. I doubt the main cola will remain the same but this plant hasn’t been typical from its germination so only time will tell. 👉 The other interesting thing has actually been trending this way for a couple of weeks…the run-off for both plants has been lower than the inflow and no low EC fertigation has been needed. The 1 gallons roots are undoubtedly densely packed in the pot. It takes several minutes to apply the nutrient solution. The volume needed has also increased. The 3 gallon still readily accepts the solution, but it takes more every day and the run off takes longer to start running out of the bottom. The saturation level of both pots has increased, and the 3 gallon especially. The EC for both has stayed below the inflow EC. This is unusual because part of the volume of water in the pot when saturated isn’t absorbed by the plant, it evaporates on all sides of the pot and the top of the media. This would leave the dried nutrients wich would rinse off at each fertigation adding to the TDS. The reduction of EC in the run-off means the nutrients are being utilized by the plant. I have dropped the inflow EC of the 3 gallon a little because I was worried about burn. I have kept the EC of the 1 gallon plant at the low end of the recommended EC range of the General Hydroponics drain to waste nutrient schedule chart for the Flora series of nutrients. I use the entire line of these nutrients. For the one gallon I had been giving it only the “simple program”, and the 3 gallon the “expert” (entire line). This week when I noted that the stretch has pretty much ended for the 1 gallon, and decided that I will go ahead and give it the expert mixture as well but given at the low end of the EC range still. Ive included the Fertigation log for the week. It shows the tent temps, the outdoor temps and HVAC setting. Also, I note when a fresh batch is made and what week on the schedule it is. Each pot has the recorded time of fertigation, volume, pH, and EC of the solution given and the corresponding run-off. I mix the solutions at full strength and use a solution with just silica and Cali-magic to reduce the EC to the desired EC. I mix that in at fertigation time. I also adjust the pH if necessary at this time. 👉 The structure of the 1 gallon is very stout main trunk, and each branch is very sturdy. The bigger fan leaf production has given way to smaller leaves. The structure of the 3 gallon also has a very stout main trunk and each branch is very sturdy. The 3 gallon has some very large fan leaves and it has lots of vegetation. Its very dense and hard to peer inside. For both plants I have begun to selectively remove branches that would not be producing anything but larf. The 1 gallon only needed the lowest main branches trimmed. I also removed some of its smaller shaded secondary branches and leaves inside the canopy. The trimming on the 3 gallon is similar, however its much harder to get inside. I just do a little at a time at each fertigation. Im not sure if the first set of branches on the 3 gallon will be tall enough to keep but I want to wait till the plant starts stretching to see what they will do. Ive left as many leaves as possible in the 3 gallon…a lot of really nice fat food factories. This plant may go very large, or it may stay somewhat stunted as it did during the early veg phase. 👉 I positioned the plants I closer to the back wall. I bought a oscillating tower fan and was hoping it would be a good addition to the tent. Alas, it had too strong of a wind current (on the lowest speed) and the 1 gallon was showing signs of wind stress after 2 days. So I removed the fan and re-positioned the smaller fans I had clipped up top of the tent. Both fans are now hanging lower on adjustable ropes and point toward the plants. They are working well like this and the air flow is good. I may modify the oscillating fan and install a variable resistor to the fan motor to reduce the flow. I have added the branch support to the legs of the stand the 1 gallon is on. These posts will be used to support the weight of buds or position them as needed. I will add the support posts to the 3 gallon plant after it has gone thru its stretch, maybe another 2 weeks for that.
Likes
4
Share
Welcome to week 8 of flower!! Things are really starting to get heavy and loaded in frost! I will be checking the trichomes this week to see what plants are nearing the end and which ones will still need a bit more time to mature and finish. To say the least Im very excited to get to the finish line with these ladies! Huge shout outs go to @MarsHydroLED and Hidden Vault Genetics for their dedication on making stellar gear that making growing extra fun and really easy. Huge HUGE shout outs go to all my followers and to the people who stop into the diary alike to show their support! Keep on inspiring to grow! -The Projexx Day#50F Some of the ladies are still putting on some mass! Day#51F Pictures N/A. Macmelonz and Banana Smoothie #1 will deff need more time to finish then the rest of the ladies in this room! Day#52F Started removing some leaves from the bottom , I will be looking to continue this until harvest day. Day#53F I knew I should have installed the second net, Some of the flowers are leaning right over now haha. Going to get some stakes to add into the buckets for some support. Day#54F Checked the trichomes looking like 6 of the 8 plants will be starting their flush while Macmelonz and Banana Smoothie #1 will continue to feed for a bit longer before starting to flush. Day#55F Really digging trichome production on Creamy Cereal #2 , she's got a wild Lucky Charms aroma to her that's quite unique.
Likes
11
Share
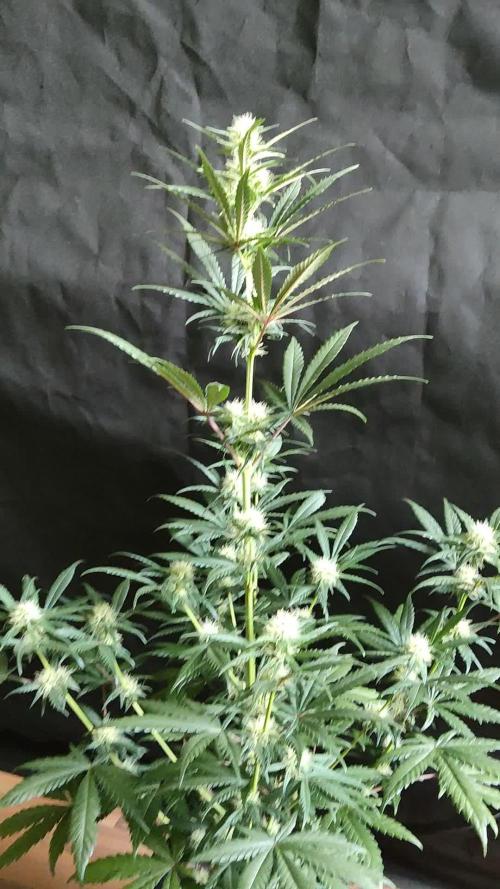
Even after all the mistake, I managed to grow one big marijuanas. This looks like one big stick of weed. This plants smells amazing !! I have never smelt weed like this
Likes
45
Share
@valiotoro
Follow
Very very sticky i had to change gloves every 2-3 buds!🤓 Delicious smell🤤
Likes
8
Share
@Monkeyboy
Follow
Wer now at 48 day, from seed in a green house, only water from tap every day and once a week where I have saved my old coffee grounds I water them down and give a bit of that. So nice and big and green. Hopefully all ends well. These were meant to be 75 days seeds, if so not long now. Angain thank you everyone for you tips and support.