
Likes
Comments
Share


@pareto
Follow
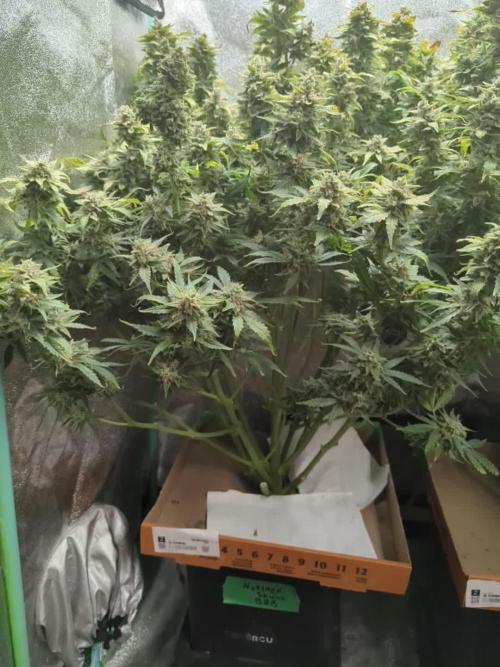
Looks absolutely awesome. This is my first photoperiod and you can really tell the difference in density and overall quality.
She did 35g dry. So I achieved less than 1€/g cost per gram for the frist time! The biggest factor obviously beeing the shorter light cycle compared to the autoflowers I usually run.
To save cost it might be smart to give the autos 12/12 as well. I will stick to 18/6 tho.
Total Runtime: 82 days
--------------------------------------------------------------------------------------------------------------------------------------------------------------------------------
Set up cost (fixed costs)
-Lamp: 40€
-Timer: 3,5€
-Pot: 4€
-Total fixed costs: 47,5€
Given 5 years (or 15 grows) usage time translates to around 3,17€ per grow in materials.
Variable costs:
-Seed: free (gift)
-Soil: 6€
-Fertilizer: 3,50€
-Power: 15,21€
-Total variable costs: 24,71€
-Total costs per grow: 27,88€
-Cost per gram: 0,80€/g


Likes
Comments
Share

@RCUgrows
Follow
Seeds are still not ready yet. Probably need about another 2 weeks
Likes
5
Share


Likes
Comments
Share


@Brocolis_Grow_Br
Follow
Chegando ao final desta colheita como comentei na última semana, por conta das pragas. Elas já estão em um nível quase incontrolável e eu já sabia que perderia alguma parte para mofo, já que tomou muita chuva e os buds estão densos.
Colhi 71g, descartei talvez uns 2g logo de cara. Ficou secando em condições um pouco ruins, pois os dias muito quentes e úmidos continuaram. No final, a planta ficou bonita e densa, mesmo que pequena. Acabei ficando com 13g secos, sendo que 4g foram para o lixo com mofo. A quantidade foi super baixa, mas fiz um teste no vape e gostei muito. Mesmo com todas as desgraças que ela passou, o produto final ainda ficou bem legal, o que já me motiva para fazer novamente mas agora com um cuidado diferente e no indoor.


Likes
15
Share


@Philhsy
Follow
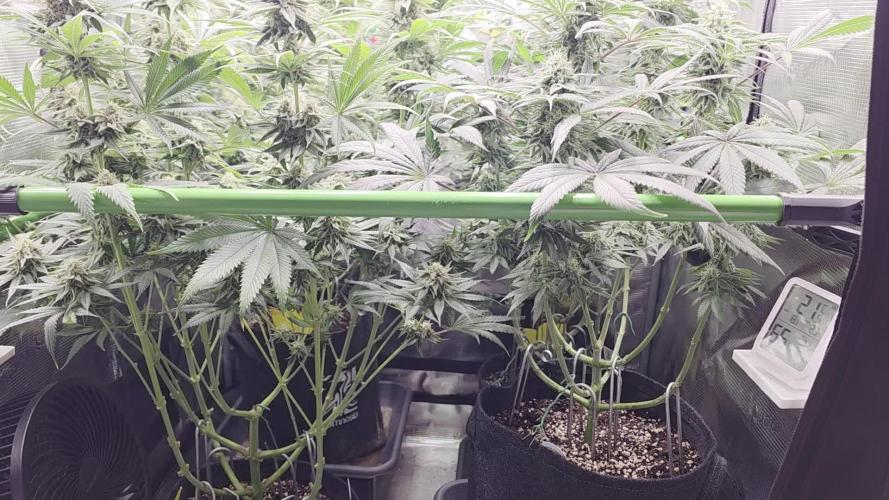
They go fatter day by day, still clear trics, and some nuggs are littel under developped further down stem, but massive colas covering the whole surface, smells like fruity candy and sticky as hell, resun production is insane. I just dont eant to get mold drying this, any yips? Whole plant or chop of piezes and hang or dry net, colas are real fat and rock hard.. counted round 35 top colas


Likes
38
Share

@McBubatz
Follow
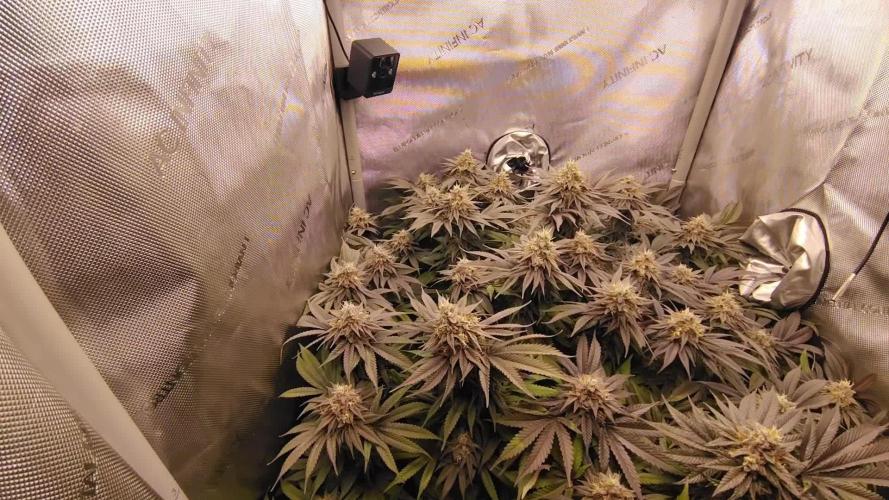
11. Woche, Pinky is absolut on 🔥, sehr schöne dicke und große Buds, Blätter sehen gesund aus und der Duft schön Fruchtig/Erdig stark in Richtung Gelato. Die letzten Wochen werden die Fotos im Zelt gemacht da die rauszuholen mittlerweile ganz schön arbeiten is 😅.


Likes
60
Share


@Belverde
Follow
Welcome guys
Finally here we are with the conclusion of this cycle with two NICOLE KUSH 👱♀️👱♀️🌱
Version from @supersiberia seed bank
I have growed all two in the same way (lights, pot, nutrients ecc)
One of them was more sweet in the aroma, but each one with a kushy base
Anyway, back to the harwest time 👇
The plants is placed for entirely in a cupboard upside down, after the cut, with the leaves still attached..
After about seven / ten days, when the leaves were pretty dry, the flowers crunchy, but before the branches break cleanly...I cleaned all the buds thoroughly, I cut them off the branches and put them back inside of a brown bag. .for about a day / two
Later I placed everything in a classic glass jar
For 24h I left it closed ⏳
Then I started opening it several times a day
More or less, after about three weeks, I usually close the jar permanently and wait a few more weeks to start using the flowers 🔥
About taste and effects 👇
The flavors in smoking are exactly the same you can smell in each one..is good but in the long time i prefer different Kush strain..
The most sweetness one has a taste like the terpenes you can find in a strain like Critical or skunk..
Not my favorites 🙌
The effect is pretty relaxing and staying chill
Body stoned
Is not my first choise but in the end is enjoyable
The plant in growing is also great to see
Nice dense buds with a good amount of stickiness 👌
I have growed her in a 3,5l airpot (not the original) with organic liquids nutrients, added in to a soil / cocco / humus and perlite base
But if you want to learn more about, check out all my previous weeks 📆
I want to thanks @supersiberia for the seeds 👍👍👍
And to @growdiaries for make this possible 🙏
FC ✌️
🇮🇹


Likes
12
Share


@CanarianGrow92
Follow
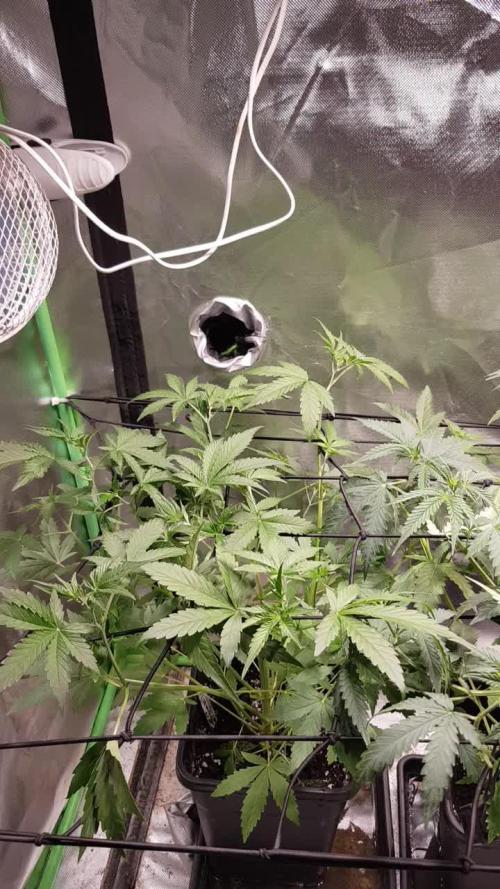
I think that during the next week she will start flowering 😁 i placed sulfur for any possible bugs (trips for example)
8th of August we put guanokalong nutrients on the soil which was a gift from a local grow shop, lets try and see how it works!
9th August water
10th August, again took the plant to my balcony, there was a loooot of wind and heat again, i also had another plant on my roof which died due to the heavy wind 😔
11th August water
12th August nothing
13th of august, today the plant is 21 days old, it should be starting to flower already!
14th of August nothing
Likes
17
Share


@The_Projexx
Follow
Welcome to week 6 of flower! Things are starting to shape up quite nicely and some of the plants are starting to get colourful! Its hard to capture on the current camera I'm using but my new one that's on its way should be much much better! Overall really excited to see what this week will bring!
I will be checking some of the ladies trichomes to see how far along we are either this week or next week to give me an approximate harvest window!
Huge shout outs to @MarsHydroLED for all their outstanding work on lighting and grow spaces that make it fun and easy to grow! Huge shout outs go to @Seedsman , @PyramidSeeds and @GreenHouseSeedCo for all their outstanding work developing genetics that give us that fine medicine!
HUGE HUGE shout outs to all my followers and to the people who stop into the diary alike! Keep inspiring to grow!
-The Projexx
Day#36F Pictures N/A. Ladies are starting to fade but they're still putting on mass daily!
Day#37F Pictures N/A. The terpenes an nose coming off the plants its INSANE we got lots of nice and unique smells going hard here!
Day#38F Removed some of the leaves blocking nodes, cleaned up the bottoms abit more.
Day#39F The ladies continue to put on mass and some of the leaves are really starting to turn purple!
Day#40F The ladies continue to cruise along. Fuel D.og#2 is starting to come back to a nice green
Day#41F Kings Juice#1 is really starting to show her fade now! Ladies continue to put mass on.
Day#42F Water increased to 5L each at 550PPM. Stalks are getting massive!
Recap: Things went really well this week, the ladies continue to put on mass on their rock solid flowers! With some of the plants starting to show signs of an open window for harvest Im going to break out the microscope next week to see exactly how far along we are! Over all really really pump about the plants , looking like its going to be a great harvest!


Likes
55
Share


@Coopmc
Follow
Chelated ready for week 9 cut diet should be amazing!!
Look like might go week 9-1/2 or 10 to
Finish flower
Pulled her at the end of week 9 all pistols were red and all glands had white center and a few the clear part around the Whit was discoloring and I like my Sativas a bit clear headed will have harvest report in a week when dry she been washed and hung to dry
Likes
Comments
Share


@GrowDiaries
Follow
Meeting with Pyramid Seeds to pass them their growers' rating!
Yo, check this! Pyramid Seeds just snagged their rating️ from the growdiaries.com crew—big ups for their awesome seeds! #PyramidSeeds #growdiaries
Likes
93
Share


@PEAKYPLANTERS
Follow
Wo wo wo....stop everyone, friends! Stop for a second and admire my central zkittez that seems to be turning into a Christmas tree 😋
Very satisfied with this flowering start
Many greetings and good harvests for all
Likes
8
Share


@Centollo
Follow
Acabo de hacer el lavado de raíces. Ya queda poco, y estoy deseando ver el resultado. No tengo ninguna favorita, porque todas tienen una pinta tremenda!! La Oreoz es preciosa, la vanilla frosting tiene unos cogollos increíbles, la Og kush es mega resinosa ( eso si, una se ha quedado pequeña y con cogollos más flojos), la Blue sunset sherbert huele increíblemente afrutado, y la Rainbow mints es super productora y suculenta. Feliz semana amig@s!
