


Likes
Comments
Share


@Old_school_grower_dude
Follow
Day 2; 48 hrs the Fat Bastard seed's root was long enough to go into soil today. I use Happy Frog soil for seedlings. The soil cup will stay on the heat mat insuring the temp is kept at 75°F.
Day1; 24 hrs and the Fat Bastard seed has a visible tap root. I'll wait a little longer before putting it in soil. I like to see the root about a quarter inch before planting.
Day 0; germination, paper towel method.


Likes
4
Share


@weed_gastro
Follow
day 42: LOTTA leaves, had to defoliate 2-3 times.
they started to show their first pistils a couple days before the Ayahuascas, hope I can do a harvest before May,(the Peyotes) but it seems really tricky..unfortunately I need to leave them for a week in April. I'm pretty scared to leave them alone at the end of flowering...
Day 43: do you think the leaves on 2 plants might be too dark green? Thanks!
day 46: defoliating

Likes
23
Share

@Hempface86
Follow
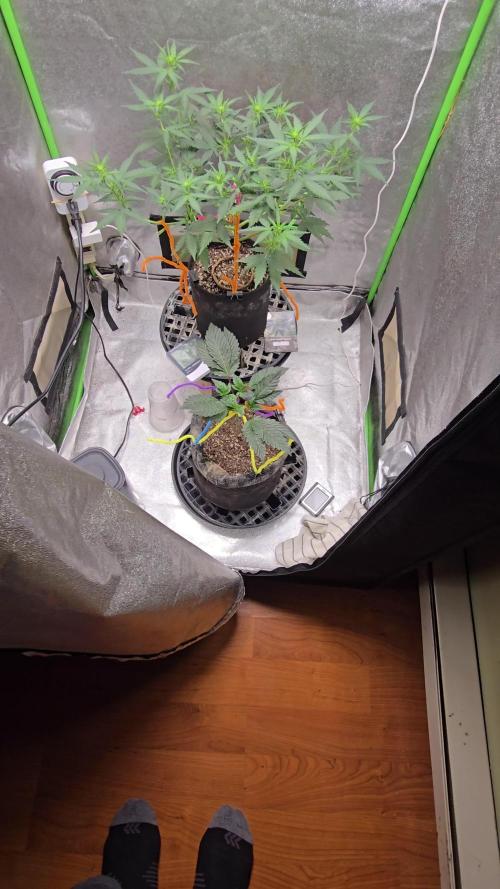
So this has definitely been a slow grow, but I also mainlined it and topped her twice... I'm not feeding her my regular feed, which is like steroids. I'm using the dots and i was warned about the growth being slow in the beginning, so no worries... I was actually going to grow her out normal, but I had to use the flowering tent for an unexpected auto flower, not being an auto flower .. no bad one is doing well.
Shout out to @Grow4releaf

Likes
4
Share


@GeminiCQC
Follow
Can't wait for each of them to finish out. Giving them hopefully their full amount of water, less with the auto as it was stunted by the 12/12.


Likes
19
Share


@Skinnytalls420
Follow
Day 16-27/12/21 all looking good!!!! Day 20-31/12/21 still haven’t got space in other tent yet so hopefully can move half of them out this one next week!!!!

Likes
10
Share


@StickyFingah420
Follow
Extrema producción de tricomas de esta variedad! Gran parte de los frutos lo usaré para extraer rosin, su resina se ve ideal para este propósito.
Fragancia exquisita a ponche de fruta dulce, con notas ácidas y un fondo de especias.
Como mencioné anteriormente dejaré la parte de la reseña de efectos, sabores y sensaciones para cuando los cogollos estén secos y curados, por ahora solo puedo apreciar lo que mi vista y olfato me permiten captar.
Totalmente conforme por la calidad de estas flores y agradecido de los amigos de Sweet Seeds por la confianza.
Será hasta la cata entonces, buenos humos!

Likes
99
Share


@TheFoxFarmer
Follow
Week 8 Flower
Flush flush flush 💦🚽💦🚽💦
It's extremely important to flush for at least 14 days when using synthetic nutes, or any bottled nutes in my opinion. The aim is to make her cannibalize (fade) as much as possible before she's chopped. By doing this, she's using up her stored nutrients, causing the leaves to eventually die. The better the flush the cleaner the smoke 👌💨 even when in an organic set up, the plant needs to be nicely faded before being harvested. Otherwise she's still full of nutrients. I still feel I'll be able to get an even better flush when I eventually make the switch to RO water, as my tap water holds a ppm value of approx 150. It's not too much, but 0 is always better.
She was taken down on Day 57 flower, after a 16 Day flush. I didn't want to take her any further as she was quite stressed being so close to the light. So to avoid getting seeds I waited until she had a beautiful fade before giving her the chop ✂️ I always take my girls down about 30mins before the light turns on so there is minimal chlorophyll production in the plant. This is to ensure the best smell, taste and overall burn after drying and curing.
A subtle but very sweet-ish tropical fruit skin kind of smell to her. Her buds are super dense and covered in trichomes. I trimmed off all fan leaves and then each branch was hung in my drying box and placed in a cool area. She was dry after 6 days and ready to be dry trimmed and jarred for curing. I'll post those pics with the harvest update!
Thanks for following and happy growing! 🐺

Likes
8
Share


@Inceptionist
Follow
On the 15/10 it was my fifth day in a row without any more signs of pollensacks or nanas! It really is worth the try is you think, you got something special on your hands. If you can, better isolate it anyways, I just didn't have the room for this.
Everything else also going great and the Double Dunked is starting to show why this run is called "Purple Beauties". From now on every week was going to blow my mind on just how beautiful this grow could turn out.
Also did some defoliation again


Processing
Likes
103
Share


@MG2009
Follow
10/06/2018
Week 3 flowering and she is developing very nicely, a couple of tops poking through scrog. Drain and fill reservoir, roots are huge it will be interesting to see how many liters it will take to bring up to full.
10/08/2018
Peaked at the roots, and they are massive i fear that she will be limited in root space, 6 liters to top reservoir starting out I needed 9 liters, so I guess roots take up 3liters worth of space! Time to keep close eye on water level, as feeding frenzy is about to commence.😀, and definitely getting her stretch on!,so if i get the Captains Cake taste, I be happy,cause she definitely got some stretch i wanted.
10/11/2018
Stripped lower branches under the scrog, good growth bud sights getting denser, posting before and after pictures of week 3 defoiliating.


Likes
13
Share


@NicoKh
Follow
Was a little bit challenging for me, due to the outdated nutrients table, mostly on the Flowering period, also little thing like i have to fill more the pots, also with this kind a strain and also with cuts instead of seeds, may be is better to don't do the topping and don't loose time and energy on the vegetative period. At the same time, more or less about the 8th week of flowering it starts to appear something like Alternalia or Overfeed of Phosphor still don't sure. All this issues have impact the grow in terms of the size of the branches and the whole plant, the size of the buds and the hardness.
In strictly terms about the strain, the quality is out of mind, amount of resin is crazy, just have to improve my skills and get bigger crops

Likes
31
Share


@TheHighentist
Follow
Was away 18/6 allday
19/6 *Water day / Looking thirsty
-Temp 25-27day/21-23night
-60% RH (2+-)
-950ml
to Biobizz Topmax, Bio heaven, and Bloom (1ml/L) biobizz grow 1ml/L
20/6
-Temp 25-27day/21-23night
-60%RH (2+-)
21/6 - I did some defoliation/trimming and removed a couple of branches that i didnt believe in.
-Temp 25-27day/21-23night
-60%RH (2+-)
22/6 Some pistils are starting to show, they look happy, but soon thirsty.
-Temp 25-27day/21-23night
-60%RH (2+-)
23/6 *Water day + i denoted lower shoots and romoved a couple branches and small leafs
-Temp 25-27day/21-23night
-58% RH (2+-)
-1050ml
to Biobizz Topmax, Bio heaven (1ml/L) Bloom (2ml/L)
24/6 Removed a couple of top fan leaves that were shading some tops.
It looks good an healthy
-Temp 25-27day/21-23night
-55%RH (2+-)
25/6
-Temp 25-27day/21-23night
-53%RH (2+-)


Likes
1
Share


@GLeee
Follow
Unfortunately one of the light bulb slide down and burned plant:( after the burn i had to remove 2 leafs as shown in video.

Likes
45
Share


@tresplantes
Follow
Heading into week 4 of Flower everything is budin up really nice
Zake is the frostiest and really has a mint smell to it
Looks like i already can say that breakpad breath will take more than 8 weeks
Pink runtz x Hollywood has a Creazy Sweet smell to it


Likes
34
Share


@gottagrowsometime
Follow
Welcome: thanks for dropping by. Be sure to drop a like so I know you viewed and I'll pop onto see what you got a going, or not, it's up to you.
This lady will be ran on a mix of 3 different nutrient brands. I germinated her in La Calavera/Voodoo juice, atlas and La Sirena from Terra Power. Y I called La Calavera voodoo juice you probably wondering. Well here's a little bit of info. So terra power is new, but they are far from new to the understanding of what makes great nutrients, these ppl are the ones who actually make their own nutrients they don't get specialists to do it. For example. Terra Power are the ones who hold the pattens and make some of ANs best products that made them who they are today. They've taken most of ANs line up and perfected it with modern day research with autos/ruderails and leds in mind. They haven't changed 3 core nutes which we all know as Voodoo juice, tarantula and Piranha, yup u read it. These guys are the makers (patten holders) of all that top widely used award winning nutrients. Even if you look at there base nutes what's in them, will blow u away. Have a look for yourself. Led-grower.eu/terra-power/ you'll see a chart with AN product names and an = sign beside it and the corresponding terra power nute that they have perfected upon will be beside it. Also for 70e a L Piranha they charge 50e a L for the exact same stuff just a dif name. There base nutes start as little as 8e. The Piranha and tarantula will be the most expensive as they are the same on AN just not as expensive as 70e. Very excited to see what there 50 billion microbes per 1ml enzyme will do aswel as the bud/resin foiler enhancer sprays, or you can use them in the substrate or hydroponics. Was surprised that the PH was perfect for these 3 nutes it came in at 6 exactly with my new milwalkee meters I can 100% trust the readings. PPM was 627 idk which one did it, as Voodoo juice has no EC value. I was so use to AN products I only remembered to PH/EC test the spray bottle after I did the 4 plants I used all them 3 just for seedlings. Thankfully the PH was perfect and these weren't even their PH perfect nutes which they have not only in their base nutes but they also have a stable PH buffer for hydroponics as PH can jump mad in pure water as the water goes down the stuff that was in the nutes is left behind and causes your PH to rise as it's taking away the ratio of water it was mixed with and in turn increasing the ratio of PH from the nutrients into the water. With mystic green that will be a thing of the past. It's like a ph - + but it'll hold a stable PH when you dry your roots in 15l and say if it drinks 5L that normally means your PH will rise around by a 1/3 or just rise unless you use a - + buffer. Whereas you find your desired PH and then add the stabilizer and it'll keep the PH in that level. Well that's my understanding of it. Read up about them if you are thinking of buying AN look at these as these ppl made AN what it is today. They should work together like a dream as I'm sure their formulas are close just terra powers were made in the past year not 5-10 years ago. I've been dying to try the jungle juice so will be using just them from AN and the rest will be Terra Power Nutrients. (OK, THATS ENOUGH ABOUT NUTRIENTS)
The plant herself is a new strain and hasn't been widely grown yet. So, there's not a big base line to go by and see how far she can be pushed. FB though, is a hardy breeder and gives little in the way of Hermies and so on. I don't have to worry about room or height this time so I'm going to go heavy with LST and train these girls out. I'll top most of them but 1 or 2 I'm going to let it grow natural. Just a bit of LST. Gonna be hands off on this 1 For the first few wks and focus on improving my LST and other skills on my other 13 plants. Will be good to see what the jungle juice trio can do on its own, see what the happens. Expecting big things and yields from these grows.
30/4/22 Veg started. 38hrs in and she's up and going strong. (Update 5hrs after this update plant 2 has popped) Glad I turned the light on last night. For the 1st day the light will go on for 7/7 making sure to give these lil guys a rest is important and as they are autos it won't hurt in the slightest. Something I'm trying out. As if the fems pop up though I'll be then starting the lights on a 20/4, regardless of where all the other autos are at. It's important to get that light cycle in the plant straight away but for autos. A lil rest at the beginning will go a long way. Just until they are showing lil fan leafs or you can wait until they show them and then turn your light on.
Decided to start these 2 on a few nutrients early. I've used Mystical Green, Artios Touch and fire yields all from Terra Power. None of these nutrients have any EC change to the solution. Mystical Green does many things but it's main purpose is to facilitate and stabilize PH allowing other nutrients to continue working in a constant set PH, as PH tends to change when added to soil or if in hydroponics when the water level goes down the PH buffers or ph from each nutrient is left behind and can cause an imbalance in your mix. I use .2 of the trio of jungle juice which changed 100 PPM to 350 or .7EC , very potent stuff. I really can't see using 4ml of each of these nutrients as the EC would be off the chart. Maybe it even out the more you add, idk, very small amount makes a massive EC change. Gave 100ml of 6 new nutrients on top of the low PPM feed they got when planted. I'll feed again in a few days. Maybe 4 and give water in 2 days.
1/5/22 Growing well plant 1 2-3x as bigger than Yday. Plant 2 4x bigger than Yday both will stay on the sane strength nutrients for the rest of the week.
2/5/22 100ml both plants. Tip dried both tops to stop any fert burn/water droplet burn. Same strength from day 1, same 1l mix holding same PH/EC. Very stable.
3/5/22 Plant 2 looking a little pale. Will up EC to 1.5/750ppm. Will upload pic after comes out of dark rest.
Added 2ml biobizz calmag to my new mix will apply this week. Made 1L 400Ppm mix and split into 81L bottles. So it is only about 50ppm if even that.
4/5/22 Both plants are showing light cal mag def. Bit hard to see but it's there. I don't think my jungle juice is high enough. I've added cal mag and will stay the course for the rest of the week and then I'll go her EC to 1.8-2. All plants are close to spliting and breaking off making a new node maybe 2 days off. Or less.
5_5_22 Split has happened on mist of them. Growing strong. Their faces are 6&7.5 cm long and in height 6.5&7.2cm PPF of canopy is around 450-480.
6/5/22 So, it's begun. I've created a negative pressure environment, 1st time, let's see if it makes an impact. On wk 3 onwards I'll be running the intake extraction for 5mins every 30mins and I'll have 2 co2 bags up. If the RH becomes a problem or temp I'll put the extraction/intake back on 100% of the time. The extraction fan/intake is set at a ratio of 2 to 1. (100% extraction 50% intake) making a negative pressure environment, best way to show you have done this, the walls in your tent should bow in lightly.
Same Day. Okay, so this my last update. Going to run fans the same right up until flower and then I'll be sealing up my tent and adding 2 co2 bags. And will be adding a dehuimifier and setting at 45% And it checks every 30mins and if it's gone up it'll turn back on and bring down to 45 or set RH, so no co2 will escape. The temp will be bordering 30-33c and then when they go into their rest window they'll be transferred to to a negative pressure environment with low temps and 45-50%RH. I'll only be able to do this for the 3 weeks of pre flower. And maybe some more, it depends how hard the dehuimifier will be working, but i want dense buds and only way to improve that is by introducing Co2 and then a negative pressure cold environment for terps. Then I'll be putting them back into full negative pressure environment and the Co2 will be useless, again all depends how it's gonna affect my bottom line. That and I only have 2 intake fans. I'll be going into detail about my Co2 adventures the week before I'll be prepping them to be able to withstand high temps, so I'll gradually bring up the temps the last wk of veg 28c max and that way when I push it to 30-32c in pre flower she won't stress as much and then they'll go into 6hrs of 21c, back to negative pressure environment. Should bring the temps down from 30+ to low 20s within a min, so I'm hoping to bring out the terpness.
Will go into details about Co2 and how to create it in a grow tent without spending 4-500euro. You will need a dehuimifier though and 2 20$ Co2 bags. And an reasonable air tight tent.
Thanks for reading this week, this is the last update for this week.
gottagrowsometime
Likes
9
Share

@MaltedMadness02
Follow
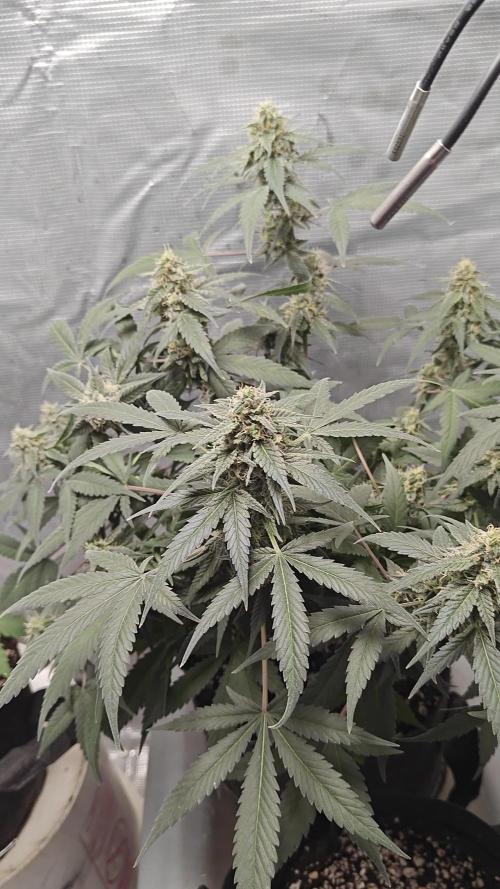
She's filled out really nicely in these final weeks. The leaves are maturing and turning amber, I hope to cut the plant here soon, I don't want too much amber in the buds, as I'm aiming for a more cerebral head high. She's got really nice citrusy diesel tones. Very similar to my first grow with notable different tones. Make sure to check back again soon as I will add more pictures throughout the week! Thank you for checking in!
Likes
38
Share


@Ukfarmer420
Follow
Hi guys flip day Sunday 6pm 12 hours lights off starts 🤞😀💚 I will be using a autopot system this grow.

Likes
31
Share


@Cultivate
Follow
Week 8 Looking absolutely huge😂 They’re so tall and wide . Lots of healthy green leaves and strong roots.
I was worrying a lot about sex issues as when I did my research I found out they’re quite common to hermaphrodite. Was really worrying but all calyx’s have female signs (so far🙏🏻) so pray for me brothers&sisters.