


Likes
Comments
Share


@SkunkyDog420
Follow
Hallo zusammen 🤙.
Sie wächst sehr schön und macht keine Probleme.

Likes
38
Share


@MadeInGermany
Follow
Info:
Unfortunately, I had to find out that my account is used for fake pages in social media.
I am only active here on growdiaries.
I am not on facebook instagram twitter etc All accounts except this one are fake.
Have fun with the update.
Flowering day 23
since time change
to 12/12 h.
Hey everyone 😀.
It gets more beautiful from week to week :-).
The buds are starting to develop well.
They also get thirstier and thirstier. Another 1 g of GHSC Bio Bloom per liter of coconut was added.
Otherwise, the week was poured twice with 0.8 l each time and the tent was cleaned. Have fun with the update.
Stay healthy 🙏🏻
You can buy this Strain at :
https://www.zamnesia.com/de/4532-zamnesia-seeds-gorilla-glue-feminisiert.html
Type:
Gorilla Glue
☝️🏼
Genetics:
Chem's Sister x Chocolate Diesel
50% Sativa/50% Indica
👍
Vega lamp:
2 x Todogrow Led
Quantum Board 100 W
💡
Bloom Lamp :
2 x Todogrow Led
Cxb 3590 COB 3500 K 205W
💡💡☝️🏼
Soil :
Canna Coco Professional +
☝️🏼
Fertilizer:
Green House Powder Feeding
☝️🏼🌱
Water:
Osmosis water mixed with normal water (24 hours stale that the chlorine evaporates) to 0.2 EC. Add Cal / Mag to 0.4 Ec Ph with Organic Ph - to 5.5 - 5.8 .

Likes
15
Share


@SirBudAlotts
Follow
Complete! 💚
So the BPP produced some exceptional sized buds..She didn't really stink up the place on the downside..
I mean her visuals were outstanding, but did lack a little *Uhmp in the end..
Guess will have to wait for the cure to tell if she was worth the grow..
As a grower I want to smell the flowers all around me but unfortunately with this grow that was not the case.
Don't get me wrong she is outstanding 👏 👌 😉..Just wished I could have all the smells.

Likes
62
Share


@MeaCulpa
Follow
I got my humidity under control.
From now on there is only H2O without fertilizer.
But I think my gorilla is a little too brown. I really hope it has to be that way.
Otherwise all the other ladies are looking great.


Likes
8
Share

@Smev1337
Follow
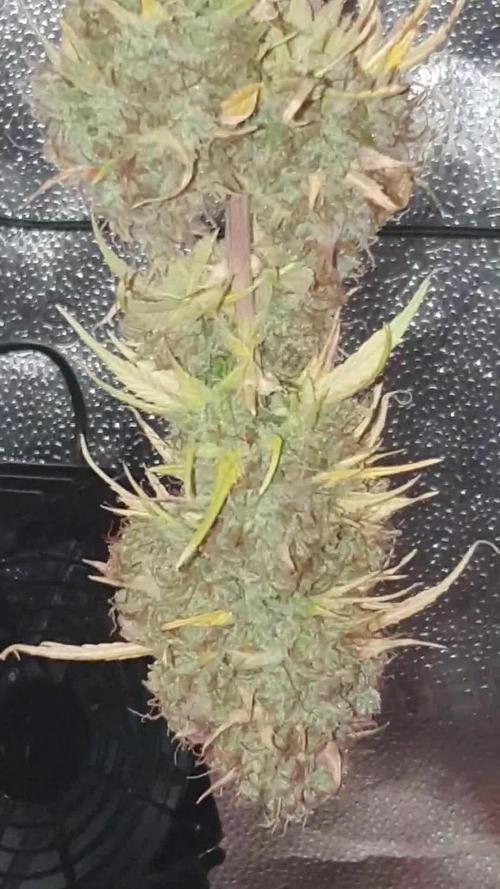
This is the end of this journey with my first grow and it turned out pretty good for an newbie grower like me, i let the plant cure properly also to get the maximum out of the terps 😋 i'm really happy with the grow and will continue to grow more and more 😈



Likes
4
Share

@BeskarBuds
Follow
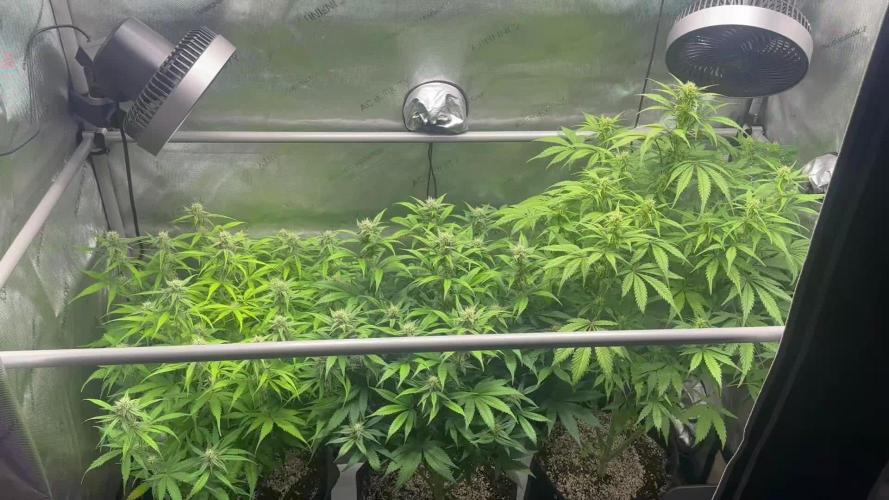
Jelly Donutz auto showing some beautiful buds growing already! High humid levels of 70% are stressing me out this time around however I have ordered the Hydrone 5 from AC Infinity to help with humidity levels this late into flowering.
Thanks for tuning in growmies!
This is the way
Likes
10
Share


@Weedman268
Follow
Really love this strain, grown it a few times, happy with how she turned out, greasy an sticky and the smoke is heavy an euphoric, she smells like fruit punch with hints of nut meg, a smell I can't explain very pungent...

Processing
Likes
26
Share


@GoodVibeGarden
Follow
I added top dressing of soil mix to all plants.
And put the plants into flower. Let the fun begin.
Likes
7
Share

@Suemchen
Follow
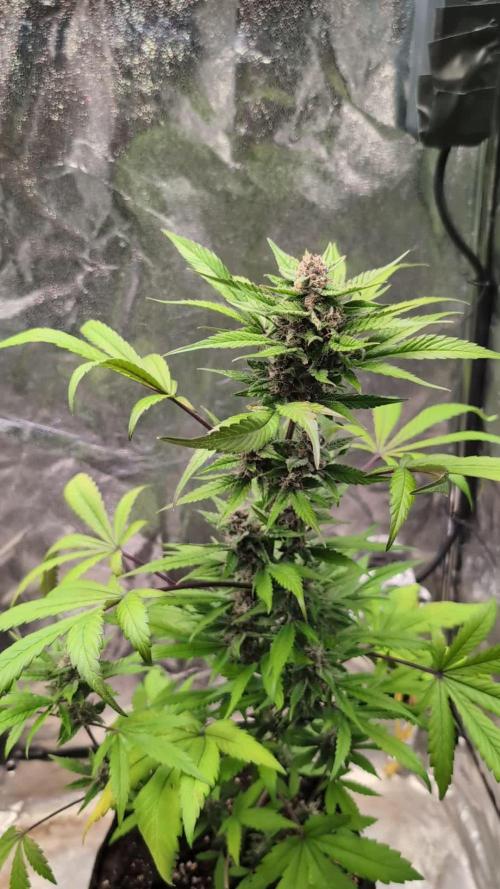
Sanlight EVO 3-60 at 80%
Day 43: looking really good 🤗 watered with rain water and 3 ml/l AlgaBloom, 1 ml/l CalMag, 2 ml/l Hesi Boost and 1 ml/l Green Sensation 👌🏻 pH at 6.4 👍🏻
Day 46: watered with rain water and 3 ml/l AlgaBloom, 1 ml/l CalMag, 2 ml/l Hesi Boost and 1 ml/l Green Sensation 👌🏻 pH at 6.4 👍🏻
Day 49 watering still with rain water and 3 ml/l AlgaBloom, 1 ml/l CalMag, 2 ml/l Hesi Boost and 1 ml/l Green Sensation 👌🏻 pH at 6.4 👍🏻

Likes
27
Share


@TheCannaProphet
Follow
~ FASTBUDS TESTER #2205 ~
Well friends, here we go on another 'canna-venture' together!
The grow room has had a complete remodel and some upgrades done to it including brand spanking new 4x8 and 4x4 tents and a Trolmaster Hydro X controller along with a new Control Panel.
This tester strain is one of six tester strains that FastBuds has graciously provided me with and I'm looking forward to seeing what this girl has to offer when she's grown to her full potential!
One drawback of 'testers' is I have little to no information on it other than its number and that it's an autoflower... 🤪 But, it's ALWAYS a blast growing them for me because not knowing a lot allows me to just concentrate on the essentials: Light, Environment, Water, Nutrients and possibly a bit of LST... not complicated, just basics like keeping a constant temperature and RH in the tent at a level that gives a good VPD, watering when almost dry and maintaining proper light levels according to their stage of growth.
____________________________________________________________________________________________________________________________________________________________________________________________________________________________________________________________________________________________________________________________________________________________________________________________________________________________________________________
~THE SETUP~
~Initially seeds were lightly scuffed, then soaked for 3 hours in 78℉ distilled water after which they were transferred to moist paper towels laid out in a Jiffy Pellet plastic starter tray with lid. Underneath the tray was placed a Mars Hydro Heat Mat with Controller that was set to 78℉ where they stayed until their tap roots emerged.
~Planted into Jiffy Peat Pellets that were hydrated with distilled water warmed to 78℉ with a 7.0 ph.
~Once roots emerge from the Jiffy Pellet they're transferred to their fabric pots.
~Grown 100% organic in a 4g Gronest fabric pot and a 3g fabric pot by Wraxly filled with Mother Earth 70/30 Coco/Perlite medium and initially amended with Dr. Earth 4-4-4 / Earthworm Castings / Dr. Earth Flower Girl 3-9-4 and Coast of Maine Stonington Blend Organic Plant Food 5-2-4.
~19/5 light cycle for the entire run with supplemental UVA added during flower. Lights are controlled by a Trolmaster Hydro X controller set for a 15min Sunrise/Sunset simulation.
~Top dressing every 3-4 weeks with slow release dry amendments and Earthworm castings.
~Straight water ph'd @ 6.2-6.8 when needed and bi-weekly Compost Tea's.
____________________________________________________________________________________________________________________________________________________________________________________________________________________________________________________________________________________________________________________________________________________________________________________________________________________________________________________
Weekly Updates:
12/29- Here we go into Week One of Flower! It's been a month since these pretty ladies popped out of the ground and they're both looking perfect and have pistils popping out everywhere!
Their fabric pots were still heavy when lifted, and they looked happy, so I skipped watering today and will check them tomorrow morning after the lights come on.
Since being topped roughly a week ago, they have two new shoots that are emerging and looking extremely healthy with excellent vigor and have a beautiful healthy green color! The #1 is now at 7" tall and the #2 a bit taller at 9".
12/31- Today was a 'dry day and all I did was refill the humidifier and some canopy maintenance, tucking shade leaves and gently bending branches.
It's been a little over four weeks since they were planted in their amended medium and it's time to give their microbes a good feed so they can continue to provide them with all the macro and micro nutrients they need so, yesterday they got a good watering with 0.5g of de-chlorinated water with GreenGro's Veg, Flower, Green Aminos, Natures Brix and Granular Myco added to it @ 1.5 tsp/g and then ph'd to 6.4 @ 73℉.
01/02- Today I watered them from the bottom with 0.5g of de-chlorinated water to which I added 3ml/g of Earth Juice OilyCann cal-mag to prevent any Cal-Mag issues they may encounter before they arrive.
I also have the HLG 650R set 36" above canopy and it's set at 60% power which is being controlled by a Trolmaster HydroX controller. The tent environment is on point with temp's running 70 when the light's off and 74℉ with the light on. I'm keeping the RH at 55-60% right now but will drop it as flowering progresses. Finally, I've been keeping the VPD in the tent running 0.85 - 1.05 which I'm happy with!
01/04- They have both been doing really well getting watered every other day and yesterday they received 0.5g each of de-chlorinated water with 3ml/g of Fish Head Farms Fish Sh!t Soil Conditioner which was then ph'd to 6.3 @ 72℉.
They're both doing fantastic but were really beginning to get choked up with growth so I went in and selectively removed a few shade leaves from both to get some light penetration down into their canopies to give that lower growth some much needed light. While I was doing that I also did a little more LST on both to also increase light penetration.
Well, there goes another week in our journey and I'm looking forward to the coming weeks as flowering gets cranked up! 😍👍
😎💚 Thank you for checking out my passion in life! Please visit as often as you wish and I hope you enjoy this journey as much as I know I will! Grow Strong! 💪😎🤙
Likes
Comments
Share


Likes
28
Share


@m0use
Follow
Left these ones out a bit to long and not nearly enough love, so they suffered a bit but that's ok. I am going to experiment and try water curing the buds. First time ever using this method and I think it will make a good little project. No idea how to it will turn out, been reading it will remove most of the smells and that sucks but the smoke is very clean and light. Only time will tell. take about 7 days to fully water cure. bud washing helped get rid of a lot of extra that stuck to them outside.
Likes
120
Share


@DogDoctorOfficial
Follow
Greetings, fellow ninja enthusiasts! Get ready for another exciting update on our Lego Ninja Tropical Tangie Run. Week 6 has been a whirlwind of growth and training, and our Tangie is shaping up to be a true ninja superstar!
First, let's talk about the transplant. Our Tangie has outgrown her previous home, so I fearlessly transferred her to a spacious 25-liter fabric pot. With the help of Aptus Holland Mycor Mix, I ensured a smooth transition, providing her with beneficial mycorrhizal fungi to establish a strong root system. It's like giving her a ninja squad of underground helpers!
To support her growth and development, I mixed 75 grams of Aptus All-in-One Pellets into the soil. These pellets are like ninja power capsules, packed with essential nutrients that will fuel her journey to greatness. With each watering, she'll receive the perfect dose of nourishment, ensuring optimal health and vitality.
But that's not all! My trusty Lego Ninja buddies have been by my side throughout the process. They provide moral support and keep the ninja vibes strong in the grow room. Who knew little plastic warriors could be such great companions on this green adventure?
After the transplant, it was time to introduce our Tangie to the art of scrogging. I installed a scrog net, creating a framework for her to weave her way through. It's like a ninja obstacle course, challenging her to grow horizontally and maximize her bud production. She's already showing off her impressive moves, filling up the space with her graceful and sexy growth.
Of course, proper nutrition is vital for our Tangie's ninja training. I've been using Aptus Holland Veg Watering Mix, enriched with the goodness of All-in-One Liquid. This dynamic duo ensures she receives the perfect blend of macro and micronutrients, giving her the strength and energy to become a legendary ninja warrior.
As she continues her ninja journey, our Tangie is bathed in a PPFD of 500. These photons are like her ninja training partners, encouraging robust photosynthesis and explosive growth. With each photon absorbed, she becomes more formidable, ready to take on the challenges that lie ahead.
In summary, Week 6 has been a thrilling chapter in our Lego Ninja Tropical Tangie Run. With a successful transplant, the magic of Aptus products, the support of our Lego Ninja buddies, and the installation of the scrog net, our Tangie is on her way to becoming a true ninja warrior.
Stay tuned for the next update, where we'll dive deeper into the ninja training techniques and witness the unfolding of our Tangie's ninja powers. Until then, keep cultivating with joy, embrace the ninja spirit, and remember that every plant has the potential to become a botanical ninja superstar!
As always thank you all for stopping by, for the love and for it all , this journey of mine wold just not be the same without you guys, the love and support is very much appreciated and i fell honored and blessed with you all in my life<3 <3 <3
#aptus #aptusplanttech #aptusgang #aptusfamily #aptustrueplantscience #inbalancewithnature #trueplantscience #dutchpassion #dogdoctorofficial #legoninjago #growerslove
With true love comes happiness <3 <3 <3 Always believe in your self and always do things expecting nothing and with an open heart , be a giver and the universe will give back to you in ways you could not even imagine so <3 <3 <3
Friendly reminder all you see here is pure research and for educational purposes only
<3 <3 <3 Growers Love To you All <3 <3 <3

Processing
Likes
6
Share


@MissSolasolita
Follow
End of week 1 of flower
Started LST today
She is doing very well
The other Power Plant in shared pot has grown 5cm this week and is in full flower by 1 week


Processing
Likes
8
Share


@Joni2017
Follow
Hello everybody 👋🏻 today full moon 🌕. I put the seed in a tupper on top of the router where it gives a good temperature😊. I will put the led at half power (400W) during vegetation and at full power (800W) in flowering
Royal Dwarf
This variety, which removes the genetics of the first autoflowering plants, is reaffirmed in the sector as a plant of the most interesting.
Dwarft genetics comes from the crossing of 2 very specific indications that transmit its main characteristics. RQS crossed a Dwarft with a feminized Skunk to obtain the Royal Dwarft. Finally, he crossed the result with his autoflowering predecessor to stabilize this characteristic.
With a maximum height of around 50 cm, and a little branched structure, it becomes a compact and vigorous plant, perfect to cultivate in small spaces, discreetly.
With a maximum production of 40g per plant, and notorious for being the most productive genetics of Royal Queen Seeds, it will be a variety of the pleasure of the most impatient growers, being able to achieve an interesting harvest volume without having to wait for a whole harvest cycle .
We are talking about a marijuana genetics with a sweet but aromatic taste, and really strong in intensity. The taste picks up the bottom of the Dwarft part, but with the nuances of the Skunk marijuana variety.
As for the effect, we will obtain the mental clarity and the socializing effect of the Skunk with a pleasant physical effect coming from the indica part. Of moderate power, it seems a boil recommended for day to day.
THC: 13%
CBD: Low
Yield Indoor : 150 - 200 gr/m2
Yield Outdoor: 30 - 80 gr/plant
Height Indoor: 40 - 70 cm
Height Outdoor: 50 - 90 cm
Flowering time: 6 - 7 weeks
Harvest Month: 8-9 weeks after sprouting
Genetic Background: Skunk x Ruderalis
Type: Sativa 60% Indica 10% Ruderalis 30%
Effect: A motivating and inspiring feeling
Flavor: Citrus, Sweet
Climate: Cold
Bio Tabs
Now fertilizing your plants will be much easier; we only have to add the Bio Tabs and the other components that are included directly in the pot when we plant, and the rest of the crop will only add water to our pots.
In the middle of the crop you have to apply an irrigation with Orgratrex and Bactrex to reinforce the biological activity and that's it. We will have plants as always, the most productive and tasty, totally organic and without having to worry about excess nutrients or fertilize them.
Dosage and how to use the Starter Pack of Bio Tabs step by step:
Fill our pots to about 3/4 and add 3g of Mycotrex for each pot, no matter the size. More or less are 3 tablespoons of coffee rasas.
Then we add another 25g of Startrex (which comes to be 2 tablespoons) every 5L of soil, so if we have 10L of pot then 50g and so progressively.
We stir well to mix with our substrate and just fill the pot of earth.
Then we make the hole to transplant our plant to the final pot, and in that hole you have to throw another 2g of MycoTrex into the hole itself and we can now transplant our plants.
Then we have to add your Bio Tabs tablets, every 5L of earth a tablet on the substrate, if we have 10L then two tablets ... You have to bury them closer to the edge of the pot than in the center. They are buried about 5 cm deep in the substrate and we will have our plants fertilized for weeks.
We make a mixture with the last component that remains when we plant, Bactrex. Add 1g to a liter of water and give the first watering with that mixture.
From now on, you only have to water with water until the 5th week.
At the 5th week, we will have to contribute a new help to our plants, we will add 20ml of Orgatrex and 1g of Bactrex in 500ml of water and stir well. Water only with that half a liter a plant and only once.
Add water until the end of the crop, that's that easy.😋👏🏻👏🏻
Biobizz light mix
With Light Mix of BioBizz we will be 100% sure of having bought one of the best lands available for your seeds. Saving on the ground is one of the worst mistakes we can make, since we are starting a job that the final result is to seek the highest quality and production. To think that is where the plant will have to live all its days of life so it will have to be of the best possible quality.
With Light Mix you will have an excellent substrate, as each land has a different formula and composition, we will find out who will best resist this substrate, according to the climatic conditions where we are going to plant. It is characterized by its high proportion of water / oxygen retention, this soil pulls more towards water retention so it will be perfect for all those who live in warmer areas avoiding having to water the pots so often, it retains a lot of humidity. We will have to be careful with the first days of our plants so as not to soil the land too much, otherwise the roots will not shoot as they should and you could even drown your plants, this advice is worth all the autoflowering genetics that are more sensitive to root problems and excess irrigation.
This sack of earth comes very light of nutrients, so this substrate should provide practically nutrients in all phases of the crop from the second week.
Composition:
Peat moss
Perlite
Ec: 1.2
Ph: 6.2
Likes
13
Share


@cookingwithninja
Follow
Week 5 day 1. I have a favourite for next run. I’m very happy, I haven’t really defoliated at all this grow, just letting it grow. Wish I was going for mains(topping) but still very good. Going to wait around week 9 so seeds will be good for next run. I have decided to do very hard hst next round to show max potential. Very happy with supercropping so will do it very heavy with scrog. I will try to reveg the one I really like but it is difficult having only 1 set of lights and 1 tent. Plants are about 7ft tall, might just run 2 next round in 4x8 or will still continue to go 4 in the 4x8.


