
Likes
Comments
Share


@ChaseNBuds
Follow
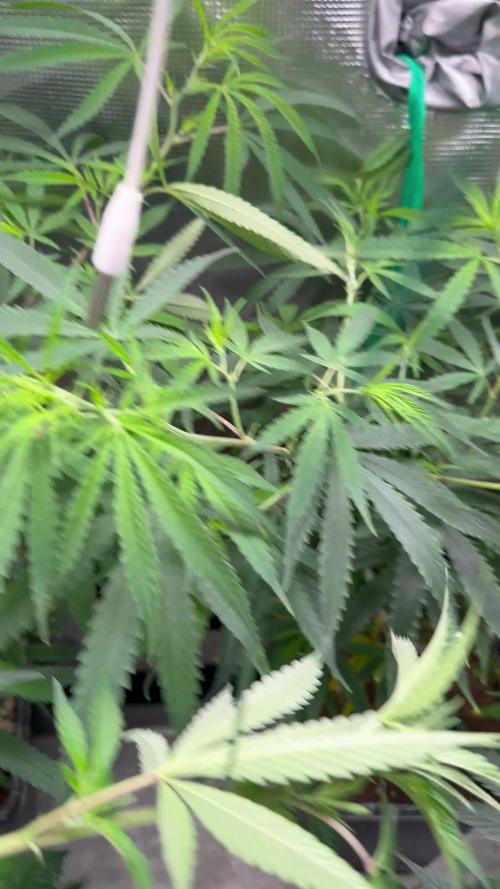
3/23/25 - Today marks the start of week 2 of flower. I top-dressed the soil with Gaia Green 2-8-4 at 2 tablespoons per gallon of soil, Gaia Green 4-4-4 at 1 tablespoon per gallon, and worm castings at ½ cup per gallon. I watered with 1 liter of water, pH’d to 6.6, mixed with 1 tablespoon of fermented plant juice per gallon. Light is at 740 ppfd.Everything is looking good as the plants continue to transition into flower
3/25/25 - added water to the reservoirs today. PH'd to 6.5
3/29/25 - Filled the reservoirs because they were bone dry. Plain water PH'd to 6.2

Likes
21
Share


@FrostRailz
Follow
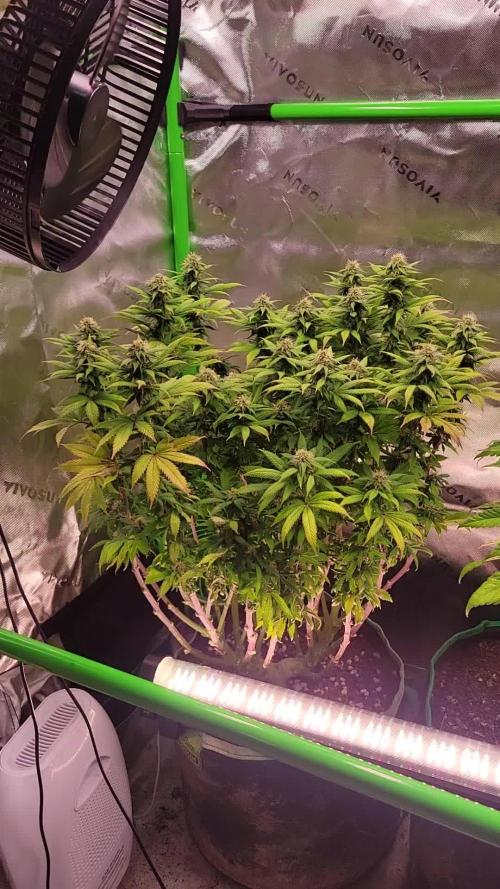
Spending lots more time w her
Keeping her flat eryday
What else .hmm should i add supplemental light 250 more true watts.
The more light the more she can eat well (biggest factor) amongst several others.
Hmmm week 5 dont foret she eats the most. Also dont cycle water nute feeds just nutes rest then flush.
Order more hygrozyme
Hmmm oh add more humidity 5-7 adds density .
Add 2 more fans
Point down little more
All is well

Likes
11
Share


@Coughy
Follow
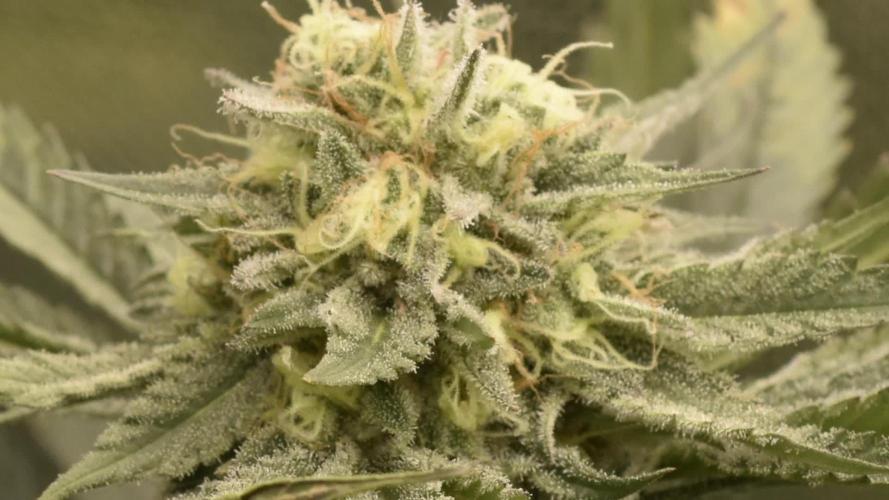
Trichs seem to be further along then last grows, I can only assume the extra light and/or higher heat has cause them to finish a bit faster. Right now we are sitting on a majority of 70% cloudy, literally only a couple ambers through out. Wanting to harvest a little earlier this grow, hopefully day 59 or 60. Sooooo, 10-11 more days till chop.
Day 51
Starting a flush, drained and filled with tap water, 2mL/L of flushing agent to help dissolve/bind salts. 3 hour cycle runtime with flushing agent. Drain/fill with high quality ROH2O, pH’d, H202 for disinfection.

Likes
4
Share


Likes
69
Share


@PEAKYPLANTERS
Follow
Hi everyone, Weed brothers.
Here we are ready for a new week of fire!
My dolls have been transferred under a wider tent with the hope of opening up their final yield ....
It's very hot ... let's get the best


Likes
7
Share


@Chubbs
Follow
420 Fastbuds Week 5
Gorilla Cookies Auto
Hello grow fam. This week has been good but got extremely cold a few nights down into the low 50's. Plants seem to be OK all in all. Flower sites seem to be maturing nice, plants not showing any major signs to worry about or try and fix. I did do a defoliation on most the the major fan leafs and light lollipopping on some of the lower nodes. So far so good.
Happy Growing

Likes
7
Share


@MariRemediesLLC
Follow
Day 9: Diagnosis: Slight Nutrient Burn, Growth Normal. Treatment: Feeding Cal-Mg tomorrow
Day 12: 👍🏾(Looking Good!)

Likes
66
Share


@GODSGIFT_2005_JM
Follow
🍼 Greenhouse BIO Feeding Line which are ORGANIC
For LIQUIDS ******GREEN BUZZ LIQUIDS***** also ORGANIC
MARSHYDRO ⛺️ has large openings on the sides which is useful for mid section groom room work. 🤩
☀️ MARSHYDRO FC 3000 LED 300W
☀️Also special thanks to VIPERSPECTRA P2000 (200W) & XS2000(240w) LED growlights

Likes
376
Share


@Metatronix
Follow
Good day to all my friends and visitors here on GD.
We harvested one of the Tropicana XL girls , this is going to be a weird entry because I decided to not make a harvest entry till the other one lady finishes.
Unfortunately because of my sticky fingers from all the trimming I did not make many pictures/videos of the grow itsels, to fill this void I decided on including the harvest videos and photographs. Although the final weight will be summed up in the final harvest.
We finally see that our problem with the plants may not a deficiency but overfeed...decided to leave the reservoir as it is for this week and add only fresh water next week we will flush the system and for seven days the girls will only drink water.
--------------------------------------------------------------------------------------------------
The SE7000 runs at 520 Watt and about 33cm from the canopy and is doing an astounding job.
For anyone who is interested in obtaining this efficient and affordable light fixture here's the link:
https://spider-farmer.com/products/spider-farmer-upgraded-se7000-730w-commercial-led-grow-light/
A shout out to Sweet Seeds for the gift of this fenomenal genetics: https://sweetseeds.es/en/
Also I want to thank Jungle Indabox nutrients for supplying me with their excellent & affordable nutrients line: https://www.jungleindabox.cz/en
That's it friends, I hope to see y'all next week, bless.


Likes
19
Share

@PavementPunk
Follow
7/8/26 Sixteen weeks in and i get fucking spidermites! Ahhhhh lol. I caught it super early and am actually not too worried. Besides that this baby has been stacking so nice. Some of the lower canopy still seems larfy af but im having faith my underlight is gonna plump those little buds up. She shouldn't be longer than about 3 more weeks 4 tops. Still really waiting for that smell to fully develop and get nice and pungent but until then happy growing friends ✌️

Likes
4
Share


@GizaWRZ
Follow
Are they going into flower? There is not many signs of that because i have a small leak of light between them but will see 🤞
Likes
37
Share


@MG2009
Follow
08/21/2018
Day 1 week 2 of flower.
Last bit of supercropping, keep the canopy low as possible
08/22/2018
#5 is the only 9 fingered leaves plant, all other GTH plants have 5 & 7 finger leaves, #5 took 3 clones she's my keeper of this batch. She is very diesely citrus,musky smell.can smell her at 90". #4 similar smell not as much stink.
#3 minty chlorophyll smell.
#2 orange,citrusy,mint.
Ps.
Gonna hit a selected branch or 2 of GTH #5 with mystery cookie males pollen I saved from earlier pollen harves. (week 19 mystery cookie grow) & some 2017 cherry pie pollen.( See Breeding Project, pollen test)@growdiary.
#1 most similar to #2.rubs Smells from stem rubs on #1#2#3#4 , #5 no stem rubs needed she straight up stinks.👊🔥🚀⛽♨️
Likes
1
Share


@DogDoctorOfficial
Follow
Folder 14 — Pickle Lemon Haze — Pheno B
Week 1 Vegetation — Early Signs of a Front Runner
Hello growers,
Welcome back to another update from the Zamnesia Tent project.
As with the rest of this grow, each phenotype is being documented individually from seed to harvest. Even when plants share the same genetics and environment, subtle differences often begin appearing very early, and those differences can become some of the most interesting parts of the entire journey.
This week we are taking a closer look at Pickle Lemon Haze Pheno B, a seedling that has already started hinting that she may have slightly bigger ambitions than her sisters.
It is still extremely early, of course, but sometimes the first clues reveal themselves sooner than expected.
⸻
The Environment
Week 1 focused on creating a stable foundation for growth.
The Zamnesia ecosystem maintained steady conditions throughout the week, allowing the seedlings to establish themselves without unnecessary environmental fluctuations.
Conditions averaged:
* Temperature: 26°C
* Relative Humidity: 71%
Lighting was set to provide approximately 250 PPFD, a level chosen to encourage compact and healthy development from the very beginning.
The LED fixture operated at:
* 27% intensity
* Approximately 86 watts drawn from the wall
Air movement and environmental control were handled through:
* Zamnesia extraction fan running at Level 5
* Circulation fan running at Level 4
Together, these settings created a comfortable environment with gentle airflow and excellent air exchange.
⸻
Feeding Program
Although the earliest days were supported using collected rainwater, this week marked the introduction of the nutrient program.
The first feeding consisted of:
* Plagron Hydro A
* Plagron Hydro B
* Plagron Hydro Roots
Mixed to:
* EC: 1.53 mS/cm
* pH: 5.96
* Water temperature: 24.2°C
The objective remains simple: establish a healthy root system before entering the coco phase of the project.
So far, Pickle Lemon Haze Pheno B appears to be responding extremely well.
⸻
Preparing The Coco Transition
While the seedlings remain in their starter pots for now, preparations for next week’s transplant are already complete.
The Plagron Premium Grow Bags have been filled and hydrated using distilled water only.
Rather than soaking the coco all at once, a slow-release reservoir system is being used to gradually distribute moisture throughout the medium. This allows the compressed coco to expand evenly while maintaining consistent hydration from top to bottom.
By the time transplant day arrives, the medium should be fully conditioned and ready to support rapid root expansion.
This upcoming move into coco will be one of the first major milestones of the project.
⸻
Pickle Lemon Haze — Pheno B
While all four seedlings have had excellent starts, this phenotype is beginning to separate herself ever so slightly from the pack.
The difference is not dramatic.
It is not night and day.
But at this age, even small differences can be meaningful.
Compared to her sister, Pheno B is showing noticeably stronger early development. She appears slightly larger overall, has produced more leaf mass, and is already pushing aggressively toward her next set of growth.
While several of the other plants are entering their third set of true leaves, this phenotype already looks eager to begin working on the next chapter.
The internodal spacing remains extremely tight, which is exactly what we want to see under these conditions. Rather than stretching vertically, the plant is investing energy into building a dense, compact structure with broad, healthy foliage.
The leaves themselves are one of the standout features.
Large, symmetrical, and beautifully formed, they create an appearance that feels mature beyond the plant’s age. The structure already suggests a vigorous growth habit and excellent energy production potential moving forward.
Color remains healthy throughout the plant, with strong green pigmentation and vibrant new growth emerging from the center.
Most importantly, the plant simply looks comfortable.
Comfortable plants grow.
And this one looks very comfortable indeed.
Of course, Week 1 observations should always be taken with a grain of salt. Seedlings can surprise us many times throughout a run, and today’s front runner is not always tomorrow’s champion.
Still, if first impressions count for anything, Pickle Lemon Haze Pheno B has made a very strong one.
⸻
Looking Ahead
The upcoming transplant into coco should provide an excellent opportunity to see whether this early momentum continues.
With a significantly larger root zone becoming available and a fully established feeding program already in place, growth rates are expected to increase noticeably over the coming weeks.
If this phenotype maintains the pace she has shown so far, she may become one of the more interesting plants to follow within the Zamnesia Tent.
For now, however, patience remains the goal.
Strong roots first.
Everything else follows.
⸻
Thank You
A huge thank you to everyone following along with this project and supporting these diaries.
Special thanks to:
* Zamnesia for providing the genetics, equipment, and support behind this grow.
* Plagron for supplying the nutrients and growing media used throughout the project.
* The GrowDiaries team for continuing to provide a home where growers can learn, document, and share their experiences.
* And, of course, the entire growing community whose passion, knowledge, and encouragement help make projects like this possible.
Week 1 is officially complete.
The coco bags are ready.
The roots are developing.
And Pickle Lemon Haze Pheno B already seems eager for the next step.
Growers Love and let’s see where she decides to take us.
🌱🍋💚


Likes
35
Share

@GODSGIFT_2005_JM
Follow
🍼Greenhouse Feeding BioGrow & Bio Bloom
⛺️MARSHYDRO
The ⛺️ has a small door 🚪 on the sides which is useful for mid section groom room work. 🤩
☀️ by VIPARSPECTRA (models: P2000 & XS 2000)
Likes
3
Share


Likes
8
Share

@DrewbieDoobieNoobie
Follow
I will just water from here on out. The fade is starting and I am just watering when dry for the last 2 weeks before harvest. 2 of the girls are a week or 2 behind. I might make hash rosin from them and the trim. the 2 good ones are going to the jars for curing and then we will have to wait for winter for the next grow to avoid the heat in the Garage/grow room. keep growing strong.
Processing
Likes
7
Share


@Mrg7667
Follow
Still looking a little bit phosphorus deficient on the girls, one of the. Big girls where not looking as good especially one, started introducing mammoth p and they seem to enjoy it and recovered!
