


Likes
Comments
Share


@Chubbs
Follow
These beauties are shaping up nice. The frost on some of them is crazy how much there is on them. They're definitely getting close, I'd say a couple within the next few days. Looking forward to harvest some to make some rosin and hash. All in all Happy


Likes
13
Share


@skimaskbandit
Follow
NO SMELL YET
PK BOOSTER EVERY FEED
BUSHY AF I AM TIRED OF DEFOLIATING
Likes
12
Share

@All_our_small_plants
Follow
Bewässerung: 700ml
pH-Wert: 6,1
EC-Wert: 1,2
Temperatur: 22ºC
Luftfeuchtigkeit 62%
Schädlingsbekämpfung:
PPFD: 500 µmol/m²/s
DLI: 33
Düngemittel: Mineralischer Dünger 3.5-6-6
Besonderheiten: Wurden direkt in die erde gepflanzt in einer Kokos-Quelltabletten.
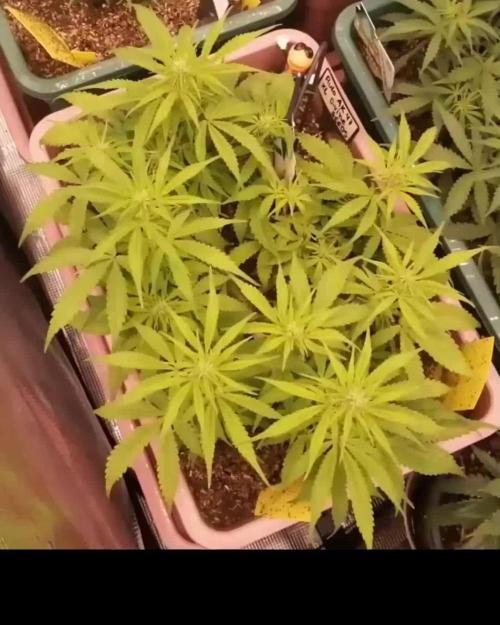
-Tag 43 Heute haben wir sie wieder gegossen und ihr Dünger gegeben. Sie ist sehr schön im Stretch und bildet so langsam ihre ersten Buds😎
-Tag 45 heute wurde sie wieder gegossen und hat Dünger bekommen😍
-Tag 47 Heute haben wir mit effektiven Mikroorganismen, mit Nematoden und mit Plagron Power Buds gegossen
-Tag 49 Heute haben wir sie mit etwas Dünger gegossen, sie sieht sehr gut aus, hat das Stretching abgeschlossen und beginnt jetzt mit dem Bulking 😍

Likes
14
Share


@Rangi_Kijani
Follow
Day 21 From Sprout - Rez Change
Overall, very happy with the development over this past week. The ones that were already looking good at now looking great!
The couple of “weirdos” (strange development of leaf/node placement) both have decent roots but are growing slowly.
The couple that initially were throwing out more “jagged” leaves seemed to have settled in and are looking good now.
Only 1 (back right corner) is iffy.
Roots are slowwwwly dropping out of the basket but not yet in the water. Going to keep
It around for now and see what happens.
Continuing with Mantis @ the “always” rate of 5 ml/L. They’re loving it!
Several of the “great ones” have 5-6 nodes developed, so I’ll top them back to the 3rd more and start training into a manifold since I’m going to give some of the others time to catch up. I’ll decide on training for them as we go.


Likes
Comments
Share


@einamio
Follow
The girl is getting bushy, I accidentally snapped one of the branches on the second or third node. Couldn't repair it, had to remove completely. No signs of preflower so far. I'm trying to control her emerging branches with bend clips and soft garden wire. Might have to consider scrog.


Likes
84
Share


@Hempire
Follow
Nice buds growing :D I’m quite impatient ! I will put PK at the 30th 35th day I wait the buds bigger ! I do defoliation a lot and every day it’s insane how it grows every day ! I pinched the apex of the plants which I didn’t cut the apex.


Likes
37
Share


@masterofsmeagol
Follow
8/19 Rained again last night. No damage but medium is drenched. The 9lb kush I've been struggling with seems to be improving. I spent a lot of time on her yesterday and at least an hour this morning defoliating and pruning her. New growth and flowers look promising. I'm cautiously optimistic. I defoliated what needed it. I needcto qpplyvorganocide again. I can see random signs of septoria leaf spot. I really have been off my fame lately. I'm back on it now. This week the garden will be rearranged and I'll pull that big GDP back and better support the blueberry for flower. That NYCSA is a beast. It's resilient as all hell and just continues getting bigger and fuller. Despite pr9blems in the garden this girl seems absolutely fine. At least I don't have that defeated feeling anymore. I've got flowers on a few different plants. I'll try to get a couple pictures. I may take rapacaps advice and add a cheap plastic roof for later flower. I'm not sure if the explosive flower growth is due to the liquid kool bloom but I think I'm going to switch back to tiger bloom as it works better with the other nutes. I'll jeep this updated but I've got work to do.
8/20 Well it Rained again last night. This is getting discouraging. Now my other 9lb kush has the bottom branch all droopy like there's a borer or something. Realistically with the temp swings and the weather I think it's a firm of root rot or pythiym damage which isn't good. I posted pictures of the stalks and would be grateful if anyone has any advice. I'm go8ng back down to look again for a borer hole but i didn't see one. What it looks like to me is that the petroleum jelly I put on the stalks (to battle ear wigs) seems to keep them moist or something inviting mold or fungus. I'm kind of at a loss. I don't really know where to go from here. I don't know if I should just replant the severely damaged plant away from the rest of the grow, bag it and get rid of it or leave it be and hope for the best. I certainly don't want anything spreading. I'm getting tigerbloom today as my plants still need to eat and I'm nervous about the liquid kool bloom. It's probably fine but still. I'll update after I put in more work and research more today. Any advice helps. UPDATE: No borer holes. The stalk looks fucking horrible. It's supposed to rain today. I'm going to give it one more day then I'll amputate that branch and get rid of the other plant if I don't see an improvement. Perhaps I'll plant it in the ground. Don't really know what to do. Family bar b que today so my options are limited.
8/21 FED TWO GALLONS TO THE GARDEN. ONLY USED .5TSP/GAL OF LIQUID KOOL BLOOM. Did not feed dieing plant. Back to super hot weather 80° at 9am. Did a lot of research last night. I also went to several commercial growers and asked advice. What I came up with was a fusarium infection of pythiym infection
(Crown rot). I looked at all my stalks and they all have bark and are darker where I applied the petroleum jelly. I'm also NEVER using DE again. It fucking ridiculous amounts of water. Everyone swears by it bit it's not going in my garden again. Since use I can just watch water sit right on the GD soil. I tried to get some examples of what I'm talking about with the stems. I amputated that lowest bottom branch I trained (which was huge). I didn't have time to dispose of the other plant before my wife's doctor's appointment. I'll update when I go back over. I'm sure this won't help and may hurt but I used Bee Safe 3 in 1 on the wound and around the stalks of the plants I saw discoloration on. I didn't touch the NYCSA even though I see some discoloration. I may just be seeing things. That plant I'd super healthy and I don't want to risk losing it. It doesn't seem to have the stem rot like the others. At least I'm not the only one having problems. I hears some pretty bad stories. Still. I'm heart broken. I'll keep this updated after I go back over. FUCK. I MAY just go back to indoor. UPDATE: Got back from the appointment and the rest of the plant was all droopy just like the other 9lb kush (and the branch amputated). I wondered about that because other branches looked worse. I got the totally dead 9lb kush out and found some root rot. AFTER wheeling the bag out I found earwigs and other insects where the bag had been. Awesome. I used h202 to try to wipe down anything that looked Fingal in the stem. It sucks because it seems like that liquid kool bloom pushed them over the edge into flower. Cotton balls where there was nothing. So that's both my 9lb kush plants and the largest plant of the year the GDP that have all bit the dust. If you grow cannabis you know how I'm feeling. I KEEP TRY8NGVTO UPLOAD THE MINUTE VIDEO I TOOK BUT I CLICK ON SOMETHING ELSE AND IT DISAPPEARS. WIFI SLOW. HAVE TO WAIT FOR 5G
8/22 What do I say? Fusarium? Pythium? Stem rot? I'm going to have to get a tent to do some indoor to get the medicine I need for me and my wife. I took the last 9lb kush out and disposed of it. Well it's still in the bag. I'm hoping maybe it might come out of it (beyond hope and far away from the others (but I'm going to toss it today). This blows so hard. Flowers are just starting to develop. I like the liquid kool bloom. It seems to make flowers explode when there was none before. At least on the plants I have left. Actually even the dieing ones started flowering. I'm really concerned considering that one plant (at least) has septoria and every plant has that petroleum jelly on it. Cautio to people that use that. It seems thats where the rot started or is. In spots I spread the petroleum jelly. Anyway my NYCSA has the smallest amount of "funky looking stuff on the stem" so I'm hoping it will make it. Cotton balls starting to appear. If I lose the whole fucking crop I'm gonna go ape shit. UPDATE: Spoke with a few others and did more research. I removed my braces on the bottom of all the plants. It looks like the pjelly and the brace allowed for some type of contaminate. Other growers think I'm being too bleak. They think things will turn out okay. They are more knowledgeable about cannabis than me but I'm with these particular plants everyday. They're probably right and my anxiety is just getting g to me. It's scary seeing a healthy plant completely die in such a short time. After removing the other 9lb kush I could easily see extreme rootbound roots still too the size of the 1 gallon they came in. The bag was PACKED FULL of tight roots so they definitely made it down. The plant however just fell over when I pushed it. I had roughed it up a big before. Anyway I'm praying to the cannabis gods to not take what I have left.
8/23 Fucking pouring again. This sucks. I've gotten loads of advice and made another friend on here. I forgot my phone so I couldn't take pictures this morning. My spirits are up a little seeing that others are at least attempting to help. I'm headed to the grow shop after a night of research to grab supplies to battle this. I'll update later. EDIT: I picked up plant doctor at the grow shop. It was 50% off and I couldn't find anything with trichodermia. However, I've heard good things about this plant doctor. It's systemic and can be used as a root drench and a foliar spray. BIGGEST selling point for me is that it SPECIFICALLY lists fusarium, grey mold. Pythiym crown rot, black mold and all kinds of other shit. The thing that sucks is it's raining and it's not supposed to stop for a few days. That's going to make application more difficult. Oh well. I think I may do a root drench on the one plant that has a wilted bottom branch. I'll keep this updated. Thank you everyone who reached out. Especially growing grannies and my commercial buddy who is always here for me. However he has no experience with this so I'm kinda on my own here. EDIT: I couldn't find trichodermia and I don't have time to wait around and order. I found plant doctor which literally lists it treats all the possibly pathogens my issue could be. Even has a section for medical Marijuana. I did a root drench on the plant up front in the middle AND I did a foliar spray. Might as well get the septoria too. It's systemic but it gets in faster through the leaves I guess. It started sprinkling and I want to test this stuff out before I go ham with it. I did give some to the to other plants bit left my best AND THE TWO SMALLER ONES alone for now. I'm not seeing those issues on the NYCSA and I don't want to risk damaging it. I chose tge root drench as it's raining and the instructions for fusarium WAS a root drench. Thank you all for your help. I will close out tge question once I know it's figured out. Wish me luck. DID A SHORT VIDEO BUT WIFI IS SUPER SLOW SO I NEED TO WAIT TO UPLOAD IT. Went back over. Finished foliar spraying the other two and left the NYCSA and two Littles alone. Hopefully this works. I did I short video. Who knows if it uploads. UPDATE: Went back over and finished foliar spraying. Took a bunch of pictures and did a video but it didn't upload. I'm hoping this will do it. Plants actually look good. And they're flowering nicely! It's too bad I had to do a foliar bug this us supposed to combat PM and septoria as well.
8/24 It Rained last night but hasn't Rained today yet. It's supposed to and uts overcast. I'm really considering putting a roof on my grow (like rapacap suggested) for flower to decrease mold chances. Plants looked happy. I saw no negative effects from the Plant Doctor. I even sprayed a branch of the NYCSA and the stem and a little around tge roots. I finally feel like I can take a breath. I've been working so hard and worrying about losing g everything. I may have been able to save that 9lbkush but I don't think bit was worth taking the chance. The sun is peaking out now. My buddy at the grow shop called and set a side general hydroponics armor si 0-0-4 silica supplement cause it was 90% off. I pad like a buck sixty lol. I'll incorporate that next feed or water. Whatever comes first but it will be good to get it in the regimen. I was worried plant doctor might hurt but the girls seemed to kike it and I went ham on the worst plant. I mixed according to medical Marijuana guidelines on the label
(Theres another label on the internet, it's not on this one, it's at the very bottom and just recommdations from commercial growers. I hope this stuff works. Things look better already though. That liquid kool bloom is the bees knees. That's making flowers pop up like crazy! I think I'll stick with it. I was going to use beastie bloom and cha ching later on (and still might) but I hate the lockout bullshit. I've done a bunch of videos but most don't get uploaded as i forget to upload when I leave and wifi is slow here. Anyway at least I've got a few good ones left and pleating the words of my commercial poll buddy, "barring anything catastrophic you should be fine. I know your anxiety gets the better of you sometimes." Couldn't be a truer statement. I'm still getting a tent and doing indoor though. I'm going to need to.
8/25 Did some slight defoliation. I think today I'm going to reorganize my grow space. Things are looking better though. Plants look healthier. Flower is on and they are going to beat hell. I'm glad I took a cutting from NY 9lb kush. I also took one from the NYCSA. THose are tge little ones. The 9lb kush is flowering pretty good. Too bad it's just on a 3 gal. The NYCSA us in a 10 gal grow bag though and is doing amazing. I still see septoria on the leaves. I'm sure I'll need to reapply plant doctor but thus far I'm impressed. Things LOOK better. I don't even remember the last time I watered. It Rained last night. Looks sunny today. I'm going to feed tomorrow. I want the soil to dry out though. We usually don't get consistent rain like this. It's a first for me. I'll update later if I get stuff done.still wondering if I should amputate that wilted branch or give it a bit. It's still attached right now. I'll get some sealant and do some more research.


Likes
11
Share


@Genussmittel420
Follow
manganese deficency is really eating her up quiet a bit.... defoliateing every 2-3 days because i just have to... wont add anything more so lets see how she goes from here


Likes
17
Share

@Chucky324
Follow
Hello This is the end of week 3 and the beginning of week 4 of flowering.
I see they almost stretched to the roof. There's about 6 inches clearance now, when I close the tent at night. Oh Well...
The stretching should be over now. I see resin starting to form on the leaves. It's always a good sign, the earlier it shows.
Took off some fanleaves and sucker branches over the weekend. Better buds in the end for doing a bit of trimming now.
Plant #5 smells great. Like candy and pop/soda , sweet fruity gelato type of smell. The others have more of a sweet skunky type smell.
It was up over 30*c in here for a few days last week and the plants look like they can take some heat. Not wilting.
That's the end of the #15 Weirdo underground comic book. Look in my other diaries to find more hidden underground comics. For your enjoyment.
OK. Keep Growing Straight.
Chuck.


Likes
35
Share


@XperencdGmanXG
Follow
This week was still a waiting week. I didn't have the room ready yet. So this week was clean and reset the tent week. Just waiting for amendments to arrive as well.


Likes
17
Share


@RDWCGrowing
Follow
Week 1 Day 1 - 8/12/2023
1st Water change Day! Such a special time it is when you remove the little bit of Nutes that you gave them as an appetizer and you give them their first real meal.
Added
39 Gallons of Water to my system
SILICA= .5mil/Gal = 19.5 = 20mil
Root Drip = 1mil/Gal = 39mil
Cal Mag= .25mil/Gal = 9.75 = 10mil
FLoraMicro= 3.0mil/Gal = 114mil
FloraGro = 2.0mil/Gal = 78mil
FloraBloom = 2.0mil/Gal =78mil
ORCA= .5mil/Gal = 19.5 = 20mil
Week 1 Day 2 - 8/13/2023
Everything is looking good the roots are making their way to the water and the new grow is looking nice and green.
Week 1 Day 3- 8/14/2023
Everything is right on track, they are looking beautiful and in the praying position all leaves happily lifting towards the light.
Week 1 Day 4- 8/15/2023
A little worried today her birth Twin the BA I am growing out is looking great and is raised towards the light and this one is just slightly under.. Will keep an eye on Her.
Week 1 Day 5- 8/16/2023
Walked in and the humidity was under 60.... ohh noooooo.. So I added 2 humidifiers to the tent and attached them to my InkBird controller which is set to 62.
Also looking at the roots and she has some poking out the bottom but just not in the water yet.. Luckily we are set for 14 days before next water change so the system will stay stable and her sister already has roots in the water so she should only be a day or two behind.. we will just keep tracking but she is delayed.
Week 1 Day 6- 8/17/2023
Roots in the Water!!! Huston, we have a successful launch. This grow is on!
Humidity was a little low this morning so I refilled the humidifiers. Other than that the temp looks great, the PH looks good, the PPM looks good the plant is in the praying position and all damage from the little drowning from over filling the cloning machine seems to have been fixed. Happy Happy.
Week 1 Day 7- 8/18/2023
Yay.. week 1 in the books, roots in the water growth has started. Everything for growth and environment is looking good and on track, there are a couple of mutations with this Lady will keep an eye on those leaves.
IMO this grow is going A lot during this week 1 then week 1 of the last grow when I had them drowning.
Really excited on how this grow is going to come out.
Likes
37
Share


@eezeegrow
Follow
Babies are growing soooo fast. Very happy about this strain! Can't wait for a tasting session... 😉

Likes
12
Share


@valiotoro
Follow
Hello everyone, all good for this week 😎
They grow fast and with a beautiful green colour on the leaves!
In this grow i will be testing out Plagron Nutrients and Mars Hydro FC-E6500
LSD-25 from Fast Buds 🍷🎢