Likes
Comments
Share
After a 6-week cure, it smells really spicy with creamy undertones. The buds are extremely dense and sticky. When vaped, the smoke is smooth but doesn’t have much flavor. It’s an energetic high — not the optimal strain for an insomniac like me who likes to smoke before bed, but I already knew that. Overall, if you enjoy sharp, spicy, and slightly gassy terps, I’d highly recommend this strain. My DIY lamp has 6-watt UVA leds. Maybe if I hadn’t run it at full blast the whole time, the aroma would’ve leaned more toward sweet and less toward spicy/caryophyllene-heavy. 84gramms dry for 86watt! pretty happy with that.
Likes
20
Share
Likes
12
Share
@Drtomb
Follow
Switched to bloom nutes. The lowered screen has already filled up to the second level and filled in very nicely. About ready for autopilot.
Processing
Likes
29
Share
I have been super excited with everything up to this point . I have made all my preparations that I think need to be made and did some trial runs on my environment. I starting preparing around the 15th of January and my set up was complete around the 19th of February. I spaced my purchases out based on budget constraints. I wanted a cheap and efficient grow area. Some thing I paid more for because through all the research I did I felt quality was more important. If you are as excited as I was, you get pretty anxious when awaiting order status when you first order your seeds. You should remember you are ordering from an online seed bank not amazon. Most work Monday - Friday and are in a complete different time zone. I ordered my seeds from seed supreme Seedbank. I placed my order on 31 January and mailed money as directed. This was the scariest part for me especially when I didn’t hear anything back. I finally received a email on the 12th if February saying my invoice was paid and then subsequently mailed out on the 15th and I received on the 20th. One thing I would like to note that recommend to anyone mail cash is to make sure you spend the extra cash and track your payment. I’m currently germinating all five GSC I received I placed them in water for the first 24 hours and then a paper towel for approximately 40 Hours. I’ll add links to most of the items I purchased below. Some items I purchased through offer up and let it go app to save money. VIVOSUN 48" X48" X 80" Hydroponic... https://www.amazon.com/dp/B07GNBCVPZ?ref=ppx_pop_mob_ap_share LED Grow Light 1000W Full... https://www.amazon.com/dp/B074MBP32M?ref=ppx_pop_mob_ap_share AcuRite 00613 Humidity Monitor... https://www.amazon.com/dp/B0013BKDO8?ref=ppx_pop_mob_ap_share Hydrofarm Grow!T Premium Coco... https://www.amazon.com/dp/B01DA4PZI4?ref=ppx_pop_mob_ap_share iPower LGTESTSOIL 3 in 1 Soil... https://www.amazon.com/dp/B075LRY5M7?ref=ppx_pop_mob_ap_share Unco Industries (WWSB15LB) Wiggle... https://www.amazon.com/dp/B00062KQ42?ref=ppx_pop_mob_ap_share General Hydroponics pH Control Kit https://www.amazon.com/dp/B000BNKWZY?ref=ppx_pop_mob_ap_share VIVOSUN Air Filtration Kit: 4... https://www.amazon.com/dp/B06XFRNPR8?ref=ppx_pop_mob_ap_share VIVOSUN pH & TDS Meter Combo, 0.05ph High Accuracy Pen Type pH Meter & +/- 2% Readout Accuracy 3-in-1 TDS EC Temperature Meter https://www.amazon.com/dp/B06XKMH86J/ref=cm_sw_r_cp_api_i_2xyCCbK4MKNN4 Botanicare CAL-MAG Plus Plant Supplement 2-0-0 Formula, 1 Quart https://www.amazon.com/dp/B004JKBMRW/ref=cm_sw_r_cp_api_i_LyyCCbY8SMFTK Century 24 Hour Plug-in Mechanical Timer Grounded https://www.amazon.com/dp/B00MVFF59S/ref=cm_sw_r_cp_api_i_ozyCCbHG8Q2PB Day 1 - 2/23/19: I planted my seeds today about a fingernail length down with tap root pointed and gave a light watering with plain tap water at a PH of 5.8. Day 2 - 2/24/19: Nothing new to report no activity on the surface, misted watering at 5.8 PH. Day 3 - 2/25/19: Plant number 1 which had the longest tap root broke the surface I started a time lapse on it to cover the first moments of birth 😭 daddy is already so proud lmao. I have another light watering today with my humidity domes on, the intent is to have the plants roots work to get the required water and hopefully promote root growth. I also added 1ml of Rapid start and diluted into 1 gal. Day 4 - 2/26/19: Checked the status this morning prior to work and two more have reached the surface only two more remaining which I suspect will reach by the time I make it home from work. Misted this morning pot was looking pretty dry with the exception of the humidity domes, which I removed on all the sprouted seedling. I intend on shifting to a 20 on 4 off cycle and starting my other fans. Day 5 - 2/27/19: All five plants have broke the surface. I did a normal watering this am still utilizing the dome to avoid watering on top of the plants. I lowered the light again some of the early sprouters we stretching a little more than I wanted and appeared leggy to me. Day 6 - 2/28/19: Nothing really to report today. Excited for the name reveal tomorrow. I did a light watering. I played around with my ppm meter and ec I definitely plan on using in conjunction with my first feeding this weekend. Day 7 - 3/1/19: Was watering this morning normal levels. I also mixed a new feed to be ready for them tomorrow. While I was watering # 5 fell over I accidentally tipped it with the spout. I grabbed some left over soul to help prop it up hopefully she is ok.
Likes
23
Share
(Update: 4/20/19) Please stand by while they dry. (Update Everything is going great though! The smell is very strong now; no more cut grass smell. From looking at all three today, I believe that some of the smaller branches will be done drying and ready for trimming and weighing in a day or two. I have one guess for dry weight of Big Lemon, any other guesses?? Remember, the picture of Big Lemon hang drying looks like its two plants, but its all Big Lemon; I had to cut it off to be able to hang it. The amputated branch left of the main plant is bigger than my other two plants alone! (Update 5/2/19) Woah...Okay. So after drying the whole for about nine days, and trimming for four days, Big Lemon's dry weight SO FAR is about 430ish grams of super dense and sticky nugs. Its amazing that I got more big bud than I got popcorn nugs from such a big plant. I have one more 1/2 gal Mason Jar of untrimmed tops to finish, then I'll post pics or a vid of the weigh up and glamour shots etc.. Oh, almost forgot, Little Lemon produced about 40 grams of very nice bud. This surpassed expectations because, although it was planted on the same day as Big Lemon, it was the runt of the bunch because it got pushed out of the main tent that had all the lights and Co2 environment and everything. It spent much of late veg under a very weak light. I remember how limp it was when I gambled on it and chose to switch her over to 12/12. But it was totally worth it in the end! Alight back to work for me. Check back later today for pics, vids! (Final Update: 5219 @11:09pm PT) Its done. Its finally done! I had to trim both plants with my own two hands! So Exhausting, yet so rewarding. So above are several videos of the weighing. Grand total for Big Lemon is 14oz of prime top shelf nugs, and about 3oz of nice popcorn/LARF (they are separated as shown above in a video. Forgive me for not throwing it all together to weigh it, I spent a long, long, very long time trimming and sorting and canning the buds according to their respective grade/quality. I may add one more update to show their respective weights. Oh and little lemon produced about an 1 1/2 oz of prime nuggets and quite a bit of popcorn/LARF, which I haven't gotten around to weighing yet. So, Grand Grand total of Both Lemon OG Candy (amazing job with this beast of a strain, Philosopher seeds) is about 18.5oz, or 1lb 2.5oz for two plants; 15.6oz of which is entirely made up of top-shelf buds 😎 Damn I love SoCal, I didnt even need to run carbon filters because no one be trippin about a lil stink weed. Thanks to those for following this grow! Tell me what yall think! Cant wait to see some comments from all you growers out there. (Update: smoke review after a week or two of cure) This Lemon OG Candy had an extended veg period, about 4 months maybe a little longer, and I harvested her on day 56 of flower (recommended harvest 60-70 days) because of the size/distance to light and her root-bound problems. The results so far, a very uplifting and stimulating quality.
Likes
3
Share
Tag 65 (Blütetag 25)! Präzision trifft auf Living Soil Power 🌿✨ Viereinhalb Wochen nach der Umstellung am 19. Dezember erreicht das 90x90 Zelt das nächste Level. Während die Pufferwirkung unseres Substrats uns den Rücken freigehalten hat, kehrt nun die volle Kontrolle zurück! 🏔️💨 📈 Statusbericht vom Feld. • Zapplez 2.0 (The Centerpiece): Sie dominiert weiterhin das Zentrum. Die dunkle Färbung ist mittlerweile tief und kontrastreich ein echtes optisches Highlight im Dschungel. 🍇❄️ • Z-Vally Power: Die beiden Z-Vallys (links hinten & vorne rechts) sind voll im Soll. Die Blüten schwellen an und man sieht ihnen an, dass sie die optimierten Bedingungen lieben. • OreoZ Milkshake Update: Endlich! Die beiden Damen (vorne links& rechts rechts ) haben ihre Schüchternheit abgelegt und ziehen nun voll nach. Das Warten hat sich gelohnt, die Blütebildung ist jetzt deutlich sichtbar. 🥛🍪 • Technik Upgrade & pH-Kontrolle! Wir sind wieder voll messfähig! Ein neues Gerät ist am Start und wir gießen ab sofort wieder präzise mit einem pH-Wert von 6,0. Ein riesiges Lob an das System von @panova25.de und @living_roots_pro die Resilienz des Bodens war beeindruckend, aber mit der Feinjustierung kitzeln wir jetzt das Maximum aus den Mädels heraus! 🎯 🌸 Das Ziel im Blick Dank der Kombination aus dem stabilen „Forest-Floor“ Klima und der wiedergewonnenen Präzision bei der Bewässerung steuern wir auf eine spektakuläre Phase zu. Die Vitalität in den 20L Stofftöpfen ist unschlagbar. 🌱 Die Crew & 🤝 Das Ökosystem • Genetik: Zapplez 2.0 (@conscious__genetics ) • Z-Vally & OreoZ Milkshake: (@positronicsseedsgermany ) • Partner: @panova25.de & @living_roots_pro • Community: @cannacommunity.deutschland @cannacommunitygermanyx @cannacommunity.germany
Likes
153
Share
I love this community and the way its like a big family, thank you all for your love time and dedication, keep it up, growers love to you all 💚💚💚
Likes
107
Share
Greetings, dear plant companions! Can you believe it? Week 17 has unfolded, and our journey with Purple Lemonade Fast Flower reaches its climax—a splendid harvest at day 69. As I stand here, reflecting on the wait and the wonder, let's delve into this momentous update. The Ultimate Waiting Game <3 Oh, the extra waiting time felt like a lifetime, didn't it? But you know what they say—the best things in life are worth waiting for. And let me tell you, this journey has been an ode to patience and a symphony of anticipation. A Marvel to Behold <3 Behold our Purple Lemonade in all her glory! If beauty could be bottled, she'd fill an entire garden. Her buds are a testament to love, care, and the dedication poured into this journey. It's like witnessing a masterpiece in horticultural art. The Trichome Revelation <3 As the days stretched, the trichomes prepared for their moment of glory. And what a sight it was! I took a sneak peek under the microscope, and oh my, the colors and trichome numbers are beyond imagination. It's like peeking into a secret universe of brilliance. A Full Cycle: The Journey Revisited <3 From seed to this awe-inspiring harvest, our journey has been a symphony of growth, learning, and beauty. Every week, we embraced new lessons, nurtured each phase, and reveled in the miracles of cultivation. The cycle is a testament to our connection with the plant world and the wonders it bestows. Time to Rest and Reflect <3 Now, our Purple Lemonade enters a period of rest on the drying rack. For about two weeks, she'll transform further, preparing for her final debut. It's a time of patience once again, as flavors deepen, aromas evolve, and magic intensifies. The Upcoming Full Report <3 In the near future, get ready for a comprehensive report on the fruits of this labor. We'll explore the buds, savor the tastes, bask in the effects, and celebrate the cycle as a whole. It's a chapter that encapsulates the essence of this cultivation journey. A Thank You to the Community <3 A heartfelt thank you to the @Fast_Buds team for crafting this botanical marvel. @aptus_holland, your support has been integral. And to @grow.diaries and the entire community, your camaraderie has fueled this journey. Cultivation, Celebration, Connection 💚🌿 As this chapter concludes, let's celebrate the culmination of growth, the dance of patience, and the connection we share with the natural world. From seed to harvest, we've written a story of love and green magic. Thank you for being part of this journey. Until we reconvene for the final chapter, let's continue to nurture, learn, and celebrate the beauty of plants. Genetics - Fast Buds Purple Lemonade FF Ligth - Lumatek ZEUS 465 COMPACT PRO 
Food - Aptus Holland #aptus #aptusplanttech #aptusgang #aptusfamily #aptustrueplantscience #inbalancewithnature #trueplantscience #fastbuds #dogdoctorofficial #growerslove With true love comes happiness <3 <3 <3 Always believe in your self and always do things expecting nothing and with an open heart , be a giver and the universe will give back to you in ways you could not even imagine so <3 <3 <3 
All info and full product details can be find in can find @ https://2fast4buds.com/ 

https://aptus-holland.com/
 
https://autopot.co.uk/ 

https://lumatek-lighting.com/ <3 <3 <3 Growers love to you all <3 <3 <3 " Arising from a cross between purple and citrus Cali genetics, Purple Lemonade FF (Fastflowering) offers a complex high made up of perfectly balanced cerebral and body effects that are ideal for daytime use. Expect an extremely enjoyable high that boosts your mood while deeply relaxing your whole body and getting rid of muscle pain. This meticulous cross produces up to 550 g/m2 of some of the most beautiful purple buds, with pinkish and reddish hues that will catch everyone’s attention. The beautiful purple buds are ready for harvest in 7-8 weeks and come hand-in-hand with unbelievably sugary citrus terps that are just as refreshing as a cold lemonade on a hot Summer day. It’s the ideal variety for the sweet-tooth stoner seeking strains that deliver both in quality and quantity of resin. Bud Description Purple Lemonade FF grows chunky, spade-shaped buds that boast a whole range of pinkish-purple hues with rich, dark orange pistils shooting out of every direction. This variety stands out for the, oftentimes, lilac trichomes that give them a gorgeous pink tint and make for outstanding purple concentrates. The buds give off a delicious tart lemon aroma that reveals a sweeter, more fruity scent as you break the buds open. Definitely a must for flavor chasers and those looking for pungent terpene profiles. Smoke Reports Purple Lemonade FF offers an effect that’s just as unique as the flavor. Expect a potent uplifting high that gives you that energy boost you need to get things done while 100% happy and stress-free. The effect gradually transforms into a wave that works its way along the limbs and through the muscles, deeply relaxing your body and putting you in the right mindset to go through a busy day with a huge smile on your face. This is an excellent all-day smoke as it not only increases energy but can also help combat chronic pain, migraine and stress. Plant Appearance This feminized photoperiod variety develops a thick and strong structure, growing a medium-sized main cola with multiple shorter side branches, typical of hybrid strains. Purple Lemonade FF develops fairly short internodal spacing with gorgeous purple buds growing stacked on top of each other, making it the perfect choice for growers of all levels looking to get lots and lots of top-shelf purple weed, as this variety can produce up to 550 g/m2 in a 7-8 week flower cycle. Grow Tips This is a super fast feminized photoperiod version that takes approximately 7-8 weeks to flower with a 5-week vegetation cycle,, this means you can have faster harvests by shortening the veg cycle or have a longer veg cycle for bigger yields. Purple Lemonade FF (Fastflowering) makes for a great candidate for growers of all levels as it’s a vigorous strain that will thrive with basic maintenance both indoors and outdoors. This is a resin powerhouse so make sure to have your trim bin close by as all the resinous sugar leaves will make for the most mouth-watering hash and extracts. Flavor Expect a long-lasting citrus zest that taste just like it smells. Purple Lemonade FF reeks of a delicious blend of sweet fruits and tart citrus that’ll make your mouth water. On the inhale, expect sour flavors that taste just like lemon candy with hints of orange and a really subtle earthy background. And on the exhale, the citrus flavors open up, giving place to a more sugary berry fruitiness that leaves your whole mouth tasting like an extremely sweet weed-infused lemonade.
Likes
15
Share
@MrJones
Follow
Mr. Jones Fast Buds Moby Dick ´🌿⊱╮🌿╰⊰🌿 WEEKLY GOALS 🌿╰⊰´🌿╰⊰´🌿 🏡Indoor - 3"x4"x8" Custom Built Grow Closet 🌾This strain likes to stretch, so a heavy training regiment will be needed. 🗓️Germenation - Soaking in Water Strait into Amended Soil. ⚱️3-Gallon Pots 📊6.4 / 6.8 PH 💧 Feeding - Gaia Green Grow / Bloom 🕷️ IPM - We will be using Green Cleaner" 1 OZ per Gallon, and CannControl from Mammoth alternating between products each month for Integrated Pest Management. 🌿╰⊰´🌿╰⊰´🌿 PLANT UPDATES 🌿╰⊰´🌿╰⊰´🌿 🗓️Saturday 10/14/23 - Saturday 10.21.23 Removed the humidity domes today, the humidity in the closet is sitting above 75% pushing 80% RH and will be misting for a few more days, the pushed down just enough to keep the plants engaged, for the next week will maintain the 24h light cycle, then reduce to 20 for week 2 and 18 for week 3 for the rest of the grow. 🗓️Wednesday 10.25.23 - These ladies are doing well, just starting to grow, going to move the light cycle from 20/4 to 18/6 on Saturday. ╰⊰´🌿 ╰⊰´🌿 ╰⊰´🌿 ╰⊰´🌿 ╰⊰´🌿 ╰⊰´🌿 ╰⊰´🌿 📝 Notes - Original Moby Dick Auto is a world-renowned Sativa-dominant giant created from two of the most popular strains ever, the White Widow and Haze cannabis strains which are known for the huge delicious aroma, huge size and yields; It’s an extremely easy-to-grow variety highly recommended for growers of all levels seeking for maximum yields with minimum effort as this strain grows up to 150cm and yields up to 650 g/m2 in 10 weeks without extra maintenance. Thanks to its 23% THC, this marvelous hybrid is all about happiness as it will melt your worries away while boosting your mood, leaving you with a big fat smile on your face and ready to get things done as soon as you take the first hit, making it an excellent choice for social scenarios and busy workdays. The Sativa effect comes hand-in-hand with a mix of lemony, piney, and woody terpenes that translate into that classic aroma every stoner loves. ╰⊰´🌿 ╰⊰´🌿 ╰⊰´🌿 ╰⊰´🌿 ╰⊰´🌿 ╰⊰´🌿 ╰⊰´🌿
Likes
17
Share
@Chucky324
Follow
Hello. This is the end of week 7 and the beginning of week 8 of flowering. I'm a bit bummed about this grow. I've read that you just need to force a plant to flower, that's 12 hours of light and 12 hours of dark for the first 3 weeks (I had a tent inside the greenhouse) and then put it outside and it will continue to flower. I thought that was amazing, so I wanted to give it a try. Well, here we are at the end of the 7th week and it looks like the plants are going back into veg. Last year I didn't do up the tent for the last 2 weeks and everything was fine so I thought I would give this keeping it open after the 3rd week a try. Now I know. I can always turn it into hash, maybe dry ice hash. Here's another reason I'm bummed about this grow. I've got spider mites. I'm doing my best to knock them down with my hypochlorous acid. I'm spraying twice a week, but had some yellowish looking leaves, I reread the article (I put up a pic of it a few of weeks ago) and found I had to rinse the indoor plants. So after I sprayed the 1/2 strength acid I waited 10 minutes and rinsed with water. Today I can see more mites than when I sprayed before. So next time I'll wait till the 1/2 acid mix is dry before I rinse the leaves and see if that knocks them down more. If you don't try new things you don't learn. That's what this grow is about, to see if the plants can still keep flowering at my latitude and now that I have mites, to see if the hypochlorous acid will work without killing the plants. Yes, I'm 60 something and still learning. 😃 Be Great. Chuck.
Likes
56
Share
@WEEDOOR
Follow
Hello friends In the last week I have reduced the growth fertilizer by half because there were signs of excess nitrogen. The flowers of one plant look really good and smell great but I feel that the other plant will not yield the same quality. Both are of the same breed from FASTBUDS but behave and look different. Hopefully the other flower will also be able to produce beautiful and oily flowers. I'm a little apprehensive about the appearance of the leaves and can't figure out why they change color and is it because they're nearing the end.
Processing
Likes
18
Share
10/19: This morning when I opened up the closet I wanted to rearrange a little, but they were so packed in, it was almost impossible. So, I went up in the attic and ran some cables and hooked up my other 200w light in the top section. I moved the 4 smallest plants up there and it created a little bit of desperately needed space in the lower section...but I still doubt very seriously that I'll be able to grow all 15 to completion in there..it's only 14.5 square feet of space!😳 10/20: I foliar fed everybody with some SP-90 humic/fulvic acid and kelp me kelp you today. They will probably get fed again tomorrow. Drying out quickly- 10/21: I applied Axiom again today..I sprayed a whole liter of the finest mist I could produce..tops and bottoms of all leaves to the point of runoff. I fixed up a 5 gallon batch of nutes and fed everybody about a 1/4 gallon each. Later the same day.... Several of them look very overwatered..and it's mainly the plants in the back in fabric pots that have seen a grow or two. I think my pots are mainly just too close together for airflow to dry the bottoms out well enough. I put another big fan in the closet and turned off the evap cooler for the night. 10/22: Most of them look better this morning, but a few are still droopy, so I used a stainless steel skewer to poke a thousand little holes in the lower part of all the fabric pots in the garden to try and improve oxygen availability to the roots. I also carefully arranged the garden so that there are gaps between all the pots. I think I'll also space my waterings a little further apart. The topsoil is drying out well enough, but I don't want their roots sitting in muck. 10/23: Several of them are flowering now, and starting to stretch a little bit. I raised the lights about 2 inches today and dialed the ac infinity's high temp trigger up to 88f for a bit to get them to dry out a little faster, so the RH climbed a little higher as well...so I also set the ac infinity's high humidity trigger threshold to 65%. After observing signs of nitrogen toxicity on several of them, I realized that I made another rookie mistake...(where is my head??) The new 5 gallon bucket I'm using to mix a batch of nutes must be about 2 inches shorter than the one I had been using, and I never bothered to calibrate it....which I did today. So, for the past couple of feedings, I've been mixing in enough nutes for 5 gallons, but in only 4 gallons of water!!! I foliar fed them with BoomBoom Spray and gave them about 8oz each of boomerang and cal-mag early in the morning, and by 5pm they all looked happier. I'll give them a little drink of plain water tomorrow, then start them on flowering nutes the next day. 10/24: Several are starting to stretch now...and all but one are flowering. This morning I fed them another little dose of boomerang and cal-mag, and also added some bembe and open sesame to the mix. This afternoon, I foliar fed everybody very thoroughly with some humic/fulvic acid, seaweed extract, yucca extract, and big bloom (for the earthworm castings and minor and trace elements) I repotted the dwarf in a smaller container and gave it to my son. He's a bonsai enthusiast, so it's right up his alley...that's one less plant to deal with! 10/25: This evening I mixed up 5 gallons of pretty much everything except grow big. and gave everybody about 1/4 gallon each. I plan to flush them with sledgehammer on Sunday or Monday and only do foliar feedings like BoomBoom spray and fulvic acid until I resume normal bloom feeding mid-week. Because I've had such a good veg, I'm pretty sure the maximum number of plants I'll be able to fit into the lower section is 13...and maybe only 12. So, that will be my 4 or 5 shortest plants in the area above..in which case, I'll need more light... I think the new UVB light will have to wait until my next grow because I've got so spend a couple hundred bucks on seeds to be able to start another batch right before my current run finishes.😖😞😩😡
Likes
6
Share
@rvabudman
Follow
Graduated, and am off from work for a few weeks, so went overboard on photos. Plant is doing well, leaves are starting to turn yellow (strain trait). Can't wait for the harvest and being able legally gift my xmas ornaments to my cousins during our "cousins walk" at our family xmas party.
Likes
Comments
Share
Night & day difference from my first grow, in a GOOD way lol good genetics for sure
Likes
33
Share
Día 88 y penúltimo antes del corte. Ya se aplicó Flawless Finish para un acabado impecable como su nombre lo indica. Siempre prefiero hacer el lavado de raiz solo aplicando agua en las últimas 2 semanas, pero esta vez lo hice aplicando el finalizador y luego los últimos riegos con agua purificada. La verdad es que estoy contento con los resultados de esta nena, que es hermosa por cierto, desprende olores ácidos, cítricos, dulces. Los colores son hermosos y las flores están rebosantes de tricomas, lo que la vuelve muy vistosa. Es todo por ahora, estaré manteniendoles informados en estos últimos días. Buenos humos! 👽
Likes
23
Share
Exciting week the plants are all out of germination and into their veg growth stage. This means we get to begin the exciting work of building our soil. When the plants veg growth reaches the tips of the pots, this indicates the roots also have and your plant is then ready for more room. We have a fantastic grow shop in town that is great about soil classes and teaching you some great essentials. We plan on utilizing this resource and will keep you updated with the progress of the soil build. Stay tuned for compost tea as well ;) Stopped by the grow shop to get the run down on the soil build. Because building your own soil creates hot soil, it needs to sit for 6-8 weeks. This obviously won't work for our purposes on this grow. After some deliberation we decided to go with a pre built soil that has already sat and composted. We are going to go with Build A Soil because they have done tons of research into their super soils. We want to do a super soil so that we don't have to top dress or add in any nutrients, we want the grow to be as natural as possible. After looking at Build A Soil's options we are leaning toward the L.O.S. OLY Recipe. This recipe uses 33% OLY Mountain fish compost. We want each plant to be able to finish out in the pots that we switch them into from their nursery pots. I recently found a new grow bag that we are going to try out for this next grow. It is a bag so it has a much larger circumference than the grow pots. It also has a lining on the sides of the grow bag so that it doesn't dry out from the sides like normal grow bags. This is our ideal growing situation because we are trying to simulate earth. When a plant is in the ground in the earth it doesn't dry out from the sides, we don't want our plants to either. The bags are very large (15 gal) but we don't want to fill to the top, in case we need to top dress more soil in the future. We use one cubic foot bag of soil per plant per container. This change will happen tomorrow at the turn of the week. Starting week two of Veg growth we will be in the containers that we finish in. This means minimal transplant stress and much less room for human error effecting my medicine.
Likes
5
Share
Week 8 start tomorrow and the super fast papaya frosting is down wow what a plant! Cannot wait for the cure heavy tropical pineapple/papaya/lime notes almost like fruit salad chewits. Coated in trichomes expecting roughly 3-4 oz from her she was the smallest in mass of the 4 though she must be sitting very high on THC & terps. Another week for the zkittlez probs another 2 for the frozen biscotti 🔥🔥🔥
Likes
56
Share
Bonjour à tous les padawans et maîtres jedis Jour84 arrosage avec 2 litres d'eau ph6.3 Jour86 arrosage avec 2. 5litres d'eau ph6.3 Jour89 arrosage avec 2 litres d'eau ph6.3 LE MEILLEUR MOMENT POUR RINCER SON CANNABIS Le rinçage commence en général deux semaines avant la récolte. Si le plant a une période de floraison de huit semaines, le rinçage doit commencer six semaines après le début de la période de floraison. Il est préférable de regarder de près les trichomes sur le plant pour déterminer quand votre cannabis est prêt à être récolter. Si les petits trichomes commencent juste à passer d’une couleur transparente à une teinte laiteuse et blanche, c’est une bonne indication que les plants peuvent commencer à être rincés. Il faut s’arranger pour que la majorité des trichomes aient changé vers la couleur désirée pour la récolte après deux semaines – ça devient plus facile à faire avec l’expérience, alors accrochez-vous ! Le rinçage peut également être un bon moyen de remettre à zéro la terre quand un plant est toujours en phase de croissance végétative. Parfois, un cultivateur suralimente par accident son cannabis, ce qui provoque un changement de couleur et un flétrissement du bout des feuilles. Ceci est appelé une « brûlure par nutriments ». Rincer la terre peut éliminer les nutriments excédentaires, ce qui aide à résoudre le problème. Cependant, c’est une mesure drastique à ce stade de la culture, alors assurez-vous que le problème soit bien une brûlure par nutriments et non quelque chose d’autre. Le rinçage ne concerne pas que le moment de la récolte. Cette technique peut aussi être mise en place durant la phase de croissance afin de débarrasser le sol des nutriments. Bien évidemment, les nutriments permettent à votre plante de rester en bonne santé et vous assurent des rendements maximaux, mais une trop grande quantité peut causer une accumulation et un état statique durant lequel la plante ne peut plus y accéder. Le blocage des nutriments peut être causé par une accumulation saline ou des niveaux de pH incorrects. Ces deux causes peuvent être résolues par un rinçage de votre plante à l’eau claire. Les fluides viendront pousser les nutriments en dehors du substrat et le débarrasseront de l’accumulation, permettant ainsi aux racines de pouvoir accéder à nouveau aux nutriments. EMPÊCHER LE BLOCAGE D'ABSORPTION DES NUTRIMENTS AVANT QU’IL NE POSE PROBLÈME Au mieux, le blocage des nutriments peut être un problème, au pire, il peut être un vrai désastre. Comme le dit l’adage, il vaut mieux prévenir que guérir. Il vaut mieux prendre de l’avant pour empêcher le blocage des nutriments plutôt que de s’y atteler lorsque c’est trop tard. Empêcher le blocage des nutriments peut se faire par le biais d’un rinçage de routine. En rinçant vos plantes une fois avant la floraison et une fois au milieu de cette dernière, vous minimiserez l’accumulation de nutriments. LES ENZYMES À LA RESCOUSSE Après le rinçage pour contrer l’accumulation ou le blocage des nutriments, vous remarquerez peut-être que vos plantes ont une apparence vert foncé, c’est le signe d’un excès de nutriments. Dans ce cas, certains cultivateurs choisissent d’ajouter une formule riche en enzymes à leur substrat. Au cas où vous auriez oublié vos cours de biologie, les enzymes sont des protéines qui catalysent les réactions. Elles aident à rincer le substrat en décomposant l’amidon, les glucides et les nutriments. Il existe sur le marché toute une variété de produits qui contiennent des formules d’enzymes très efficaces. Si l’eau ne suffit pas à vos plantes, ces petites protéines ne feront qu’une bouchée de l’accumulation de nutriments ! COMMENT BIEN RINCER SON CANNABIS Rincer votre plant de cannabis est un processus simple. À chaque fois que vous apporteriez normalement des nutriments, vous rincez à la place. De l’eau du robinet non traitée est tout ce dont vous avez besoin pour rincer, assurez-vous juste que son pH est sans danger pour le cannabis. La plupart de l’eau de puits a un pH sain et ne nécessite pas de traitement, mais s’il est nécessaire de traiter l’eau de rinçage pour avoir un pH adapté, faites-le. Les ajustements du pH seront donc la seule chose à considérer. Inonder la terre avec autant d’eau fraîche qu’elle puisse contenir. Laissez l’eau durant quelques minutes pour qu’elle puisse absorber les nutriments, puis inondez la terre encore pour rincer les nutriments loin du plant. Si vous cultivez en intérieur dans des pots, notez la couleur de l’eau qui s’échappe du fond des pots. Elle sera tâchée et aura une couleur sale. C’est à cette étape qu’un appareil de mesure des TDS (Total des Solides Dissous) est utile. Si vous récupérez et mesurez le TDS de l’eau « évacuée », elle devrait avoir un taux de 1300ppm, ce qui est assez élevé. Il est important de rincer le plant jusqu’à ce que total baisse à un niveau de 50ppm, ou du moins qu’il s’approche du TDS de l’eau fraîche que vous utilisez pour rincer le plant. La couleur de l’eau d’évacuation va s’éclaircir et apparaîtra plus propre. Vous devez tirer autant que possible de minéraux dissous du plant. Comment et Quand Rincer les Plants de Cannabis Rincer les plants de cannabis avant la récolte peut faire la différence entre les meilleurs têtes ou la plus rude pour la gorge. Cette petite tâche est simple et facile à faire. Ajoutez juste de l’eau ! Attention car le moment du rinçage joue un rôle critique. Le b.a.-ba du rinçage de ses plants de cannabis. Sommaire: 1. Qu’est-ce que le rinçage ? 2. Le meilleur moment pour rincer son cannabis 3. Empêcher le blocage d'absorption des nutriments avant qu’il ne pose problème 4. Les enzymes à la rescousse 5. Comment bien rincer son cannabis 6. Comment rincer ses plantes en hydroponie 7. Les résultats du rinçage de son cannabis 8. Quand éviter de rincer son cannabis Vous avez enfin fini vos cultures et vous vous retrouvez avec un magnifique plant couvert de super têtes, maintenant sèches, vous avez fait le curing et vous êtes prêt à fumer – et pourtant quelque chose ne va pas. La weed semble ne pas vouloir se consumer et quand vous tirez une bouffée, c’est comme si on vous avait donné un coup de poing dans les poumons et vous toussez en craignant pour votre vie ! Le goût est rude et décevant. Si c’est une situation que vous avez vécue, il y a des chances pour que vos plants n’aient pas été rincés correctement avant la récolte. Cette fumée bien loin d’être agréable est provoquée par la présence dans le plant des nutriments et minéraux utilisés lors de la culture, ce qui altère la façon dont le plant se consume. Rincer le plant élimine ces nutriments restants, ce qui améliore la qualité des sensations. Heureusement, le rinçage des plants de cannabis se fait facilement et sans effort, et cela vous permet de produire des têtes douces et délicieuses en un rien de temps. ARTICLE LIÉ Comment Utiliser les Nutriments pour Cannabis QU’EST-CE QUE LE RINÇAGE ? L’acte de rincer un plant implique d’utiliser de l’eau pour éliminer tout nutriment présent dans la terre. Une grande quantité d’eau est passée à travers la terre et drainée sur une base régulière. Tous les minéraux et nutriments présents dans la terre sont rincés avec le temps avec l’eau, ce qui laisse une terre propre. Mais pourquoi vouloir éliminer tous les minéraux de la terre ? N’est-ce pas mauvais pour la récolte ? En fait, cela aide à la récolte de manière significative. Quand les nutriments sont éliminés de la terre, ceci force le plant de cannabis à utiliser tous les nutriments toujours présents dans le plant. C’est comme pour le corps humain. Quand on consomme beaucoup d’aliments, ce que nous n’utilisons pas est transformé en graisses. Dans les situations extrêmes où la nourriture est rare, le corps s’appuie sur cette graisse stockée pour tirer de l’énergie. Comme rincer force le cannabis à utiliser tous les nutriments restants dans le plant, aucun ne devrait rester et altérer les têtes récoltées. Cependant, si vous le faites trop tôt, cela peut nuire à la santé du plant, le moment est donc clé. LE MEILLEUR MOMENT POUR RINCER SON CANNABIS Le rinçage commence en général deux semaines avant la récolte. Si le plant a une période de floraison de huit semaines, le rinçage doit commencer six semaines après le début de la période de floraison. Il est préférable de regarder de près les trichomes sur le plant pour déterminer quand votre cannabis est prêt à être récolter. Si les petits trichomes commencent juste à passer d’une couleur transparente à une teinte laiteuse et blanche, c’est une bonne indication que les plants peuvent commencer à être rincés. Il faut s’arranger pour que la majorité des trichomes aient changé vers la couleur désirée pour la récolte après deux semaines – ça devient plus facile à faire avec l’expérience, alors accrochez-vous ! Le rinçage peut également être un bon moyen de remettre à zéro la terre quand un plant est toujours en phase de croissance végétative. Parfois, un cultivateur suralimente par accident son cannabis, ce qui provoque un changement de couleur et un flétrissement du bout des feuilles. Ceci est appelé une « brûlure par nutriments ». Rincer la terre peut éliminer les nutriments excédentaires, ce qui aide à résoudre le problème. Cependant, c’est une mesure drastique à ce stade de la culture, alors assurez-vous que le problème soit bien une brûlure par nutriments et non quelque chose d’autre. Flushing Le rinçage ne concerne pas que le moment de la récolte. Cette technique peut aussi être mise en place durant la phase de croissance afin de débarrasser le sol des nutriments. Bien évidemment, les nutriments permettent à votre plante de rester en bonne santé et vous assurent des rendements maximaux, mais une trop grande quantité peut causer une accumulation et un état statique durant lequel la plante ne peut plus y accéder. Le blocage des nutriments peut être causé par une accumulation saline ou des niveaux de pH incorrects. Ces deux causes peuvent être résolues par un rinçage de votre plante à l’eau claire. Les fluides viendront pousser les nutriments en dehors du substrat et le débarrasseront de l’accumulation, permettant ainsi aux racines de pouvoir accéder à nouveau aux nutriments. EMPÊCHER LE BLOCAGE D'ABSORPTION DES NUTRIMENTS AVANT QU’IL NE POSE PROBLÈME Au mieux, le blocage des nutriments peut être un problème, au pire, il peut être un vrai désastre. Comme le dit l’adage, il vaut mieux prévenir que guérir. Il vaut mieux prendre de l’avant pour empêcher le blocage des nutriments plutôt que de s’y atteler lorsque c’est trop tard. Empêcher le blocage des nutriments peut se faire par le biais d’un rinçage de routine. En rinçant vos plantes une fois avant la floraison et une fois au milieu de cette dernière, vous minimiserez l’accumulation de nutriments. LES ENZYMES À LA RESCOUSSE Après le rinçage pour contrer l’accumulation ou le blocage des nutriments, vous remarquerez peut-être que vos plantes ont une apparence vert foncé, c’est le signe d’un excès de nutriments. Dans ce cas, certains cultivateurs choisissent d’ajouter une formule riche en enzymes à leur substrat. Au cas où vous auriez oublié vos cours de biologie, les enzymes sont des protéines qui catalysent les réactions. Elles aident à rincer le substrat en décomposant l’amidon, les glucides et les nutriments. Il existe sur le marché toute une variété de produits qui contiennent des formules d’enzymes très efficaces. Si l’eau ne suffit pas à vos plantes, ces petites protéines ne feront qu’une bouchée de l’accumulation de nutriments ! Comment et Quand Rincer les Plants de Cannabis COMMENT BIEN RINCER SON CANNABIS Rincer votre plant de cannabis est un processus simple. À chaque fois que vous apporteriez normalement des nutriments, vous rincez à la place. De l’eau du robinet non traitée est tout ce dont vous avez besoin pour rincer, assurez-vous juste que son pH est sans danger pour le cannabis. La plupart de l’eau de puits a un pH sain et ne nécessite pas de traitement, mais s’il est nécessaire de traiter l’eau de rinçage pour avoir un pH adapté, faites-le. Les ajustements du pH seront donc la seule chose à considérer. Inonder la terre avec autant d’eau fraîche qu’elle puisse contenir. Laissez l’eau durant quelques minutes pour qu’elle puisse absorber les nutriments, puis inondez la terre encore pour rincer les nutriments loin du plant. Si vous cultivez en intérieur dans des pots, notez la couleur de l’eau qui s’échappe du fond des pots. Elle sera tâchée et aura une couleur sale. C’est à cette étape qu’un appareil de mesure des TDS (Total des Solides Dissous) est utile. Si vous récupérez et mesurez le TDS de l’eau « évacuée », elle devrait avoir un taux de 1300ppm, ce qui est assez élevé. Il est important de rincer le plant jusqu’à ce que total baisse à un niveau de 50ppm, ou du moins qu’il s’approche du TDS de l’eau fraîche que vous utilisez pour rincer le plant. La couleur de l’eau d’évacuation va s’éclaircir et apparaîtra plus propre. Vous devez tirer autant que possible de minéraux dissous du plant. COMMENT RINCER SES PLANTES EN HYDROPONIE Le rinçage des plantes en hydroponie est bien plus simple que de se débarrasser des nutriments en terre. Les cultivateurs en hydroponie pourront simplement drainer leur système et le remplacer par une eau au pH neutre. Le rinçage des plantes en hydroponie est aussi un processus bien plus court. Une fois que la réserve d’eau aura été modifiée, les plantes en hydro n’auront pas accès aux nutriments externes. Pour cette raison, un rinçage de deux jours suffira. LES RÉSULTATS DU RINÇAGE DE SON CANNABIS Après la récolte des têtes, prenez du temps pour bien faire le curing pour atteindre le potentiel le plus élevé. Un affinage correct par curing permet de réduire encore plus le côté rude des têtes, en éliminant des choses comme un excès de chlorophylle. Vous serez étonné de voir la différence que ce petite effort peut avoir sur votre produit. Tout votre travail se sentira dans la première bouffée de cette weed douce comme de la soie, qui caresse la gorge comme du miel. Le plus doux de la nature. Vous pouvez donc améliorer la qualité de votre cannabis en ajoutant juste de l’eau ! QUAND ÉVITER DE RINCER SES PLANTES Le seul moment où nous recommandons d’éviter le rinçage de son cannabis est lorsque l’on travaille avec une terre biologique amendée ou un super soil. Ces substrats ont été développés avec précaution afin d’héberger des micro-organismes bienfaisants tels que des bactéries ou des champignons. Cette délicate biodiversité pourrait être éliminée et endommagée par le rinçage. Une fois de plus, l’absence de rinçage ne devrait pas poser de soucis, car aucun nutriment externe ou synthétique n’aura été ajouté au substrat. À la place, les plantes comptent sur les micro-organismes pour décomposer la matière organique et la livrer aux racines. May the force be with you 💪
Likes
17
Share
@Ts1Ko
Follow
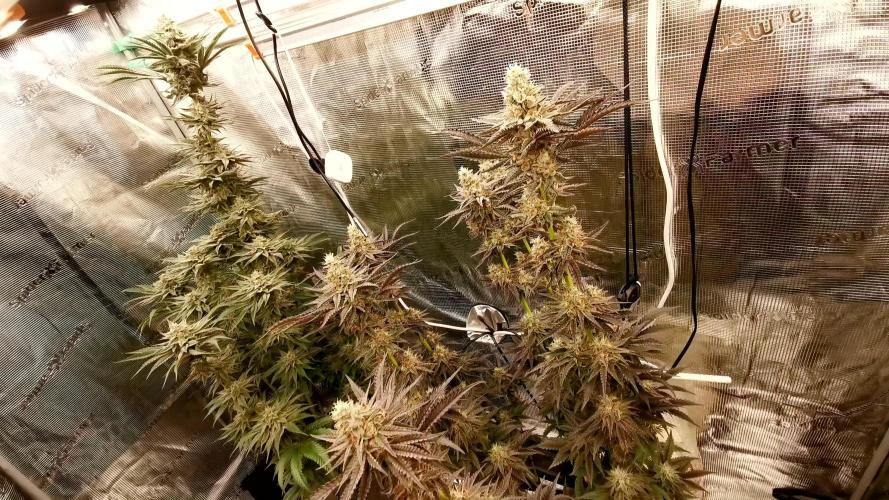
Week 1 after flowering started. And it was time for extreme defoliation ✌️