Likes
Comments
Share
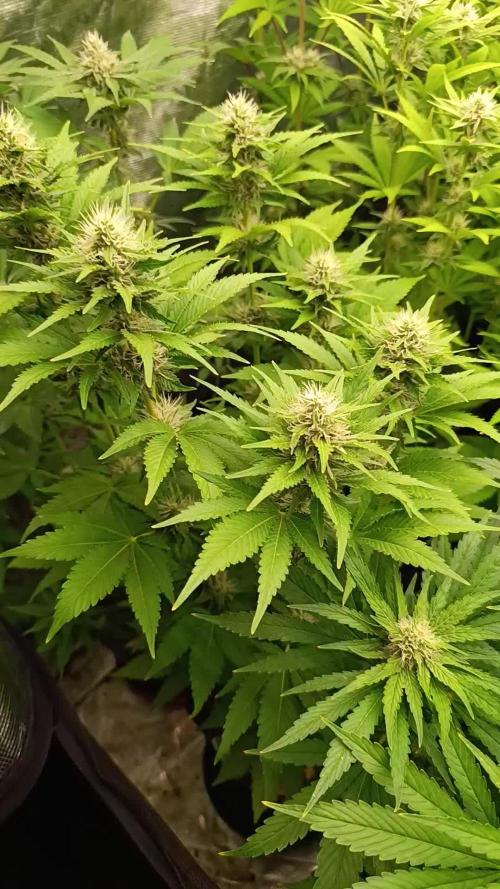
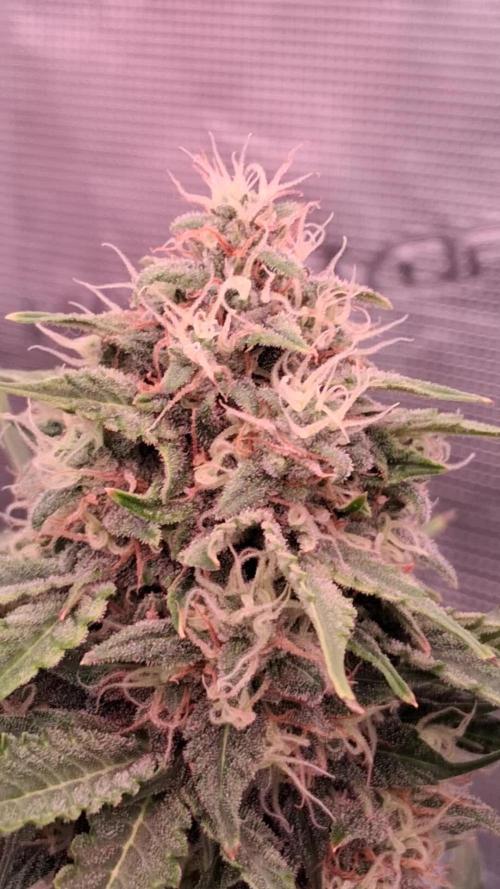
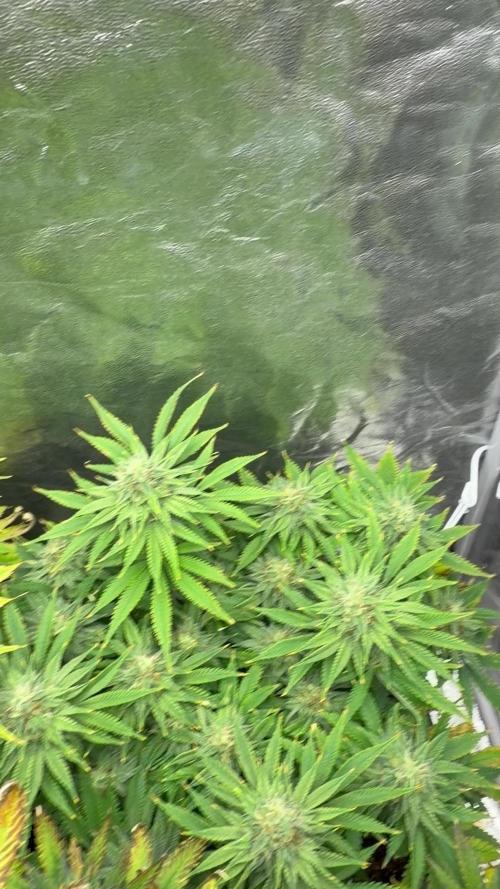
Apr 20: They hanging out at 65% rh and 65F.. Going for 7-10 day dry… No wet trim, cut plants in half and hung… Very happy with density and resin production… Can’t wait to jar and test in 2-3 weeks… I feel comfortable with this strain, I think it’s time to move on… Really wanna run some Mephisto seeds….
Likes
12
Share
Checkout my Instagram @smallbudz to see the Small budget grow setup for indoor use, low watt, low heat, low noise, step by step. 08/11/2019 - Showing early flower development? 09/11/2019 - Gave her 0.500 ml plain water PH 6.5, she's starting to need more water and also due to 30c temps. She's also showing light green around the leafs maybe slight magnesium deficiency. 10/11/2019 - Yellow leafs showing up really fast so I 'flushed' the medium with 1l of 6.4 PH plain water, watered until some run off start to showing, change the watering plan again, now I only water when the pot feels light and dry at the bottom. 13/11/2019 - Pot was really light and dry at the bottom so I gave her 1.5l of water with 0,75ml of Grow, 1,5ml of Bloom and 0.75ml of Max BioBizz PH 6.5 until some runoff started to appear I think was too much again : also added a work-supplement led strip light. 14/11/2019 - Leaves looking pale raise the light to 45cm instead of the recommended by manufacture 25-40cm.
Likes
2
Share
Takže holkám se daří ,proběhla lehká defoliace + fim “snad se povedlo” jinak dvě holky Cherrytini po přesazení se jim něco nelíbilo tak trošku listy zrezivěli , ale zdá se že už se srovnali a pokračuji ve zdravém směru. Upřímně jsem na tyhle devčice zvědavý , snad to vše proběhne podle mého plánu v pořádku ✅.
Processing
Likes
2
Share
She looks excellent on gje second week, very very terpy smells super dank and sweet,looks like she's very happy so let's see how she develops those frosty flowers 😍🌱, the smell is very powerful and strong man, I'm in love with this strain,I always recommend to every single grower please fed the plant properly that's for sure but please do it the organic way, and here's the demonstration,crazy resin production, very sticky and stinky,I didn't thought she abd her sister were going to produce such a crazy amount of aromatic very cery very sweet resin, I don't even know how to explain the aroma,but super floral,that's for sure. In love with this strain that after 19 days flowering she's producing such a big quantity of quality sweet cristals,thank you guys for creating this awesome genetic,I'm definitely happy and satisfied.
Likes
25
Share
Bonjour à tous les padawans et les maîtres jedis Pour cette semaine 4 au jour 23 ma plante fais 17 centimètres et son sixième noeud apparaît je décide donc de pratiquer un LST sur ma plante. Pour ce j'utilise du fil de fer galvanisé que je plante directement dans le substrat en faisant attention de ne pas endommagé les racines car n'oublions pas que ce qui pousse dessus pousse aussi dessous. Jour 17 je pulvérise du une solution composé d'une cuillère à café de savon noir mou dilué dans un litre d'eau en prévention d'éventuels nuisibles. Je corrige mon LST suivant la pousse de ma plante ... Pour ma par c'est la manière dont je procède mais petit rappel de la technique du LST: Quand commencer à appliquer la technique LST De nombreux cultivateurs commencent la manipulation dés que les plantes possèdent entre 3 et 6 nœuds ou une paire de feuilles. Durant cette première étape de la croissance, le tronc encore flexible est pliable sans risque qu’il ne se casse, même si au fur et à mesure du développement de la plante il sera de plus en plus difficile de le plier. Nous pouvons continuer à guider la croissance des branches durant toute la culture, même durant la floraison, ce qui pour cette étape représente un grand avantage face à la taille, qui n’est pas du tout recommandé une fois que la formation des têtes commence, cela stressera en effet la plante, ce qui aura pour effet de retarder la récolte. Comment appliquer la technique de guidage LST Si nous sommes prudents, la flexibilité naturelle des fibres du cannabis permet de plier leur tronc et branches avec une relative facilitée, même durant la floraison des plantes. En utilisant une corde fine, nous pouvons accrocher la pointe de la plante à la base du pot par exemple ou à un tuteur que nous aurons planté dans le substrat. Nous plierons le tronc avec précaution et nous le fixerons avec la corde, à partir de là, nous pouvons augmenter progressivement la tension de la corde, chaque jour un peu plus, jusqu’à obtenir la position souhaitée. Soyez attentif à la réaction de la plante, essayez de ne pas appliquer trop de pression sur la corde et rappelez-vous que la flexibilité des branches peut varier d’une plante à l’autre. Pour obtenir de meilleurs résultats, il suffit de suivre quelques règles simples. Pour commencer, nous devons choisir une corde fine mais pas trop pour ne pas blesser les troncs au fur et à mesure qu’ils grandissent et qu’ils deviennent plus gros. Nous pouvons utiliser des crochets en plastique souple ou de n’importe quelle autre matière flexible pour éviter d’endommager les plantes. Spécialement en intérieur, utiliser des cordons en plastique de couleur (voir les diaries de @Silky) est très pratique pour voir facilement les accroches et faciliter le travail au milieu du réseau formés par les cordes, les tuteurs, les mailles ou les supports que nous aurons dans la culture. Bien entendu, en culture extérieure et surtout en guerilla nous ferons juste le contraire et nous utiliserons des matériaux de couleur qui n’attirent pas l’attention pour que notre jardin reste discret. Pour stresser les plantes au minimum, la mieux est de réaliser ces manipulations le soir ou juste après que les lampes en intérieur s’éteignent, ce qui leur permettra de se remettre durant la nuit. Normalement, le jour suivant nous pourrons observer comme les pointes des branches que nous avons pliées se dressent de nouveau vers le haut à la recherche d’une source de lumière. Je combine un pincage d'Apex au LST cela me permettra d'avoir une canopé plus homogène donc une meilleure pénétration lumineuse et par conséquent un meilleur rendement. Que la force soit avec vous💪
Likes
92
Share
Week 5 Veg Report: SCROG Netting, Massive Leafs & Precise Data Mastery! 🌱 Girls Growing Stronger Than Ever! 🌱 This week has been truly epic in the grow room—so much so that it’s time to bring in the SCROG net! With the canopy expanding and the younger ones still working to catch up, the SCROG net will help me achieve that perfect, even canopy. A well-placed SCROG not only ensures better light penetration but also gives the smaller plants a chance to spread out and thrive alongside their bigger sisters. Now, let’s dive deep into the SCROG method. The Screen of Green (SCROG) technique is a grower’s secret weapon for maximizing space, light efficiency, and yields. The concept is simple but powerful—train the plants to grow horizontally along the net, forcing them to expose multiple budding sites instead of just a single cola. This way, the canopy spreads evenly, improving light distribution and air circulation throughout the tent. As the plants grow, I’ll gently weave their branches through the screen, ensuring they fill every square inch of space. The end goal? A sea of buds all basking in equal light! 💪 Huge Leafs Everywhere! 🌿 One thing that’s really catching my eye this week is the size of the leaves—they’re HUGE! Honestly, they’re so big I couldn’t resist a little fun, so I made myself some fashion accessories: leaf earrings and a cap from the Super Sativa Seed Club Green Papaya! 😂 And, of course, I captured the moment. But seriously, large leaves at this stage are a great sign of healthy, robust plants. These “solar panels” are hard at work soaking up all the light, driving photosynthesis, and fueling growth. So, what does it mean when your plants are showing off big, luscious leaves? It’s a clear indication that they’re happy, healthy, and thriving in their environment—big leaves mean lots of energy being produced and stored for future bud growth. Exactly what we want! 💧 Precision Feeding with Aptus Nutrients 💧 This week, I took a deep dive into my Aptus nutrient lineup and shared a video explaining how each product affects the water’s pH and TDS. Using the AMP-3 Precision Meter, I’m getting real-time water readings and keeping everything dialed in perfectly. Let’s break it down: • pH: 5.83 • TDS in solution: 445 ppm • Water temperature: 25.2°C The Aptus products are incredible for balancing nutrients without throwing off the pH or TDS too much. I’m fine-tuning my feedings based on these readings to make sure the girls are getting exactly what they need. The precision I’m able to achieve with the AMP-3 is mind-blowing—I get immediate feedback on pH, temperature, and EC, allowing me to make real-time adjustments and ensure the perfect environment for nutrient uptake. 📊 Environmental Mastery Thanks to TrolMaster 📊 Speaking of control—let’s talk about the TrolMaster system! Between the DSH-2U Humidity Station and all the other sensors, I’ve created the perfect environment for my plants. Here’s where we’re at this week: • Temperature: 26.2°C • RH: 70.6% • CO2 levels: 775 ppm • VPD: 1.0 kPa • PPFD: 423 Thanks to TrolMaster, I can monitor and adjust these metrics in real time, and the best part? I can do it all through the TM+ Pro app, even while I’m lounging in my green papaya leaf hat! 😆 Whether I’m checking the CO2 levels, adjusting the lights, or fine-tuning the humidity, it’s all in my hands with just a tap of my phone. Talk about convenience! 🌱 P.S. – Inline Sensors: Heavy-Duty Precision 🌱 Now, let’s talk about the heavy-duty players in this game—the (PCT-2) Heavy Duty Inline EC/Temp Sensor and the (PPH-2) Heavy Duty Inline pH Sensor. These bad boys are connected directly to the AMP-3 Precision Meter, and they’ve been absolutely crucial in giving me the most accurate readings on my water and nutrient solution. The PCT-2 keeps me informed about the electrical conductivity and temperature of my solution, which is key for monitoring how well my plants are absorbing nutrients. Too high or too low, and we’re asking for trouble, but this sensor ensures I’m always in that perfect range. The PPH-2, on the other hand, is all about maintaining the perfect pH balance. A fluctuating pH can mean nutrient lockout or deficiencies, but thanks to this sensor, I get a constant read on my pH levels, so the plants are always in their sweet spot for optimal nutrient absorption. Together, these inline sensors allow me to run a super-tight ship—every drop of water and nutrient is dialed in to perfection, keeping the plants happy and healthy! Shout Outs! As always, huge thanks to TrolMaster and ThinkGrow LED for the amazing gear, to Aptus Holland for their top-notch nutrients and Pro-Mix for the best soil i have used so far. Big love to the seed banks, the amazing Grow Diaries community, and all my followers—you guys make this journey so much more exciting. Don’t forget to catch up on my social media, Instagram, and YouTube for real-time updates and exclusive content! Stay tuned for more—next week is going to be epic! DogDoctorOfficial Discount Codes so you can save big on your next check out 💚💚💚 Kannabia - DOGDOCTOR 30% off SeedsmanSeeds - DOGDOCTOR 10% off CannaKan- DOGDOCTOR 15% off terpyz.eu - DOCTOR 15% off The Neutralizer - PORKIT5-DOG 15% off Growers Love to you all 💚💚💚
Likes
5
Share
Week 12 Update: Solo Tent, Heatwaves, & GG Curing! Hey everyone! I almost completely missed the Week 12 with all the excitement going on, and I also forgot to snap photos this week, so I'm dropping a video instead to show you the current state of the tent. Here is what's happening: The Gorilla Glue is officially out of the tent! The chop was a success, and after navigating some tricky humidity levels during the dry, she is now safely in jars. The curing process is going perfectly with Integra Boost packs holding a steady 60% RH. I will be making a separate, detailed Harvest Post for the GG very soon with all the final weights and macro shots, so stay tuned for that! With GG gone, Crystal Candy now has the entire tent, all the airflow, and the 150W light entirely to herself. As you can see in the video, she is taking full advantage of it. She is flowering beautifully, the buds are swelling up nicely, and she is marching steadily toward her own harvest window. The biggest struggle right now is the weather. Summer is arriving early here, and the ambient temperatures are pushing my tent up to 32°C (89.6°F) during the day. I am trying my best to counteract it and cool things down, but without much success so far. Despite the heat, CC seems to be taking it like a champ. I'm keeping the fans on max to ensure massive airflow and prevent any mold issues like the minor scare I had with GG. Fingers crossed the heat doesn't cause any foxtailing. She is getting closer every day! ✌️
Likes
Comments
Share
La planta que se quebró ya está terminando de soldar y parece que entrará a floración antes que las demás. - Luz: Bestva Pro 1000W / 18 h/d -FloraNova Grow G.Hydroponics: 0.6ml/l - Armour SI G. Hydroponics 0.4ml/ - Rhizotonic Canna : 4 ml/l - Everest: 0.5 ml/l Control biológico: -Solution (bioinsecticida generalista: Beauveria, Metarhizium, Lecanicillium y Cladosporium + esencia de ajo y chile). -Acaridox (bioacaricida: Metarhizium e Hirsutella + esencia de canela) - Scamin (control escama y cochinilla) Cladosporium Herbarum - Diatomea
Likes
20
Share
@RunWithIt
Follow
I mean, overall this was an extremely painless grow. The test of whether we should or shouldn't top autos is still TBD imo. Our topped candidate produced denser, frostier buds, but weighed slightly less, at 14 grams of bud total. And our lst plant produced 18 grams of bud, not as frosty, and almost as dense as our topped girl. I'll be topping autoflowers from here on out only under the circumstance I have 4+ to grow at the same time. Seems like it could be used to speed up the autoflower grow cycle if done properly, like with right. Since I'm doing a perpetual cycle, it's still a viable option for me in the long run. A few tips I have for anyone growing this strain in organics: Start feeding bloom nutes a little bit prior to flower transition - this makes the transition more seemless. From weeks 1-3 flower, I slowly dropped the grow dosage until I cut off grow nutes week 3 flower. Starting the flush around week 6 flower seemed to really bring out this plant's potential. But I think you could get away with starting the flush around week 5. I hope this helps anyone trying this strain out. It's a good one, I hope to see more journals of it, eventually. Cheers everyone! Time for me to take a well-deserved puff. :) ☁️ 🌼
Likes
109
Share
Welcome to the Green House Company Cup 🏆. Day 41 since time change to 12/12. Hey everyone . It smells better and sweeter every day 😍. Your buds are developing beautifully 😄. The look of the buds is also beautiful. She takes her GHSC Powder Feeding very well, so I'm really excited about the stuff ☺️. Very easy to feed. It doesn't take too long until these beautiful flowers reach their end ✌️🏼. I am very curious how I will like this variety and especially how it will taste 😃. I wish you all a lot of fun with the update, stay healthy 🙏🏻, and let it grow 😛 You can buy this Strain at : https://greenhouseseeds.nl/ ☝️🏼☝️🏼☝️🏼☝️🏼☝️🏼☝️🏼☝️🏼☝️🏼☝️🏼☝️🏼☝️🏼☝️🏼 Green House Seeds Company Cup 🏆 Type: Wonder Pie ☝️🏼 Genetics: Wedding Cake x OG Kush 👍😍 Vega lamp: 2 x Todogrow Led Quantum Board 100 W 💡 Flower Lamp : 2 x Todogrow Led Cxb 3590 COB 3500 K 205 W 💡💡☝️🏼 Earth: Canna Bio ☝️🏼 Fertilizer: Bio Grow Feeding ( GHSC ) , Enhancer ( GHSC ) , Bio Bloom ( GHSC) ☝️🏼🌱 Water: Osmosis water mixed with normal water (24 hours stale that the chlorine evaporates) to 0.2 EC. Add Cal / Mag to 0.4 Ec Ph with Organic Ph - to 6.0
Likes
6
Share
Welcome to Flower Week 2 of Fast Buds Purple Haze Auto I'm excited to share my grow journey with you from my FastBuds Project . It's going to be an incredible ride, full of learning, growing, and connecting with fellow growers from all around the world! For this Project , I’ve chosen the Feminized Auto Purple Haze: Here’s what I’m working with: • 🌱 Tent: 120x60x80 • 🧑‍🌾 Breeder Company: Fast buds • 💧 Humidity Range: 60 • ⏳ Flowering Time: 8 Weeks • Strain Info: 23%THC • 🌡️ Temperature: 26 • 🍵 Pot Size: 12 • Nutrient Brand: Hy-Pro • ⚡ Lights : 600W x 2 A huge thank you to Fast Buds for allowing me to try my Best with this amazing collection from Automatic and Photo Strains they managed to Sponsore . Big thanks for supporting the grower community worldwide! Your genetics and passion speak for themselves! I would truly appreciate every bit of feedback, help, questions, or discussions – and of course, your likes and interactions mean the world to me as I try to stand out in this exciting competition! Let’s grow together – and don’t forget to stop by again to see the latest updates! Happy growing! Stay lifted and stay curious! Peace & Buds!
Likes
2
Share
@GuniGugu
Follow
- slowly increasing nutrient doses toward prescripted BioBizz chart quantities, but still, every second and a half watering is pure water :)
Processing
Likes
52
Share
@MephistoGenetics, Hi all the happy people here in GrowDiaries. This is my second cultivation ever and it will be fun to try a bigger space than my closet grow. First, I'm just going to say I'm done with the construction of my new growroom. The room is 2.14 meters by 1.7 meters and has a ceiling height of 2 meters. It provides a floor area of ​​3.6 square meters. I use a 54 Watt Lightwawe T5 for germination and 2 Pcs 400 Watt HPS lamps. I have a channel fan that replaces the room air about 40 times an hour to get a comfortable environment in the room, the air enters a fresh air intake from the outside. The air is purified through a carbon filter to then leave the room to the rest of the basement. Then I use that heat to heat the rest of the basement. I will use 10 pcs 15 liter Autopots to grow with and a 100 liter water tank that supplies the pots of water and nutrition. I will grow completely organically in soil and will watercure my buds to get the best possible medicine for me. But there are no cultivation rooms to be displayed here, so I continue with what is most important. Today I have put my seeds in paper towel and hope the seeds have germinated within a few days. I am very excited to see how the new growroom will work and how this Stilton Special will turn out. Strain Name: Stilton Special F1 Genetic heritage - Sour Livers F3 x Northern Cheese Haze F3 Strain behaviour - Stilton grows well from the off, and develops into a stout but branchy specimine that leads to a fine yield of awesome flowers. She's not too stretchy but also is sizeable enough with good growth, to train and shape to your liking. Flowers develop pretty fast and grow to a good size, it may to advised to clear out some undergrowth and if needs be a very gentle defoliation mid-way through the grow, although leaf tucking may suffice well enough.The end product is of top shelf quality and she doesn't lack in yield either.Give your garden, nose, and body a treat and be sure to indulge in a slice of Stilton this year, You won't regret it. Size - 50 - 70 cm Structure - Medium height but bushy Flower Density - 9/10 Indica/Sativa - 65/35 Cycle Time - 65 to 70 days from sprout Yield - 90 to 140 grams as a single plant Best Method for overall high yield - 9-12 per 1,2m x 1,2m sq in 10-15 Liter pots (Soil) Aroma - Very strong, Cheesey/fruity/sour/spicey/ with a dash of coffee. Taste - Dank berries Effect - Good hybrid powerful but balanced effect Medicinal Benefits - TBA Best Grown - Indoor/Greenhouse Cannabinoids - TBA Extract information - Ideal extract candidate - High in resin, oil and terps. ................................................................................................................................................................................................................................................................................................................................................. 2017-08-21. Started to germinate the seed. ..................................................................................................................................................................................................................................................................................................................................................... 2017-08-23. Seed germinated and put in small pot in the humidity dome. ......................................................................................................................................................................................................................................................................................................................................................... 2017-08-27. Slow and steady she grows. ---------------------------------------------------------------------------------------------------------------------------------------------------------------------------------------------------- 2017-08-28. Transplanted to the 15 liter autopot. -------------------------------------------------------------------------------------------------------------------------------------------------------------------------------------------------------------- 2017-08-29. New movie of the girl and a new pic of the grow room from now. ------------------------------------------------------------------------------------------------------------------------------------------------------------------------------------------------------------- 2017-08-29. Hello to you who read my diary, I just want to say that I am pleased that you have chosen to check in with me and in my diary. I just want to say that I do this for myself and for a steady flow of my medicine. Everything you read and see in my diary is 100% honest and I will never distort or beautify anything here. I document my crops so that I can learn from my mistakes and also to look back at those different crops. I try to update with pictures every day and with text if something special has happened in the garden. This is my strainhunt for the best medicine and the beginning of my journey with cannabis and the cultivation of it. ----------------------------------------------------------------------------------------------------------------------------------------------------------------------- 2017-08-30. Cleaned the room this morning, just vacuuming and cleaning with chlorine solution. Im testing the fan to control temp and humidity, it works great. Added a movie. Everything is looking great right now. ------------------------------------------------------------------------------------------------------------------------------------------------------------------------------------------ 2017-08-31. 3 new pics. -------------------------------------------------------------------------------------------------------------------------------- 2017-09-01. New pics and a video of the room from today. ----------------------------------------------------------------------------------------------- 2017-09-02. New pic ---------------------------------------------------------------- 2017-09-03. Video of the girl this morning. ---------------------------------------------------------------------------------------------------------------------- 2017-09-04. Week 2 starts, new pics. ---------------------------------------------------------------------------------------------------- 2017-09-05. KL 08.00. Cleaned the room this morning, just vacuuming and cleaning with chlorine solution. KL 12.00. The girl got 2 liters of water with nutes in it, added a video. ---------------------------------------------------------------------------------------------------------------------- 2017-09-06. KL 08.00. The girls woke up after their beauty sleep, the leaves are always a bit down after 6 h of darkness, but they will stretch now when the HPS lamp starts. Everything looks good and I keep trying to tuck the leaves so they get the maximum amount of light where needed. Added pics and video. -------------------------------------------------------------------------------------------------------------------------------------------------------- 2017-09-07. Day 17 from sprouting. I have never tested PH in my grows, when growing organic in soil iv learned that it adapt PH by it self. But im curious by nature so i had to test. Kl 10.00 Tested PH in the soil, it was 6.9 and tested my tap water and it was 6.8. Added video of the girl. Kl 22.30. New pics ------------------------------------------------------------------------------------------------------------------ 2017-09-08 KL 08.00. Good morning, added new video. 2017-09-08. Kl 23.50. Gave every girl 3 liters of water and nutes, added new video. -------------------------------------------------------------------------------------------------- 2017-09-09. Kl 21.00. Defoliated a lot and added pics. ------------------------------------------------------------------------------------ 2017-09-10. Kl 08.00. Last day of week 2. New video. 2017-09-10. Kl 23.00. 3 new videos. -----------------------------------------------------------------------------------
Likes
7
Share
@KannaKoom
Follow
6/24: Things are looking good! Haven't really changed much, but I did bring the light a little closer to the plant and I brought humidity down to 70%. The bud sites are growing very quickly. Hoping to be able to start some LST by the end of the week. 6/26: Loving the growth still! Keeping things as is still, as I am liking the results so far and don't think she would benefit from any adjustments. The 4th node has dropped nicely and 5th is coming along fast! Also, I planted four mystery seeds I received from a friend and three of the four popped today! We plan on trying our hand at a little outdoor growing with these. Nothing like a little experimenting, right? 6/29: All is looking well. I did remove the lowermost node, as well as start some LST on the second node. LST is something new to me an an opportunity i was not afforded with the slow growth and early flower of my last grow. I'm excited to see what different it will make. I plan to do the same on the 3rd node as well in the coming week. It's been fun watching this plant grow! WEEK 3 AVG TEMP: 73.2F WEEK 3 AVG HUMIDITY: 66.8%
Likes
22
Share
@J_diaz420
Follow
Una cepa muy estable , muy semejante entre las 4 que cultive, venía ya probando la que coseche con anterioridad y vaya que exquisita variedad muy recomendable, en las foto no está el peso de la cosechada con anterioridad pero sume sus gramos al peso final, muy contento, me gustan estos cultivos fuertes y estables 💪👌✌️🍀
Likes
10
Share
Poda apical tardía pero trabajando fuerte con LST para lograr la estructura de plantas que deseamos. Además para lograr esquejar la genética y poder mantener los fenos que nos gustan. Sumé a la carpa un feno de Zombie Bride que salió bueno y no queria perderlo. En el video se puede ver.