
Likes
Comments
Share


@Pennuts
Follow
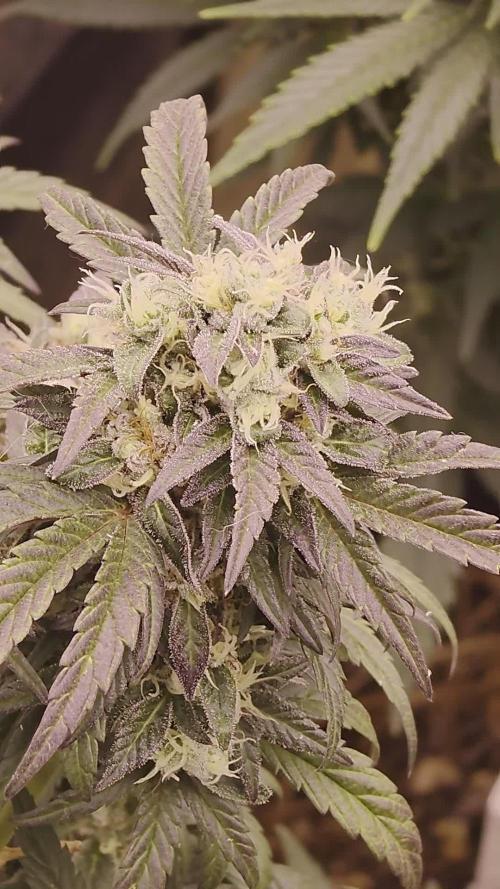
The drying process lasted 14 days and I'm in the 2nd week of curing, I've already tried some buds and neither the smell nor the taste are great, the taste and smell of both phenotypes is lemon.

Likes
3
Share


Processing
Likes
142
Share


@MadeInGermany
Follow
Hi everyone :-)
This week a lot of nice things happened in the flower tent :-)
Everyone looks super nice, and is growing stronger and more beautiful week by week 😍👌.
The blue cheese smells like a dream ;-) As usual from this variety 👍.
The kosher tangie is also very, very tasty 👏🏻.
Both got Pk 13/14 this week for the last time :-)
Everyone else is developing very well 👍, That will be the last diary with several strains together :-)
In future everyone will come individually 👌.
I wish you a lot of fun with the videos, have a nice weekend, stay healthy 🙏🏻 and let it grow 😎👌


Likes
38
Share


@Bigdaddyblue
Follow
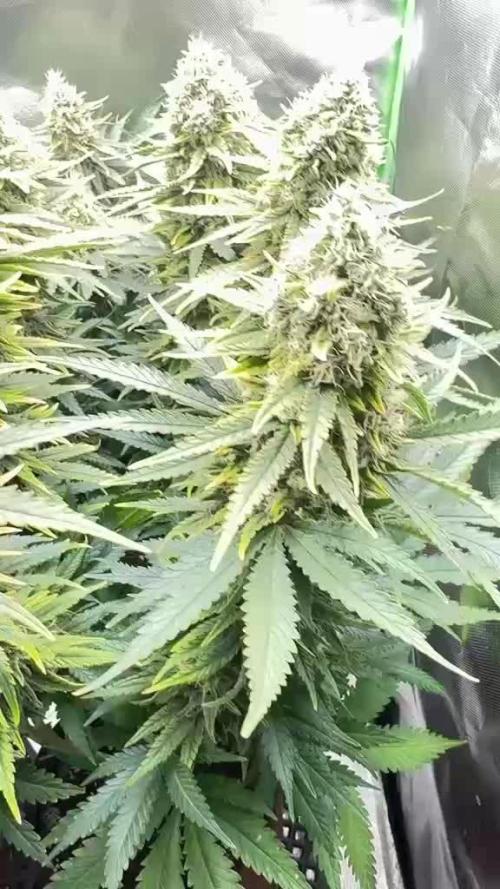
Day 65 (12/31): no change.
Day 66 (1/1): I'm thinking the plant on the left will be finished before the plant on the right. The leaves seem to be fading and the trichomes seem to be more mature on that plant also.
11pm: just watered the plants nutes. Same as last time. Left plant 6mL micro 12 mL bloom. Right plant 8mL micro 16 mL bloom
Day 67 (1/2)
Day 68 (1/3)
Day 69 (1/4): just got home from a trip. Plants seem to be doing fine. Nearing the end I assume. Plants will probably need water tonight
10pm: just fed my plants nutes again. Both plants received 8mL of micro and 16 mL of bloom.
Day 70: (1/5)
Day 71 (1/6): plants look good this morning. The left plant is definitely nearing the end of its life. The plant on the right still could have another week or more.
Just posted a video: plant on the left definitely doesn't have very large or dense nugs but it has a lot of them. The plant on the right has some super dense nugs. I'm excited to see what they both yield.


Likes
6
Share


@alex1515
Follow
привет, и еще одна неделя позади. все продвигается супер, с истечением солнечного дня приходиться растение ставить под пурпурный свет...пускай спит меньше и больше растет
Likes
44
Share


@XperencdGmanXG
Follow
just chugging right into the 2nd week of flower. This variety is 8 week flower on the nose, so Ive got 6 weeks left on this one. Will prob be the first plant I harvest this year. Pray for consistent rain for the next 6 weeks
Likes
13
Share


@SgtDoofy
Follow
April 11
Just got done with some serious defoliation. Removing all kinds of nodes that would have wound up as less than popcorn bud while taking up valuable space in the light. Some of the tips of the leaves up top got sacrificed as I waited to feed for a bit too long while I wanted for a calmag solution to be delivered. Little ugly, but no worse for the wear.
Likes
81
Share


@m0use
Follow
SPONSORED DIARY===SPONSORED DIARY===SPONSORED DIARY
TRANSPLANT #2 THIS WEEK!!!!
This week was a great one, lots of sun and gave the plants their 2nd transplant of the cycle. only one left to go in a few weeks, the plan was to do 3gal but I feel it would be best to go upto 4gal a 1extra gallon will not be all that much extra root space to expand into. Will have to check if they even make them in 4. I have a feeling its only 1,2,3.
Root wise they are looking similar but not identical. I would say the Dynomyco treated plant has a thicker rootball and more of them. but not by a massive amount. More white on the Dynomyco treated plant as well. added in some more Acti-Sol into the transplant medium. same mix as before. Then watered in with some LAB Serum. should do the plants well. I did not add in anymore of the MIIM microbial mass product as I thought it might alter the results of the grow. so we will see how they do now with out it. I'm really liking how well the plants are bushing up. I might have to take some clones and try them indoors as well. I think I prefer to grow more indica leaning strain for their growth habits.
SPONSORED DIARY===SPONSORED DIARY===SPONSORED DIARY
This is my diary entry into the Dynomyco Show Us What You Got Contest!
#DynomycoShowUsWhatYouGot!
@DynomycoShowUsWhatYouGot!
@Dynomyco
Big Shoutout to @Dynomyco for picking me in their contest. Happy to be involved and as a user of Dynomyco I am curious to see this side by side with my own eyes. I will be honest I am a little skeptical it will show any major differences. but we will see what happens. Some disclaimers, I am still using LABS serum I made, This is also beneficial to the root mass however it's a bacteria based product and not fungal or mycorrhizae like Dynomyco.
https://growdiaries.com/giveaways/DYNOMYCO_Show_Us_What_You_Got
Likes
12
Share


@Bryankush
Follow
Lei sta ancora bene purtroppo i rami che avevo fasciato non hanno migliorato per niente la guarigione adesso proverò a sperare che non si creino condizioni per il marciume.. comunque del resto la pianta ha iniziato bene la fioritura e come vedete ha già dei bei calici da gonfiare😃
Per essere la prima coltivazione di Femminizzate outdoor direi discreto.

Likes
39
Share


@Hazecat_420
Follow
Se ven tantos brotes que está todo hermoso y lleno de colores. Vamos de maravilla. Seguimos con este proceso terminando ya su 4ta semana de floración


Likes
4
Share


Likes
6
Share


@jaydee702
Follow
Both clones are Hermi
they have had low stress at most havent a clue to why they turned hermi there momma was female 100 percent .ive managed to find all bulbs over 20 throught the plants and plucked them out last week but today i found 2 open male flowers pinched them off tightly hoping not to spread or let any pollin get airborn .Crossing my fingers i havent missed any male parts . Other than that these plants got over 5' tall durring the stretch .only expected them to reach 4' must be because they turned hermi there going to produce alot of long fat buds if i can keep the male flowers from opening its alot to monitor so probably impossible to do so but ive got to try'
The june heat of summer is brutal cant keep my day temp under82 and when it does my rh goes up to 59 only have a swamp cooler and it doesnt get under 79 in the room outside the tent so my lights run at night and go dark during the hottest time of day wich is 80 at best for july and auga😡st are my worst months without A/C its 105 outsid now and will climb to 120+ in aug. ill be lucky if theres any trycombs left by mid july when its ready to harvest .


Likes
37
Share


@Ferenc
Follow
Last couple of days... No watering from today, (Day 129) and the light will be switched off as well from tomorrow (Day 130) so I will harvest them
approx on Day 132
or 133 on the 18th week :)

Likes
34
Share


@MrJoint
Follow
✌️🎃 Thank you for checking my cultivation.
🦍 Did really live up to the name.
🌰 #1 and #2 (31/05) #3 (02/06)


Likes
2
Share

@zazazilla
Follow
Den 69. Den 42. květu. Tento týden holky ještě pěkně dorostly, ale poslední tři dny už je vidět, že se růst postupně zastavuje a rostliny se soustředí hlavně na zrání a nabírání objemu palic.
Malý a velký Critical Orange Punch vypadají jako dvě úplně odlišné kytky, a to nejen vzhledem, ale i výnosem a vůní. Menší má krásně zbarvené oranžové pestíky a příjemnou sladší vůni. U toho většího jsem musel svázat korunu dohromady, aby se pod tíhou palic nelámaly větve. Manipulace už je docela o nervy, protože ty palice jsou opravdu těžké.
Frozen Biscotti má taky velmi pěkný výnos a palice začínají přecházet do fialových odstínů. Vůně se od minulého týdne zase posunula, cítím v tom zázvor a sladký podtón, připomíná mi to jemné zázvorky. Opravdu zajímavý profil a těším se na výsledek.
Trichomy se začínají pěkně kalit, zatím bych řekl půl na půl mléčné a čiré, jantarové jsem zatím moc nezaznamenal spíš jen na listech.
Na rostlinách je vidět lehké přehnojení, hlavně na sugar leaves, ale zároveň palice krásně nabobtnaly, takže už do toho nebudu nijak zasahovat a nechám to v klidu dojet. Teď už nemá smysl dělat větší změny.
Aktuálně se soustředím hlavně na stabilní podmínky, hlídám teplotu a vlhkost, aby všechno doběhlo bez problémů až do sklizně.
