The Grow Awards 2026 🏆 


Likes
Comments
Share
@Kirsten
Follow
26.4.25:
The plants were watered with 3 ltrs of dechlorinated water PH'd to 6.3, containing the following nutrients:-
♡ 1/2 Tsp Sea K(elp) by Greenleaf nutrients
♡ 1/4 Tsp Ecothrive Biosys.
27.4.25:
I LST'd again by adjusting the tie downs.
For FastBuds Mystery seed auto #1 and RQS Northern Lights autoflower, this will probably be the last time I adjust the fabric ties, as they're now well in to flower.
Hulkberry was LST'd again today, She is looking absolutely beautiful 😍
Retied some branches down and added a couple of clips.
Keeping the canopy as even as possible.
29.4.25:
HulkBerry is looking great. Nice green colour, without being too dark.
The plant has taken well to the LST training.
It doesn't need adjusting much at the moment as the growth hasn't become crazy, just now.
I think next week we will be in to flower, she has 1 pistil on the lower branch. 😅
Nb: I have added this week a couple days earlier, as last week was a couple days late, trying to get back on schedule 😅
Thanks for checking my diary and hanging out 💚✌️🍃😊🌱

Likes
58
Share
@Coopmc
Follow
Week 5 for seed bearing and week 6 on revers sexed pollen maker
So much pollen and I see signs of pollination !!
Likes
8
Share
@MrAutogrow
Follow
Got an ounce from her. Not too much as far as yield but the dense bud structure and purple hues made it all worth while. Pressing it for rosin and it is perfect.

Likes
107
Share
@MrJones
Follow
Mr-Jones Strawberry Pie Auto by FastBuds
🍓╰⊰🍓´🍓⊱╮🍓╰⊰🍓´🍓⊱╮🍓╰⊰🍓´🍓⊱╮🍓╰⊰🍓´🍓⊱╮🍓
🌞Environment -
💧 Feeding - Using "Super Coco" amended soil. compost teas, Dechlorinated H20 PH/6.5 Fish Fertilizer
🍃Training / LST
🕷️ IPM - Will be using Green Cleaner" 1 OZ per Gallon, and CannControl from Mammoth alternating between product each month for Integrated Pest Management.
💡"960 Watts of LED's 4x8x8 Custom Grow Closet"💡
🍓╰⊰🍓´🍓⊱╮🍓╰⊰🍓´🍓⊱╮🍓╰⊰🍓´🍓⊱╮🍓╰⊰🍓´🍓⊱╮🍓
Rambling - Hello everyone, work has been a bear the last few days, this girl is doing much better, and decided to LST her - we will see how it goes.
🍓╰⊰🍓´🍓⊱╮🍓╰⊰🍓´🍓⊱╮🍓╰⊰🍓´🍓⊱╮🍓╰⊰🍓´🍓⊱╮🍓
▶️Monday 12.14.20 / Watered w/ Dechlorinated H20 PH/6.5
▶️Tuesday 12.15.20 / This Strawberry Pie from FastBuds does not like LST she looks great, so I released a few of the branches today and will see what happens, I received 10 more seeds from Fastbuds, all Strawberry Pie - looking forward to getting a full grow going.
▶️Wednesday 12.16.20 / Watered w/ Dechlorinated H20 PH/6.5
▶️Thursday 12.17.20 / Did a bit of Defoliation today, adjusted the tie-downs, she is starting to do much better!
▶️Friday 12.11.18 / No watering today, this girl is starting to stretch up a bit!
▶️Saturday 12.19.20 / This morning did an IPM treatment with Green Cleaner before lights out, watered at lights on with Dechlorinated H20 PH/6.5 - this plant is showing signs of pre flower, oddly enough towards the end of week 5, this is great, the extra veg time is producing some great bud locations.
▶️Sunday 12.20.20 / Continue watering with just Dechlorinated H20 PH/6.52
🍓╰⊰🍓´🍓⊱╮🍓╰⊰🍓´🍓⊱╮🍓╰⊰🍓´🍓⊱╮🍓╰⊰🍓´🍓⊱╮🍓
SOIL MIX
COCO - 70/30% Tupur Royal Gold 30 GALLON
WORM CASTINGS 5 GALLON
LOBSTER COMPOST 5 GALLON
PERLITE 6 GALLON
INSECT FRASS 2 CUP
ORGANICALLY DONE GROW 5 CUPS
BUILD A SOIL COCO MINERAL MIX 6 CUPS

Processing
Likes
12
Share
@Therbalist
Follow
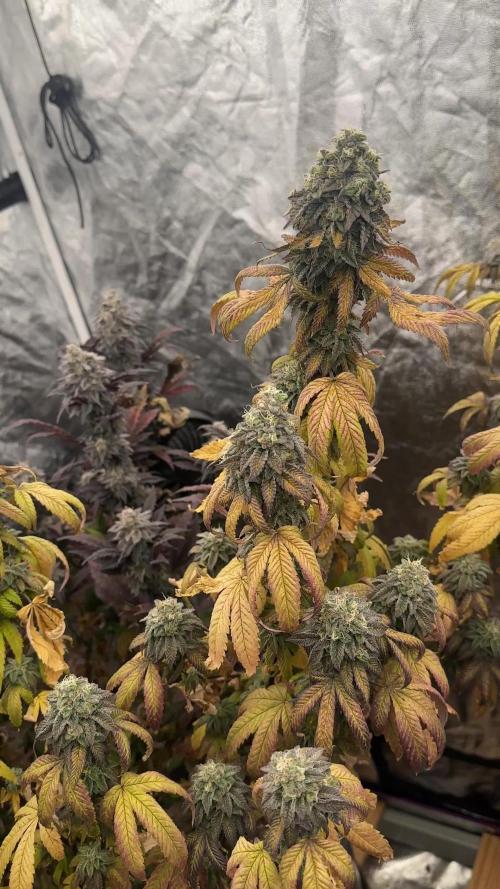
Last few white hairs left, fan leaves have yellowed off nicely beautiful pink purple colours coming through!
Absolutely stinks cheesy kush smell.
At one point I thought it smelled like prawn cocktail crisps 😉😂 let me know if you agree and I'm not imagining it!!
Great strain would defo run it again!!!

Likes
21
Share
@m0use
Follow
***Sponsored Grow*** = Medic || https://medicgrow.com || Grow = ***Sponsored Grow***
Plants still looking good from last week, the yellowing has seemed to stop spreading, still some dull green in some leaves, I think I was under feeding them, but runoff says otherwise. Noticed some more pink/purple stems on the plants and decided to increase the phosphorus content in the feed by mixing in half grow and half bloom from the nutrient lineup. I'd use the PK booster I have but its to high in K for my liking. The entire lineup is very high in K. mixing grow and bloom gives a NPK ratio of 7-7-14 then done 1:1 equal parts.
Grow=8-4-15
Bloom=6-10-14
Boost=1-15-30
Run off was a bit high for my liking but only seeing minimal signs of nutrient burn. Still watering once with feed and runoff and then later in the week with water and no/little runoff for my watering cycle.The number in the nutrient section are wrong but the EC and ratio are correct. Also impressed the roots have started popping out the bottom of the container already after only being transplanted for a week. Good root growth on these ones.
Lights doing well. The V1 spectrum is good on the medic grow mini sun-2's 240w. No issues so far, dimmed at 80%
.
Till next week.
***Sponsored Grow***
Official Website: https://medicgrow.com/
Facebook:
https://www.facebook.com/medicgrowled
Twitter:
https://twitter.com/medicgrow
Instagram:
https://www.instagram.com/medicgrow420/
YouTube:
https://www.youtube.com/channel/UCNmiY4F9z94u-8eGj7R1CSQ
Growdiaries:
https://growdiaries.com/grower/medicgrowled
https://growdiaries.com/grow-lights/medic-grow

Likes
7
Share
@Bread_n_Buds
Follow
Our Tangerine Dream Automatic from Zamnesia Seeds was planted a week after the other grow tent mates, so understandably, it's a little late in flowering, but not much. It'll be ready for harvest by the end of the year or so. It's growing well, it's been well-trimmed, and the flowers are swelling nicely. So far, so good. But we're waiting for it to land. (Cit the haine)
It's drinking a lot. I add 1.5 liters a day, and I find it very dry in the morning. Its potency is unpredictable.
Techniques chosen - Here, we've decided to let it grow freely and beautifully, with some careful tidying of the lower layers to prevent unnecessary flowers.
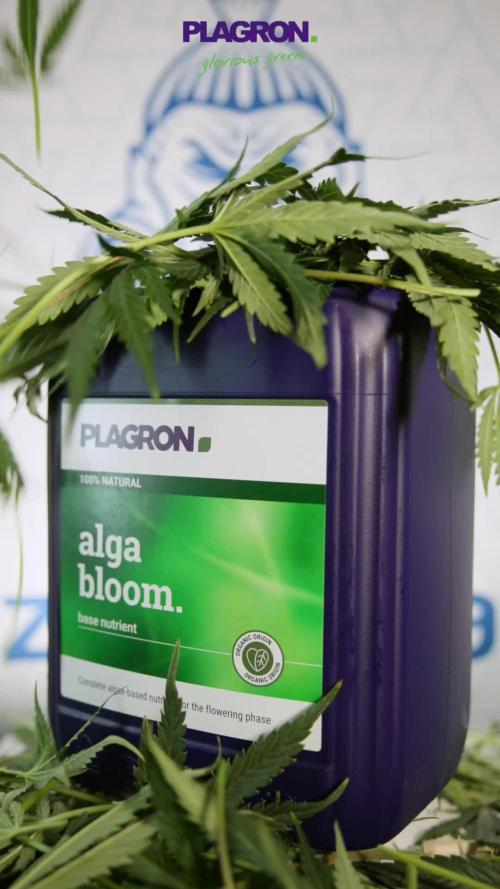
We're 100% organic and 1000% Plagron, as usual.
The soil we've chosen is the recently launched Plagron Bio LightMix, which will allow us to get off to a smoother and more reliable start, without the sudden changes that liquid fertilizers can cause. A week's worth is enough, so don't overdo it.
We're in the final flowering stage, and things are starting to get serious, so we're adding our legendary flowering stimulant and starting with Bloom.
- Pure Zym 1 ml/l
- Silic Rock 1 ml/l
- CalMag Pro 1 ml/l
- Sugar Royal 1 ml/l
- Power Buds 1 ml/l
- Green Sensation 1 ml/l
- Alga Bloom 3 ml/l (Slow when it is too much dark)
Choose your favorite style and calculate your results on the website:
www.plagron.com
Our new 720W Spider King lamp from Vanguard Hydroponics is still dimmed to its lowest setting. Visit the new Growshop area on the Zamnesia website:
Z - https://www.zamnesia.io/it/531-growshop
A very good strain, not tall but very bushy! Try it!
Z - https://www.zamnesia.io/it/10967-zamnesia-seeds-tangerine-dream-automatic.html
Z - Are you looking for a strain with citrus aromas, uplifting effects, and a short life cycle? Tangerine Dream Auto meets all these requirements and more. Combining G13, Afghan, and ruderalis genetics, this strain is a faithful reproduction of the original feminized Tangerine Dream, but in a more compact and faster autoflowering version. With 60% sativa-dominant genetics and 21% THC, it produces a stimulating and creative cerebral effect with a relaxing physical sensation. Whether grown indoors, outdoors, or in a greenhouse, this autoflowering strain offers a one-way journey into the euphoric world of sativas.
The original Tangerine Dream is renowned for its striking appearance, vigor, and productivity. And Tangerine Dream Auto is no exception. Expertly bred to preserve the characteristics of its photoperiod cousin, Tangerine Dream Auto seeds produce tall, sturdy plants that quickly complete the vegetative phase, forming a dense canopy of healthy, green leaves. True to their sativa heritage, these plants tend to stretch once they begin flowering. However, Tangerine Dream Auto rarely exceeds 70cm, whether grown indoors or outdoors. Around 11 weeks after germination, these sturdy plants will be filled with long, bright green buds covered in orange hairs and glossy, milky resin. On average, Tangerine Dream Auto plants yield up to 500g/m² indoors and 300g/plant outdoors.
You know it, but I recommend it. Here you'll find many beautiful things, essentially "all the best nature has to offer."
Z - www.zamnesia.com
Music //
www.radionula.com
+ Feng Shui Music
+ Frequencies 432 Hz
Likes
88
Share
@CBD_Sweden
Follow
The growing cycle it self worked out as expected, except that the pH-level was way off from where it should be, and I found out a bit too late. Because of this the outcome of the harvest didn't say much about the potential of this strain, but as soon as I got enough time and space, she will get a new chance to shine.
2018-03-01.
This is my review / smoke report of this lovely cbd flower.
There are rock hard buds and almost no give at all, even in those smaller buds.
When you grind it the scent will appear more than just smelling on the buds.
It smells a little weak of grass, wood, bark, sweet, lemon, honey, skunk and some kind of spice.
The taste is orange, mandarin, honey, bark, popcorn and pepper.
The effect is directly, the thc feeling above the eyes and in the forehead, it fells like its a higher thc levels in this strain compered to the cbd strains i tried before.
A little light ringing in the ears and a slight dry mouth.
After 10 minutes, the cbd kicks in and and balance the thc high.
The neck and shoulders begin to relax and the feeling continues down over the back and chest down to the stomach.
A calming, relaxing, and slightly energetic feeling.
After 15-20 minutes it is down in the legs and feet, and you can feel a vibrating feeling in your muscles, joints in a pleasant way.
It reduces my tense muscles and some of the nervpain i got.
Its a good strain for releasing stress and get you in a relaxed and satisfied mood.
It is a very well-balanced strain and it fits in all sorts of contexts.
If you take this in the morning or mid day it will give you a small energy boost and get you in the mood for doing something.
I think this is a lovely strain and I highly recommend it to everyone but especially for more inexperienced people that dont like the high thc strains and want to have a good relaxant, pain controlling, anti depressant medication that also can give energy or help with getting to sleep.
This is a must try strain.


Likes
1
Share
@GingerGarageGrow420
Follow
Day: 35 from sprout
Strain: Chill Out OG F4
Medium: Fox Farm Ocean Forest
Light: Vivosun VS2000 50%
Light Distance: 12 inches
Watering: By hand, ~12 oz daily
Nutrients: pH Perfect Advanced Nutrition Grow, Bloom, Micro 2 ml / L
Looking bushy. Did a little defoliation throughout the week
Likes
2
Share
@THEFROZEN710
Follow
During this week, in addition to gnats and hydrophobic soil, I faced high humidity at night and poor ventilation inside the grow tent. I felt this delayed the development of the sprouts. I used only pure water for watering, and even then, I did it in small volumes (50 to 100ml) several times to combat poor nutrient absorption on top of the pot due to the hydrophobic soil. I also applied Bacillus to control the gnats in the larval stage. I noticed that my traps had fewer each day, but it's difficult to completely eliminate these little demons.

Likes
20
Share
@Flavors
Follow
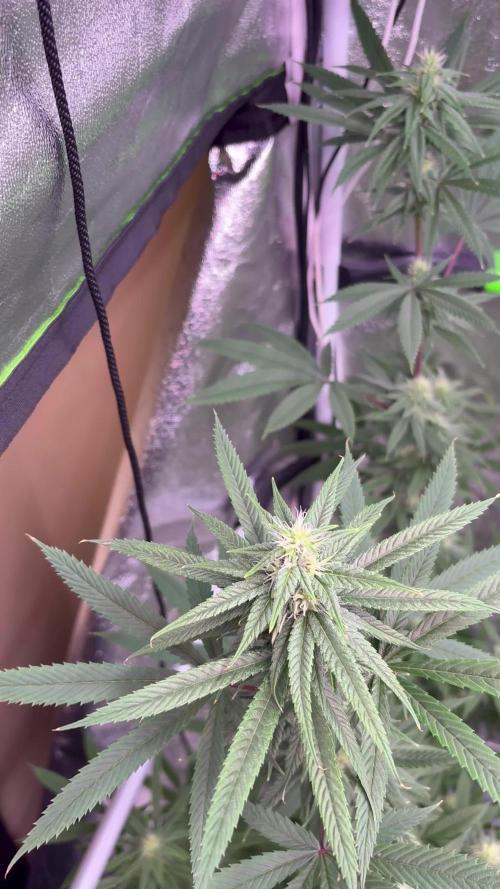
🌸 Week 25 Update (Early Flower – Pistils Arriving!)
This week marks the official start of the show — pistils are popping and both plants are settling beautifully into early flower 🔥🌸.Red Hot Violet is stretching with confidence now. Node spacing is ideal, and those early white pistils are lighting up each site like tiny fireworks 💜✨. Her structure is going to pay off big as she starts stacking.Amaretto Sour is smelling sweeter each day — that lemon-blueberry aroma is getting louder 🍋

Likes
17
Share
@Herbz_Unkraut
Follow
Defoiled all overlaying leaves again
Increased lights to setting 3/4


Likes
19
Share
@buddhi_coop
Follow
Day 21 of flower & things are looking good. This weeks been filled with just watering and defoliating. I trimmed off most of the bottom leaves that weren’t getting any light/wasting nutrients. I didn’t do much though because they’re so pretty & I don’t want to take away from their natural beauty. I love these girls. They’ve been super chill & easy to work with.
I’m looking forward to seeing how much they grow this next week.
Likes
2
Share
@Ninjabuds
Follow
This plant is a beast I finally got the nutrients down and got rid of the light color growth it was having the plant would have been great to have a clone it is definitely something worth growing again


Likes
10
Share
@mikheil007
Follow
At the beginning of the week I thought it would be a harvest week, but it drives me crazy: as it goes on to develop so greatly that I am not sure it will be done in more couple of weeks!...
Likes
2
Share
@Mr_Prawn
Follow
Esta semana apliqué por planta 5 gramos de ceniza de palmera, 3,5 gramos de dolomita y 5 gramos de turba rubia.
A final de la semana aprecen carencias, se ven hojas amarillas al final de video, que sera?? el día 4 aplico una pastilla mas de biotabs.
Likes
Comments
Share
@GuerillaGrow
Follow
Packing on weight and has this og earthy smell . Getting sticky and white
Likes
3
Share
@Earthsower
Follow
She has received a little water this week a gave her 100 ml of phd balanced water she has been recovering steadily under the natural sunlight so I will keep her there and play it by sight. I will wait until the pot drys a bit before I feed h
Likes
12
Share
@cookingwithninja
Follow
day 42 images are in last week, I can not count XD. bridal is stacking a lot of weight and is constantly shifting/leaning every morning, good things. I would chop any day but I will wait it out. water, tiny bit of humic and folvic to reduce chloromine, chlorine- air stones
day 45 took a few nugs off on day 42, dried for 3 days. Tried bridal and blackberry. As a heavy recreational, thc is up there! bridal felt like having a blindfold over your eyes somewhat sativa uplift but heavy weight feelings. Very good. Lasted as good as 30%'s. Dr. Thunder was also very nice, nug was smaller so mixed with blackberry to have a small j. Also feels very good indica. Both trials were chopped on week 6 day 1. Very pleased with the results. I was worried bridal was more sativa; which charasteristica I am not looking for. So I believe this is a very good heavy hitter run with 4 plants. I can chop any day, but I am waiting for pink paradise to finish seeds.
day45 took top nugs from bridal party, blackberry oreo bigstuff and dr. thunder. No touching pink paradise!!
day 46 can chop anytime just waiting on pink paradise seeds to finish, bridal party leaning more
day 47 bridal leaning hard from weight.
day 48 stacking, day 48 video
