
Likes
Comments
Share


@Bread_n_Buds
Follow
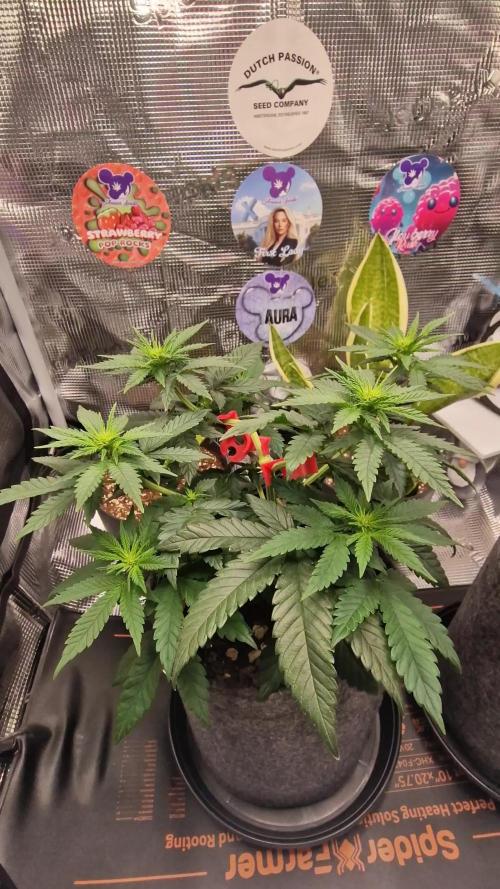
Our Zamnesia Super Boof is a brand new strain, Zamnesia brought it out before anyone else in Europe and now it's the others who are chasing it. I'll show you that the Zamensia one is the best of all, of course also the American ones.
Remember that we are growing a plant worked with the techniques indicated and another left to grow without pruning to preserve its speed; in the previous/next diary you will find the other plant of the same variety.
In this diary you will find the planta left to grow straight, just a little LST at the bottom on these plants but then I often decided to cut away the lower branches. In fact if you leave the plant free to grow you will notice that the branches that do not get light are not very good so it is necessary to clean very well at the bottom and let only the parts of the plant that see a sufficient amount of light flower well that you must learn to evaluate.
Comparison is the salt of experience, so the plant in the other diary will be treated very differently, go and see it to compare.
We have started the Plagron fertilization program, we are in 100% organic configuration, the soil is recycled Promix + 1/3 fresh soil + 10% Perlite + RQS Mycorrhizae Mix (4 g in the mix, 1 g under the small fiber pot).
We start bloom time now fertilize with: 1 ml/l Power Roots - 1 ml/l Pure Zym - 1 ml/l Sugar Royal - 1 ml/l Power Buds - 4 ml/l Alga Bloom
We sprayed 3 ml/l Vita Race foliar fertilizer once a week.
https://plagron.com/it
We always have the excellent mycorrhizae from RQS flowing in the soil.
https://www.zamnesia.io/it/5778-mix-micorrize-easy-roots.html
Leafy's strain of the year ---- // https://www.zamnesia.io/en/13317-zamnesia-seeds-super-boof.html
Zamnesia Short Description // Here's your chance to grow one of the most sought-after strains of recent years: Super Boof, crowned Leafly's strain of the year 2024, and for good reason. Descended from Black Cherry Punch and Tropicana Cookies, this indica-dominant hybrid (70%) takes the already exceptional characteristics of its predecessors to new heights. Grow it at home to find out for yourself.
The whole world of growing and much more is at Zamnesia: just take a look at the site and you will find "all the best that nature has to offer" in various shapes and colors.
The new strains are fantastic and the old ones are no exception...
-- // www.zamnesia.com


Likes
7
Share


@Mr_Motalovah
Follow
These ladies came in a rush, such a rush that they stretched out without leaving the seed.
I only got a picture of two but about four of them were like that.
As soon as they shedded the seed the leaves came in nicely, only one got a bit damaged from being stuck in the seed.
I placed the seed in a 500ml cup with BioBizz Light Mix soil, beforehand I mixed 1 gram of Synergy per 4 liters of soil.
These are live microbes called Mycorrhiza which live in symbiotic association with the roots.
My idea is to leave them in this container for about 14-21 days until the roots develop correctly then transplant them to their final pot which will be an 11L fabric pot.
As the light mix soil comes blended for at least two week of life, no nutrients will be added until after the transplant.
All out good first week only problem was I had to adjust the light a bit to keep them from stretching, but at the end of the week ladies were spreading their leaves so they comfy now.

Processing
Likes
4
Share


@Grownewgenetics
Follow
We arrive on the Last week of the L.A.kush from stranger'seeds, i love These Strain and how beautiful cola's u get, i also take two cuts from it, to grow the Genetic.
I do have still a small blueafghan+ sourdiesel
, Also I think one week more and they're ready to go
Likes
40
Share


@Ukfarmer420
Follow
Hi guys,
So this week im expecting rapid growth on all the plants, my plant still has orange spots i call it plant aids 🤣. There on 18/6 light cycle. I will be doing some lst on them to try and fill my grow space out abit.
I been soaking them and turning lights down for 2 hours then turning light back up for a few hours then soaking again so on so on. My misses plant is doing better than mine thats for sure tho.
Happy growing canna family 💚🍁
Likes
67
Share


@GanjaReaper
Follow
Day 83:
After being in the dark for like 4-7 days, they where ready to harvest. All plants getting cut by the machine, big buds are cut by hand.
I never weight wet buds because that doesnt make any sence. I will update soon on how much it is dry weight.
My friend helped me with the harvest since it takes many hours of work.
I have many buds that are as big or bigger as my hand.
Quallity so far looks promising even thought there are shitty buds as well, but thats normal and oke.
They have been cut freshly so I won't lose much weight when cutting. This will happen when cutting dry buds.
The remaining small leafs on the wet buds will dry in with the buds and will be barely visible.
More info soon.


Likes
15
Share

@BudVision
Follow
Hi Growers,
Another week of vegetation is complete. The plants were divided into two tents to provide more space and improve airflow. Topping was done yesterday, so I’ll give them some time to recover. Once they are ready, I will flip them to flower.
———————————————————————————
Další týden vegetace je za námi. Rostliny jsem rozdělil do dvou stanů, aby měly více prostoru a lepší cirkulaci vzduchu. Včera proběhl topping, takže teď jim dám nějaký čas na regeneraci. Jakmile budou připravené, flipnu do květu.
Peace and happy growing ✌️🌱


Likes
1
Share


@Ieiogrow94
Follow
Eccoci di nuovo qui!!!
Super eccitato per questa nuova collab con Divine Seeds, team davvero al top, che mi ha dato l’opportunità di testare questa nuova genetica e di condividere i progressi con tutti voi!!!
Come sempre partiamo nei bicchieri per poi travasare.. Questa volta verrà svolto tutto sotto la Lumatek Zeus 465 ProC, mi aspetto molto da questo ciclo!!
Settimana devastante sono in procinto di terminare la fioritura, non vedo l'ora di finire!!!!!!!
Grazie a tutti per il supporto ❤️🍀🔥

Likes
4
Share


@GERGrowDesigns
Follow
Welcome to Flower Week 3 of Sweet Seeds Strawberry Cola Sherbet F1
I'm excited to share my grow journey with you from my
Sweet Seeds Project . It's going to be an incredible ride, full of learning, growing, and connecting with fellow growers from all around the world!
For this Project , I’ve chosen the Feminized Photo strain Strawberry Cola Sherbet F1 :
Here’s what I’m working with:
• 🌱 Tent: 120x60x80
• 🧑🌾 Breeder Company: Sweet Seeds
• 💧 Humidity Range: 50
• ⏳ Flowering Time: 7weeks
• Strain Info: 18-22%THC
• 🌡️ Temperature: 26
• 🍵 Pot Size: 16
• Nutrient Brand: Narcos
• ⚡ Lights : 600W x 2
A huge thank you to Sweet Seeds for allowing me to try my Best with this amazing collection from Photo Strains they managed to Sponsore . Big thanks for supporting the grower community worldwide! Your genetics and passion speak for themselves!
I would truly appreciate every bit of feedback, help, questions, or discussions – and of course, your likes and interactions mean the world to me as I try to stand out in this exciting competition!
Let’s grow together – and don’t forget to stop by again to see the latest updates!
Happy growing!
Stay lifted and stay curious!
Peace & Buds!

Likes
22
Share


@Prof_Weed
Follow
Last 4 days, it's flushing time Baby
Give her a scrog net again..
The buds are milky now with some amber.
Madame GG4 Sherbet smells good!
Likes
6
Share

@CannaArchive
Follow
Growth Stage: Vegetative
Environment:
140 × 70 tent
Temperature: ~24.5–25 °C
Humidity: ~60 % RH
Light cycle: 18/6
Light intensity: ~400 PPFD. ☀️
Watering / Feeding:
Watered every 2–3 days, based on pot weight, with approx. 1.5 L per watering using RO water + CalMag. 💧
Additionally, the plant received 1x Startrex during this week.
Observations:
Growth remained steady and healthy. The plant still has a slightly thin structure, but overall looks vigorous. 🌿
Leaf color is normal green, briefly a bit lighter after topping, but quickly returned to a healthy tone.
At the end of the week, the plant was topped above the 4th node, aiming to keep 6 main branches. ✂️
The topping was handled very well, no visible stress reaction, and growth continued almost immediately. 🙂
Structure is now much more even compared to the earlier stretch.
Notes:
Week 4 was very positive. The plant transitioned from vertical growth into structural development smoothly. With topping completed successfully, the focus now shifts to recovery and branch development in Week 5. 🌱💪

Likes
26
Share


@Bakeryguy420
Follow
Sorry guys havent updated in awile
Gg4 harvested
Tangiematic harvested
Ogesus #1,2 harvested
Gluebeerry just main cola harvested
White rrussian harvested
Sweet creme harvested
In.the run.left is rhino rryder, royal haze, amnesia gold , amensia haze , forgotten cookies and gluebeery and the new girls
Update on 3rd grow going Start a new diary for them today . My cat knocked down the seedlings 3 times zero stunt life which is shocking crazy crackhead ..
Quality is amazing for them all yield wasnt aa, much as I wanted believe emerald harvest is as garbage as foxfarm.

Glueberry Auto · Expert Seeds
Gorrila Glue #4 Auto (Expert Gorilla Auto) · Expert Seeds

Tangie Auto · Fast Buds
Sweet Cream Auto · Expert Seeds

Amnesia Haze Auto · Vision Seeds

Amnesia Gold · Pyramid Seeds
OGesus Auto · Expert Seeds

Royal Haze Automatic · Royal Queen Seeds

Caramella Auto · Custom Breeder & Strain
Rhino Ryder Auto · Fast Buds

Fugue State · Mephisto Genetics
Likes
53
Share


@DogDoctorOfficial
Follow
Hello, my amazing green-thumbed friends! Welcome to the Week 1 flower report for our beloved P.C.R.s. The transition from veg to flower is a magical time, and our plants are already showing signs of their future glory. Let’s dive into the exciting details of this week!
Entering the Flower Stage
Our P.C.R.s have officially entered the flowering stage, and the transformation is already visible. The stretch has begun, and you can see the plants reaching up, preparing to produce those beautiful buds we’re all waiting for. This stage is all about supporting their growth and ensuring they have everything they need to thrive.
NutriSpray Magic
This week, we’ve been diligently spraying Aptus Holland NutriSpray, and the results are phenomenal. NutriSpray is like a spa treatment for our plants, providing essential micronutrients directly to the leaves. It helps with nutrient uptake, reduces stress, and boosts overall plant health. Our P.C.R.s are absolutely loving it, standing tall and proud with their leaves praying to the light.
Nutrient Transition
With the start of the flowering stage, we’ve made some important adjustments to our nutrient regimen. We’ve stopped using StartBooster and replaced it with TopBooster, which promotes flowering and bud formation. Additionally, we’ve introduced P-Boost, a phosphorus booster that enhances root development and flower production.
TopBooster: Encourages larger and more abundant flowers.
P-Boost: Provides essential phosphorus for robust root and flower development.
NutriSpray: Continues to support overall plant health and stress reduction.
Optimal Conditions
Maintaining the perfect environment is crucial as we move into the flowering stage. Our TDS is now at 360, with a pH of 5.9 and a temperature of 21°C for watering. These conditions are optimal for nutrient uptake and overall plant health, ensuring our P.C.R.s have everything they need to produce those beautiful, resinous buds.
Care and Attention
Paying close attention to our plants during this stage is key. Regularly inspecting for any signs of stress or nutrient deficiencies and adjusting care as needed ensures our plants stay happy and healthy. The love and care we put into this process are reflected in the vibrant health of our plants.
In Conclusion
Week 1 of flowering has been all about setting the stage for a bountiful harvest. With the help of Aptus Holland NutriSpray, TopBooster, and P-Boost, along with our careful attention, our P.C.R.s are off to a fantastic start. The excitement is building, and I can’t wait to see how they develop in the coming weeks.
Shout Outs
A huge shout out to @aptusholland, our main sponsor, for their incredible products that keep our plants thriving. Another big thank you to @artgenetix for creating the phenomenal P.C.R. strain. And to the wonderful community at Grow Diaries and all our followers, your support and enthusiasm keep us going. Let's continue to grow together!
Until next time, happy growing, and may your gardens be full with love and green!
Genetics - P.C.R. @Art_Genetix_Team https://artgenetix.world/
Nutricion @aptusholland https://aptus-holland.com/
LED Power @Lumatek and @viparspectra
As always thank you all for stopping by , for the love and for it all, i fell blessed to have you all with me for one more love journey Thank you Thank you Thank you , you guys are great and have been amazing , thank you for everything !
#aptus #aptusplanttech #aptusgang #aptusfamily #aptustrueplantscience #inbalancewithnature #trueplantscience #dogdoctorofficial #growerslove
With true love comes happiness , Always believe in your self and always do things expecting nothing and with an open heart , be a giver and the universe will give back to you in ways you could not even imagine so !
Growers love to you all

Processing
Likes
10
Share


Likes
300
Share


@Ju_Bps
Follow
Hello growmies 👩🌾👨🌾🌲🌲,
👋 End is arrived, let's go for harvest 💜✂️✂️🏁
💧 No Water
💡Mars Hydro - FC 3000
50% 26 cm
Mars Hydro Fan kit
Setting 9
Have a good week and see you next week for the harvest ✂️👋
Thanks community for follow, likes, comments, always a pleasure 👩🌾👨🌾❤️🌲
Mars Hydro - Smart FC3000 300W Samsung LM301B LED Grow Light💡💡
https://www.mars-hydro.com/fc-3000-samsung-lm301b-led-grow-light
Mars Hydro - 6 Inch Inline Fan And Carbon Filter Combo With Thermostat Controller 💨💨
https://www.mars-hydro.com/6-inch-inline-duct-fan-and-carbon-filter-combo-with-thermostat-controller
Fast Buds - Tropicana Cookies FF🌲🌲
https://2fast4buds.com/us/seeds/tropicana-cookies-fast-flowering


Processing
Likes
20
Share


@Speezy
Follow
I think I'm off to a good start. This is the roughest part of a grow for me so far. One thing that I learned from my past killings was to not get obsessive and that's the approach. I've got a way better understanding of feeding now. I was confused about feeding charts, thinking that it was mix and feed.
Even though I checked the PH and PPM (incorrectly a few times) I'd consistently fry my plants to near death, bring them back with plain, proper ph'd water and then re-fry the next feeding. It hadn't dawned on me that the nutrient mix while being in the optimal PH range, mixed in right order and correct measurements, my PPM/EC was way too high for the stage of the plant. Yikes, I was feeding a toddler 3 double Whoppers with extra everything. And XL fries.
You burn and learn I guess. The little girl was starting to look hungry so I took a shot and fed light nutrients with some hydrogen peroxide (will update the chart soon getting sleepy). I also punched a lot more holes in the bottom of the solo cup. Few hours later her leaves perked up like she was giving me a high five. Leaves are looking good too with a PPM of about 211. It's going to be a warmer weekend so I figure I'll crack another seed and put my 5 gallon pot to use. Possibly a photoperiod?