


Likes
Comments
Share


@Targona
Follow
Targona: 29 days since my little girl sprouted from seeds🌱
Fourth week of growth of my OG Eddy Lepp Auto 💚🌺💚🌺
Nutrients:
I use nutrients from Advanced Hydroponics Of Holland - three basic components, still according to the table for growth during the flowering period 💓 -
- Dutch fertilizer Formula 1 Grow - supplies the plant with substances necessary for the perfect development of roots, stem and leaves; intended for the growth phase 🌾
- Dutch fertilizer Formula 2 Bloom - contains a large amount of nutrients necessary for rapid growth and fruit development, supplies the plant with energy; intended for the flowering phase 🌸🌿
- Dutch fertilizer Formula 3 Micro - increases oxygen intake, improves plant immunity, ensures better absorption of nutrients; intended for the growth and flowering phase 🌴
-------------------------------------------------------------------------------------
Plagron Power Roots - Root Stimulator Plagron Roots is a biological root stimulator that supports the formation of the root system. I use it until the fifth week of growth 🍃🍃 - I fertilize for the last time in the fifth week of plant growth.
-------------------------------------------------- -------------------------------------------------- --------
BioBizz Calmag - The special Calmag supplement was designed for professional and hobby growers who need to supply their plants with calcium and magnesium in organic quality for a long time or immediately. The 100% organic 💩💩 and certified BioBizz Calmag product is made of calcium carbonate and magnesium sulfate supplemented with humic acid.
-------------------------------------------------- -------------------------------------------------- --------
BioBizz Bio pH - is an organic pH regulator. An aqueous solution of citric acid, which occurs naturally in citrus fruits 🍋🍋
------------------------------------------------------------------- ----------------------------------------------
During the flowering period, I add Advanced Nutrients stimulants:
- JUNGLE X Environ is a highly effective complex preparation for stimulating flower formation. 🌸🏵️
- Bud Candy - carbohydrates for my girls 🍭🍭🍭
⚡⚡⚡However - from the next watering I will fundamentally change the nutrients to organic with small exceptions. I will make this change carefully, so that the girls feel good, have the nutrients they need and at the same time not give them so much synthetics ⚡⚡⚡
General:
OG Eddy Lepp Auto 💚🌺💚🌺 - The girl is growing beautifully and responds well to nutrients. In the last week she switched to the flowering phase and therefore grew tall, even though it is a hybrid.🌿💚
Training:
Classic, I continuously perform defoliation and small LST - I tie up the branches that grow towards the pot just like the others so that they do not shade each other's buds. In addition, I gently pulled the large leaves closer to the stem so that I don't have to cut them 💚🌞🌞
Light: Mars Hydro TS1000 The plants respond effectively and the light is technically very well managed - I try to have 50 cm between the light and the plants, so I regularly move it up 💡💡💡
Thanks for the likes :)
See you soon 😍😍

Likes
28
Share


@No_Clout
Follow
Hopefully will be starting flush next week seeing how it is, gonna do a two week flush, yes it is coco but I want a proper flush this time round so o can get that thick white ash we all know and love instead of some nasty dark gray/Black.




Likes
16
Share


@Hawkbo
Follow
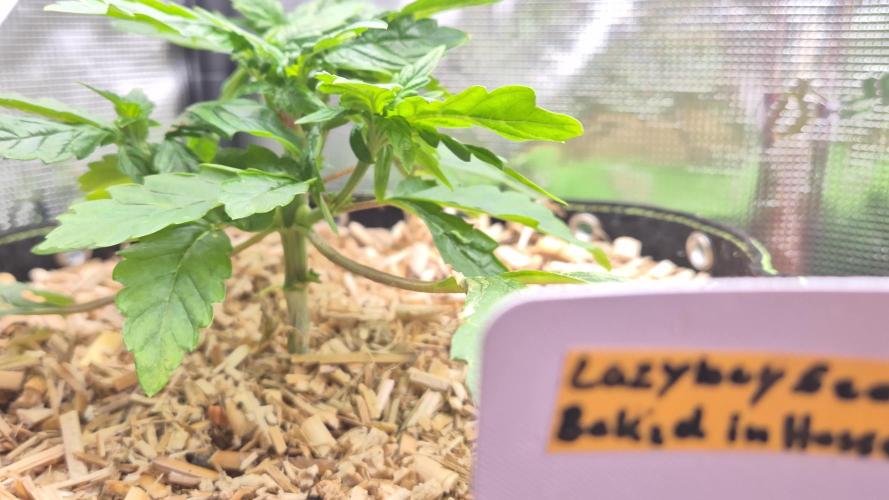
Videos were taken on day 37 of flower. This one has a heavy strawberry aroma and some strange lookin buds. Looks like it will fill in pretty good. It's on the far right of the tent in the videos next to the purple leafed plant.


Likes
12
Share


@Noob_quest
Follow
Another mostly positive week completed.
Pests firmly at bay. Environment humidity looking good and all the buds are getting bigger.
Top dressed some nutrients / insect frass earlier in the week which I’m sure was a week or so late. - Heidi looking very hungry by D57 - the whole plant is looking yellow.
Solution to problem is some organic liquid nutes which arrived today from now as needed.
Overall they and the other 2 ladies in the tent are looking a zillion times better than my first grow.
Starting to feel the harvest impatience kick in. Will try to overcome this time
Thanks for reading have a great week 😊
Likes
9
Share

@Alvareas
Follow
Der Grow:
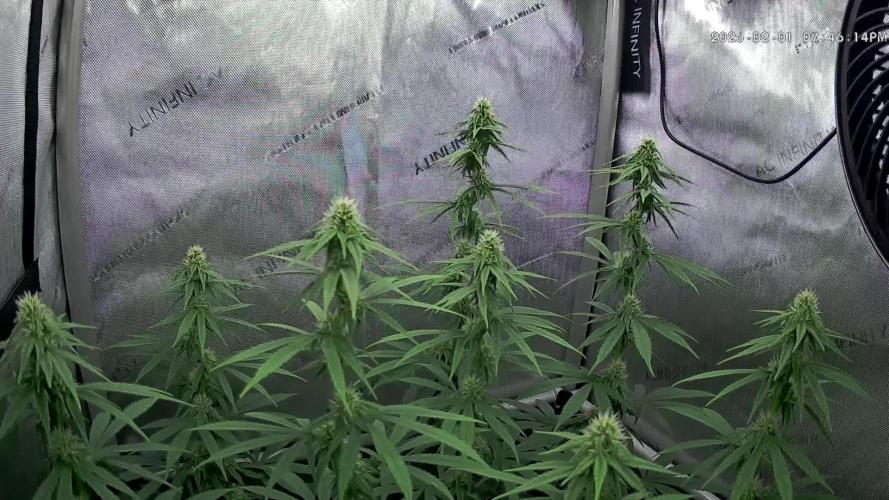
Die Pflanze ist diese Woche nochmal 14cm gewachsen und hat jetzt eine Höhe von 106cm.
Der Stretch ist zum Glück vorbei.
Die Pflanze hat dann im Blüte Stretch insgesamt 69 cm an höhe zugelegt.
Viel Platz zur LED habe ich nicht mehr, kann diese aber auch nicht mehr höher hängen.
Aber wen es kein Bleaching gibt ist alles gut.
Ich lasse die LED jetzt mal bei 40% Leistung.
Das sind ca. 1000 PPFD an der Spitze des höchsten Triebes.
Ansonsten schwellen die Buds langsam an und erste Trichom Bildung ist auch schon zusehen.
Der Geruch hat nochmal deutlich zugenommen.
Die Parameter in Woche 9:
Controller Einstellung Tag: Advanced AI Luftfeuchtigkeit 50% - 60%
Controller Einstellung Nacht: Advanced AI Luftfeuchtigkeit 50% - 60%
Durchschnittliche Tagestemperatur: 25 Grad
Durchschnittliche Nachttemperatur: 22 Grad
Durchschnittliche Luftfeuchtigkeit Tag: 55%
Durchschnittliche Luftfeuchtigkeit Nacht: 55%
Durchschnittlicher VPD Tag: 1,3
Durchschnittlicher VPD Nacht: 1,1
LED Leistung: 40% = 145 Watt
Beleuchtungsdauer: 12 Stunden
Umluft: Stufe 1 oszillierend

Likes
24
Share


@Aleks555
Follow
Hi everyone. We're doing well and we're growing fast. Our girl really likes fertilizers. Thank you very much to Xpert Nutrients for the very good fertilizer, for the help and for the advice. I recommend Xpert Nutrients

Likes
53
Share

@wolfvb
Follow
? Harvest Day: Sticky Broccoli Micro is Down! 🥦❄️
The day is finally here! After weeks of swelling, frosting, and fading, the Sticky Broccoli Automatic has officially been chopped. She was an absolute pleasure to run and put on an incredible colorful show right at the finish line.
⚖️ The Harvest Stats:
Wet Weight: We hit the scale at exactly 162.1g wet! For a micro run in such a small pot, I am absolutely thrilled with that yield. She packed all her energy into those dense clusters.
Bud Quality: The density and bag appeal are unreal. She's rocking beautiful deep violet and purple hues under a thick, frosty blanket of trichomes, and the terp profile in the room right now is ridiculously loud.
🚀 Into the Dry Room:
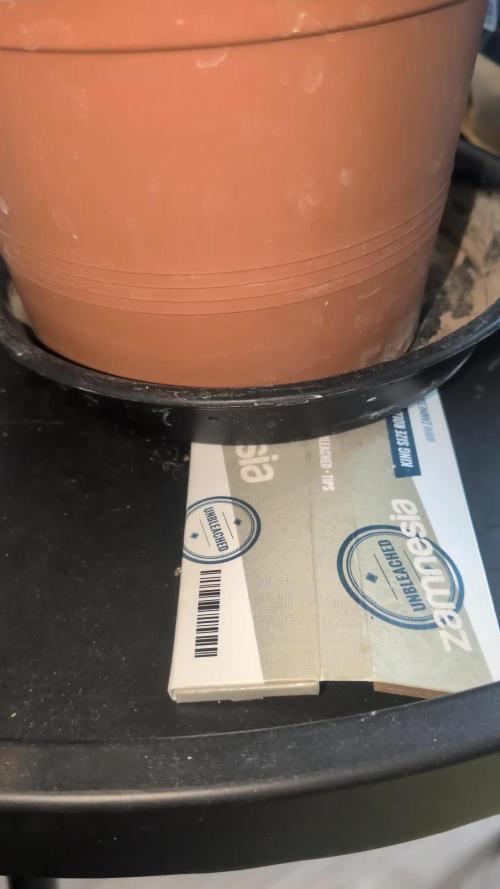
She got a quick wet trim to remove those large, faded yellow fan leaves and is now hanging upside down in the tent. You can spot the DryRocket in the background getting to work and keeping the drying environment perfectly dialed in! (Speaking of which, today is the final day for the DryRocket giveaway, so congrats for the winner 🏆! 🤞)
Now comes the hardest part of every grow: the waiting game. I'll be monitoring the dry closely over the next week or so before trimming her up fully and moving these beautiful purple nugs into jars for the cure.
Dry weight and smoke report coming soon! Let's grow! 🌱💨

Likes
64
Share


@SmokingTiki
Follow
This is the last week 💀 There are less pictures than usual but nothing special happened except the yellowing of the plants due to the nutrients cut. Wait for the "Harvest" week for the final photo shoot 😎
Likes
5
Share


@MadeInGermany
Follow
Flowering day 34
since time change
to 12/12 h.
Hey guys :-)
The buds have developed incredibly nicely this week.
The smell is getting more and more extreme :-) .
The growth has slowly stopped as the full energy goes into the production of the buds.
Watering was done twice this week, each time with 1.2 l (nutrients see table above)
They were individually inspected and checked for their health.
Osmosis water for the coming week was refilled in a 100 l tank 👍.
Have fun reading the diary and stay healthy 💚🙏🏻
👇🏼👇🏼👇🏼👇🏼👇🏼👇🏼👇🏼👇🏼👇🏼👇🏼👇🏼👇🏼
You can buy this Nutrients at :
https://greenbuzzliquids.com/en/shop/
With the discount code: Made_in_Germany you get a discount of 15% on all products from an order value of 100 euros.
👇🏼👇🏼👇🏼👇🏼👇🏼👇🏼👇🏼👇🏼👇🏼👇🏼👇🏼👇🏼
You can buy this strain at :
https://gardenofgreenseedbank.com/candyland/
Water 💧 💧💧
Osmosis water mixed with normal water (24 hours stale that the chlorine evaporates) to 0.2 EC. Add Cal / Mag to 0.4 Ec Ph with Organic Ph - to 5.8 - 6.5
MadeInGermany

Likes
226
Share


@Kitties_and_Colas
Follow
~_~_~_~_~_~_~_~_~_~_~_~_~_~_~_~_~_~_~_~_~_~_~_~_~_~_~_~_~_~_~_~_~_~_~_~_~_~_~_~_~_~_~_~_~_~_~_~_~_~_~_~_~_~_~_~_~_~_~_~_~_~_~_~_~_~_~_~_~_~_~_~_~_~_~_~_~_~_~_~_~_~_~_
08/21/21:
🐱 Week 6 is here!! The new growth is coming in a little limey, we insist on reusing Promix so PH is always a bit of a rollercoaster lol.. no sweat, usually a gallon each PH'd to 5.5 with 5ml/gal N solution will get them back to baseline..we seem to have the same issue with most plants grown in our basement during summer, I'm sure the super high humidity and
low evaporation rate has something to do with it... if they don't come around after the adjustment, they'll spend some time under the HIDs, this always straightens them out..we topped the mainline for the last time today
for 8 mains per side, as well as another full round of toppings on the x2 LST plants... thanks for reading if you made it this far and happy growing everyone!!! ❤️🐱💡🌱
~_~_~_~_~_~_~_~_~_~_~_~_~_~_~_~_~_~_~_~_~_~_~_~_~_~_~_~_~_~_~_~_~_~_~_~_~_~_~_~_~_~_~_~_~_~_~_~_~_~_~_~_~_~_~_~_~_~_~_~_~_~_~_~_~_~_~_~_~_~_~_~_~_~_~_~_~_~_~_~_~_~_~_
8/22/21
🐱 Quick update, the mainlined plant is showing signs of calcium deficiency which is odd, with our routine we almost never have Calcium or magnesium issues..its really only noticeable under the florescent lights on this one but we'll have to make changes.. they all have plenty of calcium in their media so I'm wondering if the PH has gone screwy in that pot.. we reuse promix which gets really acidic sometimes and we add lime to buffer this but we guess a lot and may not have used enough (or waited long enough)..I know when our media gets around 5-5.5 calcium deficiency is a huge issue..ill add a little more calcium to be sure and will try using water PH'd higher (6.5-7) and see if this helps anything. Thanks again for reading growmies!!
~_~_~_~_~_~_~_~_~_~_~_~_~_~_~_~_~_~_~_~_~_~_~_~_~_~_~_~_~_~_~_~_~_~_~_~_~_~_~_~_~_~_~_~_~_~_~_~_~_~_~_~_~_~_~_~_~_~_~_~_~_~_~_~_~_~_~_~_~_~_~_~_~_~_~_~_~_~_~_~_~_~_~_


Likes
3
Share

@Muckman
Follow
This grow is looking phenomenal. Can’t wait to wash for rosin! Freezing as of now update: test run of bubble this shit is fucing crazy gas. So pungent and full of flavor. Tried some wet Melt in the Puffco it hits like crazy. Great effects and gas flavor. Will be pressing asap update did a 2nd wash tonight of all the trim from plant 3. I’d say 600 wet grams. Yielded great and awesome color.
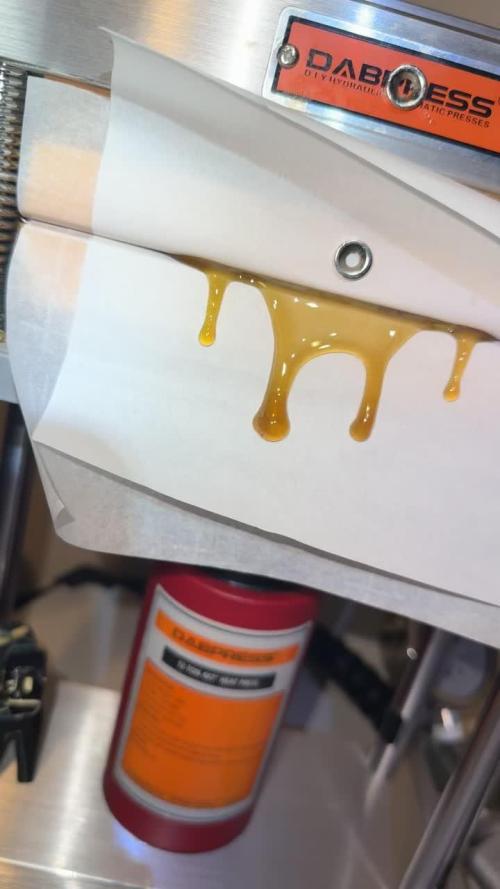
update: pressed 10 gram puck of rosin to test run. See results above. She’s a squirter! Update: I’m officially done wash all of this plant. Good fuckin riddance in the best way. Ugh I’m just pooped hands are killin me. Over 3 batches the yeild is insane: the coloring in the first hash batch has such an orange/ yellow tint compared to the pale merky other 2 batches. Anywho ids say 35 grams total in hash. We will have to see the total numbers but to say I yielded 10 grams with the smaller batch I’d say on par. Fuck I can prolly make some thumbprints with the 2 different hues make it fancy. Great time for it being cold!
Update: I am done officially washing this strain. 4 batches I’m going to estimate 50 grams of fresh frozen dried hash out.

Likes
10
Share

@HashishOculus
Follow
Week 16 – Harvest
Today, March 18th, I decided to harvest after getting advice from several people.
It turned out to be quite a job just getting the plant out of the tent. Removing the trellis net without cutting it apart was more difficult than expected, but in the end I managed to free the plant intact.
After that, I trimmed away everything that wasn’t covered in trichomes. The plan is to use all the sugar leaves and popcorn buds later for edibles, so nothing goes to waste.
Next step was taking down the light. I had it zip-tied up, so I had to cut it loose before continuing. Then came the actual harvest cut — I cut the plant at the base. That took a bit of effort, as my pruning shears couldn’t quite get around the thickness of the stem.
Once cut, I decided to hang the whole plant intact. My humidity in the tent is relatively low, so this should help slow down the drying process and preserve terpenes better.
Seeing the plant from all angles for the first time gave me a different impression — it actually looks like a larger yield than I initially expected. Up until now, the plant has been locked into the trellis, so I’ve only really been able to view it from one angle.
Detaching the net pot from the root mass was another small challenge, but eventually I got it done.
Now the plant is hanging, and I’ve set up good airflow in the tent. We’ll see what the final yield looks like in about a week.
I will be honest and say the result (though I don't know yield) is not what I had hoped for. The trichome development seemed to stall, and I couldn't get the amount of milky ones that I wanted. I think two things came into play: first of all I had the accident later January. Second of all, the plant seemed to struggle at the end. I think it's because I use very hard tap water, and the large quantity of calcium locked out magnesium uptake. Added calmag had no effect (since that's also adding calcium). I can't be certain at the end of the day, but I've bought a RO system for my next grow.
Finally, I found a small bud hanging limply from a branch. It was totally dry and must have hung there for a while. Of course I grinded it up and made a small joint, and it got me nice and baked. So it's looking promising!
After dry:
About 6 days dry time. 70g of a plant is not bad. It's more than double of what I got from the last plant. So in that way the grow has been a success. I got more than I expected, but it's all a bit larfy, sadly. Vaped some and got super high, so no complaints. Smoke was a bit harsh, so gonna let it cure some more before I start smoking it. The high is more cerebral than I usually prefer. It doesn't get you couch locked. Just gets you nice and relaxed with a high that goes more to your head than in your body.
It has a strong smell of berries that have been cooked. Very sweet and almost like caramel. Underlying is the diesel smell.

Likes
11
Share


@johdlong
Follow
I made a time-lapse while I was away for weeks 6-9. I had a helper water, and its interesting to see the plants sway with the watering cycles. Too bad I didn't continue this through flower. Maybe next time.
Likes
27
Share


@LockDownGrow
Follow
Ok so this week I did a defoliation and a tigh down too the netting , I really was not planning on doing such a big defoliation but the leafs became thick and dense and there was almost no light penitration down too the lower branches of the plant , so she is opened right up now and the humidity and temperature has dropped loads and the air is moving alot better around the leaves and branches , I will not take anything more off her now , I have also added Cal mag too the nutrients for this week only , she is well into pre flower now but the stretch has not yet started so I figured it's no or never too defoliate and tigh them down ,
I am very happy with them so far and being new too all this it's all very exciting ,
Thanks for looking :)
Likes
7
Share

@NSABND
Follow
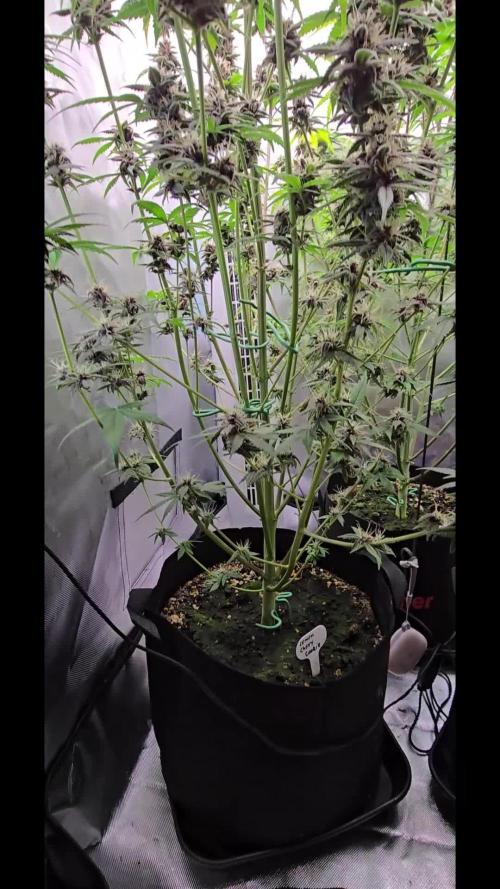
Day 57 😁👌all the queens are ok 🙏
Day 58 the queens got some fertilizer 💪😃👍
Day 59 what should i say... everything seems to fine 😃🙏👍
Day 60 the queens got some fertilizer 💪😃👍
Day 61 all queens are in good shape 😃🙏
Day 62 everything seems to be ok 🙏👌
Likes
26
Share


@XperencdGmanXG
Follow
Well, these girls are well on their way into bloom. They are really stacking it on since the addition of the worm castings. I strongly suggest everyone use worm castings in your soil mixes, even if you are using salt-based nutrients.
Likes
26
Share


@Ageddd
Follow
Last week, 2 irrigations, gave her plain water.
Beautiful colours, it was a pleasure to grow such a pretty plant, production is going to be like 10 grams i expect, Cloudy days and bad weather while growing and flowering, but quality seems pretty good, she is so frosty and smells like fruits.
1 week of drying, and curing at the moment.
Put the weed in jars with Boveda 62.
Im making a harvest post with the smoke effects flavour and all the stuff, so you can get more details about the high, flavour and quality.
Harvested 1/07/2018
Good vibesss
