
Likes
Comments
Share


@Olduffybastard88
Follow
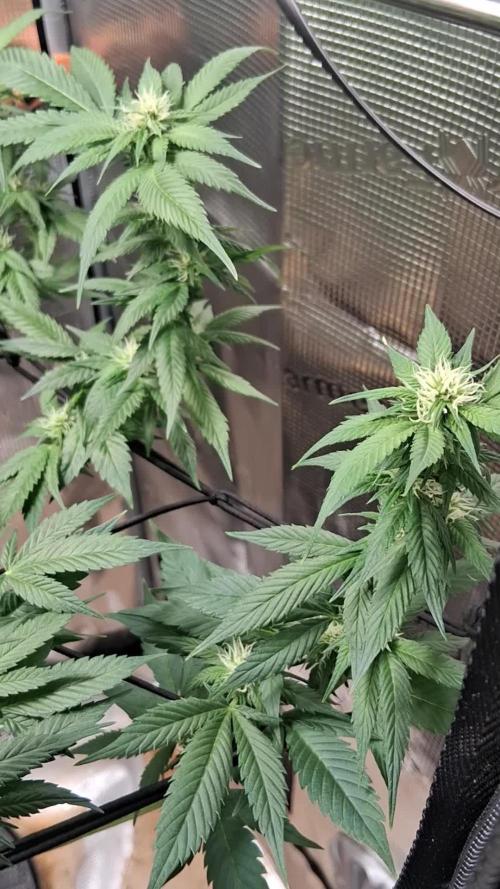
Couple plants at doffeent weeks here's a quick tour of the tent

Likes
24
Share


@Caertner
Follow
#1: Stamm beim umstellen leicht geknickt... Blumendraht zur Stabilisierung + Lollipopping
#2: Wächst gut, sehr große Blätter + Lollipopping
#3: Bonzai wächst mit wenig Licht sehr "spargelig" (lange Internodien)... also mehr Licht, aber weniger Photosynthese - Entlauben (halb)

Likes
1
Share


@nefcxt
Follow
Except for them getting a bit elongated this week went quite well. They have already grown multiple pairs of leaves and despite being so thin feel relatively robust. For watering I've just used rain water and I also added some of those reflective blankets to the walls (which are black otherwise), they're not perfect but better than nothing.


Processing
Likes
5
Share


Likes
39
Share


@Mrs_Larimar
Follow
May, 18th.2021
The Lambsbreath does it like her Sisters, performing well, looking
healthy and happy, and budding some Flowers
Doing just like she should

Likes
14
Share


@Kersche
Follow
Endlich fertig! Ich kann keine Trimmschere mehr sehen.
Um bei meiner Malibu OG Gold nachzusehen, ob die obersten Buds schon so weit sind, musste ich mit der Leiter hoch steigen.
Ich habe von oben nach unten geerntet und dazwischen immer so viel Zeit vergehen lassen, bis die Blüten jeweils im Optimum waren.

Likes
2
Share


@Cupboardgrowuk
Follow
Be happy get couple ounce off blueberryz she really stinks, very fruity and starting to get frosty. Limoncello looking amazing caked in trichs strong lemon and pine smell. Bud seem to get fatter and each time I look at her which is often she's a sexy plant.

Likes
30
Share


@Hawkbo
Follow
Ok folks, gunna be one armed for another 6 weeks so I'm just the conductor the true heroes will go unseen. Everything is alive atleast, had a scare yesterday as things got so dried out everything went limp but an hour after feed turned back around. Noticed some yellowing and other coloring coming thru on alot of leaves so I bumped ppm up a little bit this last feed. They dont look like they have a deficiency, it's weird, they look beautiful but with a premature fade almost. I really like Green Buzz' line up/regiment I just have to dial it in which isnt easy since it's a multi strain crop and various size plants. It's very easy to use and makes me feel good knowing it's not poison. Did a minor leaf strip around the tent just to make things fit better. I'll copy and paste this to the diaries for the rest of the crop per usual but go into a little more detail on each plant individually. Pics and vids were taken on day 28 of flower. I'm trying to keep up with these as best I can from start to finish, the flip date was 6.10.19, today is 7.9.19.
They are both coming out great, little yellowish/lite green but still look good. They both have a much better bud structure than the 1st pheno I grew out looks like theyll fatten up nicely. Havnt smelt them yet but the frost is real on both of them. Photo credit goes to my girl I just watched.


Likes
11
Share


@Guaxi
Follow
I am worried about one of the plants because the leaves are not growing (White Widow). Gelato #33 and Chocolope are going strong beside the not so stable enviroment!

Likes
4
Share

@Rare_Terps_5280
Follow
Another couple weeks down, day 14 of flower, day 113 total, no smell, no tricomes, but stacking up nicely, tons of hairs and should be some gorgeous big ol colas! 32 colas!!! Lots of nutrients, started sugars and high pk.

Likes
12
Share


@Brixx
Follow
The start of this week marks 8 weeks since flower. That tall one in the back has spent the entire grow being a lighter color, then losing much of it, and now any green that comes back gets immediately swapped out for red. Not sure what I did to this one early on but its been lighter colored and stretchier the entire time.

Likes
15
Share


@UberSmokez
Follow
Very good week so far will be going over to small pots soon then will move to 5 gallon
Likes
5
Share


@ChitownCannaChica
Follow
Quality over quantity all day. Getting frosty and looking nice! More green grow to round her out! Minor defoli


Processing
Likes
30
Share


@zombikush81
Follow
my friends growers, arrived at the 5 week of flowering, everything goes well.
end 5 week blooming