The Grow Awards 2026 🏆 


Likes
Comments
Share
@420DeepGrow
Follow
!Volvemos a la carga con la Titan F1 de Royal Queen Seeds!
Después de una primera experiencia muy positiva, me he animado a repetir con esta genética que ya demostró su potencial. 💪
Para asegurar un buen arranque, estoy utilizando de nuevo el Seed Booster de RQS, garantizando un enraizamiento fuerte y saludable desde el inicio. 🚀
La iluminación corre a cargo de la ya bien conocida TS1000 de Mars Hydro, que en la primera vuelta se portó de lujo, ofreciendo una luz intensa y homogénea. 💡
Con ganas de ver si esta vez consigo aún mejor rendimiento y resina
Seguimos creciendo fuerte! 💪

Likes
3
Share
@mquintero7
Follow
Everything going well. Very fat flowers.
Compost added on top of the soil.
Final stages before harvest.


Likes
22
Share
@MonsieurDeLaRuche
Follow
D97 F50: what a week!!! I can't believe it, the plants are more and more fragrant, the flowers are bigger and bigger... I expected less than that!
I started the flush with simple osmosis water, corrected with a PH of 6.1! I managed to increase the EC from 2.1 to 1.3, with about 4 liters per plant!! I was able to remove the excess water in the tank using a pump! I'm aiming for an EC between 0.1 and 0.5 for half of week 9, before letting them dry on the foot.
In any case, there are fewer seeds in my flowers than I thought, I tried to remove a few seeds with tweezers, it worked for a few plants but the code red #1 didn't like it... some pieces of flowers dried a little and some trichromes matured faster!! I'm not touching anything anymore
smells:
Papaya Bang Bang #1: smells of exotic fruit candies, especially papaya, very deep and addictive!! a banger
LA Vanilla cake #2: smell of gas with ripe fruits, very cali gelato
Papaya bang bang #2: smell of exotic fruits on a very earthy background, a little og, it's not really what I was looking for but it looks interesting! I think it will be round in the mouth
cherry gar see ya #4: smell of exotic fruit compotes on a very fresh background!!
white runtz x Hollywood: a banger!! a very resinous runtz smell, almost rosin, with smells of lemongrass, ginger... I've never smelled that in my life!!
code red #2: smell of tangy strawberry, simple, not so many smells in the background, almost a little citrus
Code red #1: a banger too! a smell of strawberry syrup, cream, sugar, I can't take my nose off when I smell it
B-45: smell of citrus, grapefruit, with a bug background that I love
LA Vanilla Cake #1: very cali, gas, good gelato too, but without fruits
no TCO for the last two weeks, or very light! I'll give you the recipe anyway
in my flowering TCO, I put:
- kelp hydrolysate
- epsom salt
- bat guano
- mealworm guana
- castor bean shell ash
- palm ash
- vermicompost
- blackstrap molasses
- elycitor
-Yeasts Saccharomyces Cerevisiae
Bottom right: LA vanilla cake #2
Bottom middle: Code red #2
Bottom left: Papaya bang bang #1
middle right: cherry gar see ya #4 clone
middle: white runtz x Hollywood
middle left: Papaya Bang Bang #2
Top right: Code red #1
Top middle: LA vanilla cake #1
Top left: B-45


Likes
47
Share
@MadeInGermany
Follow
Info:
Unfortunately, I had to find out that my account is used for fake pages in social media.
I am only active here on growdiaries.
I am not on facebook instagram twitter etc All accounts except this one are fake.
Have fun with the update.
Flowering day 30
since time
change to 12/12.
Hi everyone 😀.
Another very nice week.
This week it was poured twice with 1 l.
1 g enhancer per liter of water was added.
Otherwise, like every week, everything was checked, everything was cleaned and refilled.
Have fun with the update.
Stay healthy 🙏🏻
You can buy this Strain at :
https://www.exoticseed.eu/
Type:
Herz Og
☝️🏼
Genetics:
Larry OG X Kosher Kush
Indica 60 % / Sativa 40 %
👍
Vega lamp:
2 x Todogrow Led
Quantum Board 100 W
💡
Bloom Lamp :
2 x Todogrow Led
Cxb 3590 COB 3500 K 205W
💡💡☝️🏼
Soil :
Canna Coco Professional +
☝️🏼
Fertilizer:
Green House Powder Feeding
☝️🏼🌱
Water:
Osmosis water mixed with normal water (24 hours stale that the chlorine evaporates) to 0.2 EC. Add Cal / Mag to 0.4 Ec Ph with Organic Ph - to 5.5 - 5.8 .

Likes
6
Share
@GreenForce
Follow
Hi,
Today was the day 😍, the harvest day. I will return after 15 day +/- with more photos when trimmed and dry.

Likes
10
Share
@Mo_Powers
Follow
the first week in the greenhouse is over and i think it has recovered well. still quite small but i think it will start to grow well in a few weeks. let's see. hope dies last


Likes
44
Share
@GreenHouseLab
Follow
Little clean up in the tent things got out of control. By removing lowers and inners that would possibly not produce much will definitely let those tops stack up nicely. These buds will without any doubts be rock solid, I can tell by how sturdy those stems already are. I transplanted this week was a nightmare root mass caught everywhere in the 3 Gal, now into 5’s.
👍✌️


Likes
76
Share
@JonnyTerpen
Follow
Hey Freunde, ich hab heute spontan geerntet (leider etwas zu früh), aber jetzt kann ich mich auf Weihnachten konzentrieren und die Trichome waren fast alle milchig, also halb so wild. 🤓
Für den ersten Run nach über 10 Jahren bin ich relativ zufrieden, vor allem in der kurzen Zeit! 🦊
Die Bilder sind Leider nicht wirklich gut geworden, war ohne Lampe leider zu dunkel, aber ich mach nochmal welche wenns getrocknet is!
Ich wünsch euch und euren lieben schöne Feiertage und frohe Weihnachten! 🎄💚


Likes
7
Share
@tresfrangos
Follow
did some light defoliation (lower larger leaves and the ones touching soil) on day 28.
started feeding her bio-bloom as she transitions to pre-flower.
next week will start feeding with top-max as well.
looking healthy but im worried they wont grow as much as expected :(

Likes
40
Share
@valiotoro
Follow
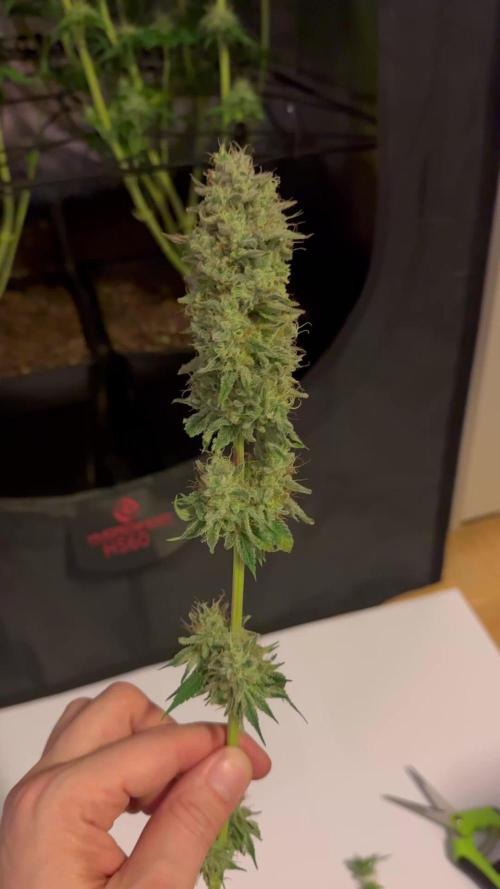
Easy trim✂️
The buds are super sticky & dense⚡️
The smell is Absolutely DIVINE,flowery sweet & orange🤤🍊🌸


Likes
9
Share
@n1mbu5
Follow
Please like and follkw my diary and check out my others!! Would appreciate the support🙏
Ok guys week 4 starting now and these girls have gotten all bushy and lushy!!
I am just now setting up and starting to play around with time lapses lol here are my 2 tester videos to start. Any pointers and tips would be greatly appreciated👏
Soo the girls are doing great done a little lst and neem oil applied last night for pest prevention
I wanted to bend down their main stems and do a little hst but unfortunately their main stemsare waaaay to thick for it, I'll add some pics later
Ok and as for feeding we are following the advanced nutrients feeding schedule, no more pirahna for now
I have measured EC and PPM this time but i need to go find my notes will add it into this weeks diary
Ok that's it for now I've got another time lapse running so I'll add that one later today too!
Likes
14
Share
@artems
Follow
1 week from switching to 1212. Plant looks good and deserved defoliation with little banding. Looks amazing! Watering with 1 liter of water in 2 days.

Likes
23
Share
@Horseluisweed
Follow
Bueno, le salió la radícula en las primeras 24h, pero quise esperar a que se desarrollara más antes de transpartarla al sustrato, tras pasar más de 48h me quedé sorprendido que siguiera (aparentemente) igual, la pase a la tierra(💦mojada en el centro con 100ml del agua que utilicé para germinarla), se me hizo eterno esperar a que sacara la cabeza, tremenda alegría al 4 día ❤️🙌🌱, al ver el sustrato relativamente seco volví a mojar💦(esta vez con la mitad, 50ml aprox.). Decidí comer hummus (como ella jijiji) y ponerle el plástico de invernadero con la idea de manter la humedad alta💦💦💦

Likes
6
Share
@Drewseph
Follow
Solid start to flower for these ladies... Starting this grow diary now and filling in as much as I can from the ~8 weeks before this point. I'll keep updating from now 'til harvest.
Struggling to keep the heat down so had to rig up a styrofoam cooler "AC" I found on YouTube, like this one: https://www.youtube.com/watch?v=TpqUr6bEYOs
Keeping the DIY CO2 generator running full blast while the lights are on and have some side-lighting led bars in the works that I'll have installed later this week.
Drip system has been working great, dialed back the feedings so I don't overwater and can give the top layer of coco a chance to dry out a little bit.
Heavy defoliation tomorrow to clean up the canopy...
Likes
31
Share
@Hempface86
Follow
Everything is going good. I flipped to flower about a week ago. today is day 84 from germination.. Not a whole lot to say it's been an extremely bad last few days for me, I have some personal issues..


Likes
28
Share
@tislam95
Follow
As I was planning to harvest this week, I started flushing Mishka with PH 7.5 water and no nutrients as per guidelines.


