Likes
13
Share
@knicko
Follow
24 Stunden habe ich sie in ein Wasserglas getan was Zimmertemparatur hat. Nach 24 Stunden habe ich sie in eine Brotdose mit Taschentücher gelegt auch bei Zimmertemparatur 2 Tage Keimen lassen. Als die Wurzeln ca. 1.5-2.5cm lang waren habe ich sie in Jiffys gesteckt und in einem Gewächshaus wachsen lassen.
Likes
13
Share
Day 1- 08/04/22 14:30pm Germination Time!!!!! Here we have 21 wonderful seeds from the amazing fastbuds!!!! Placed in a glass of water for 18-20hours!!! So excited!!!! - Day 2-09/04/22 seeds have been placed on a wet paper towel!!!!! - Day 3-10/04/22 getting the pots filled with soil ready for planting tonight or tomorrow!!!!! - Day 4-11/04/22 most of the seeds had popped last night so I planted most of them and the rest I planted this morning!!! 1 seed out of the 21 didn’t pop so germinating another to make it back up to 21!!!! So there all in the tent except 1!!!! - Day 5-12/04/22 one has come through so far and should be planting the last seed tonight!!!! A few more should pop out by tomorrow!!!! - Day 6-13/04/22 14 out of the 21 have come out so far!!!! - Day 7-14/04/22. 19 of the 21 have come through!! I think one isn’t going to come through so I’m germinating another seed to replace it and if the other one doesn’t come through tomorrow I’ll germinating another one to replace that Aswell!!!.
Likes
6
Share
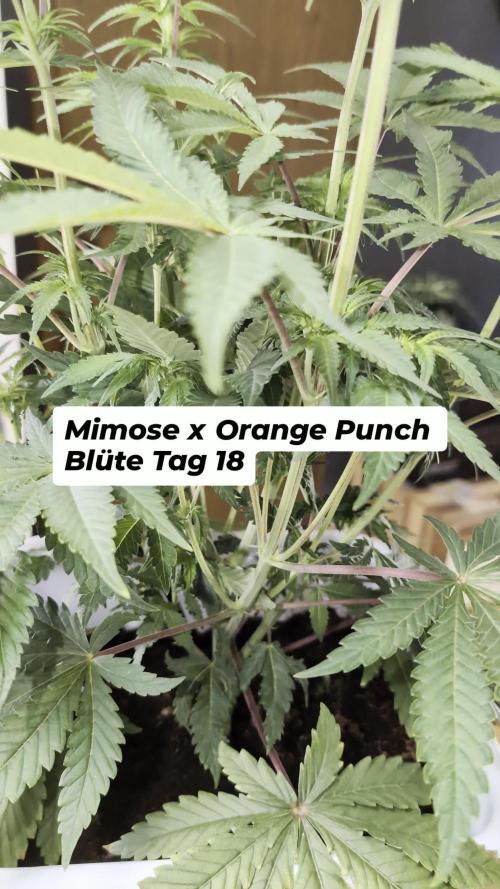
Keine Komplikationen, alle Pflanzen sehen gesund aus und entwickeln sich gut. Der Lichtzyklus wurde über 6 Tage hinweg schrittweise reduziert, jeden Tag eine Stunde weniger Licht. Heute ist der erste Tag mit 12/12 Licht-Dunkel-Zyklus und damit der offizielle Start der Blütephase. Erste Anzeichen der Blüte sind sichtbar, Internodienabstand nimmt zu, das Wachstum verlagert sich in die Höhe. Keine Mangelerscheinungen oder Stressanzeichen. In den kommenden Tagen wird das Stretching genau beobachtet. Ab nächster Woche beginnt das Monitoring der Vorblüten.
Likes
5
Share
Week 8 start tomorrow and the super fast papaya frosting is down wow what a plant! Cannot wait for the cure heavy tropical pineapple/papaya/lime notes almost like fruit salad chewits. Coated in trichomes expecting roughly 3-4 oz from her she was the smallest in mass of the 4 though she must be sitting very high on THC & terps. Another week for the zkittlez probs another 2 for the frozen biscotti šŸ”„šŸ”„šŸ”„
Likes
19
Share
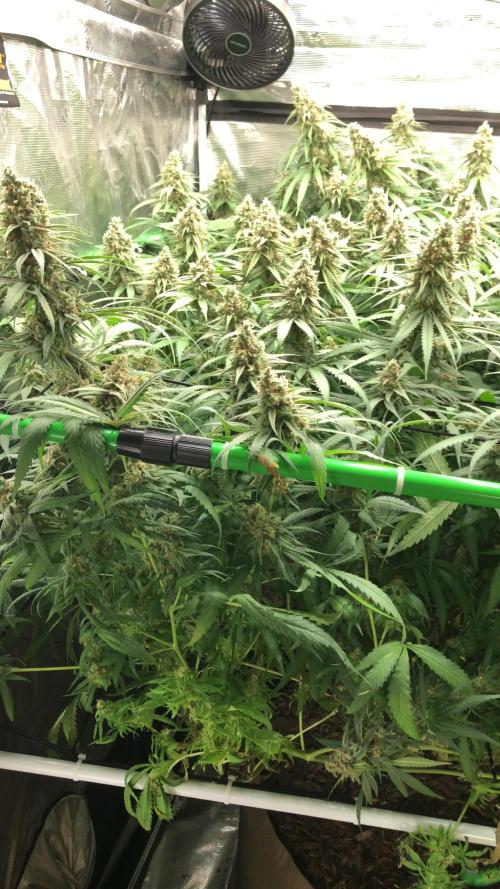
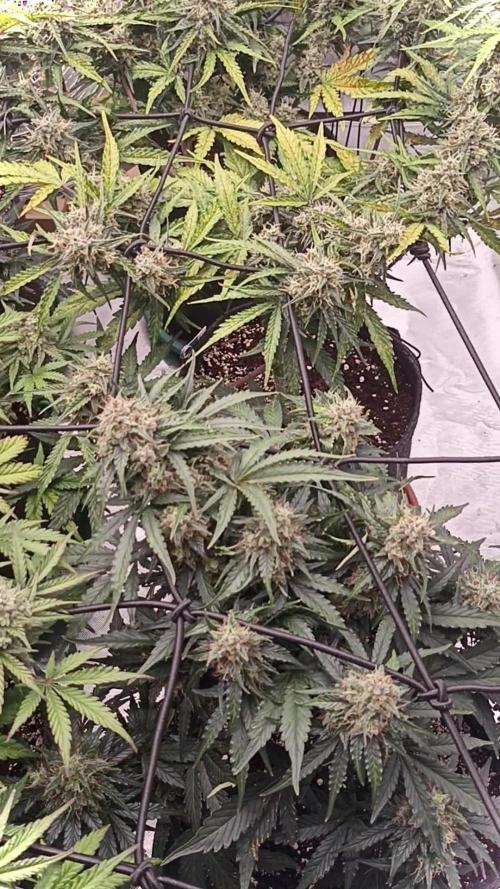
She is growing nice, the buds are getting fat, apparently i was expecting gorilla cookies to be the winner at the size of the buds until now, apparently i was wrong, amnezia has bigger buds than gorilla at this stage :) we will see who is going to be the winner... who you think is going to win?
Processing
Likes
13
Share
@GrowGuy97
Follow
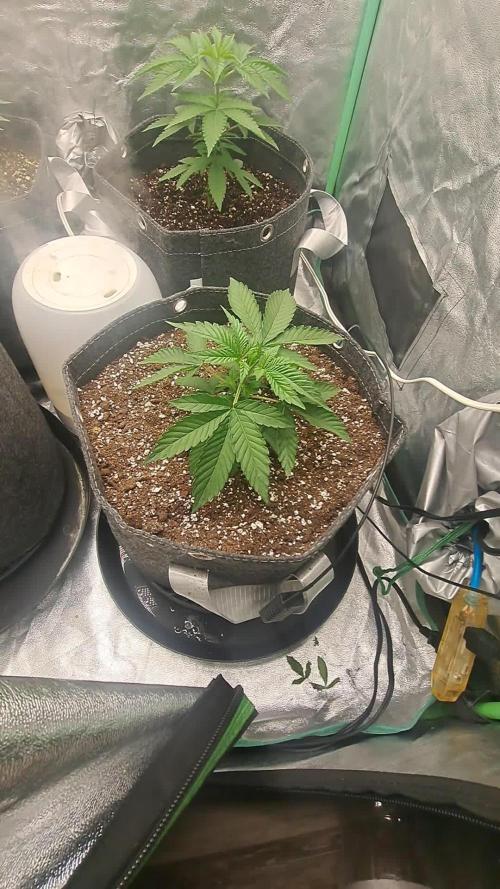
Just got the new 8x4 setup and got some new seeds in from Seedsman so let’s see how this run goes! 5x5 is week 2 of flower going strong!
Likes
141
Share
@Ju_Bps
Follow
Hello growmies šŸ‘©ā€šŸŒ¾šŸ‘Øā€šŸŒ¾šŸŒ²šŸŒ², šŸ‘‹ The end is close now, Buds keep bumping and frosty, I've started the flush this end week, Harvest in few days, look delicious šŸ˜‹. šŸ’§Give water each 2 or 3 days 1,5l Water + Nutri NPK Bloom Boost 1,5l Water + Flash Cleaner PH @6 - Nutri NPK Bloom boost 1/4 tsp for 1 gal. šŸ’”Mars Hydro - SP 3000 100% 54 cm. šŸ”„ Thanks community for follow, likes, comments, always a pleasure šŸ‘©ā€šŸŒ¾šŸ‘Øā€šŸŒ¾šŸ’ššŸŒ². Mars Hydro - SP 3000 šŸ’”šŸ’” https://www.mars-hydro.com/sp-3000-samsung-lm301b-greenhouse-led-grow-light NUTRI NPK šŸ’„šŸ”„ https://www.nutrinpk.com/product/npk-mix-pak-for-4-to-5-plants-cannabis-fertilizer/ SweetSeeds - Sweet Mandarine Zkittlez XL Auto🌲🌲 https://sweetseeds.es/en/autoflowering-seeds/3233-sweet-mandarine-zkittlez-xl-auto.html
Likes
4
Share
Seconda settimana di veg...la runtz che ĆØ nata prima dell'altra sta mutando in modo strano. Non avevo mai visto spostarsi il centro apicale..sembra che si ĆØ piegata e l'apicale sta crescendo come sĆ© fosse un ramo laterale šŸ˜‚šŸ¤£šŸ¤¦šŸ’Ŗ
Likes
16
Share
All plants are down! I am stoked with how the grow went and this strain has performed well. Terps are out of this world - candy - jelly babies, sour worms, Fanta grape and bubblegum stinking up the room. Some pheno's are more forsty then others but it seems we have found a couple keepers to re-test. Next post will be nug shots, weight once all dry. We will also do full cannabinoid testing to determine the potency of some of the phenos which we think are worth testing. Look out for that! It will be the final entry on this log :) Happy growing fam
Likes
55
Share
@w33dhawk
Follow
So liebe grower, 20 Wochen voller Spannung sind für mich ins Land gezogen und ich muss sagen ich bin begeistert von dieser Sorte, das Wachstum verlief gut und sie hat sich fast garnicht für mein topping und lst Interessiert und einfach weiter gemacht mit ihrem Wachstum. In der blüte gab es dann ein paar Probleme mit Überdüngung die ich verursacht habe was mich sicherlich Ertrag gekostet hat aber dank der fleißigen Helfer hier auf Grow diaries war das Problem schnell gelöst und der Schaden minimal gehalten danke schon mal an euch ihr seid die besten. Aber ein ganz besonderes Dankeschön möchte ich an Mrs Larimar richten da er/sie mir bei einigen Fragen geholfen hat und eigendlich immer gleich zur Stelle war wenn was mit meinen Ladys war, also danke Mrs Larimar du hast 1000 likes verdient für deine Arbeit die du hier auf Grow diaries leistest. Zum eigendlich en Ergebnis zurück gelato 41#1 hatt 374,94 gramm abgeworfen, gelato 41#2 hatt 361,01 gramm her gegeben, gelato 41#3 satte 370,37 gramm und zu guter letzt gelato 41 #4 330,29 gramm sind insgesamt 1436,61 gramm nass Gewicht. Ich bin mehr als zufrieden mit dem Ergebniss und finde das gelato 41 ein guter produktiver Cannabis stamm ist. Zu dem Wachstum der Knospen im allgemeinen kann ich sagen das bei 4 Ladys 3 verschiedene Profile raus kamen gelato 41 #1 und #4 haben eher längliche colas entwickelt die relativ fest sind gelato 41 #2 hat eher tennis Bälle produziert die echt hart wie holzbälle sind und gelato 41 #3 war ne Mischung aus den beiden. Zum Geruch der sich über die gesammte blüte immer wieder verändert hat es fing an mit zitrus Noten die dann gepaart wurden mit so nem cremigen touch dann kam ein hauch von Minze hinzu und ganz am Ende Rochen die Ladys nach cremigen sauerlichen Beeren mit leichtem Zitronen Duft der gepaart mit cremiger minz Note einher geht einfach nur lecker im Duft. Trocken Gewicht werde ich updaten wenn die Ladys in die Gläser gehen und Rauch Bericht nr.1 folgt dann ca 14 Tage später und Rauch Bericht Nr2 weitere 14 Tage später, euch allen noch einen wunder schönen Grow mit reichlich ernte und bis zum nächsten Bericht cu........
Likes
27
Share
Today is Day 50 !! We have started flower an they are just looking amazing! We have switched up the nutrients for flower, instead of 1 tsp bloom and 3 tsp of veg , we just swap 3 tsp of bloom and 1 tsp of veg !! Can’t wait to see what these laddies do this week!!
Likes
11
Share
@Aeries
Follow
Day 64. All looking good. Gave her some banana fertilizer and some Blackstrap molasses. Sprayed all the foliage around her again with safe insecticide and found some aphid nests around her too and nuked them šŸ˜Ž. Little defoliation of popcorn bud sites and leaves feeding into the branches and stems blocking sun from bud sites. Water only with molasses for the next 3 weeks. Weather is looking great for the next few weeks so looking forward to end result! šŸ¤“ Day 68. She is starting to buff out šŸ˜. Gave her some water with molasses.
Processing
Likes
1
Share
week 5 when the thrips first showed themselves. I noticed them cuz some silver stains started appearing on some leaves. you can see them better under LED light. So, I sprayed Neem Oil all over the plant. I could notice that if you don't do it well, spraying and rubbing the leaves with a piece of cloth, the oil will also create some stains. 2nd topping. killed some thrips this week, they're cute and didn't seem to harm the plant seriously. Neem oil worked fine to control them. No other pests that I could notice + Defoliation + LST Flowermind (4ml + 0.5g)
Likes
11
Share
@LiamF
Follow
When will this end? lol Pretty cold week, temp dropped to 12°c @ night So the top 2 huge colas are like 30% amber The middle big buds are like 10% amber and the small lowest buds are like 80% cloudy with no amber I think tomorrow(friday 10/02 first day of week 16) will harvest i dunno i think there's no benefits of letting her live more, i know its not 100% perfect but i think the combination of the very ambery top colas with the middle ones cloudy will balance the unconsistent ambers on each buds.
Likes
7
Share
An interesting strain. From the very beginning, it handled everything really well, even though I managed to stunt it with nutrients at one point. Thankfully, it recovered and bounced back nicely. Unfortunately, because I was away, I wasn’t able to take any photos before harvest. For plants grown in 10L pots, they became genuinely huge trees, which you can tell from the size of the root system. One plant was harvested two weeks earlier than the other. I’ll add photos of the buds after drying and curing (if there’s anything left by then šŸ˜…). Overall, I can definitely recommend this strain. It grows like crazy and the final result is very satisfying. The potency is certainly higher than what the breeder claims on the website. Unfortunately, I have no way to verify that scientifically, so you’ll just have to take my word for it. šŸ˜…šŸŒ±šŸ”„
Processing
Likes
19
Share
Okay, so I didn’t think this seed would actually terminate as it was a joke. I didn’t use the cup of water and seed soak technique. I just planted it directly into some dollar tree soil I got for my kitchen window garden. So because the soil was so cheap, I didn’t even expect the seed to sprout. So I figured I’m going to grow it and see what I produce. I’m not sure if the picture I chose uploaded, but the other plants in the picture are bell pepper plants.
Likes
16
Share
@Ensign420
Follow
Introduction - Week 14|07 Summary - Ensign's log, stardate 9437.65, Great week of growing! Wow what a good week! Growth in the main tent has all around been incredible! Submitted my first submission to the Global Grow Cup! Filmed a video of the solo cup container (marked with the ticket/order number) that will be used for the competition. Also had to fill and prove the solo cup holds 2 cups of soil. Now I need to root a clone (for the first time), transplant her into this cup, and submit my 2nd entry before the 30th of this month. As far as my first attempt at cloning, have already begun the rooting process! Managed to take cuttings from 3 out of the 6 phenos in the main tent (the first cutting was also my first time topping). Soaked the cuttings for two days before planting them into Coco Coins. So far everything has gone surprisingly well! The clones are now rooting under the propagation dome with the vents fully closed. Will check for roots soon! At the end of the week, growth was just raging! Was planning on flipping to flower in a week, but decided to begin the first week of flower next week! Thus this is the last week of veg. Plan to flip to 12/12 next Monday! Onwards to next week! [START OF WEEK 14|07] ========================================================== Garlic Budder #1 - WEEK 14|07 - Full Veg Wk5 Garlic Budder #2 - WEEK 14|07 - Full Veg Wk2 Garlic Budder #3 - WEEK 07 - Full Veg Wk5 Garlic Budder #4 - WEEK 06 - Full Veg Wk4 06/03/24 → 06/09/24 This Week's Estimated Goals ---------------------------------------------------------------------------------------------- DLI: ~26 mol/m²/d PPFD: ~400 μmol/m²/s VPD: ~1.0 kPa This Week's Meter Readings & Averages [Lights On: 16:00 - 10:00] ---------------------------------------------------------------------------------------------- DLI: 24.56 mol/m²/d PPFD: 379 μmol/m²/s VPD: 0.91 kPa Soil %: [32.7, 37.6, 37.9, 34.1] ========================================================== Day 01 - Monday - 06/03/24 - Total Days: 098 ----------------------------------- Daily Averages [~23:00] - Temps: 80.7°F [27.1°C] - Humidity: 74.4% - VPD: 0.90 kPa - Soil %: [31, 34, 39, 35] ----------------------------------- - [09:57]: Quick morning check! --- #1 is looking a bit droopy, but almost lights off (at 10:00) so not concerned. --- Nice! Mainly wanted to check on #4 and she is looking great! She’s perked back up and looking good! - [23:08]: Evening check. --- Wow! It’s a jungle in here! --- #1 has gotten too big? Nah!? Keep on growing girl! --- #2 is growing and definitely getting bigger! Growth just looking really weird. --- #3 has continued to get larger and is looking quite uniform in growth! --- #4 is growing and looking perky again! --- Even the original #1 and #2 phenos (in the back) are looking good! --- Wow! #4 is really getting close to the light. - [23:14]: Checked down both fill tubes. --- Both reservoirs were completely dry! - [23:27]: Checked the Ecowitt soil moisture sensor data: --- 30% - [CH01 EB1 - Garlic Budder #1] --- 34% - [CH02 EB2 - Garlic Budder #2] --- 39% - [CH03 GFP - Garlic Budder #3] --- 32% - [CH04 FPT - Garlic Budder #4] - [23:32]: Poured 4 cups of distilled water down EB1’s fill tube. --- Poured 2 cups of distilled water down EB2’s fill tube. - [23:38]: Checked the humidifiers. --- Refilled the 4X4’s humidifier with distilled water. --- Tomorrow, plan to defoliate and start cloning for the first time! --- Going to take multiple cuttings from both #1 and #4 for sure, but still deciding on the rest. --- Getting hyped! Day 02 - Tuesday - 06/04/24 - Total Days: 099 ----------------------------------- Daily Averages [~23:00] - Temps: 81.4°F [27.4°C] - Humidity: 74.3% - VPD: 0.93 kPa - Soil %: [29, 35, 38, 32] ----------------------------------- - [11:59]: Time to film the first entry for the Global Grow Cup! --- Going to be using BuildASoil 3.0 potting soil. --- Filming the video using a stand and my phone. --- This video is mainly to establish the container that the plant will be grown in. Also to prove that the container is a 16oz container and that it can hold 2 cups of soil. --- The ticket (order) number also had to be written on the cup. - [12:36]: Done! --- The video had to be done in one continuous shot with no edits (my original submission does not have the logo). --- There was also a photo that needed to be shot which shows the cup filled with 2 cups of soil (just like the video, the original image submission did not have the logo). --- I think I did everything correctly, but also sent an email for verification of submission and validation. --- Getting hyped! --- [*smokes a bowl] --- Going to defoliate today along with for the first-time, going to take cuttings for clones! --- After a bit of online research, decided to split the cloning process into two days. --- Today going to take cuttings and will soak them in a solution of aloe for 24hrs. Afterwards will change the water out and use straight distilled water. --- Then in a couple days, plan to transplant into coco plugs (Coco Coins) for rooting. --- For optimal results, also be using a rooting hormone (Clonex). --- Well.. Here goes nothing! - [17:01]: Evening check. --- Wow! #1 is looking huge! Her main top is stretching above the lower canopy which is continuing to bush out. --- #2 is growing along. Growth is gnarly and a bit droopy, but she’s getting taller! --- #3 is looking great! Still a bit small, but she is continuing to get larger. --- #4 looks like she needs a watering. --- Both plants in the back are also looking surprisingly great as well! - [17:05]: Checked down both fill tubes. --- Both reservoirs were completely dry! --- As far as today's defoliation, going to leave #2 and #3 alone and will focus my defoliation and cloning on the rest of the plants. --- This will be my first attempt at cloning, also going to try topping for the first time today. --- No pressure Ensign. What can possibly go wrong right? - [17:27]: Time to start the cloning and defoliation process! --- Filled a measuring cup with 3 cups of distilled water. ------ Added 3/4tsp of Horticultural Aloe ------ Added 1 more cup of distilled water --- Mixed the solution and poured an even amount into three separate solo cups. --- Made sure to mark two of the cups (#1 and #4). The unmarked one will be for any other clones from amongst the 6 phenos (if any at all). - [17:43]: Time to top and defoliate #1! --- Using a pair of brand new trimmers (AC Infinity), --- Gently cut the main stalk to even out the canopy. --- Then trimmed and cleaned most of the nodes leaving the top node or two. --- Also trimmed the leaf fingers a bit before placing the top cutting into the cup of aloe solution. --- Now for the rest of the cuttings! --- [~45 minutes later] - [18:32]: Managed to finish defoliating and cutting the rest of the clones. --- Took two more lower cuttings from #1 (3 clones total). --- Took 3 lower cuttings from #4 --- While defoliating, decided to try and clone the original #2 pheno as well. Took 4 small cuttings. --- Similar to the top cutting, trimmed and cleaned each lower node for each cutting before placing them into the cups. --- Before finishing up the 2nd cutting, I noticed the first cutting (the top cut that was also trimmed) was drooping. --- So I did not trim and the leaf fingers for the other cuttings. --- In total there were 10 cuttings taken for potential clones. --- My main focus was to take cuttings and to clean up all the lower growth from both #1 and #4. --- Defoliated and cleaned up the back original phenos as well (also trimmed back the cover crop). - [18:35]: Temporarily placed the cuttings onto the floor of the 4x4 tent. --- Took the trimmings (about 3 cups) and spread them onto the top mulch of #1 and #2. --- Time to set the environmental controls for the 3x3 veg tent. - [18:43]: Within the AC Infinity App, --- For the Veg Tent [3x3] controller, --- Adjusted the 'Vegetative [18/6]' Schedule for the grow light. ------ Set the Mode to ā€˜On Mode’ ------ Set the START/END times to 04:00PM/10:00AM ------ Set the MAX to 1 --- The IonBoard S33 is now utilizing around 60.8W (at intensity 1 out of 10). --- Adjusted the 'Vegetative [18/6]' Schedule for the exhaust fan. ------ Increased the Humidity’s HIGH trigger value from 81% to 87% --- Adjusted the 'Vegetative [18/6]' Schedule for the humidifier. ------ Decreased the VPD target value from 1.5kPa to 0.8kPa - [18:52]: Moved the cuttings into the 3x3 veg tent. --- It begins! I think. --- Going to let these cutting drink some aloe for a day before switching to straight distilled water. --- Hmm. Could be the white floor of the 3x3 veg tent, but have noticed the S33 has a whiter spectrum whereas the FC-6500 seems to be warmer in color. --- Anyways, - [18:58]: Poured 4 cups of distilled water down EB1’s fill tube. --- Poured 2 cups of distilled water down EB2’s fill tube. - [19:06]: Filled a pump sprayer with 5 cups of distilled water. --- Focused mainly on the straw mulch of #4. --- But also misted the straw mulch for the rest of the plants a bit. - [19:12]: Checked the humidifiers. --- Refilled the humidifiers with distilled water. - [19:44]: Going to be using Clonex rooting gel before planting the cuttings into Coco Coins (pre-soaked with microbes and aloe). But before that begins, going to transfer the Clonex gel into a squeeze bottle. --- Gently peeled back the seal on the original Clonex bottle. Just enough make a tiny opening, --- Then slowly and carefully poured the gel into an empty squeeze bottle. --- Also removed the sticker from the original bottle and placed it onto the new one. - [19:54]: Perfect! --- Instead of applying the gel to the cutting, going to be applying the gel to the Coco Coin. --- This squeeze bottle will make applying the gel a lot easier. --- Will take PPFD readings tomorrow. --- Also will change out the aloe solution to distilled water. --- I really hope I didn’t screw things up before they could even begin. --- Don’t die on me ladies! --- Please. Day 03 - Wednesday - 06/05/24 - Total Days: 100 ----------------------------------- Daily Averages [~23:00] - Temps: 81.9°F [27.7°C] - Humidity: 75.5% - VPD: 0.90 kPa - Soil %: [29, 36, 38, 36] ----------------------------------- - [09:40]: Quick morning check! --- #1 is looking a bit droopy, but looking okay. Topping is a high stress technique so going to take some time to recover. Don’t plan on flipping the main 4x4 tent to flower for a good week or so which should be enough time. --- #4 looks great! The defoliation seems to have no effect on growth. Nice! - [09:41]: Also quickly checked on the 3x3 veg tent, --- Nice! The cuttings are looking great! --- No yellowing and they all seemed to have turned up towards the light. --- So far so good! - [22:53]: Evening check. --- #1 is continuing to dominate this grow! She has spread wide and looking incredible! --- #2 is looking gnarly, but getting there. --- #3 is getting larger! But still a runt. By far, her leaves are the darkest of the bunch, but she is still growing! --- #4 looks happy and growing along beautifully! Wow! - [22:55]: Checked down both fill tubes. --- Both reservoirs were completely dry! - [22:59]: Poured 5 cups of distilled water down EB1’s fill tube. --- Poured 2 cups of distilled water down EB2’s fill tube. - [23:05]: Checked on the 3x3 veg tent. --- Ooo yea! The cuttings are still green! Nice! - [23:07]: Took PPFD readings. --- The cuttings were around 121 μmol/m²/s which gives a DLI of 7.84 mol/m²/d --- Nice! These levels are on the lower range for seedlings (~100-300), perfect! I think. - [23:14]: Swapped the aloe water out to straight distilled water. --- Going to let these cuttings soak for one more day before planting. --- Please don’t die girls! - [23:15]: Checked the humidifiers. --- Refilled the humidifiers with distilled water. --- Ooo yea! --- Tomorrow is the big rooting day! Day 04 - Thursday - 06/06/24 - Total Days: 101 ----------------------------------- Daily Averages [~23:00] - Temps: 81.9°F [27.7°C] - Humidity: 75.2% - VPD: 0.91 kPa - Soil %: [32, 38, 38, 34] ----------------------------------- - [16:20]: Evening check. --- #1 is a bit droopy, but growth is looking green and healthy. --- #2 is looking bigger! She’s also looking sort of droopy. --- #3 is growing along nicely! Looking good girl! --- #4 is looking great! A bit droopy but plan to water today. - [16:23]: Checked down both fill tubes. --- EB1's reservoir still has some water. --- EB2's reservoir was completely dry! - [16:23]: Checked the Ecowitt soil moisture sensor data: --- 28% - [CH01 EB1 - Garlic Budder #1] --- 36% - [CH02 EB2 - Garlic Budder #2] --- 37% - [CH03 GFP - Garlic Budder #3] --- 30% - [CH04 FPT - Garlic Budder #4] - [16:30]: Using a pump sprayer, --- Misted the straw mulch of #4 with 6 cups of distilled water. --- Focused mainly on the straw mulch. --- Also misted the straw mulch of #3 (in the grassroots fabric pot) a bit. - [16:43]: Poured 5 cups of distilled water down EB1’s fill tube. --- Poured 3 cups of distilled water down EB2’s fill tube. - [16:52]: Checked the Ecowitt soil moisture sensor data: --- 56% - [CH01 EB1 - Garlic Budder #1] --- 44% - [CH02 EB2 - Garlic Budder #2] --- 40% - [CH03 GFP - Garlic Budder #3] --- 45% - [CH04 FPT - Garlic Budder #4] - [17:01]: Took general PPFD readings. --- #1 was around 379 μmol/m²/s which gives a DLI of 24.56 mol/m²/d --- #2 was around 333 μmol/m²/s which gives a DLI of 21.58 mol/m²/d --- #3 was around 293 μmol/m²/s which gives a DLI of 18.99 mol/m²/d --- #4 was around 378 μmol/m²/s which gives a DLI of 24.49 mol/m²/d - [17:09]: Took the weekly height and light distance measurements. --- #1 was about 21" tall. --- #2 was about 13.5" tall. --- #3 was about 9.5" tall. --- #4 was about 19.25" tall. --- Hmm.. - [17:19]: Adjusted the right oscillating fan a bit. --- Re-angled the CloudRay S6 oscillating fan upwards. Been noticing that the air has been hitting the tops of the plants so easing off a bit (#1 is still getting hit, but she’s huge so not too worried). - [17:23]: Back to the measurements! --- #1 was about 9.5" away from the grow light. --- #2 was about 17" away from the grow light. --- #3 was about 17.5" away from the grow light. --- #4 was about 11.5" away from the grow light. - [17:46]: Checked on the 3x3 veg tent. --- Cuttings are still green! They do look a bit droopy but no signs of yellowing. --- Okay! - [17:55]: Time to begin the rooting process! --- For my first attempt at rooting, going to be using Coco Coins pre-soaked in saponins, microbes and aloe. --- To further help with rooting, going to also be using Clonex rooting gel. --- Filled a measuring cup with 4 cups of distilled water. ------ Added half of 1/64tsp of Quillaja Saponaria Extract [60] ------ Added 1/16tsp of Horticultural Aloe ------ Added 1/8tsp of Mycrobe Complete --- Mixed the solution thoroughly. --- Time for the Coco Coins! --- 10 cuttings means 10 Coco Coins. - [18:09]: Dropped 10 Coco Coins into the measuring cup. --- The coins immediately started to expand. --- A bit too much.. Oops! --- Poured the solution and Coco Coins into a pitcher. --- Added 2 cups of distilled water to the solution (now at 6 cups). --- Great! The coins are pretty much fully expanded, but going to wait a bit longer to fully saturate each coin. --- [~20-30 minutes later] - [18:42]: Great! --- Took the seedling and flood tray from the AC Infinity propagation dome and placed all 10 Coco Coins into the slots. --- Gave each Coco Coin a quick shake to remove excess solution. The coins were not dripping with solution but still pretty saturated. --- Arranged them into 3 groups with the cuttings in mind. --- Also tried to keep the pre-made holes intact. --- Time to inoculate the Coco Coins! - [18:54]: Using a squeeze bottle, --- While keeping the nozzle from making contact with the coco, gently filled each pre-made hole with Clonex rooting gel. Just enough gel to fully cover the hole of each coco coin. - [19:00]: Time to plant the cuttings! --- Gave each cup a misting of distilled water. Focused on wetting the top growth with water. --- Okay! --- To avoid mixing cuttings up. - [19:01]: Starting with the original #2 pheno cup, --- For each cutting, --- Using a pair of clean trimmers, made a final 45° cut about 1/2" from a bottom node. --- Then stripped away and scared the protective membrane below the node before planting. --- Made sure the node was about 1/2" below the surface of the coco. --- To help with planting, while inserting each cutting, gave the Coco Coin a gentle squeeze to loosen the coco. This also helped to ensure the coco and gel was in good contact with the cutting. --- Once the cutting was planted into the Coco Coin, made sure to place back in the same spot (made sure to keep the cuttings in their groupings). --- Once a cup was complete, made sure to keep the label with the group. --- Re-misted the top growth as needed to keep it wet. --- Also wiped the trimmers with isopropyl alcohol in between cuttings (plan to use 10% bleach solution for next time). --- Repeated this process until all 10 cuttings were cut, planted, and in the tray. --- The coco coins fit perfectly into the tray and don’t reach the bottom. Nice! --- The bottom air gap is important. --- Poured a bit of distilled water through one of the empty slots into the bottom of the tray. Just enough to fill the bottom of the tray, but not enough to reach any of the Coco Coins (~1/4cup). - [19:35]: Placed the propagation tray with cuttings into the 3x3 veg tent. --- Placed the first layer of the propagation dome on before giving the sides a misting of distilled water. --- Also sprayed the top of the propagation dome before covering the cuttings. --- Vents are all fully closed. - [19:40]: Placed the bar lights onto the top of the dome before configuring the controller. ------ Set the START/END times to 04:00PM/10:00AM ------ Set the bar light’s intensity to 2 (out of 10). --- Also made sure the propagation light controller’s time was in sync with the Controller 69 Pro. - [19:47]: Took PPFD readings. --- The cuttings were around 136 μmol/m²/s which gives a DLI of 8.81 mol/m²/d --- The PPFD levels are similar to the floor. --- Perfect! --- Going leave the IonBoard S33 on during this rooting process. --- Will check back tomorrow to cycle the air under the dome. - [19:56]: Checked the humidifiers. --- Refilled the humidifiers with distilled water. - [20:17]: Quick night check! --- Ooo yea! Growth is raging and looking perky! --- Mainly checked on #1 and #4 which were looking incredible! --- Keep on growing ladies! Day 05 - Friday - 06/07/24 - Total Days: 102 ----------------------------------- Daily Averages [~23:00] - Temps: 82.7°F [28.2°C] - Humidity: 76.2% - VPD: 0.89 kPa - Soil %: [37, 40, 38, 35] ----------------------------------- - [10:03]: Decided to increase the ambient temp in the 3x3 veg tent. --- Within the AC Infinity App, --- For the Veg Tent [3x3] controller, --- Adjusted the 'Vegetative [18/6]' Schedule for the heater. ------ Increased the Temp target value from 78°F to 82°F --- Hopefully this will help to keep the veg tent at a more consistent temp. - [22:26]: Evening check. --- Ooo yea! The garden is looking incredible! --- #1 is looking perky and just bushing out! Wow! --- #2 is getting big! Growth is weird and leaf fingers are huge! Just going to let her grow. --- #4 is looking happy and growing along like a champ! Nodes are starting branch out and she is turning into a bush! - [10:28]: Checked down both fill tubes. --- Both reservoirs were completely dry! - [22:33]: Poured 5 cups of distilled water down EB1’s fill tube. --- Poured 3 cups of distilled water down EB2’s fill tube. - [22:40]: Checked on the propagation dome (inside the 3x3). --- Ah yea! Looking great ladies! --- Lifted the top of the dome to let some fresh air in for a bit. --- Wow! --- Leaves still look nice and green! --- So far everything looks great! --- Just going to continue on! - [22:53]: Checked the humidifiers. --- Refilled the humidifiers with distilled water. - [11:01]: Decided to adjust the humidifier for the 3x3. --- Within the AC Infinity App, --- For the Veg Tent [3x3] controller, --- Adjusted the 'Vegetative [18/6]' Schedule for the humidifier. ------ Increased the VPD target value from 0.8kPa to 1.5kPa --- The higher VPD level will essentially turn the humidifier off. --- I won’t be needing the humidifier for a good week so might as well save the water. Day 06 - Saturday - 06/08/24 - Total Days: 103 ----------------------------------- Daily Averages [~23:00] - Temps: 81.6°F [27.6°C] - Humidity: 74.9% - VPD: 0.91 kPa - Soil %: [35, 40, 37, 31] ----------------------------------- - [07:40]: Quick morning check! --- #1 and #4 are looking perky and happy! --- Also checked on the propagation dome, --- All cutting still look green! Hyped! - [20:02]: Evening check. --- Wow the garden is raging with growth! --- #1 has blown up! She has clearly recovered and growth is ramping up again! --- #2 is stretching upwards! --- #3 is now the smallest of the 4, but still getting larger! --- #4 is looking incredible! Wow! Growth looks perky and happy! - [20:05]: Checked down both fill tubes. --- Both reservoirs were completely dry! - [20:10]: Poured 6 cups of distilled water down EB1’s fill tube. --- Poured 2 cups of distilled water down EB2’s fill tube. - [20:16]: Checked the Ecowitt soil moisture sensor data: --- 35% - [CH01 EB1 - Garlic Budder #1] --- 40% - [CH02 EB2 - Garlic Budder #2] --- 36% - [CH03 GFP - Garlic Budder #3] --- 27% - [CH04 FPT - Garlic Budder #4] - [20:19]: Using a pump sprayer, --- Misted the straw mulch of #4 with 5 cups of distilled water. --- Focused mainly on the straw mulch. --- Also misted the mulch of #3 a bit (in the fabric pot). - [20:27]: Checked propagation dome (in the 3x3), --- To cycle the air under the dome, lifted the top off for a bit. --- Ooo yea! Everything is still green and looking great! --- Keep on rooting ladies! --- Oops! - [21:45]: Checked the humidifiers. --- Refilled the humidifiers with distilled water. Day 07 - Sunday - 06/09/24 - Total Days: 104 ----------------------------------- Daily Averages [~23:00] - Temps: 81.5°F [27.5°C] - Humidity: 74.8% - VPD: 0.91 kPa - Soil %: [36, 40, 37, 36] ----------------------------------- - [08:18]: Quick morning check! --- Nice! The main tent is looking great! #1 and #4 are both raging with growth! --- Checked on the propagation dome (inside the 3x3) and the clones are still looking green! --- Wow! Everything is going almost too well! Just keep on growing! - [19:08]: Evening check. --- Garden is just exploding with growth! Seems everyone has fully recovered from the defoliation and topping! --- Wow #1 is bushed out and looking incredible! --- #2 is growing really starting to get large! Growth still is funky, but stoked none-the-less. --- #3 is starting to fill in the pot! Getting larger! --- Wow! #4 is getting taller and looks healthy and green! - [19:12]: Checked down both fill tubes. --- Both reservoirs were completely dry! --- Wow the canopy is really starting to get taller and closer to the light. May need to raise it up soon. --- Absolutely surprised how low the light levels have been throughout this entire cycle. Barely moved the light and have not increased the intensity past 2 (out of 10). Less is really more. --- Anyways! - [19:18]: Checked the Ecowitt soil moisture sensor data: --- 36% - [CH01 EB1 - Garlic Budder #1] --- 41% - [CH02 EB2 - Garlic Budder #2] --- 37% - [CH03 GFP - Garlic Budder #3] --- 34% - [CH04 FPT - Garlic Budder #4] - [19:19]: Poured 6 cups of distilled water down EB1’s fill tube. --- Poured 3 cups of distilled water down EB2’s fill tube. - [19:24]: Checked propagation dome (in the 3x3), --- To refresh the air, lifted the top off for a bit. --- Sweet! Still green! Wow! --- Using a spray bottle, misted the top growth with distilled water. - [20:35]: Checked the humidifiers. --- Refilled the humidifiers with distilled water. --- Wow what a week! --- Growth has been just insane in the 4x4 tent! All plants have fully recovered and have just exploded with growth. --- I think it’s time to flip to flower! --- Also, I’m absolutely baffled about how well the cloning process has been going. --- So far no issues! --- Not complaining, but just surprised. Keep on growing ladies! --- If all goes well, should have fully rooted clones soon ready for transplanting (into solo cups of course). --- Absolutely hyped for next week! --- Maximum warp Ensign, Engage! [END OF WEEK 14|07]
Likes
10
Share
@Unnamed
Follow
Removed 20l from the reservoir and filled it up with fresh nutrients. Added Yara Kristalon Orange, Yara Calcinit and a little bit of Haifa GrowClean to the reservoir. Adjusted PH/ORP, PH- adds P and ORP adjustment adds K. Topped it up with tap water every second day, the dehumidifier pulls ~12l/day, most of it should be from the plants I've got in my tent. I am struggling to keep ORP at ~100, might be a sign of root trouble. Nothing else to report. Values are average of the day. DATE - °C - RH% (Tent Temp/RH) 20241125 23.9 61.9 20241126 23.6 60.9 20241127 23.3 60.3 20241128 22.8 60.7 20241129 23.2 60.4 20241130 22.7 61.3 20241201 22.3 60.3 DATE - PH 20241125 5.99 20241126 5.94 20241127 5.96 20241128 5.95 20241129 6.02 20241130 5.98 20241201 5.93 DATE - ORP (mV) 20241125 103 20241126 95 20241127 92 20241128 67 20241129 127 20241130 88 20241201 72 DATE - EC(us/cm) 20241125 1955 20241126 1852 20241127 1864 20241128 1914 20241129 1988 20241130 2052 20241201 2135 DATE - CF 20241125 19.55 20241126 18.52 20241127 18.64 20241128 19.14 20241129 19.88 20241130 20.52 20241201 21.35 DATE - °C (Reservoir) 20241125 23.1 20241126 22.3 20241127 22.2 20241128 21.9 20241129 22.3 20241130 21.8 20241201 21.2