
Likes
Comments
Share


@Milky_way
Follow
1x topping and still waiting for a new place.. a new place for my fast-flowering Forbidden Mochi flower
Pre-fertilized with cow manure and chicken manure, a large pile of shells and old used substrate on a former compost pile. I'm still waiting for it to warm up.
At the end of the week, I will do a radical topping cut of the entire flower, it will go outside in a week.
Spraying Biobizz Fishmix 1ml/l


Likes
2
Share


@BakingBaked
Follow
This week was all about letting her recover from the cloning. Sadly most clones I took did not made it. Just 2 survived my inexperience hands.
The good news is that miss Daisy it's doing so well I may be able to give it another try before flipping to flower. I have no rush for this harvest so will probably give it a try.
After the cloning and some extra pruning she recovered in no time. The roots look good, just wish the nutrients did not stained them, that way would be easier to sight any root rot if present.
🗓️ Day - 28
⏰ Hour - 8:30 am / 10:00 pm
🌬️Air Temp. - 74 / 77
💦Humidity - % 50 / 54
⛽️ TDC (ppm) - 630 / 650
⚱️Reservoir Tmp. - 73 / 72
⚗️PH - 6.1 / 6.1
🌿 Looks perky and happy after pruning. She’s is recovering very well. Her roots are showing new white hairs so seams she’s liking the higher nutrients levels.
🗓️ Day - 29
⏰ Hour - 9:00 am /
🌬️Air Temp. - 76 /
💦Humidity - % 54 /
⛽️ TDC (ppm) - 680 /
⚱️Reservoir Tmp. - 73 /
⚗️ PH - 6.1 / 6.1
📝 Added 4 Gallons of tap water starting feed for week #5 with higher nutrient concentration so ppm should stay around 600. Also added 10 ml of hydrogen peroxide to the reservoir.
🗓️ Day - 30
⏰ Hour - 8:00 am /
🌬️Air Temp. - 76 /
💦Humidity - % 54 /
⛽️ TDC (ppm) - 680 /
⚱️Reservoir Tmp. - 73 /
⚗️PH - 6.2 /
🌿 Bouncing back very well and has nice new roots coming out.
🗓️ Day - 31
⏰ Hour - 8:15 am / 9:00 pm
🌬️Air Temp. - 75 / 76
💦Humidity - % 61 / 60
⛽️ TDC (ppm) - 680 / 710
⚱️Reservoir Tmp. - 72 / 73
⚗️PH - 6.2 / 6.2
🌱 Two clones left of Sour Diesel show small signs of root development. Other samples did not made it.
🗓️ Day - 32
⏰ Hour - 8:10 am / 11:30 pm
🌬️Air Temp. - 75 / 76
💦Humidity - % 61 / 57
⛽️ TDC (ppm) - 710 / 740
⚱️Reservoir Tmp. - 72 / 72
⚗️PH - 6.2 / 6.2
🗓️ Day - 33
⏰ Hour - 8:10 am / 11:00 pm
🌬️Air Temp. - 73 / 74
💦Humidity - % 49 /
⛽️ TDC (ppm) - 770 / 800
⚱️Reservoir Tmp. - 72 / 72
⚗️PH - 6.2 / 6.2
🗓️ Day - 34
⏰ Hour - 7:30 am / 10:00 pm
🌬️Air Temp. - 74 / 74
💦Humidity - % 52 / 53
⛽️ TDC (ppm) - 820 / 880
⚱️Reservoir Tmp. - 72 / 72
⚗️PH - 6.2 / 6.2
🗓️ Day - 35
⏰ Hour - 7:30 am / 9:00 pm
🌬️Air Temp. - 73 / 74
💦Humidity - % 55 / 52
⛽️ TDC (ppm) - 910 / 960
⚱️Reservoir Tmp. - 71 / 71
⚗️PH - 6.1 / 6.1

Processing
Likes
50
Share


@WsCalighost
Follow
Nice flowering stretch time to see some buds soon i guess.
It has stretched nicely i guess during the flowering period.
I have upgraded the tent size to 1m x 1m x 2m and seems to be better air flow and humidity levels.
Also changed the hygrometer to a AirComfort bluetooth wireless monitor which gives great detailed information on temps and humidity as per picture added.
Finally pistils have developed cant wait to see bud sites.
Likes
4
Share

@Pechu420
Follow
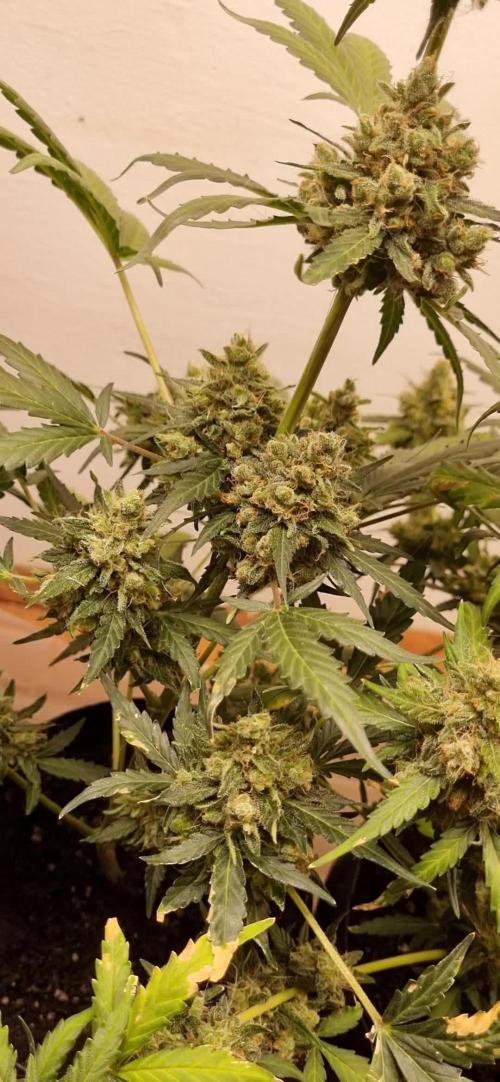
They are nearing the end of the flowering season, and the scent is delicious.
12/12 from seed
Watering with filtered tap water every 2/3 days, when the pot is lighter, 500-1000ml
Soil:
peat, coconut powder, perlite, carbonized rice husk, sheep manure and worm humus. essential mineral mix, vegetable flours, vegetable cakes, biochar, bokashi EM1 and other organic inputs, Algae ascophyllum nodosum
small pots 3,7liters // 1gallon
light: lm301h-evo
120watts with other plants


Likes
202
Share


@CrazyHorse
Follow
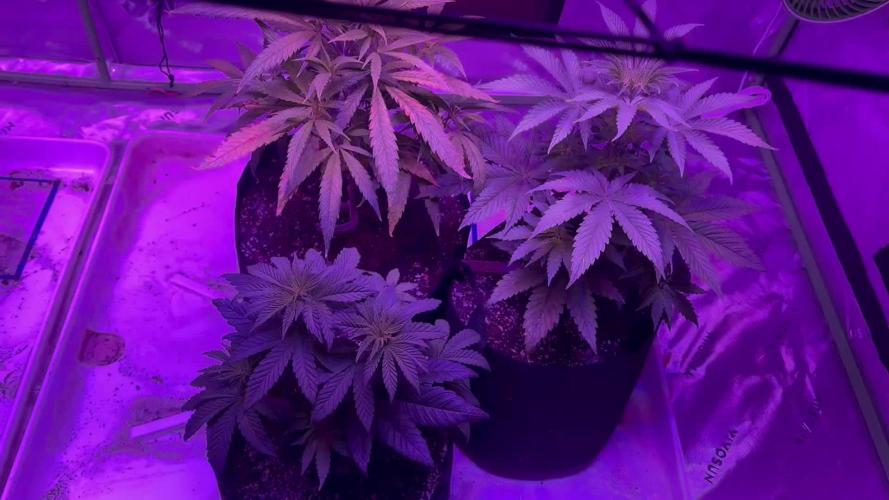
Hello my beautiful friends 😇 😇 😇
After 3 weeks on grow period flowering stage is here 💪 💪 💪
Day- 22
The girls started to be very bushy, as they start showing first sign of flowering I go into the action and I proceed a small defoliation 🙌
Nothing big just to maintain a healthy growth and airflow 😇 😇 😇
Day- 23
Around two or three days ago I make a new tank of 10l... Nearly entire solution goes 😇
I have got heavy drinkers here 😂 😂 😂
All the best, You Lovely Girls Growers 💪💪💪
Likes
22
Share


@Luv2Grow
Follow
Day 57 - Starting week 9 and WOW, what a difference in week. I’m thinking this girl is gonna end up being a beast. She’s stretching about an inch every day and filling in more and more each day. I’m ready for the next few weeks of more of the same. Growing is still fairly new to me and I can’t be happier with the FastBud genetics and how this girl is looking so far. Will give her the next foxfarm trio feeding on Thursday.
Day 58 - Not much to really update. She’s getting fatter and filling in everyday and getting pretty frosty. Will give her her next feed of foxfarm tomorrow. It amazes me, how much she fills in and fattens up each day.
Day 59 - I’m still amazed by the growth everyday. She’s looking pretty amazing. Gave her the last week 9 foxfarm feeding and will give her straight water until the week 10. She’s still got a couple weeks to go but can’t wait for her to be finished.
Day 60 - Looking great. She slowed down her drinking a bit so held off on watering her but will check her out tomorrow and see how thirsty she is. She’s defensively fattening up each day but still a couple weeks before I think about chopping. She’s got lots of growing time left.
Day 61 - She’s really starting to smell the place up and it amazing. She was pretty thirsty, gave her a full gallon of pH’d water before she started any sort of runoff. All looking good and can’t wait for her to finish.
Day 62 - Nearing the end of week 9 and really pleased with this girl. She’s really starting to fatten up and fill in. Still a couple weeks left but can’t wait to harvest and try this girl.
Day 63 - Ending week 9 and looking sweet. She’s really starting to pack on some weight and filling in nicely. She’s definitely starting to get frosty and starting to smell really good.
Processing
Likes
28
Share


@Bud_E_grows
Follow
Cruising right along. Baby girl is definitely devilish. Week 11 feed this week ph 6.4 runoff at 6.6 environment high of 81.9F 51%RH low 67.5F 39%RH. She’s stacking at top still shooting pistils out slowly. Taking slot of real estate in tent had to get rid of one other plant :( but this one shall prevail. Super eager for the buds. The scent she leaves on your fingers after interaction is lovely.
Likes
15
Share


@MG2009
Follow
09/29/2020
Washing off all the nasty dust, pollen,and such that has accumulated over her long veg and flower period.
She is 72.1 grams wet I guess she should dry out to around 18-22 grams. Which is fine as this was a tester to see if I will do again.
I am keeping a clone till I grow a few dozen more seeds, to see different phenotype/genotype. It will take some time but I am hunting for a UNICORN before I will stop! 🙏 lol
Good candidate for a grafting project
Will update the rest of the report in a couple weeks to let dry out and cure some before testing. I chose this strain because it is said to not make me hungry and no red eyes but I will let you know soon.🙏
10/07/2020
She's dry and jarred up final weight 21.2 grams. Smell of hay and sugar should improve over next couple weeks.
Preliminary smoke report, very smooth not much taste but feel it right away soon after first hit last 3.5 hrs. So just waiting on the cure for full flavor report.
Processing
Likes
5
Share


@sercultiveta
Follow
35 dias de actividad en el indoor, foto periodo de 20 horas de luz y 4 de oscuridad


Processing
Likes
11
Share


@PowerofNature96
Follow
To germinate the seeds I put them in hot water for 12 hours, I put them in a dish with slightly damp paper and closed it with the film. The seeds are germinated in 48 hours. At this point I put the seeds in plastic cups previously drilled and filled with a mix of ground professional plus 30%, coco professional plus 69% and mychorrhize 1%, at a depth of 3 cm. Then I watered with 5 ml of distilled water with rhizotonic and NPK + micro elements 20-10-10 ph: 6.0 and c: 0.5. After 3 days the little ones came out. At 7 days from the seed the young plants exhibit an incredible vigor and an already thick and strong root system.


Likes
43
Share


@The_Good_Twin
Follow
09 May 2021
Today starts the 15th week of my grow, and the 6th week of flower. Just over a month till the scheduled harvest, and today the nutrient amounts change according to my feeding chart. So today feeding went like this: CALiMAGic 5ml, FloraMicro 7.5ml, FloraBloom 15ml. Today we aren’t using any of the FloraGro, and won’t be for the rest of the grow. I chilled the water again, but not as long this time and the temperature of the solution was 56.3 degrees F. I thought it odd that the website doesn’t allow for entries lower than 50 degrees in that block, but oh well. The initial pH was 5.89, and I added pH UP 2.5ml which adjusted the pH to 6.53. The runoff pH was 5.63. Lower than I want, but still within range for a healthy plant. Temperature in the tent was 81 degrees F, and humidity was at 53%. The plant looks great, and is maturing quite nicely.
11 May 2021
Today was a busy day! My DarkStar Kush is doing very well! The smell is starting to get stronger and the buds are fattening up as well. I’ve noticed some mild nutrient burn on some of my leaf tips, but nothing terrible. I’ll keep an eye on it to make sure that they don’t get worse. I haven’t really made any adjustments to the nutrients lately with the exception of increasing the FloraBloom by 2.5ml’s, and stopped using the FloraGro in accordance with my feed chart. Feeding today went as follows: CALiMAGic 5ml, FloraMicro 7.5ml, and FloraBloom at 15ml. The initial pH was 5.85, so I added 3ml of pH UP to increase the pH to 6.52. The runoff pH was 5.65. I finally received my TDS meter today, so the TDS reading was 1070 ppm. My feed chart says that the ppm range in looking for is 1050-1400 ppm, so 1070 puts me in that range. I chilled the water again today, and it was 46 degrees F. The temperature in the grow tent was 81 degrees F, and humidity was 40%. So far so good, and I’m starting two new diaries today for some clones I was gifted by Buddabud, so check them out.
13 May 2021
Just when I thought I was on cruise control with my baby here, she throws me a slow curve. The question is; will I hit it, or miss it? The light nutrient burn that I noticed in my last entry on the 11th has gotten just a small tad worse, but nothing terrible. I believe it’s not from the feeding, but the build up of nutrients in the soil. I finally got my TDS monitor as I noted the other day, so I tested the ppm in the runoff and it was over 4000. Then, as I was shaking the excess water off the end, the end cap for the battery came off and the whole monitor plunged back into the water completely submerging for a moment before I could get a hand free to grab it. It’s been sitting in a bowl of rice since yesterday. I just hope it dries out and keeps working. I need to see what the TDS of the soil at this stage is supposed to be and then either keep going and damn the burn, or maybe feed with pH’ed plain water for a feeding or two and then see how it reacts. I’m still deciding, but will research first before making my decision. For today I kept to the feed chart. I gave the following: CALiMAGic 5ml, FloraMicro 7.5ml, and FloraBloom 15ml. The initial pH was 5.92, so I added 2.5ml of pH UP which raised the pH to 6.47. That is what I fed the plant. The TDS reading of the feed solution was 1036 ppm. Runoff pH was 5.63. Tent temperature was 79 degrees F, and humidity was 40%. I have just about 4 weeks left in this grow till the scheduled harvest.
15 May 2021
Today is the last day of the 6th week of flower, and I’m going to try and arrest my mild nutrient burn on my baby. I’ve decided to just give water and CALiMAGic today properly pH’ed to see if it does anything to improve the situation. I wanted to have a significant amount of runoff today so I fed 1.5 gallons of water with 7.5ml of CALiMAGic. The initial pH was 7.60, but adding the pH DOWN is much different than adding pH UP! I initially added just 0.5ml to the gallon of water which lowered the pH from 7.60 to 4.9. I was like, “DAMN!” 😳 so I had to pour it all out and start over again. I learned through research never to mix pH UP and DOWN in the same solution. If it’s wrong, you need to start over;!so I did. After 3 tries and lots of wasted CALiMAGic, I finally got it right by only adding 5 drops (gtts) of pH DOWN to get it to 6.64. The TDS meter dried out and still works, so the TDS going in was only 403ppm. Like I said, I wanted a lot of runoff to try and clear out some of the nutrient buildup in the soil. The runoff pH was 5.58, and runoff TDS was 3803 ppm. Daytime temp was high today at 86 degrees F, and humidity was 31%. She looks good. She smells good. I hope she stays good! A few weeks left till harvest!


Likes
151
Share


@PapaNugs
Follow
First week of flower going well. I've been adjusting the lst ties to spread these girls out. Been getting water every other day to every day. They've been drinking a lot.
When I went to adjust after taking pictures, I snapped off my last main branch I was working on. F me. Whelp it should be ok

Processing
Likes
4
Share


@fezzollas
Follow
The time is coming. It's very healthy, I ended up exaggerating a little bit with the fert, but don't panic, it's organic, it caused just a little burnt on the edge of the leaves. The weather is stabilizing, it stopped raining here and the humidity is normal now. The pistils are starting to fester and are resining too much. She is very fat, the smell is strong every day and I am totally in love with her.

Likes
46
Share


@Chubbs
Follow
420 Fastbuds Week 9
Gorilla Punch Auto
Week 9 for these two ladies. I decided to give them some added nutes a few feedings back and boy did they not like it. Over all the flower are still maturing nice and no other apparent issues besides the burnt leaves. Almost finished for the one but still a couple weeks on the other. All in all Happy Growing.
Likes
72
Share


@Roberts
Follow
I am starting Auto Maxi Gom. I scuffed the seed lightly, and placed her in a glass of water. She will be in there for 24 to 48 hours. Basically once I see a root tail start I will drop her in the coco. I will dome her and keep moist. She will be under a Medic Grow Mini Sun-2. She will be in Xpert nutrition. Thank you Medic Grow, Seeds Mafia, and Xpert nutrition. 🤜🏻🤛🏻🌱🌱🌱
Update: first seed appeared to be a dud or just really slow to germinate. I started a second seed, and it went right away.
Thank you grow diaries community for the 👇likes👇, follows, comments, and subscriptions on my YouTube channel👇. ❄️🌱🍻
Happy Growing 🌱🌱🌱
https://youtube.com/channel/UCAhN7yRzWLpcaRHhMIQ7X4g
Likes
3
Share


@Didier_ridoux87
Follow
elles devraient être plus développées, j'ai eu un soucis avec mon ph mètre ce qui fait que mon eau avait un très mauvais ph, ce qui a entraîné des carences qui ont réduits considérablement la croissance. Je tiens à m'excuser auprès de @madamegrowfans @madamegrow.official @barneys_farm_products et @biotechnology_officiel qui ne sont en aucuns cas responsable de cette avancée au ralenti, c'est uniquement moi le responsable.
#zenationcrew

Likes
11
Share


@sweetkaya
Follow
Day 58 - Adding Big Bud Coco to the nute mix, seems that it's doing its job 😁
(Yes, I need a bigger closet 😅)
Keep on growing 🙏😋
Day 63 - Haf some problems with my EC pen the last days, it wasn't clean so I overfeed a little bit but I noticed almost immediately so I've cleaned it and re-done the nute solution. Just a few tips of Gelato's leaves were burnt, nothing to worry about. I think 4 weeks from now and the Purple Lemonade will be ready for harvest, so other 5 days of Big Bud and then I'll switch to Overdrive for the final boost before ripen and flush 🙏