
Processing
Likes
Comments
Share


@Tazard
Follow
We have a very full tent! Taz’s jungle 😂🤣. Check out the purple purple photos from day 20!!! Everyone looks absolutely beautiful I’m hoping that the white critical will be ready in 4-5 weeks. She’s going to have some fat colas!

Likes
6
Share


@DaddyPrime2
Follow
i was surprised that she was done on 2/15/25
spidermites had completely taken over one bud so i decided to check trichomes and she seemed ready.


Likes
11
Share


@Madman2020
Follow
Vegetative Steering
71f/60%
6:30 220 P1
6:49 440 P1
7:08 660 P1
7:27 880 P1
7:46 1100 P1
8:09 1320 P2
10:45 1540 P2
11:04 1760 P2
03:00 1320 P3
Day 14
Plant training shows most here. I do not like the look of a doubled topped plant.(will continue to do one top per 6 week Veg)
Day 15
Secret sauce microbes 1ml per.
Day 16
Tricantonol Spray(150ppm)
Did that spray fix the sick plants? I think so
15 of 16 plants have preflowers.
the 7 week veg plants are my favorite.
7 weeks is good if i will be topping twice
The third fan was crucial to humidity control
Day 17
Sprayed 6 plants(pictured right) with Jas
wondering if these 6 will have stunted growth.
Either they will have a stress response and halt root growth to early OR they grow normal but are a but frostier
These 6 will be sprayed a second time during week 4 BEFORE the bud sites are medium sized.
The other 6 will be sprayed once wk4 qnd once wk 5

Likes
55
Share


@Xpie77
Follow
Will start defoliation in 2 weeks. Want to try not to do that to soon. Started give some food to the ladies. Some like it, soms its just a bit to much.
💚Please Like This Diary and Leave a Comment!💚
Plants are growing nicely! Just some water @ pH 6.5
Red Wine was created by crossing Rozay F2 with Jet A. They are 2 very powerful aromatic Cali hybrids. This exclusive new Cali strain is a very strong and fast flowering indica-dominant strain. It has an aromatic, intoxicating and relaxing effect. That is comparable to enjoying a good glass of wine.
Red Wine has an average flowering time of about 7-8 weeks when grown indoors. Outdoors it is ready fairly early, usually around the end of September.
The yield is very good. Indoors she has an average yield of 450-650 gr/m². When growing outdoors, 600-800 grams can easily be achieved per plant.
Red Wine has an aromatic scent that can be compared to a full red wine. Her full, purple-green buds are very compact with few leaves. This is very convenient when cutting the plants and saves a lot of time. Smoking this weed gives you a nice high with relaxing properties. The taste of Red Wine is very fruity sweet with an aroma of red grapes.
Flowering time: 7 – 8 weeks
Genetics: Rozay F2 x Jet A
30% Sativa, 70% Indica
Plant height outside: 100 – 180 cm
Outdoor harvest month: from June to October
Yield indoors: 450 – 650 gr/m²
Yield outdoors: 200 – 800 gr / plant
THC: 25%
💸💸💸Wanna Try Red Wine from Seeds Genetics?💸💸💸
https://seedsgenetics.nl/product/red-wine-gefeminiseerd/

Likes
32
Share


@Borberad
Follow
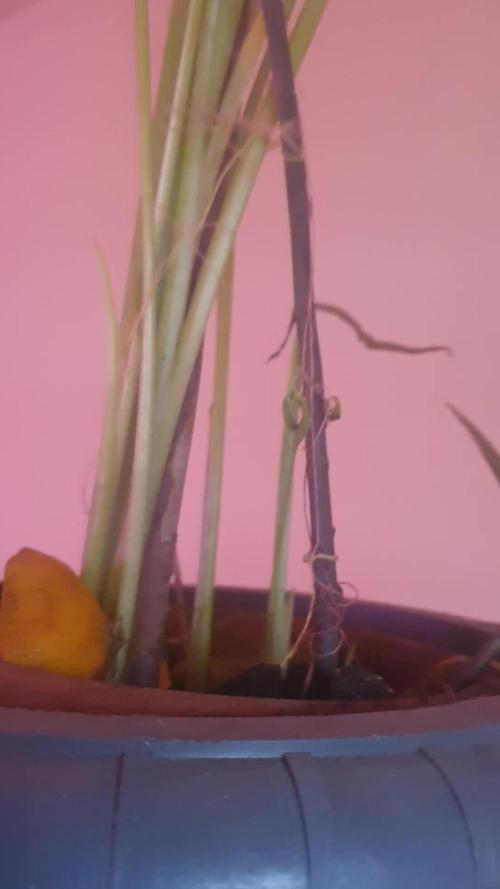
Keine Samen trotz Pollenbeuteln. Glück,
Gehabt, viel Glück gehabt. Pflanze lecker und stark, sehr guter Rosin produzent! ⭐️⭐️⭐️⭐️⭐️


Likes
31
Share


@The_Bearded_Grower
Follow
Welcome to 📅 Day 1 of veg 3/15/2021 as you can see the seedling has grown a lot she had a 1 inch root sticking out the bottom already so I know the root starter was working. If you look close you can see she has her first true leaves and that's when I say day 1 of veg has started. I will do the video tomorrow
germination under the mars hydro TS 1000 was a dream the dimming gives it a hand up over my Aglex light. I am growing the plants side by side this one is under the TS 1000 and the other will be under the Aglex 1200 to see how they compare. I have high hopes for the TS 1000 🌱🌱🌱
Update 📅 Day 3 of veg 3/17/2021: she is coming along very nicely her first true leaves are getting very large. I have the TS 1000 putting out 13253 lux. I'm top feeding her for about the first 2 weeks so the roots get down in the soil far enough for the auto-pot to do its job
Update 📅 Day 6 of veg 3/20/2021 she is growing fast and strong under the TS 1000 the second set of leaves has started and progress is great I adjusted the lux down a bit

Likes
3
Share


@OldskoolHed
Follow
Starting to get pom poms nice and early and throwing out tons of frost..had to raise light and dim to 75% was hitting 1300ppfd without co2. No good. Adjusted to aprox. 900-950 ppfd. Stretch is over woo-hooooo🙌
Likes
33
Share

@Cauli
Follow
Week twelve for Strawberry Zkittlez.
This will be the last week for this lady – and we are super satisfied on how she performed in that 3l pot.
Resin production is absolutely high level, lollipoping helped her a lot to focus on her remaining buds and she is really beautiful.
Super nice one :)

Likes
202
Share


@CrazyHorse
Follow
Hello Hello 🙂 😇 🙃
Today is day number 50, firs day of week 8th 😇
I never ever grow so fast strains, FB seeds are a monsters 😇 💪 🙏
Update:
Day 50
The Cinderella and the Bruce Banner start to show some deficiency of Cal and Mg as they flowering wildly. Not a big deal I just increase CalMag Agent from 0.3ml/l to 0,5ml/l plus I'll add BN Roots for better nutrients intake.
I hope this will help 🙏
All the best, You Lovely Girls Growers 😇 💪 🙏


Likes
24
Share


@FlynnRyder
Follow
So These girls are doing great in my unprofessional opinion lol. they all look like they could use a cleanup but man if I come at them again like Sweeny Todd I don't think they will make it haha. This is rolling into week 3 so I'm going to wait just a couple of days and then I'm going to hard Lolipop and defoliate just a wee tad more. I'm just worried I could herm one out and I don't really know what to do with that situation. I've been playing around with Great White and that's been fun but aside from that, I'm just weaving these tops through squares. those corners could be a problem but let me know in the comments if you think I need additional light in the center or your thoughts. OH, I ALMOST FRGT LOL! so I mixed microflora and aqua flakes B together and the plants might have sat in that while I cried for an hour over the hundreds in nutrients I just ruined lol. I dumped the system and redid it though so we gucci

Likes
2
Share


@Jofflepov
Follow
Finally some strong summer days. Plants are swelling. All good. Still a big difference. Biggest plant seems weeks ahead.

Likes
10
Share


@eldruida_lamota
Follow
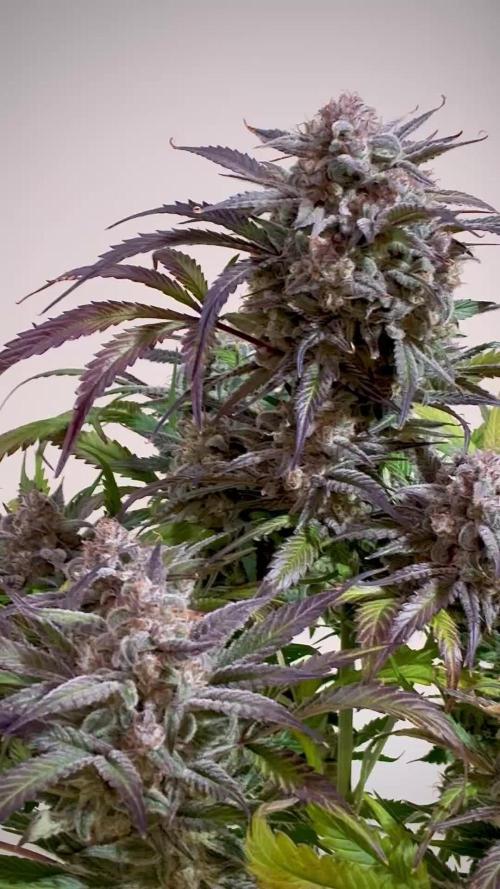
Que pasa familia, vamos con la cosecha de estas FBA-2506 de FastBuds.
Por dónde empezar, es una autofloreciente que es normalita de cultivar, tiene un periodo corto de crecimiento y de floración igual no es largo.
En cuanto a la alimentación , pues la aplique una vez por semana y a sido suficiente, se a comportado bien en interior, la flor pues no es muy prieta porque no deja de ser una autofloreciente, pero es una flor que va repleta de tricomas, y tienes unos colores morado intensos.
El periodo de luz pues de principio a fin a 18 horas, fue suficiente para completar el ciclo de vida como esperaba.
Hasta aquí todo, Buenos humos 💨💨💨
Likes
8
Share


@first_time_grower
Follow
The gals are gorgeous! The Durga Mata II CBD can't get enough to drink! Oh and they smell divine...


Likes
2
Share


@KeemBboomin
Follow
Everything is not as accurate as I would like to say, but I wanted you guys to see what I can do


Likes
59
Share


@JeyGanesha
Follow
Un altra settimana è passata e tutto procede bene.per fortuna non ho più trovato nessun nanners 🙏✌️💪..belle piantine mie, continuate così che farete delle belle pannocchie....
30/8/24 gente ho combinato una bella cazzata.pur avendo esperienza, mannaggia a me,mi sono portato a casa dentro il box, il cazzo di ragnetto rosso... fanculo...
Ho già iniziato a ripulire tutto, box e piante con Neem...li sterminerò tutti 😂..
