
Likes
Comments
Share


@SirBudAlotts
Follow
Wow! So I have reached the end of this journey with 4 wonderful ladies 🚺 ❤️ 💕..
This was the easiest grow of my life lol! And she packed on size and stinky aromas everywhere..
Big shout out to the Kannabia Team!!!! Excellent strain, amazing colors, fat Colas, everything that makes you smile during harvest! Thick Frost coating..
Also big shout out to everyone that has been keeping an eye on this diary..Much love from my heart grow community ♥️
Perfecto 😀😃🌿🌿

Likes
1
Share

@Skipi_CZ
Follow
The girls are doing well, more ingredients from advanced nutrients will be added during the week, hopefully everything will go as planned
Likes
15
Share


@Venabr96
Follow
Armario posto em fase de floraçao.
Rega de 4 a 4 dias com 2l de agua desmineralizasa.
Deixei a lampada cair sobre elas , piqueno incidente 😣😣
Mas esta tudo bem só perdi uma folha da piquena uma da grande e algumas queimaduras 😣😣


Likes
4
Share


@krizth
Follow
It is my first harvest of feminized plants, I hope that next time I do better, although I would not recommend planting 3 BSF in 80x80 greenhouse because they really grow quite a lot.


Likes
34
Share

@GrowBro1981
Follow
Hallo liebe Growfreunde 💞
Zum Abschluss stand heute die Ernte der Gorilla Zkittlez an. Nach ca.48 Stunden Dunkelheit, habe ich sie eben vorgetrimmt und in das trockenzelt gehängt. Die Pflanze war wie auch die Green Gelato und die Peyote Critical super einfach zu growen. Ich bin auf den Ertrag gespannt. Sehr massive Buds, hart und schwer🤗😎. Alles in allem eine tolle Pflanze.
So, jetzt mal ein Resümee des gesamten Grows: 6 verschiedene Pflanzen in einem 2qm Zelt mit 3 sanlight Lampen (liefen max auf 65%), konnte ich sehr gut gemeinsam über das Autopot bewässerungssystem kontrollieren, nur CalMag und PH-korrigiertes Wasser, sonst nichts. Dünger wurde vor dem eintopfen dem Substrat untergemischt. Ergebnisse ist Top liebe Growfreunde💞💪. Bisher ohne die Gorilla Zkittlez liegen wir bei einem trocken Gewicht von sagen und schreibe 735g👀 (Gorilla Zkittlez fehlt nocht). Ich würde sagen dass Experiment ist gelungen. Kein LST oder HST, kein Topping garnichts. Entlaubt und wachsen lassen. Das Netz hab ich am Ende nur gebraucht um die Äste zu stützen. Mit ein wenig Training und lollipoppen könnte man noch gut optimieren und bessere Ergebnisse erzielen.
Und liebe Growfreund💞,
Ich muss sagen ich bin ein wenig enttäuscht von dieser Plattform. Man wird eigentlich kaum gesehen, weil alles total überfüllt und überladen ist. Ich starte bald eine eigene Plattform und hoffe dass Ihr dass vllt ähnlich wie ich seht🤔


Likes
16
Share


@Oldwied
Follow
I am super happy with the harvest.
Unfortunately, the grow was not a brilliant performance. But MimosaEvo is always a great choice.

Likes
15
Share


@I_Identify_As_A_Dan
Follow
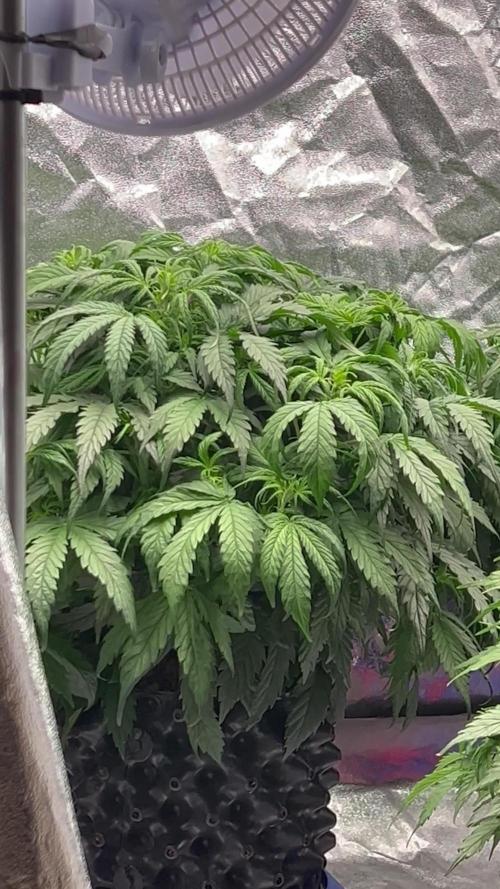
Week 18 for Gelato 41 by seedstockers
She's just becoming a monster... i know i went through a period of barely feeding her... well this week she's been fed 5-7L of water plus heavy heavy sprays every night😂 so a bit of a change up she doesn't seem phased either way. Im a little worried when it comes to flowering because she barely/never gets wind & her branches aren't very strong. Which is one of the reasons I spray them heavy every evening to build some strength. She also needs a nice defoliation again to keep PM away + also need to start thinking about giving her flower dry amendments top feed because i think she's partly going into flower because of the shade.

Likes
3
Share


@Northern_Ent
Follow
June 28: Tropicana Cookies FF is progressing nicely and well timed for the end of June. Supercropped (HST) the two main stems to bring the outer growth tips to the same elevation as the four inner ones. Taped with floral tape to stabilize after supercropping.
watered with about 0.5 tsp/gallon of Extreme Blend which is half strength.
June 29: plant looks very happy today and it’s warm and sunny.
July 2: did final (third?) round of topping to get from 8 to 16 colas. Unlike some others I’ve grown, this plant is nicely symmetrical which should be easy to manage. Fairly tall which is fine.

Processing
Likes
9
Share


@shabazz411
Follow
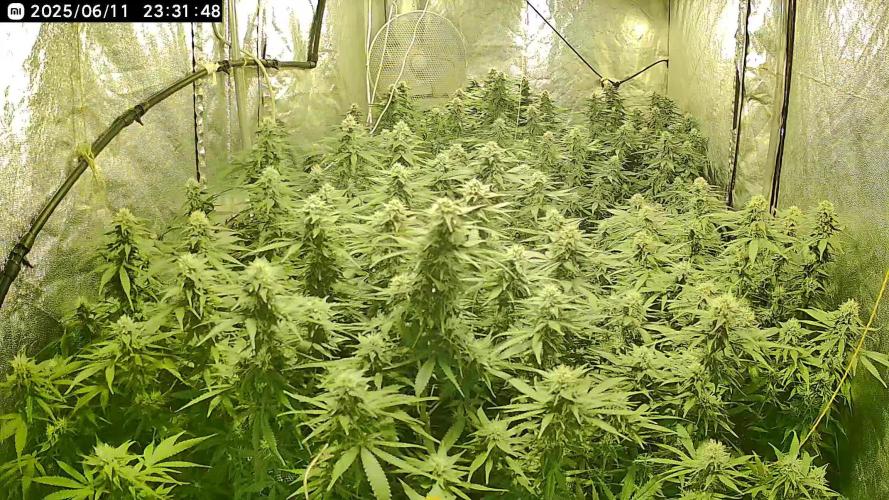
Last week was the last feed week we will be flushing the plants for the last two weeks of this grow flushing with kleens by cyco and a touch of molasses to finish of this grow of the year harvest in two weeks

Processing
Likes
65
Share


@ASCBOOGS
Follow
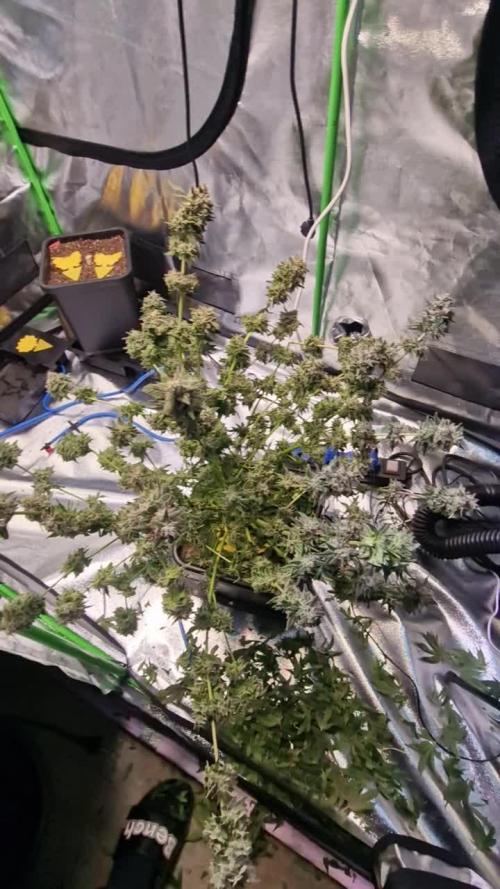
Everything seems fine but seems like things are starting to slow down so I decided to feed plain ph'd Water the last 2 feeds will be continuing with normal nutrients solution again I have 3x strawberry stardawg which all still have White pistols 2x critical jack which has 60% amber pistols 1x strawberry diesel 40% amber pistols and 1 somango all white will try post pictures soon p


Likes
12
Share


@Kakui
Follow
Veg32, gran defoliación y Lollipop, riego con 2.0 EC y 6.2 pH. Están entre 25~28 centímetros de altura. En esta misma etapa en el cultivo anterior, estaban solo de 20cm, eso quiere decir que hasta ahora el crecimiento ha sido más eficiente.

Likes
50
Share


@crimsonecho
Follow
going fine. that tip bleaching is here to stay :)
i’m defoliating and lollipopping everyday. couple of leaves here couple of leaves there a growth tip here a side shoot there..
watered yesterday with 3.5l or something. distilled dehum water.
caribe transitioned too fast. it didnt give me any stretch which was strange and cannalope as expected hasnt even started transitioning. i think caribe is gonna be overshadowed by the cannalope.
dinachem looks lighter in the photos but its not really that light green in color. dinachem x peyote cookies gave me more stretch than i expected but seed runs are always full of surprises haha they both finished stretching atm so they will start filling up in the coming weeks.
destroyers are fine too. yeah tip bleached a bit but leaves are very healthy otherwise. they feel soft and firm which is how they should feel. i’m plucking 10-20 leaves daily and it grows back the next day. they may give me a couple days of stretch but its not gonna grow much more than this. its not gonna double from here i mean and the 2nd destroyer is gonna be about 25% smaller than the 1st because as i mentioned not identical clones when transplanted but i’m still expecting exceptional yields and quality from both.
‘till next week!


Processing
Likes
12
Share


@medicalcannabelfast
Follow
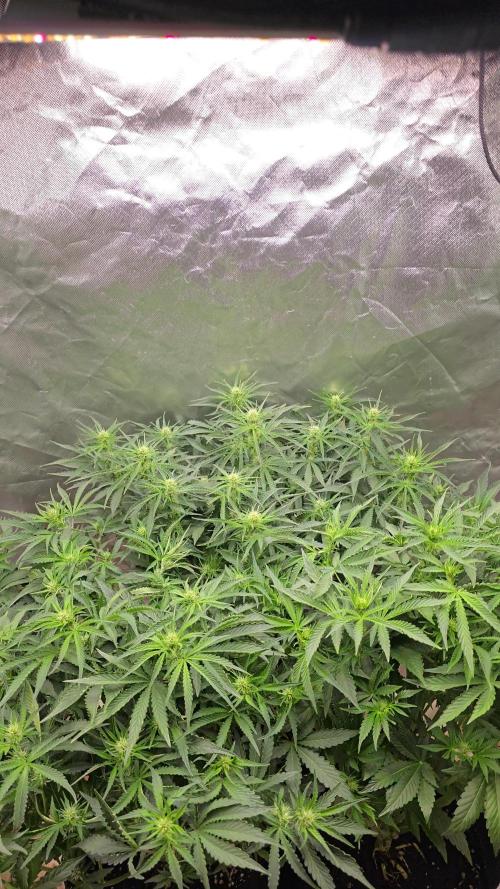
So far so good , these girls are coming alone better than I was expecting ,
I’m not sure were I went wrong but I fucked up early doors with these 2 girls :( , but they have surprisingly recovered well and seem to have produced plenty of budding sites that look like they are swelling and growing nicely :)
Likes
39
Share


@GrowWiththeBro
Follow
Mild flushes last week.
Day 54/ Day 1 of Flowering. Fed and light defoliation.

