


Processing
Likes
94
Share


@Master_weeda
Follow
Good morning all
Day 63 and everything goes wonderfully I think for most that feels the end.
Some begin senescence including my gorilla glue from fastbuds and northen light auto from RQS
I start rinsing all of my 5 plants except the bubblegum which has not started to flower after 63 days
I specify that in terms of performance the blueberry auto of pev seeds and the most prolific it is beautiful. 😍
The gorilla glue from fast_buds is smaller but is not left behind because it is loaded with nitroglycerine 😋
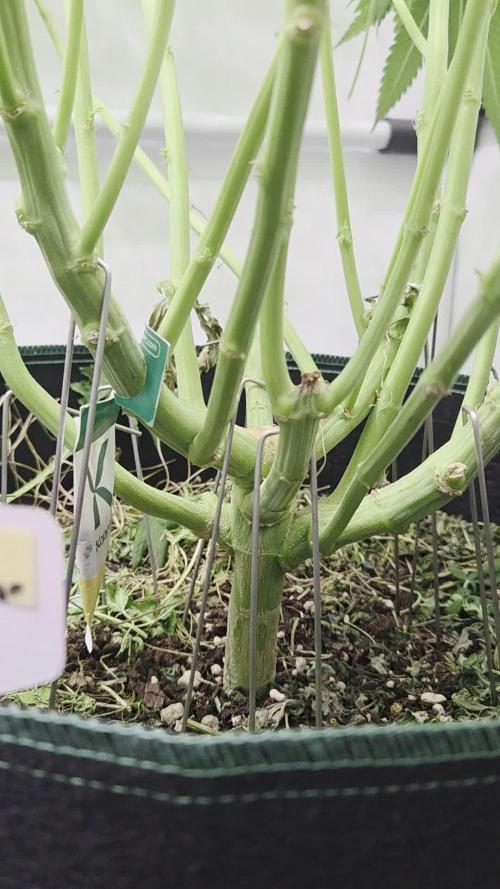
We are no longer far from the harvest I am doing a final defolliation in order to let the light reach the lower heads
I think that within a week for some to two weeks for others they will all be harvested
What a pleasure for this run even if the weather is long approaching the harvest ... patience is the mother of all the virtues 😉
May the strength be with me 💪
And in french langage
Bonjour a tous
Jour 63 et tout ce passe à merveille je pense que pour la plupart cela sent la fin .
Certaines commencent la senescence notamment ma gorilla glue de chez fastbuds ainsi que la northen light auto de chez RQS
Je commence le rinçage de la totalité de mes 5 plants hormis la bubblegum qui n'a toujours pas commencée à fleurir après 63jours
Je précise que en terme de rendement la blueberry auto de pev seeds et la plus prolifique elle est magnifique. 😍
La gorilla glue de chez fast_buds est plus petite mais n'est pas en reste car chargée à la nitroglycérine 😋
Nous sommes plus très loin de la récolte j'effectue une dernière defolliation en vue de laisser la lumière atteindre les têtes du bas
Je pense que d'ici une semaine pour certaines à deux semaines pour d'autres elles seront toutes récoltées
Quel plaisir pour ce run même si le temps ce fais long à l'approche de la récolte... la patience est mère de toute les vertus 😉
Que la force soit avec moi 💪


Likes
16
Share


@Tezza2
Follow
The purple lemonade auto is growing better its looking good the gorilla glue auto isnt showing any sign of preflower yet im starting to think it may be a photoperiod plant .The gorilla glue auto still isn't showing any sign of preflower yet i dont know what to do i don't want to go to a 12/12 because i dont want to stuff up my purple auto thats in flower
Likes
8
Share


@Squaregrouper
Follow
The tree is very fruity has a extremely sweet fragrance mixed with pineapples like a pineapple dum dum but when you brush against the tree or rub a bud.. it is reminiscent of old school Bubblicious bubble gum the pink kind they sold back in the 80s.

Likes
60
Share


@BOMbolenath
Follow
Buds getting bigger. This strain is very greasy, a lot of resin. It smells very sweet, amazing.


Likes
10
Share


@4F1M6
Follow
Stretch is done and flowers are piling on now! I treated with lost coast as a preventative. I kept the feed the same but it will be altered end of grow week. Canopy is getting hella full can't wait to watch these colas stack on. Until next update. Happy growing and stay lit fam.
Likes
17
Share

@Borberad
Follow
Woche 10
🍒 Kannabia-Ladys Update: Tag 70 / Blütetag 35
Hallo liebe Grow-Community,
wieder einmal Zeit für ein Update unserer beiden Kannabia-Ladys: Cheery Dream und Karibbean Mango. Wir befinden uns heute an Tag 70 insgesamt, was Blütetag 35 entspricht.
Das Höhenmanagement hat uns anfangs etwas Sorgen bereitet, aber wir denken, wir haben die Situation jetzt sehr gut im Griff. Wir haben ich Scrog-Leinen eingezogen, um das Wachstum zu kontrollieren und eine gleichmäßige Lichtverteilung zu gewährleisten.
Beide Pflanzen entwickeln sich prächtig und zeigen erste Anzeichen für eine vielversprechende Blütenbildung. Ich bin gespannt, wie sich die beiden in den kommenden Wochen weiterentwickeln.
Schaut gerne wieder vorbei für das nächste Update!


Processing
Likes
46
Share


@PureMedicin
Follow
Nice growth and bud developtment. Hps still doing its thing while im sitting back and relaxing. Got to keep an hawk eye on watering. I feed full strenght going over to full canna so they were transplanted into soil. Clones doing good but the Lemon skunk clone dont feel to good. Lets see what the week will bring.


Likes
8
Share


@Salokin
Follow
Overall plant wet weight was 2,6 kg after initial trim and removal of all stems, it came down to 2,1 kg, which will end up up somewhere in the high 300s maybe 400 gr dry. Harvested a bit in a hurry as the one mutated bud on the plant looked a bit funky and I feared but rot (all other buds look rot free so far). Tried to take some nice pictures with the plant out of the tent, however she was not able to support herself at all and I will there fore post some nicer pictures of the finished product .
I have to say for a, in the beginning, pretty small plant, she turned out very nice and I would definitely grow her again.

Likes
44
Share


@Cogollo_eu
Follow
**Encontrarás la traducción a español al final de la descripción**
From/Desde: 12/04/19 || To/Hasta: 18/04/19
From day/Desde día: 50 || To day/Hasta día: 56
You can find the Money Maker Diary here:
** Podéis encontrar el diario de las Money Maker aquí:**
https://growdiaries.com/diaries/25667-gorillamakingmoney-gorilla-vs-money-m
-----IMAGES & VIDEOS-----
I'm sorry for not having a tlapse video this week, i slaved the cam onto my 60x60 tent to record the first growing week of another plants, next week i will return with more tlapse videos.
-----WEEK SUMMARY-----
To have a visual size of the plants take into consideration that the SCROG net it's fixed 24 cm abobe the top part of the soil.
There's something i want to correct and remark this week. About the question i asked some weeks ago on growers help, about the plant with decoloring problems (Photos 7 & 13), where i've choose the defoliation answer as the correct one. Watching the plant today, I would say that it can be an excess of co2 in the roots caused by a co2 tablet that I used during the first days of growth. You can notice how the part of the plant in the back does not present de decoloration it have in the front.
Also remarking what i've told last week, i must say the SCROG is not a true SCROG, as some colas begin below others, and also colas are of different heights among all plants. Anyway i'm very happy on how everything is going. And insisting again, I have very very few experience growing cannabis, this is my 3rd grow, 2nd indoor, and first time with photo-period at indoors, and of course is the first time too i'm trying to apply growing technics on a serious way. I really don't know if i'm doing things right or wrong.
-----WATERING CALENDAR-----
13/04/19 - 1.250 ml with all week nutrients -(Sensizym, bloom stimulator, bloom nutrition & amino complex) @ PH6.4 & 1.3 E.C.
17/04/19 - 1.250 ml with Silica Power, Pro Active, Bloom Stimulator, Bloom Nutrition, Sensizym & 5 drops of Amino Complex @ PH6.5 & 1.3 E.C.
*****ESPAÑOL*****
-----IMÁGENES Y VÍDEOS-----
Siento no tener vídeos timelapse esta semana, he esclavizado la cámara en el armario de 60x60 para grabar la primera semana de crecimiento con otras plantas que tengo en el.
-----SUMARIO SEMANAL-----
Hay una cosa que quiero corregir y remarcar esta semana. En sobre la pregunta que realicé hace unas semanas sobre la planta que tenía una decoloración (Fotos 7 y 13), en la que escogí la respuesta de la variegación. Viendo la planta a día de hoy, yo diría que es un exceso de CO2 en las raíces causado por una pastilla de CO2 que usé durante los primeros días de crecimiento. Al fijarse bien se ve como la parte trasera de la planta no presenta las decoloraciones y sin embargo la frontal si.
Para tener una idea más o menos certera del tamaño de las partes de las plantas, tened en cuenta que la red está fija a 24 cm de la parte superior de la tierra de los tiestos.
También remarcando lo que dije durante la última semana, he de decir que el SCROG no es un SCROG real, ya que las colas no empiezan desde la misma altura ni son de la misma altura, ni las plantas son de la misma altura. Pero yo estoy muy contento con como va la cosa, vuelvo a insistir que es mi primera vez con foto-dependientes indoor, mi segundo armario indoor y el tercer cultivo de mi vida, y por supuesto la primera vez que aplico o intento aplicar las técnicas de cultivo. Lo estoy intentando realizar bien y de manera eficaz, pero realmente no se si lo estoy haciendo bien o mal, yo simplemente me lio y veo como responden las plantas.
-----CALENDARIO DE RIEGO-----
13/04/19 - 1.250 ml con todos los nutrientes semanales -(Sensizym, bloom stimulator, bloom nutrition & amino complex) @ PH6.4 & 1.3 E.C.
17/04/19 - 1.250 ml con Silica Power, Pro Active, Bloom Stimulator, Bloom Nutrition, Sensizym & 5 gotas de Amino Complex @ PH6.5 & 1.3 E.C.

Likes
15
Share


@DeepRootsGrowTrees
Follow
AUTO MOON ROCK / DIVINE SEEDS
HARVEST WEEK
This lady was easy to grow she didn't have any issues during her grow. She produced quality stinky buds just covered in trichomes!! She's a heavy
smoke nice and relaxing for both your mind and body. She's a special lady!! Stay Growing!!
Thank you for stopping by and taking a look it's much appreciated!!
THANK YOU DIVINE SEEDS!!! Appreciate you hosting the grow contest!!
DIVINE SEEDS / AUTO MOON ROCK

Likes
12
Share


@DudeGrowsWeed
Follow
February 28, 2019 Update:
Chugging right along in the veg tent. I sprayed the plants with Neem Oil last week and the leaves look shiny from that, but no new signs of bug damage since then. I did feed them a little Recharge also and they really responded great to that.
After taking the pics I did some HST bending at the base of the stem on all plants. I didn't bend them over, just pinched real hard and wiggled the plant back and forth until I could feel the bend between my fingers. We'll see how that goes.
The DinaMed's are still taller than the MediKush's but the MediKush's still have a nice tight node structure. If all goes to plan I'll have my flowering plants chopped and hanging in 2 weeks and will then be able to move these girls into the flowering room.
Bonus pic at the end of the view from my bedroom window. I'd love to see my buds get that frosty!

Likes
38
Share


@ILoVeThiSpLaNt
Follow
La pianta per le bassissime temperature di fine ottobre è stata tagliata qualche giorno prima ma sicuramente la rifarò indoor. Sono molto contento e difficilmente lo sono. Ho detto tutto 😊🖐️

Processing
Likes
19
Share


@Fire_Farmer
Follow
I'm like 5 days late with this update so I have had to pin videos that I took the same week while I was communicating with TRYHARD so ignore any dialogue that's out of context they aren't diary logs they are simply correspondence between myself And TRY, oh and sorry about my language I'm common as muck me.
The pictures are just random pics I took that week as oppose to my usual more organised method but hey ho I'll do a more tidy job next week.
The week went swimmingly barring some nitrogen deff on the lowers which I initially put down to the hot weather drying the pots too quickly and causing nute lockout with the salt buildup so I flushed then gave them a nice feed after they dried the pot at which point I noticed the most heavily afflicted by the N deff were also the quickest drinkers and had lower EC on the runoff so I have been giving them a slightly stronger feed than the others and it seems to have solved everything so I'm happy with that.
Bud development is nice, frost is nice, terps are through the roof right now.....
Zkittlez ones are really stinking of lime and candy bubblegum
Punch ones are stinking berry berry nice!
Grandpas Crush is smelling kinda hazey right now but I'm hoping the berries comes out of her too.
Little else to report really.
Thanks for reading
One Love 💚
Fire Farmer🔥👨🌾