
Likes
Comments
Share


@majklsoft
Follow
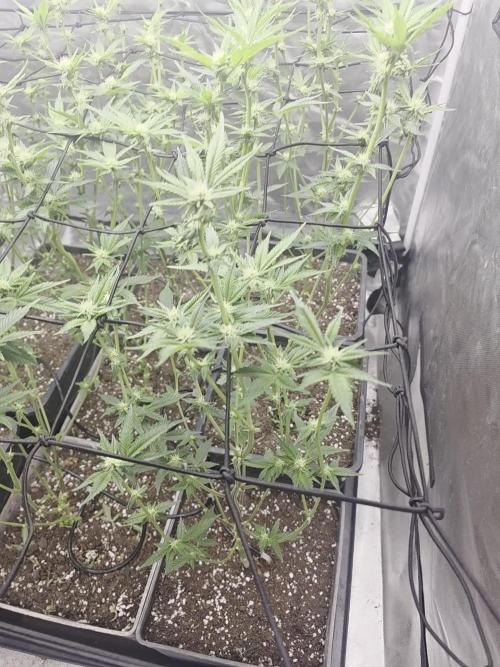
- introduced 7W far red light bulb to boost stretching (girls are VERY bushy)
- slowly drying soil (so I drilled more holes on side of the pot like a cheap dyi airpot)
- preflower
Keyra (the bigger one) is what I would say a stretching phase and Margot (smaller) evidently falls behind but not stretching yet, I hope she catches her atleast little bit..

Likes
49
Share


@LockDownGrow
Follow
Ok just finnished a blunt of this a out an hour ago, and I do not smoke blunts lol
But it seems only right too do a real smoked reveiw ,
So the fbt7 has been dry now for about 2 weeks and in a jar and today was the day too take the first bud too try so I rolled a fat one " fat one in photos lol ,
So for me the flavour just isn't there yet and am hoping that will come after a cure ,
So I smoked this all too my self and qiukly ,
Within a few minutes I went white as a ghost as was twitching the the corner hehehe,
This is very strong bud and I would go as far as saying it's probably the strongest bud I've had in years ,
I am what I would describe as a joker smoker , as I turn my bud into oils and do not smoke it ,
But any serious cannabis smoker will absolutely love this strain ,
Well done fast buds and thank you :)


Likes
7
Share


@Organic473
Follow
My longest vegetative growth to date. This may be her last week in veg, I will keep her outdoor for flowering as of next week….my theory is proven with the solar powered light. I love what she has come…the LST worked for even spacing.

Likes
23
Share


@WolverineGreens
Follow
Everything going good. Growth is starting to speed up 😀. Will start to get a little more aggressive with feeding soon. Excitied for the fall.


Likes
5
Share


@PhatRobs
Follow
She looks good. 2 gallon pot is 100% rooted completely out! No real smell just smells green!

Likes
209
Share


@Rock_n_Roll_Randy
Follow
Day 73 for the 54 plant grow. 42 different strains of photoperiods and 12 different autoflower strains in the:
8X8 GROW TENT WITH THE NEW FC-E6500, FC4800 AND TSW2000 and green buzz all organic/vegan fertilizers🤘
The girls are loving their MARS MANSION and everything is doing good and looking nice and getting bigger👍 lots of hairs clumping up now and they are all getting nice and frosty and starting to stink ALOT. MARS HYDRO ALWAYS GETS EM FROSTY👍.I AM NEVER DISAPPOINTED With how awesome these lights are🤘. KEEP KILLING IT MARS🤘👏👏
BREEDERS AND SEEDS:
DIVINE SEEDS:
MAZAR, OPIUM, WHITE WIDOW, OG KUSH, PABLO ESCOBAR, DIVINE INDICA.
AUTO WHITE WIDOW
AUTO PABLO ESCOBAR
AUTO WHITE RUSSIAN
AUTO FRACTAL
AUTO MONTREAL
AUTO OPIUM
AUTO KABUL
AUTO MAZAR.
WEEDSEED EXPRESS:
GREEN CRACK, GHOST TRAIN HAZE, LITHIUM OG, CHEESE.
DOCTORS CHOICE:
DC KUSH, AUTO NIAGARA, AUTO ROCK MACHINE.
EXOTIC SEEDS:
HIPPIE BERRY, MALASANA GELATO, EXOTIC ANIMAL.
GENE/MEME SEEDS:
BLACK HELL.
ORIGINAL SENSIBLE SEEDS:
PURPLE PUNCH COOKIES, WEDDING CAKE, PURE KUSH, GORILLA COOKIES.
SWEET SEEDS:
BLACK JACK, GORILLA GIRL, SWEET ZKITTLES.
EMERALD TRIANGLE SEEDS:
GORILLA GLUE, MASTODON KUSH.
SEEDSMAN SEEDS:
BLACK SUGAR, PEYOTE FORUM, PEYOTE WIFI, BADAZZ COOKIES OG, PURPLE GHOST CANDY, STRAWBERRY BANANA GRAPE, L.A. PEYOTE KUSH, PEYOTE WIFI CBD, FUEL DOG, CRITICAL PURPLE KUSH.
AMSTERDAM MARIJUANA SEEDS:
GIRL SCOUT COOKIES EXTREME, GREEN CRACK.
QUEBEC CANNABIS SEEDS:
BRUCE BANNER, GREEN CRACK, QUEBEC CBD 20:1.
I 💚 GROWING MARIJUANA:
SKYWALKER OG, BANANA KUSH, BLUEBERRY CBD.
FOR EVERYTHING MARS HYDRO VISIT:
www.mars-hydro.com
www.marshydroled.ca
PROMO CODE: rocknroll
VISIT THE ALIEXPRESS STORE:
@marshydro_aliexpress2
Instagram: @marshydropenny
https://youtube.com/channel/UChU5ZWwNi-DvnO3oWVU3ceA
https://greenbuzzliquids.com/
#greenbuzzliquids
@GreenBuzzLiquids
https://greenbuzzliquids.com/en/shop/
PROMO CODE: rocknroll
https://www.youtube.com/watch?v=8hEqyS1jPpI
https://growdiaries.com/diaries/112437-grow-journal-by-rock-n-roll-randy/week/593118
Thanks for taking the time to read and check out my shit🤜🤛
FC-E6500 LED GROW LIGHT:
FC-E6500 grow light with 3978pcs OSRAM BridgeLux Diodes & Moso Driver, market-leading PPF 2.7 µmol/J, Max 2.5g yield/watt with 30% higher Average PPE, more cost-effective when compared to same style type lights. Only consumes 650W, perfectly cover 5x5ft (personal), 4x4ft (commercial) grow space. Innovative Precise Uniform Lighting-Built-in removable bars interval & dimmability enable the exact & dynamic PPFD control over each of the plant growing stages, FC-E6500 detachable bars deliverSuperior Heat Dissipation: Real Aluminum heatsink together with 6 slim profile passive cooled bars (THINNER & LARGER surface) and detachable Meanwell Driver, create less heat. save 50% hydro than other old grow lights! Driver can be mounted remotely on the side of a grow tent/rack or on an adjacent wall to remove heat from grow space. Full Spectrum UV IR LED: With Yield Max spectrum (660nm Osram enhanced Deep Red,2800k-5000k,730-740nm IR,380-410nm UV LEDs), Average PPFD the FC-E6500 LED grow lamp enables cultivators to produce BIG FAT Dense Buds, perfect for full-cycle hydroponic, soil, grow tent/grow room.
Dimmable Commercial Grow Light: Cost-efficient, easy dimming & daisy chain With a max up to 20 lights, IP65 Waterproof, master light easily controls the rest. Perfect for commercial & home horticulture.
FC4800 LED GROW LIGHT:
GET THE MAX FROM MARS👍: Welcome one of the newest members of the Mars Hydro family🤜🤛🤘. The Mars Hydro FC 4800 480W LED Grow Light can accommodate up to a 4' x 4' area for flowering. It has OVER 2000 LED chips consisting of the best selling Samsung LM301B diodes which has a Luminous Efficacy of: 220 lm/W
0.2 W, 3 V mid power,
Osram 660nm Diodes, Infrared light and UV LIGHT👍. It boasts the incredible efficiency of 2.8 µmol/J, maximum 2.5gram yield per watt with 30% higher Average PPFD. This High-intensity spectrum is beneficial for plants at all stages - from veg to bloom, and creates Big dense Buds👍. achieve 50% higher yields & quality compared with the old lights! Only consumes 480W for 4x4ft personal grows, and 3x3ft for commerical grow. It comes with a dimmer and daisy chain function with a maximum of up to 15 lights, the master light controls the rest👍. Wide 6-bar design offers even & wide canopy coverage and can maximizes your grow space. slim 180° FOLDABLE DESIGN... YES I SAID FOLDABLE🤘🤣 , making it compact and easy to install, it's IP65 WATERPROOF and will give you no worries while growing in a humid environment and makes it a flexible high performance commercial grow light for enormous SUPER FROSTY yields.😛😛😛. MARS GETS EM FROSTY BOYS👍
AWESOME HEAT DISSIPATION: The Low energy consumption FC4800 growing light has 6 passive-cooled bars and an aluminum heat-sink a removable driver you can upgrade later or have it outside your tent. with zero noise you can save up to 50% in your electricity bill compared to HID's or HPS lights!
It also has a removable driver so you can upgrade it in the future or have it outside your grow space for better heat control in your growroom👍
UPGRADED FULL SPECTRUM: Yield Max Spectrum with enhanced red (Top-Bin Samsung 3000k-5000knm, Osram 660nm Deep Red), speed up blooming & fruiting, perfectly suited for full-cycle growing. The FC4800 LED grow lamp was born for Big Buds, perfect for commercial, grow tent, grow room, hydroponics, and all soil grows.👍
THE BEST SAMSUNG DIODES: THE FC4800 has Top Bin genuine Samsung Osram Diodes, combined with remarkable 2.8 µmol/J Efficacy, 30% higher Average PPFD, 50% less energy consumption, to maximize your yields. They give you a TRUSTED 3 years warranty 100% Satisfactory guaranteed!!!
TSW2000 LED GROW LIGHT:
INCREASE YIELD AND CROP QUALITY WITH MARS HYDRO LED GROW LIGHTS: NEWEST SMD LED technology provides the highest PAR/LUMEN output (1122umol@18") and can make you get 30% higher yield compared to OLD blurple led lights. Max 2.5g yield per wattage and achieve maximum quality and quantity, much better than traditional HPS grow systems
LOW ENERGY CONSUMPTION LED GROW LIGHT: Consuming only 300W true output with 684 LEDS! It saves up to 50% energy than other led grow lights. Perfect for 3.5x3.5ft bloom stage, 4x4ft veg stage. Over 90% light energy can be absorbed by plants, it will have higher intensity in a MARS HYDRO grow tent with diamond design mylar, or by crossing over using multiple TSW2000
HIGH EFFICIENCY FULL SPECTRUM INDOOR GROW: 3000K 5000K and IR 660nm 760nm RED, makes it close to natural light, highly engineered to provide improved growing performance for plants at all stages of growing, rapid plant response from seed to flower; Uniform and wide-beam light distribution for your plant's optimal growth
8x8 GROW TENT:
The MARS HYDRO 8x8 Grow Tent interior is made of a unique diamond design mylar which is highly reflective. (Other companies mylar and reflective rate is as low as 50%, and it won't provide efficient light. They use thick 1680D oxford canvas, and being double stitched, it is tear proof and perfect for locking in the light. Their grow tent keeps 100% of the light inside the tent and helps your plants absorb more light. EXTRA-THICK material means No light leaks or rips at all.👍
Strong Stable metal corner adapters and poles are the trustful supporters of the tent. It's very sturdy, neither rusting or paint flaking off. quick and easy tool-free setup. They use heavy-duty metal zippers, with double layer black lining, by far the best on the market which creates a light-proof seal.
The Easy observation windows are made by double layers of cloth. Observe the growing conditions of your plants without opening the tent and avoid disturbing your plants. The observation windows also serves to dissipate heat and ventilate the air.
Processing
Likes
13
Share


@GrowGuy97
Follow
Flower day 31 - Having a little trouble with the temperature getting higher than I would like because my dehumidifier puts off some heat while it’s running so it’s been a constant struggle to keep the environment in this tent stable! Definitely will not have so many plants next run lol, but all in all the ladies are growing great & I can’t wait to see how they turn out! Thanks for following friends & happy growing!✌️🏼🌱
Flower day 33 - Fed half the plants today with PH at 6.4 to try and keep the humidity down some I’ll water the other half tomorrow!


Likes
1
Share

@PhinolaGreen
Follow
8. Woche
Läuft soweit gut, die Ladys sind mitten in der Bloom. Der eine Pheno hat bisschen Stress aber sonst, kann mich nicht beklagen 😊

Likes
32
Share


@LapsekiliTayfur
Follow
Day in and exit fan 15 min off 15 min on Van is full on
Night in and exit fan 30 min off 15 min on Van is off
Lst tranings return
Nutrients started 0.5gr/1L at day 21 400ML Per Pot
Day 24 Grow powder 0.75gr/1L Short Flowering 0.5gr/1L 400ML Per Pot
Day 26 Grow Powder 1.5gr/1L Short Flowering 1gr/1L 600ML Per Pot
Day 28 Grow Powder 1.5gr/1L Short Flowering 1gr/1L 600ML Per Pot


Likes
4
Share

@eldruida_lamota
Follow
Que pasa familia, vamos con la séptima semana de floración de estas Mandarin Panties feminizadas de Seedstockers.
Vamos al lío, las plantas se trasplantaron a macetas de 7 litros.
El ph se controla en 6.5, la temperatura la tenemos entre 24/21 grados y la humedad ronda el 50%.
El ciclo de crecimiento puse 12h de luz, el foco está al 100% de potencia.
Tenemos como visitante de nuevo los trips, compré depredadores que colocaré a principios de semana.
Me gustaría estar más encima este cultivo pero la salud me está impidiendo un poco estar 100% con el proyecto.
- os dejo por aquí un CÓDIGO: Eldruida
Descuento para la tienda de MARS HYDRO.
https://www.mars-hydro.com
Hasta aquí todo, Buenos humos 💨💨💨

Likes
346
Share


@Canna96
Follow
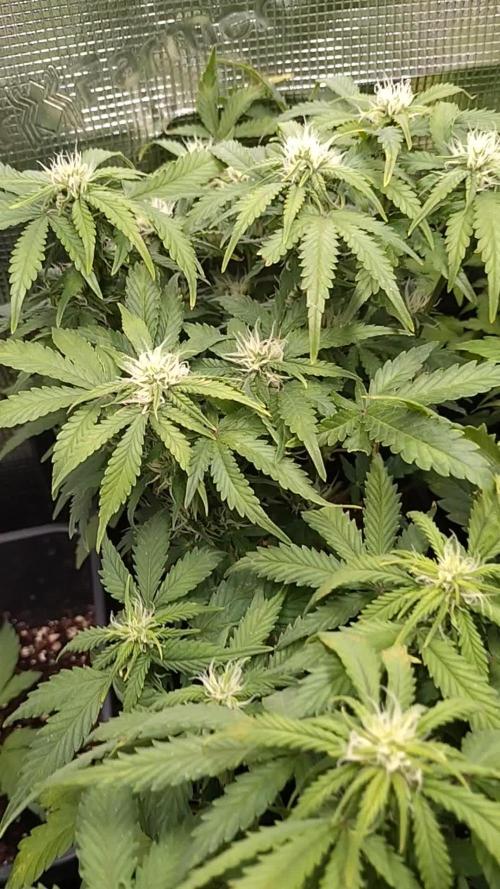
This week went pretty well, other than she stretched like crazy and I am now getting worried about running out of vertical space. I also had a few of my bottom leaves get a few brown and yellow spots on them. I did post some pics and asked a question, thank you for the responses, much appreciated! I am thinking about adding my Spyder Farmer LED 100 Watt light into the tent for the nebula auto because it is about 23 inches shorter than the sour diesel. I believe it would only raise my temp about 2 degrees, and possibly lower the humidity by one or two percent. I must say my dehumidifier has been a freaking stud, running 24X7 and not complaining. I should look into adding another unit, it has been in the mid 90's and muggy for about a week. So far I have to say I am super impressed and excited with this setup, the genetics, and with growing this wonderful plant in general. Already planning ahead to my next grow, and what I can do better. I have been enjoying myself and I really appreciate everyone who has taken the time to answer my questions! I am having a blast and am excited to see what this lady will give up in a few weeks!

Likes
13
Share


@Divs_darkroom
Follow
Took her down on day 69 of flower. Her fan leaves were faded purple and she shows a lot of purple in the calyxs on the stalks and in the nugs. Just a beautiful strain. And the small is amazing. The best smelling harvest I've had. And the stickiest. If you want to grow automatic cannabis. You should try Mephisto Genetics.00

Likes
14
Share


@Mr_Dior21
Follow
Last 2 weeks before I put her in a 3 day dark period! I’m no longer giving any nutrients and I’m letting the plant deplete all the nutrients in the soil, I’m also only using water for now own. I have her in a 11.5 hour light schedule. There’s slight nutrient burning too on some parts but it’s nothing drastic.
Likes
190
Share


@Sparkles
Follow
********** edited Dec 13 **********
Added one more pic.
Seems like I will be growing one this round. Veg for a lil longer, spread out the canopy, two trellis’ and prolly finish in 15 gallon pots.
Two derpy runts haven’t move much in 24hrs. Treated them all the same. Under one T5 LED for now.
Ah well. See u next week :)
********** edited Dec 12 **********
One is a champ compared to the two other derpy looking ones, not much growth after the cotyledons. It is what it is. Grow one this round and train it til it covers the canopy…maybe try out that flux technique and finish in a 15 gallon pot.
********** EDITED DEC 9 **********
I will most likely be growing 2. One didn’t make it and I’ll be giving a seedling to a buddy.
********** Edited Dec 4 **********
Another tap root popped out….one more added to the crew.
3 out of 4 so far.
**********EDITED Dec 3 **********
Couldn’t wait…
Seed soaked 2 Mafia Candy overnight in some Zeus Juice (fulvic), paper towel for 48hrs and tap root finally popped but I’m impatient and thought they were duds so I soaked another two last night and waiting for them taproots now…looks like imma grow 4 this run (if they all make it).
Two seeds with taproot: into peat pellets sprinkled with VAM (mycos), into soil and now I just sit back and pray.
Maybe I’ll just let them grow. No topping, no training. Veg for a few weeks and flip. We’ll see how it goes.
More updates coming soon.
************************************
Woohoo. Seeds finally arrived after like a month, usps is slow.
My man RightHemisphere.Genetics hooked me up with some breeder seeds and his own creation Mafia Candy (fem).
Soil has been cooking for 30+ days. OneShot, worm castings, biochar, oyster shell, bone meal blah blah blah. Just a few more times with this ‘style’ of growing and will switch to something easier and simpler cuz growing with Nectar is just too crazy.
Gonna pop 2 Mafia Candy soon, just gotta figure out timing as I’ll be away for a week in Dec and might not be able to find a plant sitter….
Will be updating the diary with more pics when they pop.
In the meantime, please enjoy the video :)
Thanks for stopping by 🌱
Likes
43
Share


@Hashy
Follow
********************************************
Week 8 early flower (flower week 2)
********************************************
Light cycle=12/12
Light Power=218w 90%
Extractor controller settings
High temp= Day 24c, Night 20c
Low temp= c
Temp step=0c
High Rh= Day 53%, Night 56%
Low Rh= %
Rh step=0%
Speed max=9
Speed min=2
Smart controller settings (during lights on).
Lights on=9.00am
Top fan on=+23.5c
Top fan off=-23.0c
Dehumidifier on=+58%
Dehumidifier off=-55% or +26c
Smart controller settings (during lights off).
Lights off=9.00pm
VPD aim=0.6-1.6
DLI aim=30-45
EC aim=0.2-2.0
PH aim=6.0-6.5
NPK(15.4/7.2/25)
💧💧💧💧💧💧💧💧💧💧💧💧💧💧💧💧
Method= Autofeed 6 drippers.
Feed=Flower Nutes.
Neutralise=0.1ml/L
Bloom=4.0ml/L
Roots=0.2ml/L
Silicon=1.0ml/L
Calmag=1.0ml/L
Boost=1.5ml/L
Volume=12L
Easy Ph down= 0.125ml/L
Ec=1.95 PH=6.4/6.5
Runs=17
Run times=4min (276ml each)
Gap times=16min
Total runtime=68mins (5.0L each)
Total flowrate= 138ml/min (69ml/min each)
Auto start time=10.00am
Auto stop time=3.24pm
💧💧💧💧💧💧💧💧💧💧💧💧💧💧💧💧
********************************************
********************************************
📅7/7/24 Sunday (day 50, day 8 flower)
📋 defoliation on lower nodes and leaves.
💧
Method= automatic
Feed=Nutes flower
Volume=12L
Ec=1.95 PH=6.4/6.5
Volume left=3.5L
Volume used=8.5L (138ml/min)
Volume each=4.25L (69ml/min)
Runoff.
Total runoff=tiny amount
Ec= PH=/
Feed=manually @3.40pm
Run time=4 mins
Feed=manually @4.00pm
Run time=4 mins
Volume left=2L
Volume used=10L (138ml/min)
Volume each=5L (69ml/min)
Runoff.
Total runoff=0.7L
Ec=3.95 PH=/6.2
💧
📅8/7/24 Monday (day 51, day 9 flower)
📋
📅9/7/24 Tuesday (day 52, day 10 flower)
📋 H=72cm D=27cm Dli=57.2 Ppfd=1323 12/12
Really been pushing it with the light trying to minimise stretch, will raise light tomorrow and adjust power.
📅10/7/24 Wednesday (day 53, day 11 flower)
📋 H=76cm D=23cm Dli=60.5 Ppfd=1400 12/12
Raise light, running out of space.
Lowered power to 200w
H=76cm D=29cm Dli=45.4 Ppfd=1051 12/12
💧
Method= automatic
Feed=Nutes flower
Volume=12L
Ec=1.95 PH=6.4/6.4
Volume left=2.5L
Volume used=9.5L (138ml/min)
Volume each=4.74L (69ml/min)
Runoff.
Total runoff=0.3L
Ec=3.3 PH=/6.2
Feed=manually @4.20pm
Run time=4 mins
Feed=manually @5.10pm
Run time=4 mins
Volume left=1.5L
Volume used=10.5L (138ml/min)
Volume each=5.25L (69ml/min)
Runoff.
Extra runoff=0.5L
Ec=4.1PH=/6.2
💧
📅11/7/24 Thursday (day 54, day 12 flower)
📋 Big defoliation on lower leaves and colas that will restrict air flow.
📅12/7/24 Friday (day 55, day 13 flower)
📋 Hst 2 main colas, slightly snapped both.
📅13/7/24 Saturday (day 56, day 14 flower)
📋H=86cm D=20cm Dli=74.8 Ppfd=1732 12/12
💧
Method= automatic
Feed=water
Volume=12L
Ec=0.2 PH=6.4/6.3 (PH D=0.013ml/L)
Volume left=3L
Volume used=9L (138ml/min)
Volume each=4.5L (69ml/min)
Runoff.
Total runoff=0.2L
Ec=3.0 PH=/6.8
💧
********************************************
Weekly roundup.
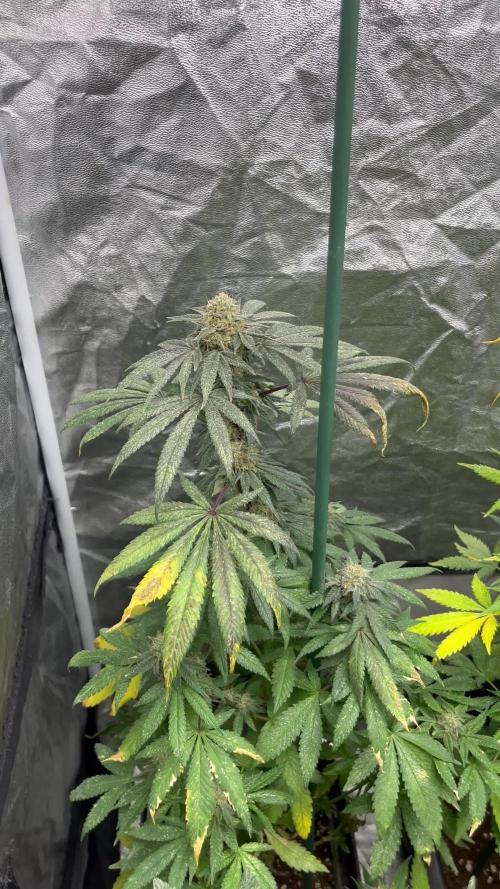
📋 Absolutely fine, been growing great, had to apply Hst as she's getting that tall, she's stretched a further 24cm this week and I'm praying she's going to stay as she is, I probably have 10cm max left of room to raise the light.
Take it easy.
Back soon.
********************************************


Processing
Likes
16
Share


@Dunk_Junk
Follow
She is easily the smallest girl in the tent. This week she was transplanted into her forever home. A 38 litre airpot. The timelapse is the whole week except a few hours when I was repotting.

Likes
47
Share


@Jimmy89
Follow
Nearing the end with these ladies now, maybe another week in flower and I’ll ruthlessly murder them all. Been over a week since my last update. Photos taken day 51 of flower
