


Processing
Likes
Comments
Share


@GanjaFarmerGrow
Follow
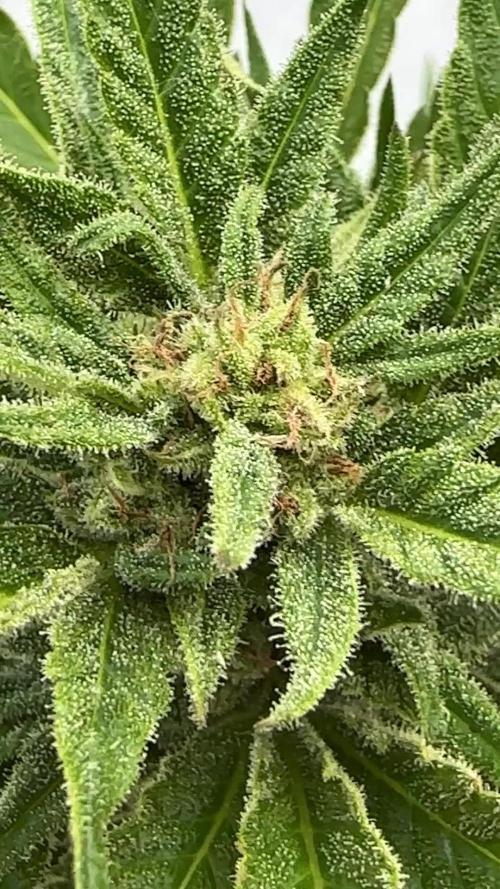
Week 5 of our Legal Bio Grow is in the past...
It is going very nice..
the plant is quite tall but mostly it is very branchy...
it already indicates a good yeild...
Added a little BioFlores from Canna..
Hope it goes good...
fingers crossed👍

Likes
20
Share

@Susquihanna
Follow
Frosty Frostbanger isn't growing any taller. I started measuring the cola today for height and width. It is 10 inches tall and I am not really sure how one determines its width. I took a picture and will ask a question to someone who is more experienced than me. I plan on entering this cola in a contest, however, I don't really know what I am going up against. :)😬
I have continued to feed my plant on a regular basis. It has been hot enough here in this area that I water/feed on a daily basis.
We have a few more weeks to go until its harvest time. I am curious to see how big the buds are going to get.
I can definitely see the dense, tight, resin-soaked buds that glitter like fresh snow in a sparkling winter wonderland as per its description of Fast Buds. . Buds also appear to be very compact. And, it is definitely putting of a super strong smell.
That's all for now, Stay tuned for more news next week.
Susquihanna


Likes
9
Share


@Rckeh
Follow
This week will arrive Bug Bud and Carboload by Advanced nutrients, let´s see how she responds :). Next week will rain a lot, so i will prepare myself and start giving her Botryprot by Prot Eco to prevent mold.
Day 50 - She´s healthy. today is the first foliar day. I used 2,5ml/L of Botryprot. Overall she looks very happy, maybe needing some PK. She´s starting to have some fresh blueberry aroma. Fingers get sticky
Day 52 - Feeding day. I added 1ml/L Alga Bloom making a total of 3ml/L. Sprayed her today again.
Day 55 - Has been hot these days, feeding day today again. Today i added 1ml/L Bid Bud, 2ml/L Carboload and 1ml/L Alga Bloom. As she´s healthy i didn´t feel i needed to slowly introduce. Let´s see how she responds, but my experiments are going well :) I´m confident.
Day 57 - Foliar spray today again. The storm will come in strong.
Likes
37
Share


@GrownwithLED
Follow
After germinating the seeds are transplanted into small pots with soil (see tutorial in VIDEO above). The soil is prepared with water mixed with a little bit of BIO NOVA Roots (0,5 ml/l), which aids the development of the seedling. Transplanting is very easy now, because they have grown a STRAIGHT tap-root while hanging during the SERIOUS' WAY of germination. This straight root allows for easy potting of the seeds. Simply make a little hole in the center of the soil with your pinky finger and carefully place the germinated seed with the white root pointing DOWNWARDS into the hole. Best is to lay it onto one side-wall of the hole with the seed shell right at the surface. Then I push the other side inwards and enclose the whole root with soil. At the end only the top of the seed-shell peeks out of the soil. IT IS VERY IMPORTANT to plant the seeds NOT TO DEEP into the soil. The seedling only needs extra strength to work itself upwards thru the soil and you run the risk of the soil drying out and the seed dying off. When you PLANT THE SEED VERY SHALLOW into the soil (=with the top of the seed-shell still peeking out) your seedling can grow out right away and you have a small plant already 24 hours after putting the seed into the soil.
The small seedling sometimes still has the seed-shell on its 'head', it normally falls off by itself, but sometimes you have to carefully help and take it off with your finger nails. Be careful to NOT clip of the seedling accidentally when you do this!
The seed-shall has an inner lining, which feeds the small seedling when it germinates. This inner lining sometimes gets tangled around the stem of the small seedling after the shell has fallen off. This little skin MUST be taken off the stem right away! Once it dries up, it gets hard and can strangulate the seedling around the stem. In order to avoid this, the skin must be taken off as soon as possible! I show it in the pics above and also made a video about taking off the inner lining of the seed.


Likes
9
Share

@burnout
Follow
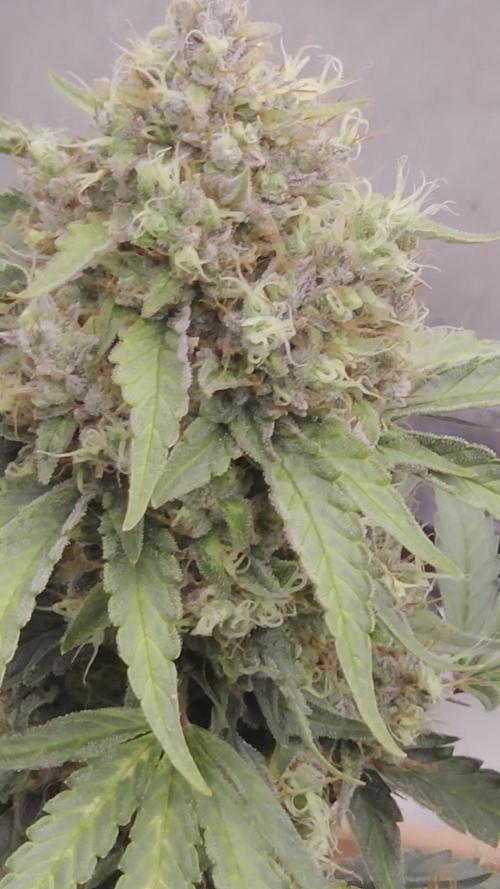
Day 70. Same watering routine as last week again. Going to cut out buildabloom at the end of this week but continue with recharge and ferment. Will be gradually reducing the time the lights are on and the intensity over the next couple of weeks.

Likes
13
Share


@CanabisLoverHobbyGrower
Follow
Really fattening now and smell is nice and strong,.. start of week 9 now so done the 8 weeks that they can finish in, I'm guessing 2.5/3 weeks maybe left with flush,.. hopefully start a 10/14 day flush next week but yeah this strain has been a delight so far to grow hopefully get over the finish line strong 💪 ... roll on next week 👌
Likes
31
Share


@Pedrojuan
Follow
En el comienzo de esta 3a semana de vegetación, parece que la situación va mejorando, gracias a las personas que me aconsejaron bien, para no entrar en pánico... seguramente estaban estresadas y ya les paso...😂😂😂 en fin, esta semana subo el EC a 0,6, distancia de las luces a 1,2 mtr y veremos cómo procede.
Tengo ganas de probar una CORTE APICAL con este cultivo y ver qué beneficios me trae; si alguien lee esto y me quiere aconsejar cuando y cómo hacerlo, soy todo oídos.

Likes
110
Share


@Dennis_Bong
Follow
!!!!!!!!!!!!!!!!!!!!!!!!!!!!!!!!!!!!!!!!!!!!!!guckt euch letzen Report an !!!!!!!!!!!!!!!!!!!!!!!!!!!!!!!!!!!!!!!!!!!!!!!!!!!!!!
Blüte hat begonnen:
Edit:11.05
Die Pflanzen sind innerhalb von 2 Tagen explodiert. Ich habe das Licht nun auf 75 Prozent gestellt und noch einmal Cal-Mag nachgegeben, da die letzte Gabe nur eine halbe war. Die beiden Titan sehen fast identisch aus. Die beiden Epsilon sind circa 3 Tage unterschiedlich, eine ist etwa 5 cm kleiner als die andere und hat noch kaum Blüten. Ich denke, in 3 Tagen wird das der Fall sein. Die Cosmos F1 ist im Umfang circa 50-50 cm, kaum Blüten bisher. Ich hoffe, sie wird nicht noch viel größer, da der Platz langsam eng wird. Ich bin von dem Wachstum dieser Pflanze absolut begeistert. Mal gucken, was die Blüte bringt.
Edit ende
Ich habe alle Blüten entfernt, die nicht im direkten Licht sind, und alle Blätter, die die Blüten bedecken.
Die Pflanzen weisen einen Cal-Mag-Mangel auf, was bei der Blüte normal ist, gerade bei diesem Licht.
Ich habe dem Gießwasser etwas Cal-Mag hinzugefügt.
Die Pflanzen sind drei Tage älter als im letzten Report.
letzte Woche :
Die Pflanzen sind seit der Keimung auf diesen Fotos genau 30 Tage alt.
Ich habe eine Pflanze ausgetauscht, da es sich um eine Epsilon F1 handelte, die vermutlich Mutationen aufwies. Sie hatte verkümmerte Blätter, die nicht wie die ihrer Artgenossen aussahen, und wuchs deutlich langsamer. Daher habe ich sie nach 2,5 Wochen ausgetauscht. Der kleine Mann(die ausgetauschte Pflanze) leidet natürlich jetzt ein bisschen unter Lichtstress, deswegen werde ich wohl nur eine sehr gestauchte Pflanze erhalten. Aber besser, als die Fläche leer zu lassen.
So viel zu dem, was nicht funktioniert hat:
Die Sanlight stand die ersten 2 Wochen auf 20 Prozent.
Dann habe ich sie teilweise mit dem Dimmer höher gestellt: 2 Stunden auf 25 Prozent.
Eine Woche später bin ich auf 30 Prozent und 2 Stunden mit 35 Prozent gegangen.
Für Woche 4 habe ich 40 Prozent und 2 Stunden auf 45 Prozent gewählt.
Ich erhoffe mir, die Pflanzen so schneller an die starken Lampen zu gewöhnen.
Im Nächsten grow soll bei jeder Pflanze die TDS per Infrarot gemessen werden. Da werde ich dann ein Experiment zu machen, wie die Lichtsteigerung am besten umzusetzen ist.
Zu den Lampen kann ich bis jetzt nur Positives sagen. Im Gegensatz zur dazugehörigen App, diese ist wirklich nicht sehr gut umgesetzt. Das Menü und die Einstellungen sind teilweise irreführend und nicht sehr durchdacht. Ich muss mir immer wieder die Tutorials in der App ansehen, da diese immer wieder angezeigt werden.
Noch dazu hätte ich gerne die Möglichkeit, mehr Einstellungen treffen zu können. Das ist aber Meckern auf hohem Niveau, weil auch die App das macht, was sie soll, nur eben meiner Meinung nach nicht sehr gut umgesetzt.
Die Pflanzen wurden von mir mit Klipsen aus dem 3D-Drucker gestützt. Diese Klips kann man Stück für Stück im Winkel verstellen, so dass man die Triebe damit neigen kann. Das habe ich von Tag zu Tag im Winkel verstellt, so dass ich am Ende einen 45-Grad-Winkel habe. Das habe ich insgesamt über 6 Tage gemacht.
Die Pflanzen haben an sich ein sehr gleichmäßiges Wachstum. Die Cosmos F1 wächst so optimal, dass kein LST mit den Klipsen nötig ist. Ich habe an den Pflanzen keine Mängel entdecken können und auch keine Anzeichen von Mutationen.
Die Pflanzen haben im Durchschnitt eine Höhe von 35 cm, wobei eine etwas stärker abweicht mit 22 cm (wieder eine Epsilon F1). Der Umfang mit LST bei der Cosmos F1 liegt ohne LST bei 20 cm im Durchschnitt, wo wir wieder die Epsilon im Negativen haben mit 14 cm.
Die Pflanzen wurden alle entlaubt, das eine Woche vor der Blüte. Morgen werden die Pflanzen erneut entlaubt und ge-lollipoppt.
!!!!!!!!!!!!!!!zusätliche infos werden morgen ergänzt + Fotos !!!!!!!!!!!!!!!!!!!!!!!!!!!!!!!!
*1. Foto Mutation:
Dieses Foto wurde nur 5 Minuten nach dem Umtopfen der Pflanze aufgenommen. Vorher stand sie in einem größeren Topf, in dem sie genauso aussah. Ich habe sie umgetopft, weil ich den Topf brauchte, aber die Pflanze nicht wegwerfen wollte. Der Pflanze geht es gut, aber sie sieht im Moment etwas mitgenommen aus. Bilder folgen


Processing
Likes
3
Share


@Ogbangbang2981
Follow
last week only feeding water trichomes level is low but plant looks healthy and strong loving the smell coming off her waiting to harvest

Likes
11
Share


@WeedM8
Follow
So beautiful looks its going vey well apart of thats its too hot the heat from the lights if there is no air circulation it gets very humid and i have to leave the tent open

Likes
13
Share


@Everest
Follow
Surprising growth, they are showing Mg deficiency but I don't know if it's the dysregulated ph that I'm not following. Flowers are everywhere and the LST is helping to distribute space.
The plant that underwent TOP pruning had less growth.
Likes
4
Share

@Minuteman_Organics
Follow
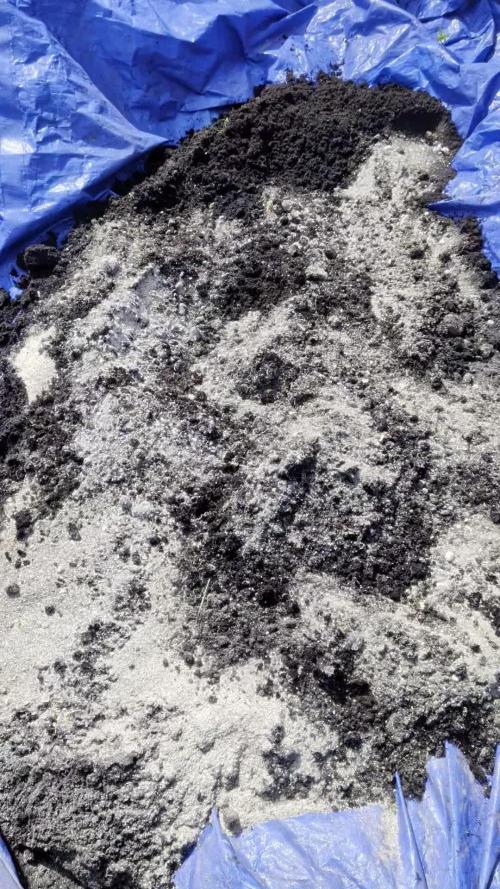
Big week this week! Fed the plants about 40gal of compost (5gal worm casting and 35gal lobster compost) plus all the amendments listed above in those rough ratios. I cut down all the cover crop and removed my straw mulch layer. I then added about 2.5gal of my feed to each of my pots. Covered in the cut down cover crop and straw and watered everything in very well. I'm guessing it'll take only 3 weeks for the plants roots to completely take over what I added.
Additionally this is the first week I sprayed BT. The OG kush are finishing up their second week of flower and the stretch has diminished but the buds are setting in! Time to spray these girls down!
The early lemon berry and grandpas stash are close behind. I'd say they are about 1 week behind the kushes so they're just starting the second week.
The stretch for the early lemon berry is very strong. It's all tied up in the trellis net by now so it has been diminished somewhat
The grandpas stash is barely stretching....gonna be some massive fat buds. Hopefully they don't mold!


Likes
14
Share


@Gympaddy
Follow
The groundwork is laid, now we can get started. The field looks healthy.


Likes
11
Share


@CookiesAndCake
Follow
Week 18
Day 120 | 08/11/2021:
I just can’t stop looking at them, they are so plump 🍑 I watered them today with just 1L of plain water because I want to harvest them in 4 days and don’t want them to wilt, but at the same time I know it’s better to let the soil be on the dryer side when harvesting.
Day 124 | 12/11/2021:
Today the beauties are being harvested!!! So exciting because they’ve been growing for a while and I can’t wait to finally vape them. From day 1, no, even from germination, the seeds were so strong and quite resistant to nutrient deficiencies. Very good and strong genes, I’m really happy that I tried them out! I will be hanging them with the stem to dry for 10-14 days, I keep the leaves so that the humidity can stay high in the tent, I used to struggle a lot with humidity when I would hang them without leaves, and then the buds tasted like hay for the next month, so I try to avoid that now. Can’t wait to see that the total weight is! They are quite big but I think the buds are not extremely dense so it could be deceiving 👀


Likes
47
Share


@Schnabeldino
Follow
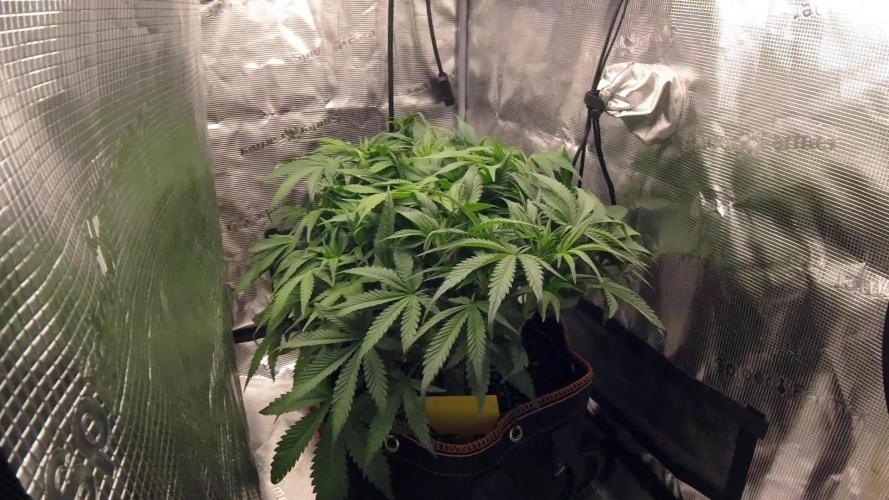
_____📅 Week 5 | 📅 Day 29 - 35 | 27.05 - 02.06 ______
27.05.25 | Day 29 🌞💧
🔸The ladies moved into the big tent on the 29th day after I had cleaned it and hung up my new lights.
🔸Grape Guava: At the beginning she looked very thin and sparse, but has developed splendidly, she tolerates the LST very well.
🔸I only work with hooks and occasionally with clips, but I've often broken branches with them so I prefer to use hooks hehe :D
01.06 | Day 34 💧
🔸 1500 ml
🔸 Sorry not the best pictures/vids this week, we are currently down with the flu again - only the bare minimum is being done 😅
_________________________________________________________________________________________
current conditions:
🌡️🔆= 24-25°
🌡️🌜= 18-19°
💨 Hum. = 65%
🔦 PPFD = 500 umol 18/6
🔦⌚DLI = ~ 32
_________________________________________________________________________________________
Equipment to use:
💡 Light: 2 x Sanlight Evo 4- 120 on 50%
⛺ 120 x120 x 180
🍯 Pots: 18 liter pot
🌱 Soil: Bio-Bizz light mix
💊 Nutrients: Advanced Nutrients
💧 Water: Tap Water 0,5 EC