


Processing
Likes
Comments
Share


@Ferenc
Follow
All good flowers are coming along nicely and getting thicker. 500ml water per day 12/12, fertilization happens on Monday, Wednesday and Friday with the mix above. All good so far I just keep removing the bottom leaves that are yellowish. Fruit Tree will be the quickest to be harvested all of them are nicely maturing needs some more time. Some more weeks and we will see.


Likes
2
Share


@Kelly420
Follow
Insane stretch this week.. that single super cropping pinch and lay over a few weeks ago has really paid off. It went from about 6 or 8 inches to almost 20 in two weeks. Looks like I'll be needing to support these side branches toward the end.

Likes
6
Share


@Valmont505
Follow
There are plenty of show off buds especially from the one plant with 4 Queen kola thickenfrosty bitch buds.
They did drop a lot of weight in the dry, but all are very solid, very sticky nice buds. I will say that I was away for 9 days and my goddam dehumidifier snorkel fell off and the plants went on a pogo ride of humidity for fuck sakes. leading to one plant having a herm - just a
few I noticed at the base. Everything else looked amazing!!!
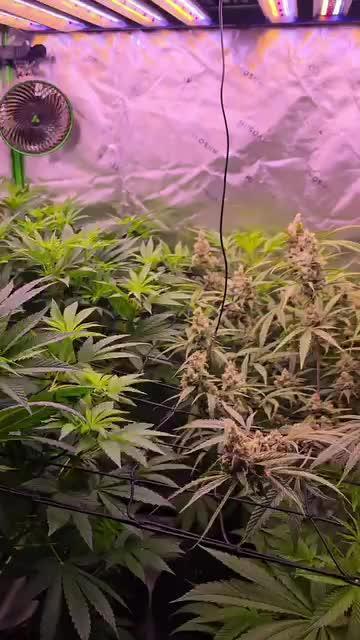
Classic Wedding Cake buds fresh out the Box! & now into MY curing jars!
Super excited as this is one of my favorite strains -- r





Likes
19
Share


@emeraldlabs
Follow
Second topping on day 28! 1 more to go!
Will include all details once done with topping (going for mainline).
Photos/video taken 28 days after breaking soil.

Likes
Comments
Share


@Santaclaus
Follow
Día 40 me ha dado carencias de calcio magnesio y posforo y potasio, me he dado cuenta un poco tarde... Las hojas estaban caídas y se me estaban poniendo amarillas con manchas marrones...les puse calmag y empezaron a buscar la luz ... También me di cuenta, que las Lili que no veía se me ponían las hojas moradas, creía que era exceso de nitrógeno, pero no era posforo y potasio... Así, que lo que no quería hacer, lo he hecho he metido a tope de nutrientes y más... Espero no liarla más...

Likes
5
Share


@Kirsten
Follow
Orion F1 Liquid Nutrients grow.
31.5.25:
Well, this week has been pretty dull 😅 I was hoping to have something to report on by now. I guess maybe next week 🤞
I've just been keeping the pot watered. I watered twice this week, with about 2l of dechlorinated water PH'd to 6.4. Once;
I used 1ml/2l of Xpert Nutrients Cal-Mag amino acids, the other watering I used .15Tsp Ecothrive Biosys.
☆ Xpert Nutrients PH down, up to 1ml.
☆ Ecothrive Neutralise 1 drop per litre from the 1ml pipette, which is attached.
This is my dechlorinator.
I am planning on either topping or FIMing both plants. So I'm hoping that purgatory won't last much longer here 🤞
Quite a boring update, I know, but thanks for stopping by and hanging out! 💚✌️🍃😊🌱

Likes
14
Share


@9LittleGrow
Follow
The last day of week 7 vegetative stage and the next day I’ll change my light cycle from 18/6 to 12/12. I flushed my babies with tap water last 2 days ago and so they gonna be thirsty and tomorrow I’m gonna feed with flowering nutrients. So, I’m very excited with the flowering process of they gonna be.


Likes
30
Share


@Mosquito_Haarlem
Follow
Oogsttijd 🌲
Werkelijk waar boven verwachting, dikke vette keiharde wiettoppen.
Zamnesia strains blijven me verbazen.
Dit is zijn harde toppen zoals een indica, maar met de lange lengte van een sativa, heerlijk.
Ze vertoont paars, roze en oranje tinten en ruikt zoet.
Ik heb de plant in zijn geheel opgehangen en zal de resultaten delen wanneer de wiettoppen droog zijn.
Wordt vervolgd

Likes
25
Share


@Gutismoke102
Follow
The girls are little stressed I topped them for the 3rd time and performed some super lst
I just released them of the lst and feed them some homemade labs and Recharge other then that they are doing great stay tuned thanks for following
Likes
7
Share


@Nofeckingclue79
Follow
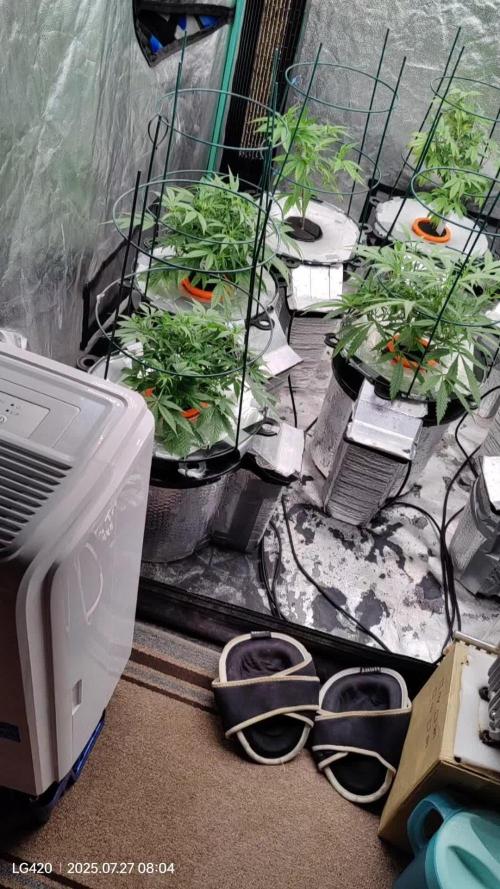
I am well happy with the yield from this one auto flower it is all nice dense bud as well🤙🙏👍
I'm going to cure for about four to six weeks and then be back with a smoke update


Likes
16
Share


@CzAlmighty
Follow
Hello growers,💚
beautiful strong plant .No problematic flower.🍰🍰🍰
naprosto úžasná vůně květů 💨💨💚

Likes
Comments
Share


@AestheticGenetix
Follow
10/16
day 2 of drying. i trimmed a couple buds wet but theyre so dang sticky. will update as things progress. drying conditions have been 60-62
10/20/24 jarred for curing. jars have been 62-65% burping multiple times a day.
11/07/24 she has a really nice high. intense mental high with quite a bit of physical relaxation. laughing non stop. watching movies that felt super intense but not paranoid or any discomfort. couldn't/didnt want to move my legs. a very well balanced and comfortable

Likes
20
Share


@LockDownGrow
Follow
So I managed too lst this little lady sideways very early on and she is now starting too form a little Bush,
The next week or two will surely provide something very special judging on who her sister lemon pie is now 2 weeks ahead of this one,
It seems this little lady is the purple
I really pumped the nutrients this week as you can see,
At the end of this week a stopped giving the plant these addavitves
More roots,
Humic acid,
Growzyime,
Fast bud folar spray,
And big buds,
And have now started too raise the house & Garden A&B soil feed and also there budXL
I also started off early but as a trace amount of there top shooter,
By the end of week I intend on giving them the full recommended of each and only be giving them the house and garden range at full streingh,
I will then wait for the first Amber tricomb then instant flush feeds,
Hopefully I get two weeks from that stage but it is often genetic so as long as I get at least one week and at least 3 feeds of water only then I'm happy

Likes
24
Share


@ValleoGrow
Follow
So this was the first time doing lst, and the first time i trained Them was def to early, so i might have decressed my yield pretty much but, theyre doing really fine besides the lack of budsides, and i Think still 4 weeks of flower to get faat, and soo beautiful Colors showing already😍😍
Likes
Comments
Share


@LokalGrenz
Follow
Added some cal mag to the ro water besides that everything looking good so far
Added bloom 6/25
Likes
55
Share

@JaramnieJazz
Follow
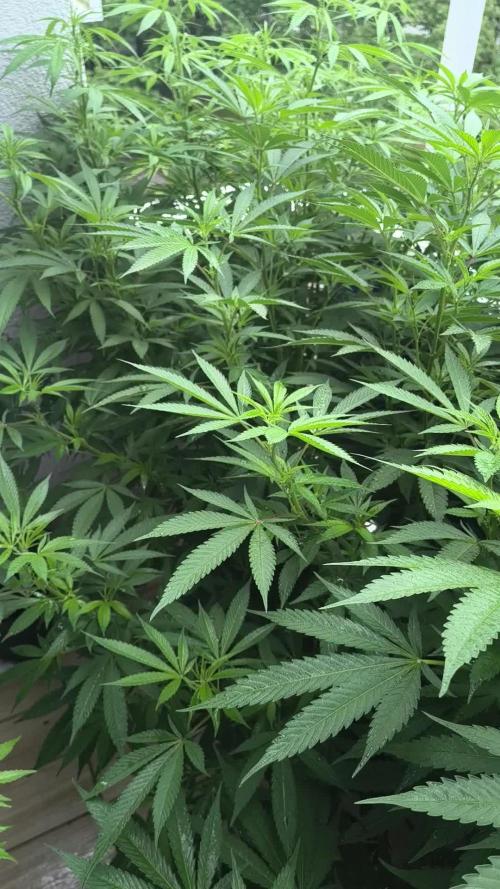
01.07.26 Ja weiter geht's sind richtige Monster geworden und so wie sie im Moment aussehen werde ich wohl nicht entblättern müssen das Licht dringt schön in die Pflanzen ein ich denke Apple Betty wird wohl am meisten Ertrag bringen zusammen mit Chocobang aber GDP braucht sich nicht verstecken wir werden sehen die Frage ist nur wann in Blüte entweder in 2 Wochen oder am 01.08.26 in 2 Wochen wäre wohl besser da ich paar Sorten diese Runde hab die bis zu 11 Wochen gehen dann wäre Anfang Oktober ende sonst ende Oktober und da ist das Wetter Mist mal schauen Daumen drücken für gutes Wetter Peace 🕊️
02.07.26 Sieht Bombe aus
03.07.26 Keine Ahnung ob es mir nur so vorkommt aber irgendwie bekommen die immer voll den Schub nach Regen sind deutlich größer geworden
04.07.26 Wetter ist schlecht keine Sonne nur Regen ich will sie bald in die Blüte schicken Daumen drücken dass das besser wird zumindest in der 2 Hälfte der Blühte .
Hab noch paar Triebe gefunden die nichts werden und entfernt. Größe ist jetzt 133cm die Chocobang ist ein Riese fuck mein Balkon ist ein Busch ich musste auf den Stuhl mich stellen um ein Überblick zu bekommen ich wünschte ich könnte die draußen anbauen damit sie sich voll entfalten können so klaut eine der anderen Licht eigentlich darf ich so 4stk machen 6 ist zuviel die können garnicht ihr volles Potenzial ausschöpfen
05.07.26 Weiter geht's es regnet am Stück hoffe das bleibt nicht so führs Wachstum ist das gut aber nicht die Blüte und die rückt näher .Der Favorit fürs bestäuben ist Black Lemon wegen dem FIZZZZ im Stemrub
06.07.26 Mehr Regen 😑 und kalt 14°C die Dünger Angaben von RQS ist eine Tablette auf 10L
07.07.26 Regen Regen Regen Größe ist 143cm


Likes
13
Share


@IQuSX
Follow
Hi, topman!
We had meet of last week!
I would like give you some information about its report.
Its week had defoliation double times.
We are getting ready add nutrients for period of bloom and change it.
Plants are stood with some different strains.
We are have Purple Ghost Candy by Seedman & Bay Burger by Delicious seeds, it also getting to have triploid genetically in the gen.
If you have dream to seeing its, typing in comment, and we will be add photo and may be make the report!
See you, and thank you for your time.

Likes
15
Share


@Pottstradomus
Follow
One of the two phenos is a week ahead of the other.
The buds are developing and frosting up real nice.
Im having a little issue with yellowing fan leaves on the upper half of the plants... after some research it seems like some growers have the same issue with this strain so idk... any thoughts?
I dusted off a old camera I hadn't used in a long time, working on taking better quality pictures.
Thanks for following
