


Likes
44
Share


@UKauto
Follow
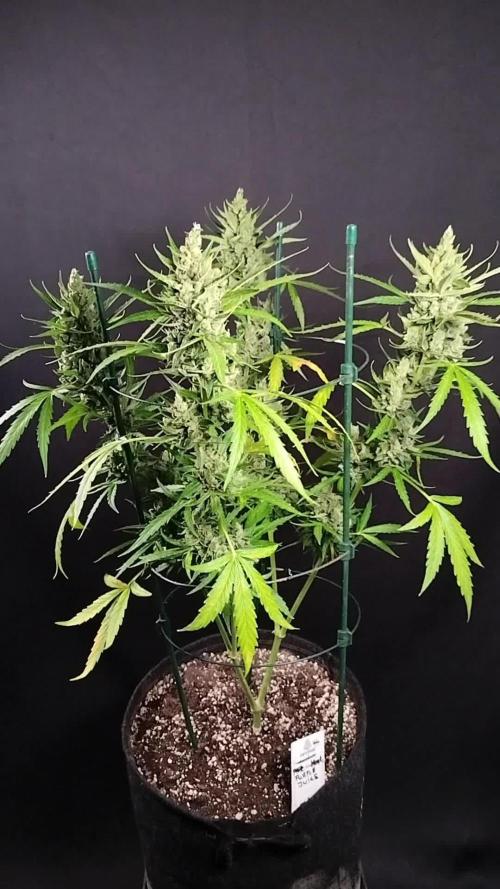
All good here 👌🏻
Stretching nicely now.
Still has short internodes too she should pack out lovely.
Don't think I'll have any issues with any bananas anymore she's is all clear.
No smell as of yet. Just that regular weedy hint. Used the sumo boost as a foliar spray aswell as root fed this week.

Likes
31
Share


@THCpapa
Follow
Week 12 in the garden, and it's time for some serious plant pampering! The ladies got a trimming fit for royalty, and even a leafy lollipop treat – because who says plants can't enjoy a little sweetness in their lives?
With the flipping of the plants just around the corner, it's like the calm before the botanical storm. I can almost hear the plants whispering among themselves, "Get ready, folks, it's about to get real in here!"
As I prepare for the flip next week, I can't help but marvel at how far my green companions have come. From tiny seeds to leafy giants, it's been a journey filled with laughter, love, and a whole lot of growth.
So, here's to Week 12 – a week of trimming, lollipops, and anticipation for the flip. Stay tuned for more leafy adventures as we enter the next chapter of the garden saga! 🌿🍭


Processing
Likes
8
Share


@julian100614
Follow
Comenzamos su 2°semana aportando los nutrientes principales Deeper Underground de Top Crop para su sistema radicular añadiendo 1ml/l al agua de pH6
Día 9: La pequeña ya alcanzó los 5cm y sigue creciendo bastante bien. Ahora lo importante es que cree un sistema radicular en perfectas condiciones.


Likes
12
Share


@CanadianFillmore
Follow
Week 3 begins for LSD and Green Crack. Both ladies are looking good, but had some small signs of deficiency. Added big bud coco and upped feeding another liter (split feed day 1 & day 5 of each week), hopefully this will help resolve the deficiencies.
Thanks for stopping by growfessors 👽🌳💚

Likes
10
Share


@Skinnytalls420
Follow
Day 16-27/12/21 that lemon baby is getting strong!!!! Day20-31/12/21 all loooking good just need space in other tent so I can move half of them!!!!
Likes
44
Share


@Ukfarmer420
Follow
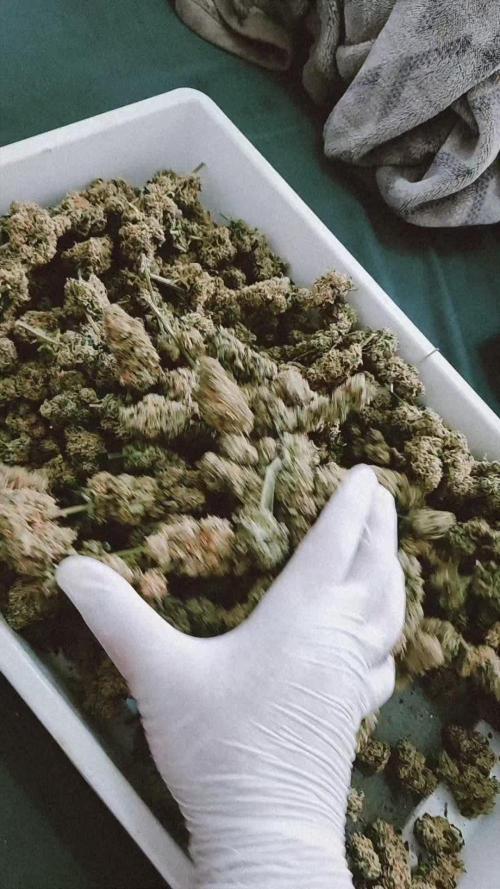
So this week i harvested the orangesherbert so sticky and stinks of orange, 50grams dry of 🔥 bud.
Curing in a big jar at 21 degrees and humidity of 60% dark cool cupboard.
Watermelon zkitles is bouncing back, the runts is doing amazing with the lst and leaf tucking.
I had to kill the purplelemonade due to it herming on me I dont have space for that so I'm going to run a ethos genetics seed in its place.


Likes
6
Share


@GanjaDjarin
Follow
Things are now advancing smoothly, having effectively weathered the majority of the challenges encountered. It's a truly uplifting experience to watch the process unfold, seeing how the plants are developing and thriving. Each day brings new progress, and I am continually enthusiastic about maximizing the sunlight that each plant receives as they continue on their growth journey.
In addition to the hands-on cultivation aspect, I'm also diligently working on expanding my clones collection. The plan for the next week or so is to cultivate and ready these clones for transplantation. It's an exciting aspect of the process that helps me stay committed to my ultimate goal.
That goal, of course, is to maximize my supply chain and provide high-quality cannabis. This involves more than just horticultural efforts. I am also persistently studying and researching the relevant laws to familiarize myself with the legal process. Navigating the licensing phase is a vital part of this journey, and I am committed to understanding and adhering to all legal requirements to ensure success in this venture.
Diary Entry for Growth Project: Day 24 - Today, a slower-growing plant was effectively moved from its soil environment into an idle hydroponic system. With this transition, the count of prospering plants stands at eight, with a couple more still being monitored due to uncertain growth. Significant discoveries include the paramount importance of light distance to the plants, which was underestimated initially. Further, it has been found that genetically modified seeds hold no superiority over the prevalent autoflower seed market. Additionally, the positioning of the plant and the volume of medium placed between the plants and the water source have been recognized as key determinants in accelerating early stage growth.
Welcome to the Day 25 update of our grow journal. I must apologize for the slight confusion - although the video says it’s day 23, today indeed marks the 25th day of our journey. I’m thrilled to announce that we’ve had a successful transplant. The plants are now settling nicely into their new environments. The question now at hand is, should we introduce stress training?
As we move into days 26 and 27, I have been pondering on this. High-stress training can sometimes stimulate growth, but in our current situation, it might not be the most prudent course of action. This time around, we are expecting all our plants in the grow tent to blossom concurrently.
In light of this, I’m leaning towards letting nature take its course rather than intervening with stress training. By doing so, we will allow our plants to focus their energy solely on flowering. The goal here is to encourage the production of dense and frosty buds, the hallmark of a successful growth cycle.
Rest assured, we’ll continue to provide the plants with the care and nutrients they need. Remember, every cycle is a learning experience, and we’re on this botanical journey together. Keep checking back for more updates on our garden’s progress.


Likes
2
Share


@Ninjabuds
Follow
My Strawberry Gorilla seedling is looking healthy with its deep, dark green leaves. I've been gradually increasing the light intensity over the past few days, which is crucial for autoflowers at this stage. It's definitely time to ramp up the light now, and I'm excited to see how it responds.
It's been a challenging week with the constant rain and ridiculously high humidity. Keeping things dry indoors has been a real struggle. Despite the weather, I managed to flip all my feminized photoperiod plants to flower this week. I'm hoping the switch will go smoothly, but with this humidity, it's going to be tough.
Likes
2
Share

@Skinnytalls420
Follow
Day 40-03/09/22 sorry for not updating but haven’t been well and was very busy but again this is second time I’ve grown this now and idk the genetics have a mind of there own but we will see
Likes
37
Share


@RFarm21
Follow
Boas growmies!
O gráfico representa a nutrição misturada em 2,5L de água da Royal Gorilla 1.
03/08/2021 - Alimentaçao das Royal Cheese's (4L): EC = 0,74mS; pH 6,1
-BioGrow - 5,5ml; BioBloom - 3,5ml; TopMax - 4,5ml; BioHeaven - 5ml; Activera - 2ml; Calmag - 1,2 ml;
Alimentação Royal Gorilla2 (2L): EC = 1mS; pH 6,1
- BioGrow - 2ml; BioBloom - 2ml; TopMax - 1,5ml; BioHeaven - 2,5ml; Activera - 1,5ml; Calmag - 1,5 ml;
---------------------------------------------------------------------------------------------------------------------------
05/08/2021 - Alimentação Royal Gorilla 1 (2,5L): EC = 1,12; pH 6,3
- BioGrow - 3,5ml; BioBloom - 3ml; TopMax - 3ml; BioHeaven - 3,8ml; Activera - 3ml; Calmag - 0.6ml
Alimentação Royal Cheese 1 e 2 (4L): EC= 1,10; pH 6,3
BioGrow - 6ml; BioBloom - 4,5ml; TopMax - 4ml; BioHeaven - 5,5ml; Activera - 5,5ml; calmag - 1ml;
Alimentação Royal Gorilla 2 (2L): EC =0,98; ph = 6,3
-BioGrow - 2ml; BioBloom - 2,5ml; TopMax - 1,5ml; BioHeaven - 2,5ml; Activera - 2,5ml; Calmag - 0,7ml


Processing
Likes
12
Share


@ThatoneAKguy
Follow
Now this side of the tent seems to be doing great. At first I thought it was the air circulation with the other side so I’m still digging into that. Either way this is about these two ladies and I see the forming of pistils and can’t wait to see what kind of stretch they get into in the upcoming weeks. As for the coco vs. the rockwool way I’ve done it in the past I’m leaning towards the rockwool way. It’s easier and thus far the plants I get from it are larger. It consumes about the same amount of water although less nutrients.

Likes
23
Share


@Vincent11
Follow
Yes it's going amazing 21 days and the plant looked great after lifting the lights to 38000 lux there is no current issues that I can notice.
Hope it goes all the way without a hinge.
Please leave your comments below.
Likes
6
Share


@MasterKush714
Follow
Next week gunna chop!
48 hours darkness and then bam!
Water only for flush!!
Will update as necessary thanks!!!


Likes
5
Share


@cr0baron
Follow
Really good sativa, was supposed to be 'fast-flowering' but was not, however it grew to the largest plant of the 4. Would grow this one again. Unfortunately the main cola ended up rotting due to high humidity which was a great shame.

Likes
2
Share


@CannaIGrow
Follow
I did not top this girl, yet. Her top lowers started catching up to the top so I didn’t want to stop her yet lol. But all in all she’s looking healthy.
Likes
2
Share

@Nickeluring
Follow
It is still hot here and all my girls are suffering. We´re almost done and I will start checking the trichomes now.
I had to add some support to help keep the heavy buds upright. Both plants are getting beautiful buds that smell amazing.

Likes
8
Share


@Lickey
Follow
Buds are ripening and trichomes are starting to get cloudier. I expect two more weeks

Likes
19
Share


@DogDoctorOfficial
Follow
one more week up we go, and after intruducing the AC to the Girls, and rase some of them up closer to the ligth ( i did this because the most of my SG are 3 phingers from the ligth lol, so bringing the ligth down was not an option )now i realize that the BB and the AP are showing some spots on the older leaves with i think it migth be nutrients problem, so i'm intruducing Calmag Agent and see how they react. Appart from that they all look amazing, the smell is starting to show off in all of them, it's like a rainbow of fruity smels with a sweet taste going from one strein to another, so far the one i think is the winer in tha smel factor is the PG, man, she's becoming and amazing white frosty smly litle plant <3 the same is happening to all of her siters in my litle love garden.
So let's see how the wee goes, i'l try and keep it updated the most i can,
Stay safe
Peace out
D
So day 31 F and i intruduce Calmag and lower EC to 1.8 , now let's seeee :)

