Likes
Comments
Share

@GERGrowDesigns
Follow
Dear Growers ,
Welcome to Week 10 or Flower week 7 // Harvest Day from Kannabia Purple Dream Auto
Whether you're a beginner or an expert, you are warmly invited to join, ask questions, and share your own experiences along the way!
Project Setup & Conditions:
• Brand/Manufacturer: Kannabia Seeds
• Tent: 222cmx150cmx150cm
• Light: 2x 720 Watt Full Spectrum
• Humidity: 50%
• Soil: Narcos Organix Mix
• Nutrients: Narcos Products
• pH Value: 6
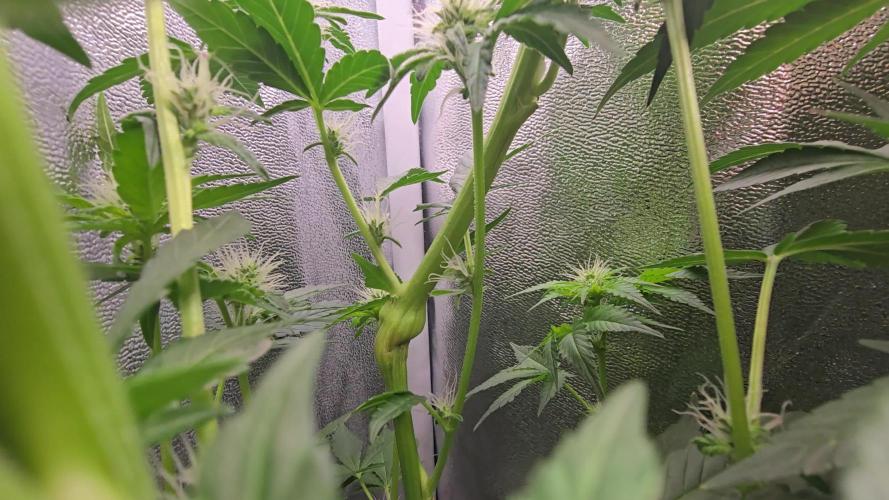
The Pictures Showing genetic 1 and 2 Purple Dream Auto
If you want Germinitation results like mine , check out Kannabia Seeds with my link [https://www.kannabia.com/de?ref=61966] and grab the germination device or the strains I used . Trust me – it’s worth it for sure !
Get another 20% Discount at all products using the code [GGD] at the Checkout .
Stay curious and keep up Growing —we look forward to welcoming you back for the next Projects soon!


Processing
Likes
3
Share


@Dico29
Follow
Day 136.... buds are swelling and looking nice, don’t really do much beside chill in my closet with my other plants but all in all it’s great smell and destroys all my chances of smell control, which is very little to a point of non existent

Likes
8
Share

@Roberts
Follow
She is getting harvested today. She looks great and loaded in frosty flowers. She grew fast and well. Thank you Zamnesia seeds, Medic Grow, and Hon&Guan. 🤜🏻🤛🏻🌱🌱🌱
Thank you grow diaries community for the 👇likes👇, follows, comments, and subscriptions on my YouTube channel👇.
❄️🌱🍻 Happy Growing 🌱🌱🌱
https://youtube.com/channel/UCAhN7yRzWLpcaRHhMIQ7X4g.

Likes
3
Share


@HowtoBubatz
Follow
This week has been a mixed bag for my two plants. #1 is really taking off now, showing strong growth and picking up speed!🌱
It’s looking healthy and vigorous, which is great to see. Towards the end of the week, I also noticed the first signs of flowering—exciting!
Unfortunately, #2 is still struggling.😩
It has barely grown and remains very small compared to #1.
If it doesn’t start making progress soon, I might consider replacing it with another plant.
I’ll give it a little more time, but let’s see how things develop in the next week. Fingers crossed!🤞


Likes
15
Share


@BushDoctor740
Follow
Day 28 I’ve been training the girls branches this week and they are filling out nicely.Watered with recharge and ph 6.5 they still are not drinking heavy but watering when pots are dry.I increased the light intensity to 50 percent power and they are taking it well.Ive noticed signs of flower development so i will top dress with 50/50 Gaia green power bloom/gaia green 4,4,4 and water with recharge.
Likes
29
Share


@Wrongholn519
Follow
Smooth sailing at this point... I have just a few key things to discuss going forward this week. No more nitrogen being fed to these plants at this point. My PK booster has no nitrogen, and I plan on using it once or twice more.
The majority of nutrition at this point is coming from the rooted leaf Cal-Mag fuel which is an organic source of food. I've also been using the Golden Tree 0-0-2 but unfortunately I ran out this week. To replace it, I'll be using an organic black strap molasses.
My temperatures have also dropped at night. By by about 7° c. My daytime temperatures are down two or three degrees Celsius.
CO2 dosage is set to 800 parts per million

Likes
12
Share


@Brixx
Follow
Well thats my grow diary. I hope it ends up being informative of helpful to someone somewhere along the line. I have more grows going, but I am going to skip on diaries for now. See you next time.

Likes
14
Share


@Gardens_of_Of
Follow
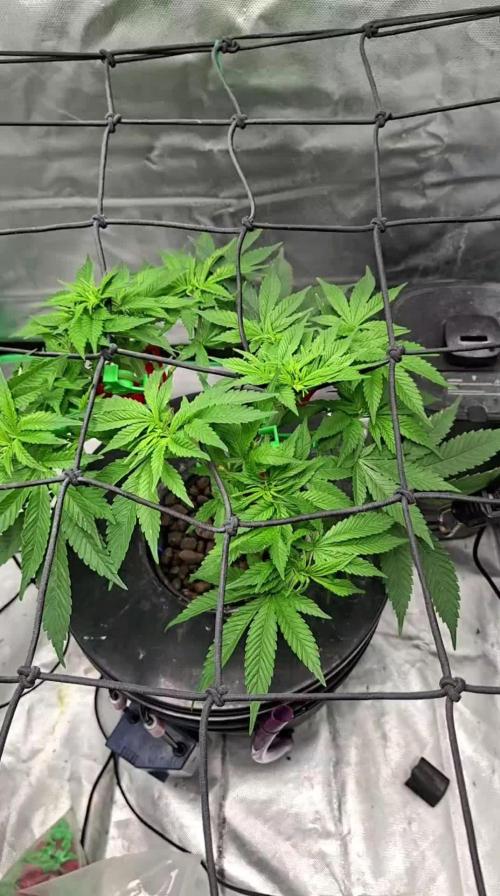
Both plants look healthy. I keep defoliating every day and they keep growing new leaves. They are extremely bushy plants. I have elevated their pots as they almost don’t stretch and they are a lot smaller than the rest of the tent now. A trailers net is added to level the canopies end of 1st flowering week.

Processing
Likes
30
Share


@CBD_Sweden
Follow
2018-03-13 Week 11 Day 1
As I mentioned last week, the girls are growing like crazy since I changed to 600W HPS,and even though they haven't grown so much higher, they are definetly wider because of LST.
My growroom is only about 1.8m2, so now the girls are so wide that there's not enough space for them to get wider, so now I will let them stretch.
Nr 1 is 43 cm
Nr 2 is 44 cm
2018-03-14 Day 2
I LST'd the girls one last time and also defoliated them mildly so all the tops get as much light as possible, hopefully increasing the yield in the end.
I also turn the girls 1/4 lap every day to ensure that all sides of them get as much exposure to light as possible, it would've been great to have some kind of turntable that turns the girls 1 lap in 12 hours,, but until I find out a device that does just that,I'll keep on doing it manually.
Added some videos for you to enjoy.
2018-03-18 Day 6
Watering the girls with 2l of plain water (pH 5.8), the soil were dry after 3 days since they got water and nutes. I want to release the remaining dry nutes buried in the soil.
Some of the girls got burnt leaves but not from nutes, but from the hps-lamp, they've stretched so much so I raised the lamp about 10 cm, but now I'll keep an eye on the distance between the lamp and canopy, don't want them to get burnt again. But lucky me, only leaves got burnt - no top got harmed 👍
-----------------------------------------------------------------------------------------------------------------------------------
Strain information:
The word synergy is a business term first quoted in the early eighties to describe mutual enhancement through interaction or cooperation, where the end result gained is greater than the sum of the parts used. What do synergy and the Crazy Cookies cannabis strain have to do with each other you may well ask?
The parents of the forthrightly indica Crazy Cookies are marijuana royalty. OG Kush and Girl Scout Cookies. These strains of contemporary legend have been combined to cerebrum shattering effect. The cured flowers deliver a mouth-watering and couchlocking 24% THC. The initial delectable spacey upbeat onrush compliments of the Durban Poison coursing through the genes of the Cookies soon becomes a lush and rich, inescapably delicious body flux.
There should be a picture of a Crazy Cookie nugget in the dictionary next to the word synergy. Crossing the OG back into the Cookies has amplified the psychoactive effects of the notorious lineage of both parents. This is an indica with a capital I.
As a breeder it would be fair to assume that injecting more OG into the Cookies would result in an OG-dominant Cookie, or even close to a pure OG, but something else has happened. Some long dormant genetic switch has been flipped and a standalone indica has emerged whose spicy notes and earthy tones, hints of grape and horny pheromone are an absolute pleasure.
Paying this breed some careful attention as it grows will reward you substantially, indoors or out. Typical hybrid vigour is shown throughout each grow phase. Stout plants to 80cm can be expected indoors and muscular examples with fluted stalks growing to two metres can be easily achieved outdoors. Good bracing is necessary as the flowers mature. With more than 500g at harvest per robust plant, colas can easily snap and twist branches.
-----------------------------------------------------------------------------------------------------------------------------------

Likes
18
Share


@Grower_Of_Persia
Follow
week intel:
every thing is amazing girls are ripening , we can now cause more e.c stress than before because:
1-plants are very mature now and can handle stress
2- at this week its the only stress that is helpful for increasing plant resins
stresses :
E.C stress around 1.6 and 1.7 3 times a week
feeding:
i replaced B-52 with Bloom Base Nutrient
i feed them 3 times this week with this order :
day 1 : i feed them high with base nutrients(calcium & micros (half dose) + Bloom) about 850 ppm - 1.7 e.c to cause a little stress.
day 3 : i feed them high dose of Top-Max + Bloom Base Nutrient around 877 ppm - 1.7 e.c to cause stress .
day 5 : i feed them high dose of Feeding Booster around 850 ppm - 1.7 e.c to cause e.c stress again
guide of the week :
last weeks are time of ripening , and the only helpful stress is e.c stress at this moment
Likes
42
Share


@Theia
Follow
A great week for the sherberts. They have been topped and pinned and are growing out great. Always praying always happy. I wish my kids were like these two!.
No dramas to report. They seem to like any enviroment they have been subjected to in order to keep other plants in the grow space happy. They take the cold just fine. they love the warm also. Only thing i found is they had issue sooner then others with RH over 70% ( i was running high RH to fix my Chibas)
#1 has bee cleared of nodes 1 and 2 and will have another topping in 3 days or so. #2 i plan to grow out node 1 cut 2 and top 3.. Giving 12 colas in total after final topping.
Started feeding some grow to them at an EC of 1.25. I was planning to repot but they seem okay atm. Maybe next week.
I also dropped 2 hrs off the light scehdule so they are running on an 18/6 from 20/4.
Added a little vid of the grow room ATM😅👍
Thanks for stopping by.
stay safe..
Grow well.

Likes
16
Share


@Marshydrots1000
Follow
Sure are stinking the place up now ! Unbelievable. Still maturing nicely buds arnt supper tight on one on the left the right side is looking better. But still a week or so yet I would say one will be done a week or so before the other also. All in all things are looking good.
Likes
84
Share


Likes
4
Share


@C_More_Budz
Follow
FOLLOW THE GROW———>https://youtu.be/SjZ-eizIP7o
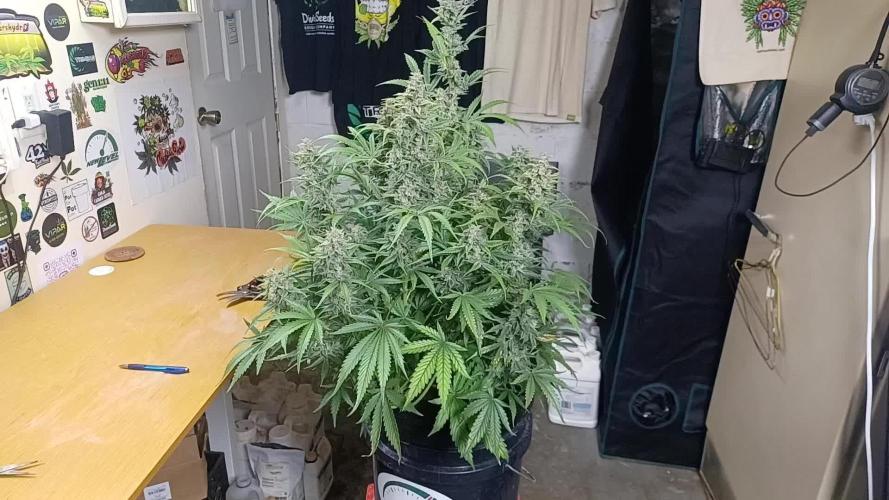
Growth has been steady and lush considering the fact that there has been a 2 week heat wave.
For the plants in the bucket the 2 smaller ones are phenos of my previous Fanta Sea RBX grow, and the bigger one is a Sherb clone from my previous grow as well

Likes
30
Share


@HydroGrowLED
Follow
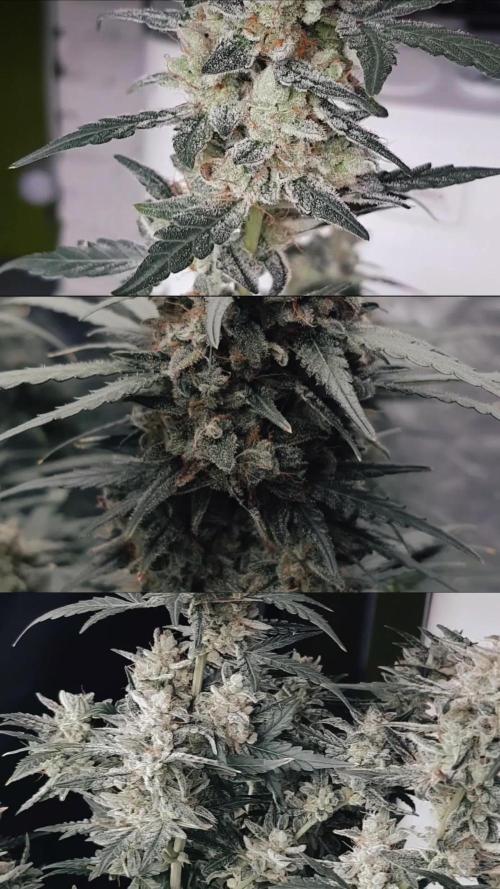
Quite a few are finishing up I’m gonna start the flush in around a week then harvest few days after that, incredible thc on this strain and buds are really dense I couldn’t recommend a better autoflower then this is best I’ve ever done 💪🌱😜
Processing
Likes
30
Share


@Velk1
Follow
All the baby's are in great shape the mbap's are taking to the scrog well loads and loads of bud sites
The grape walker kush are getting nice and big I esspesially like the look of the mainlined/folded one structure is nice and open
Now the gold glue by topping this seems to have really done it well more open branchy structure much Easyer on training this one is going to be interesting ......... Check out the insta for more @velk_1