
Processing
Likes
Comments
Share


@Grey_Wolf
Follow
High Level From Eva Seeds 13 weeks of Veg completed 13th of Jan 2020
So last week was aproximately the Half Way mark for this Grow and Ive started to prepare for the Flowering stage by adding support lines (plant yo-yo's) to the Branches.
Both plants are looking good and I fed them both a feed of some of the DR Greenthumbs "High tea" that I brewed up over the last 24 hours.
At the month of this Month (Jan) I'll start to add the Dr Greenthumbs Bud & Bloom soil Booster that is part of the Full "Super Soil" Kit.
I'm hoping for a Good haul off these two girls , especially plant 1 so I need to provide all the energy I can to the Girls during the Flowering stage.
Thanks for stopping by and I'll be back next week. 👍


Likes
35
Share


@InhaleXhale
Follow
Nach langer Zeit ist es endlich soweit, ich habe sie geerntet.
Bei dieser Pflanze habe ich mich dafür entschieden sie gegen den natürlichen Lebenszyklus outdoor eher zum Blühen zu bringen.
Ich pflanzte sie in einen Hanffasersack den ich mit Erde auffüllte. Diesen platzierte ich auf einer Schubkarre.
Wo ich wohne wird es manchmal schon im Oktober sehr kalt, sodass die Wahrscheinlichkeit für eine sichere Ernte realtiv gering ist (at this point i hope the best for my other outdoor plants).
Ich rechnete mir aus wann der perfekte Zeitpunkt zur Ernte ist um noch im Sommer das Resultat genießen zu können.
Ab diesem Zeitpunkt fuhr ich die Schubkarre jeden morgen um 8 Uhr nach draußen und um 18 Uhr wieder nach drinnen um optimale 12 Stunden Lichtzufuhr zu gewährleisten.
Während den letzten Wochen der Blüte sind ein paar männliche Blüten aufgetaucht wie auch bei meinem indoor grow.
Für einige war der Zeitpunkt der Ernte vielleicht zu früh, aber ich finde es so sehr angenehm zu rauchen und auch der Effekt ist in diesem Stadium optimal für mich.
Die einzige Methode die ich hier verwendete ist das Pruning.
Es erspart dir einen Menge Zeit beim beschneiden der Blüten und lenkt die Kraft auf die verbleibenden Blüten, um diese zu stärken.
Nachdem ich bei meinem letzten outdoor grow viel zeit beim trimming verbracht habe, habe ich mir eine Erntemaschine gekauft (look at the video).
Mit dem Ergebnis der Maschine bin ich zufrieden, da ich es per Hand in der gleichen Zeit unmöglich in der Qualität geschafft hätte.
Die Blüten wurden ungefähr 2 Wochen bei guter Durchlüftung getrocknet, um am Ende wurden es 255g.
Für mich persöhnlich ist es ein sehr gutes Ergebnis.
Die Blüten sind schön fest und klebrig mit einem sehr süßlichen Geruch.
Ich habe versucht ein paar schöne Fotos zu machen und habe meine Kreativität spielen lassen (my wife also got a great idea, you can guess which idea was mine ;D)
If you have any questions feel free to ask. Im also open for criticism
I hope you enjoy the pictures and the report stay safe and happy growing.
____
i will update the smoke report soon.

Likes
40
Share


@MadeInGermany
Follow
Info:
Unfortunately, I had to find out that my account is used for fake pages in social media.
I am only active here on growdiaries.
I am not on facebook instagram twitter etc All accounts except this one are fake.
Have fun with the update.
Hey everyone 😊.
The lady was repotted 4 days ago and has developed very well since then :-).
I let them take root for a few more days before I start training (topping) and add their GHSC Powder Feeding bio Grow 👍.
Otherwise, as always, the tent was cleaned and the humidifier refilled :-).
I wish you all the best ☺️ stay healthy 🙏🏻
You can buy this Strain at :
https://sweetseeds.es/de/cream-caramel/
Type:
Cream Caramel
☝️🏼
Genetics:
Blue Black
x
Maple Leaf Indica
x
White Rhino
👍
Vega lamp:
2 x Todogrow Led
Quantum Board 100 W
💡
Bloom Lamp :
2 x Todogrow Led
Cxb 3590 COB 3500 K 205W
💡💡☝️🏼
Soil :
Bio Bizz Coco
☝️🏼
Fertilizer:
Green House Powder Feeding
☝️🏼🌱
Water:
Osmosis water mixed with normal water (24 hours stale that the chlorine evaporates) to 0.2 EC. Add Cal / Mag to 0.4 Ec Ph with Organic Ph - to 5.8 .

Likes
12
Share


@Belverde
Follow
Hi and thanks for stopping by here..
Lowley strain...run at 12/12 and they responds well with great production of sweets bud..
The bigger one I think to cut in a couple of days..the smallest one of the two, but with a lot of buds I think to cut in the end of next week..the smallest and later girl I think probably 10 days more, but she smell absolutely awesome, real candies girl🍬..
See you next week..
Bye✌️

Likes
Comments
Share


Likes
14
Share

@GERGrowDesigns
Follow
Welcome to Flower Week 7 and harvest of Sensi Seeds Purple Berry Muffinz
I'm excited to share my grow journey with you from my
Sensi Seeds Project . It's going to be an incredible ride, full of learning, growing, and connecting with fellow growers from all around the world!
For this Project , I’ve chosen the Feminized Photo Strain Purple Berry Muffinz:
Here’s what I’m working with:
• 🌱 Tent: 120x60x80
• 🧑🌾 Breeder Company: Sensi Seeds
• 💧Strain Info : 26%
• ⏳ Flowering Time: 6-7weeks


Likes
14
Share


@Luv2Grow
Follow
Overall, this grow took care of itself, other than the watering and feeding. She grew like a damn tree and didn’t know if she would ever stop stretching but finally did at around 32”. She took very well to LST and this was definitely the biggest auto that I’ve grown to date. All the buds are as solid as a rock, even most of the lower stuff. There were some fluffy buds in there but will end up using that with the trim and leaves to make edibles. All in all, I ended up with 665 grams of wet bud and looking forward to seeing what the final results will be. I’ll update in a week or so with finally weight and a smoke report.
Likes
12
Share


@Tagadatek
Follow
Il me semble que les puissante brûlure son due au pk13-14.
J'ai effectuer un rinçage . En attente de résultats, espérons ne pas brûler les bud

Processing
Likes
7
Share


@fiognarr
Follow
did a bunch of defoliating right before the pictures, it was wicked dense.
two waterings ago it got .5ml fox farm grow big in 5gallons of water. it really hasnt needed nutes yet.


Likes
8
Share


@y11dos
Follow
So far i feel like the plants have all decent health, for one of them i build a little think to stand on because its 10-15 cm smaller in height so that it would have the same height than the others and gets enough light for sure. I defoliatet completly i think by now, and i will just let buds develop from now
Im so curious how it evolves during the next few weeks
Likes
21
Share


@Potgoblin
Follow
Hello Growers!
Nice to finally join the club! 😁
This is a step by step of my very first attempt at growing from Start to Finish.
It's something I've always wanted to do and I've researched a lot of over the years but now is the right time to give it a go as I have become a medical user of cannabis and the price just keeps going up!! 😂🤦♂️
So without going on too much let's get down to the nitty gritty...
I Dropped the 1 seed into a glass of 5.8 PH water on 10/05/21 which I also dechlorinated, waited until she sank then placed her between two damp paper towels inside two plates in a warm, dark & humid spot (bucket) until the tap root showed and was about 1/4" long then she went straight Into media on 12/05/21.
Day 1 - 15/05/21 - first two baby leaves open & lights on!
Day 2 - 4L Humidifier added, seedling just under 3" tall ALREADY!!! So I've lowered the light from 23" to 15" to try and stop the stretching.
Day 3 - 17/05/21 - Checked on my girl and she's the same height as yesterday so hopefully the stretching has stopped 🤞 I also built a T-bar diffuser for my humidifier using some 32mm PVC pipe and fittings (Photo Above) I'm hoping this will distribute the humidity more evenly so I can have the humidifier on less often, I'm getting puddles of condensation forming in the bottom of my tent which is annoying! 🌊🌊🌊 😂 I'm hoping it might save me a bit of deionised water as well? 🤔
Day 4 - The T-bar diffuser I installed on the humidifier is working well, The RH is staying up and so far no puddles! ⛲ 😂 I will get a more comprehensive reading of highs and lows over the next few days and get it dialled in the best I can. I also think that because there is a lot of red LED's in this Mars Hydro light that may also contributing to the stretch during my girls early stages of life. Thankfully she is looking great and the stretch is massively reduced now that The light is lower. 😁
Day 5 - 19/05/21 - So far So Good! 😊 The stretching has definitely stopped but I'm still worried about her getting so tall so fast!! So today I installed a small 6" fan in the corner of my tent to try and get her stem to thicken up a bit, this is set to run only when the humidifier is on otherwise it screws up my RH and Temperatures. I also plan to bury her an inch or two deeper when I re-pot 👍 apart from that she's doing great! 🙂
Day 6 - 20/05/21 - No major updates today she's just looking happy! 🙂
Today's Environment Readings:
Max Out (Probe) - 24.2c
Max In (LCD Screen) - 23.8c
Max RH (LCD Screen) - 81%
Min Out (Probe) - 18.8c
Min In (LCD Screen) - 18.7
Min RH (LCD Screen) - 47%
Day 7 - So that's week 1 done & It seems like I've gotten all my temps down now, 👍 she's no longer stretching, humidity and temperatures are staying where I want them and my little girl is looking healthy 😁
No nutrients for the first 7 - 10 days of her life just water 🚰 set to PH 5.8 and dechlorinated.
Hardware
0.75 x 0.75 x 2.0m Bud Box Pro tent in White
Telos 6 Pro 175w LED! 😁
4" TT pro fan for Extraction moves up to 187M2 & SMS Controler + temperature probe
3" Passive intake (made slightly larger than normal due to the small area and large fan, also covered to prevent pests)
6" clip on Ram fan placed next to intake
Rhino Pro 100/300mm Carbon Filter
4" Black combi ducting which feeds outside
4L humidifier set to run intermittently via analogue timer to increase humidity in Seedling + Veg stage
Agro lab Temperature and humidity sensor
Media
I decided to go with a soil media as all of the medicine I grow will be for myself so flavour, quality and terpenes mean more to me than weight
0.2L"ish" Seedling pots - 75% BioBizz light mix 25% Canna Coco Professional for added drainage
I will only be re-potting once into 8L Fabric pots 75% BioBizz All Mix 25% Canna Coco Professional
Nutrients
Going to stick with the BioBizz range of organic liquid nutrients including Grow, Bloom, Root Juice, Cal-Mag, PH down & Top Max apart from using some Plant Magic Silicon, some Root it First Feed, some Neutralise to remove the chlorine and chloramine from my tap water & Flawless Flush at the end.
(I have some more seeds en-route to be safe)
Light Distance From Canopy - 120cm
Temperatures - Lights On - 26.0C
Temperatures - Lights Off -20.0C
Relative Humidity - 75% - Lights On
Relative Humidity - 60% Lights Off
Current Light schedule - 18/6
I can't think of anything else to include in regards to specs but if I've missed anything off or if you have any questions or comments then get involved as I'd love some input and advice!!!
In the Meantime everyone I'm going for a smoke!! Stay High, Stay Happy and keep Growing!!!
PEACE!!!! ✌️
Potgoblin
Quick edit...The 3 remaining pots will have some other vegetables in them for this run, Pear Drop Cherry Tomatoes and Sweet Peppers if anyone was wondering...

Likes
1
Share


@Growjrim
Follow
I've decided not to send her into flower yet and I'm trying to stretch her throughout the whole tent.
Likes
9
Share


@Rock_n_Roll_Randy
Follow
ALL THESE PHOTOPERIODS WILL GO IN THE 8X8 TENT ONCE THE AUTOFLOWERS ARE CHOPPED AND I WILL SWITCH THE LIGHT TO FLOWER THEM IN THERE FOR MORE ROOM
FOR EVERYTHING MARS HYDRO VISIT:
www.mars-hydro.com
www.marshydroled.ca
PROMO CODE: rocknroll
VISIT THE ALIEXPRESS STORE:
@marshydro_aliexpress
Instagram: @marshydropenny
Thanks for taking the time to read and check out my diary🤜🤛
TS3000 FEATURES:
WIDEBAND SUNLIGHT FULL SPECTRUM LED GROW, Infinite close to natural sun light, suit for all plants whole stages indoor growing, rapid plant response from seed to flower, achieve maximum quality and quantity, much better than traditional HPS grow systems.
HIGH REFLECTIVE & NOISE FREE-Fanless LIGHT BOARDS design will make your growing life easy and quiet, quickly heat dispersing material aluminum reducing light lost to aisles and walls, increase the light intensity up to 20%, allowing your plants receive more energy and without burning your plants for maximum headroom.
HIGH EFFICIENCY ENERGY SAVING PLANT LIGHT, high-power NEW LED grow, Compares to traditional 3000 watt HPS lamp and other brand led grow light while only 450 watts true output with 1016 LEDs, more scientifically and energy-efficient! Perfect for 5' x 5' veg stage, 4' x 4' bloom stage, higher intensity in a MARS HYDRO grow tent, reflective area, or by crossing over using multiple TS3000.
BOOM YIELD LARGE GROW LIGHT, NEWEST SMD LED technology provide highest PAR/LUMEN output(1095.6umol/), makes you get 30% higher yield compare OLD led lights, can get max yield at 2.5g/watt, less pay but get more yield, bring a amazing grow trip to any home grower as it beams huge amounts of light energy to plants below.
COMMERCIAL LED GROW LIGHT, Updated easy dimming & daisy chain function, main light controlled, especially come with two waterproof and dimmable Mean Well Drivers, auto sensing power supply works on both 120VAC and 240VAC and 277VAC, suit for Large Rooms and Commercial Setups.
Low Energy-Consuming LED Grow Light: Consuming 300w and also mounted with 1016 chips, TS3000 has the ability to replace a 450w HPS light while reducing 40% power intake.
High Efficiency LED Grow Light: With overall light output PPF 343umol/S as well as amazing PPE 2.3 umol/j, it's 50% even more photon efficient and can assure a 30% more return than the old HPS/MH lights.
Patent Highly-Reflective Hood Shape: The reflector design on TS3000 is patented, which can effectively gather the light dispersed in all directions to enhance its light intensity as well as assist plants in absorbing more light.
Full Spectrum Plants Favorite Spectra: By the unique mix of spectra that makes most light in the 400-700nm waveband, incredibly conducive to plant photosynthesis. Adequate IR(730-740nm) is additionally consisted of in the range to generate larger buds.
Dimming And Daisy Chain Feature Available: Upon an independent dimming button on the external driver, backing 0-100% settings adaptation and up to 30 LEDs daisy-chained in a group, it supplies different light levels for various plant stages meanwhile saving energy.
Safety Certifications And Service Warranty: CE, ETL, RoHS, UKCA security certifications accepted, 50,000 hours durability, 5-year service warranty, and local after-sales repair
5x5 GROW TENT:
LOCK ALL LIGHT INSIDE MARS HYDRO Indoor Grow Tent interior is made of diamond mylar which is highly reflective. (Other brand's mylar and reflective rate is as low as 50%, won't provide efficient light. )MARS HYDRO 1680D canvas, being double stitched, it is tear proof and has perfect light locking. Mars Hydro's grow tent keeps 100% lighting beams inside and helps your plant absorb more lights. EXTRA-THICK --No light leaks or rips at all
DURABILITY GROW TENT Stable metal corner adapters and poles are the trustful supporters of the tent, standing sturdy, neither rusting nor paint-falling, quick easy tool-free installation. Mars Hydro's heavy-duty metal zippers, with double layer black lining, are the best on the market which create a light-proof seal
EASY OBSERVATION FOR YOUR PLANTS. Special observation windows are made by double layers of cloth. Observe the growing conditions of your plants without opening the tent and avoid disturbing plants. The observation window also serves to dissipate heat and ventilate air
AUTOMATIC 6 INCH EXHAUST FAN KIT W/ CONTROLLER:
Mars Hydro 6'' Inline Fan uses a mixed-flow design to maintain peak performance in a high static pressure environment.
GROW TENT FAN: MARS HYDRO inline fans are designed to ventilate hydroponic grow rooms, transfer heating/cooling, cool AV closets, and exhaust odors.
EFFECTIVE VENTILATION: Variable speed controller for easy fan speed adjustment. Optimal ventilation for your planting.
LOW NOISE LEVEL: Durable plastic fan housing and blades for extremely low noise(32dB-A); create a truly quiet growth environment.
EASY INSTALLATION: Removable duct ends with locking tabs for quick removal and easy maintenance and a cord length of 4.9 feet for hassle-free setup. This grows tent fan with a controller for easy fan speed adjustment.
BASIC PARAMETERS: Ventilation exhaust fan size: 6” | Dimensions: 315mm*225mm*210mm. | Weight: 2.7. | Airflow: 402CFM | Noise: 32dB-A | Bearings: Dual Ball.
Likes
17
Share


@CzAlmighty
Follow
Tak pomalu zjistuju ze je tu čím dal víc Čechů. Co mě moc těší. Další týden bez žádný problému. OG jede luxusně. A větví se taky krasne. Příští týden už jedu LST 😇🍀🍀🍀příjemnou sobotu . ❤️
Likes
18
Share

@Hempcules
Follow
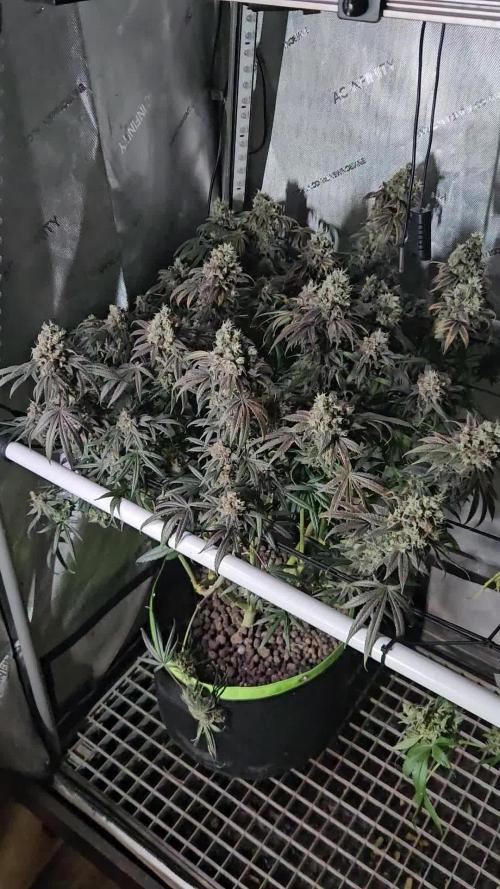
WEEK 17
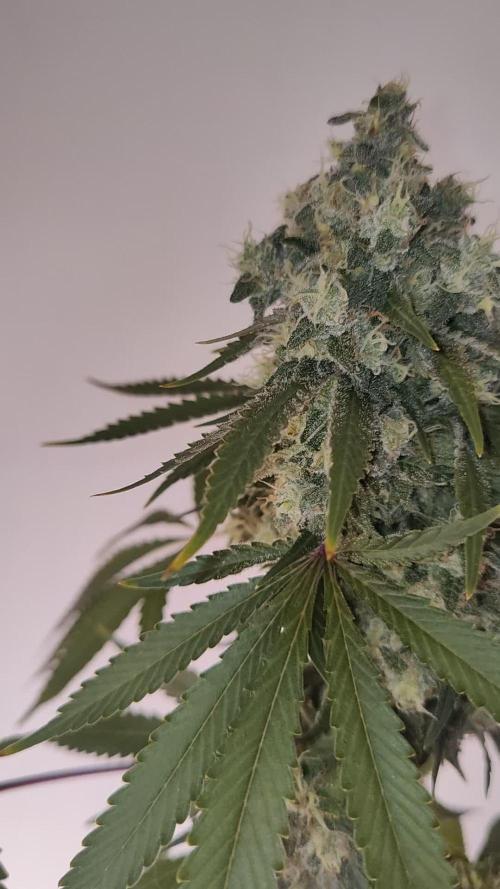
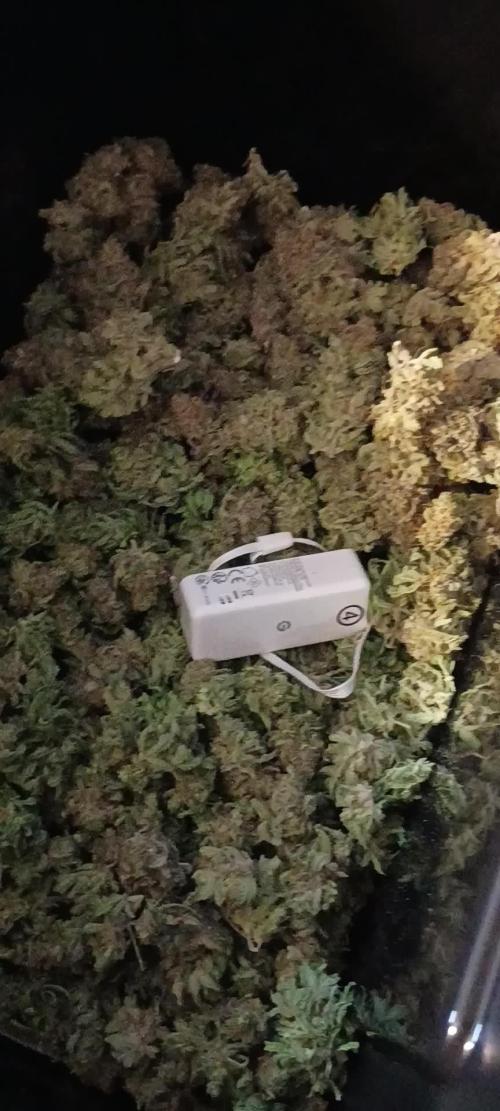
It’s coming to an end with this grow. I’ve already reduced the nutrients over the course of the week and I think I’ll be able to harvest soon. At the moment, a few amber-colored trichomes can already be seen.
The buds have become thick and firm by now and are covered in plenty of resin.
Now it’s entering the final phase, and I’m already looking forward to the harvest.
PPFD: 1000µmol/m²/s
Water: 2x water 1x nutrient solution
Vpd: 1,8Kpa


Likes
43
Share


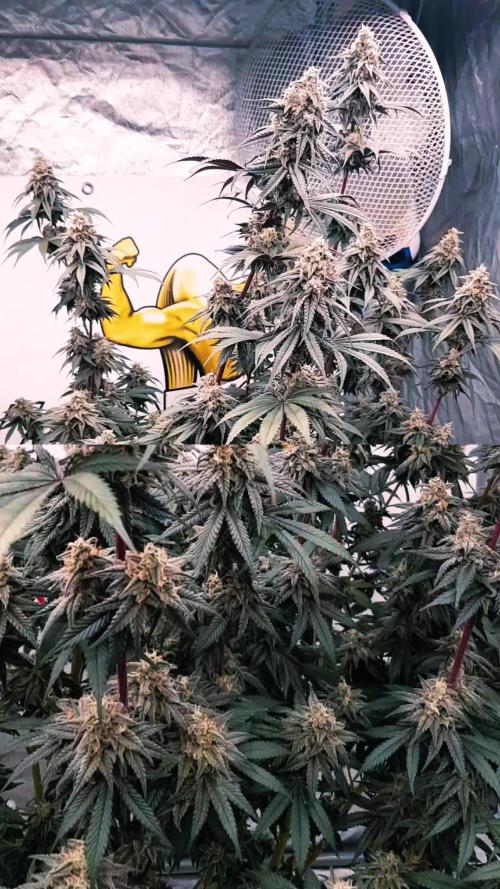
@OrganicPower
Follow
Week 5 flower. This one just grows slow. Slowly filling in. Very frosty, but not a nice smell. Hopefully the flowers end up tight, hard, and smelling great. Lights are at 12-14” from canopy, and plants are taking it well. Blumat drip still working, and hand watering once a week with Gaia Soluble Seaweed Extract 0-0-17. Not going to top dress anymore as these 30 gallon pots have lots to offer still and this plant is using nothing really. Thanks for views!
