


Likes
Comments
Share

@Radagast_
Follow
04.08.
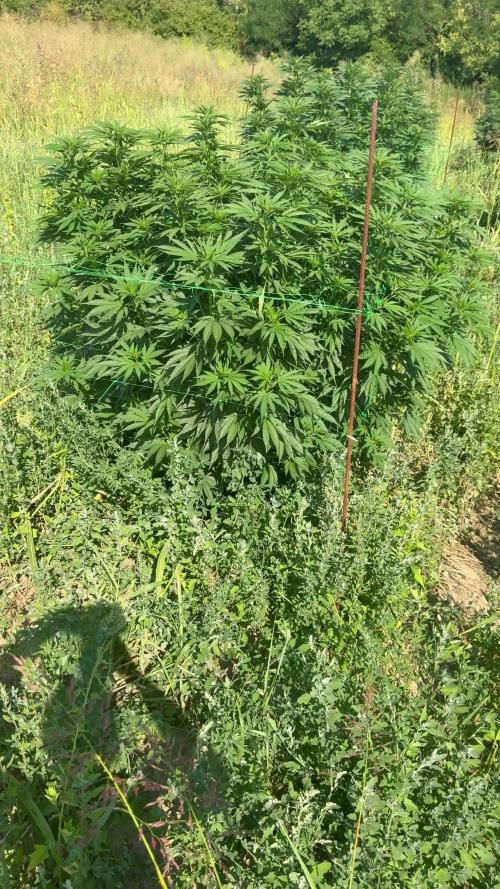
Rainbow Sherbet 1# Day 101#
Rainbow Sherbet 2# Day 99#
The plants are progressing well, most of them went into preflower a few days ago, the others are slowly entering... I was too lazy to photograph and record each plant separately, so I took a picture and recorded everything together... this grass has grown too much, in some places it is half way up the plant and you can't see how big the plants actually are, these days I will mow it under them and around them and in the next update I will post individual pictures where everything will look nice...day before yesterday I watered them with clean water, the next watering also with clean water and then I will most likely switch to food for the flower, I will see from the situation.
Three days ago it was the end of their fourteenth week, the pictures and videos are from day before yesterday.
Stay High and Keep Growing!!!

Likes
59
Share


@Neo09
Follow
🌌🛸 hey hou,
just putting in all pics from begging till now, cos im really low with the time,.. behind this project is biggest story of my life, not only grow story, its much more behind.. i wish nobody to get such a grow in way as i do,. actually is nothing possitive there and this project i started, cos i lost everthing what in life importnt is. with this project, once, i wanted to give back just a litle bit of that what i got,.. and it still not eneough,. some things you cant buy, you cant pay,.. and you can get back... peace and stay hard, thing about what you decide, think about twice..
Likes
2
Share


@gr3g4l
Follow
con 22 dias hice una última poda, a partir de esta última poda solo iran cayendo algunas hojas por viejas.
empieza el buen tiempo y toca retirar el ventilador que tenia por encima del lumatek por dos de más pequeños enfocando directamente a las copas.
Likes
4
Share


@Alejangrow
Follow
Giving her ph adjusted tap water to flush her out well for the chop in 7 days. 🌊✂️
First time growing a sativa dominant strain & I was expecting it to grow taller than the other hybrids in the same enviroment but it didnt. Not sure why my buds are airy & foxtailing a bit. Maybe heat stress or maybe just the genetics. 🤷♂️🏽Nothing else in the room showed nug structures like this so it kinda makes me suspect the bud structures to be due to genetics. 🤔

Likes
33
Share


@Odissey
Follow
Update week 15: I have been flushing them for a week now. I will let them go an additional week and then I will probably harvest depending on the trichomes. They smell lovely, the DGx3BOG smells like gummy bears and the Tangie smells indeed very citrusy.

Likes
16
Share


@Cauli
Follow
Week 5 already of Guava.
She finally reached a good size and the first pistils started to show.
Very excited about her stretching and the growth in the next weeks.
Had some aphids this week, but spotted them early and could just remove them (about five or six only).
So far no new are visible, but will watch closely.
Likes
68
Share


@Zengrower
Follow
Allright! After the suspected light stress last week, the plants are in their second day of 18/6 light schedule and it looks like they are recovering. The front-left plant's upper leafs seem to be straightening out and overall the plants look healthier than last week 👌. I plan to measure the light intensity, but as things look now, there were two plants that were more susceptible to stress from the LED lights. It's not what you want in a grow, but it has taught me a valuable lesson. Don't just blindly assume a plant can handle 100% of the grow light in the third week ✌️☘️
In the end I don't think it affected the grow that much. The plant on the left corner in the back is a bit taller compared to the rest, but all plants look healthy and ready to start blooming! I have applied some LST clips on the side branches of the tallest plant. This guides the branches sideways and creates a more open structure. You can check them out at https://www.royalqueenseeds.com/growing/533-bending-clips.html
🌿🌿🌿 Mid-week update
The plants have grown very fast this week and now they're all in bloom ✌️ Because of the fast growth, I've removed some of the fanleafs in the canopy, and fan leafs and small branches in the lower parts of the plants. I use the leafs for tea with liquorice in the morning and at dinnertime I chop them up for a mixed salad. The taste is really good and raw Cannabis is super healty as well.

Likes
7
Share


@Meksi2790
Follow
first week in flower will defoliate week after all plants look real good lolipopped and cleaned
Likes
42
Share


@xs8
Follow
Week 6 started with more growth and more LST 😁
🌱👍🏻
------
Day 38
Amazing how beautiful they are, and until now I'm really satisfied with my first grow 😁🍀🌱

Likes
43
Share


@Esoteric_growing
Follow
Hung them to dry today, very happy to say I have found 3 very very good keeper phenos which doesn’t surprise me as I have grown many seeds of this before. The pictures and video tell more than words can say.
I have named my favourite pheno ‘john wayne’ as I have a convoy swagger about my walk every time I look at her😂 I lost this pheno a few months ago and so relieved to have her back plus two other great phenos.
Barneys absolutely provides some real fire genetics and I have been a fan since blue cheese and pineapple chunk were released many years ago.


Likes
69
Share


@nonick123
Follow
Día 37 (08/07) Ajustes de LST en todas las plantas! 🚀
Día 38 (09/07) Ajustes de LST en todas las plantas. Las ramas inferiores están creciendo como un cohete! 🚀😍
Riego con 250 ml H2O pH 6,5
Día 39 (10/07) Las plantas se muestran sedientas! Creo que el cepellón está lleno de raíces y piden el trasplante!
El crecimiento no se ha visto afectado de momento
Riego con 500 ml H20 pH 6,5
Día 40 (11/07) Paso a regar con 500 ml / día, ya que hace mucho calor (30 ºC) y efectivamente las plantas ya han copado la maceta de raíces
Riego con 500 ml H20 pH 6,5
Día 41 (12/07) Riego con 500 ml H20 pH 6,5
Clones! Mi experimento vuelve a demostrar que NO necesitas complejos productos de clonación ni sistemas para obtener clones!
Hace 15 días puse 2 clones con el tallo sumergido en miel durante 5 minutos en una maceta de 400 ml con PRO-MIX HP BACILLUS + MYCORRHIZAE
He mantenido la humedad alta con una cúpula de humedad casera hecha con una botella de agua PET de 5 litros cortada por la mitad y pulverizando a diario.
Han estado los 15 días en mi terraza con luz indirecta, y temperaturas que rondan los 30 - 32ºC durante las horas centrales del día
Hoy los he trasplantado a una maceta de 1 litro porque ya habían formado raíces y empezaban a formar nuevas hojas!
🐥🐥🚀🐥🐥
Día 42 (13/07) Riego con 500 ml H20 pH 6,5
Día 43 (14/07) Trasplante a maceta definitiva de 21 litros de ROOTPLUS Pot de GSKOREA GLOBAL!
Estas macetas son una maravilla!
Proceso de trasplante:
Se prepara con 17,85 Litros (85%) de sustrato PRO-MIX HP BACILLUS+MYCORRHIZAE + 1,05 Litros de Humus de Lombriz (5%) + 2,01 Litros de Insect Frass (10%) + 210 gramos de Earth Vibes Super Soil (10 g/L substrato)
Se llena la maceta de sustrato con las manos (limpias) y rompiendo los trozos más gruesos, para que el sustrato esté aireado y esponjoso, sin presionar
Se coloca una maceta vacía de 6,5L para que quede la forma perfecta de la maceta donde están actualmente
Se espolvorea la parte proporcional de la probeta de microorganismos sobre el agujero de trasplante
Se saca la planta de su maceta actual (bonitas raíces 😍) y se coloca en la maceta final
Se riega muy lentamente hasta percolación profunda con H2O EC 0,5 pH 6,5
Una vez asentada, complemento con un riego de 500 ml con 25 ml/L de Humus de Lombriz Liquido
Se coloca mulch (acolchado) de paja para evitar traspiración excesiva y cuidar a los microorganismos del suelo
A ver como reacciona al trasplante!
Aplicación foliar Kelp hidrolizado de Lurpe Solutions a 0.25 ml/l
Realizo ajustes de LST aprovechando el trasplante a la nueva maceta. De momento tienen una canopia muy bien formada!
💦Nutrients by Lurpe Solutions - www.lurpenaturalsolutions.com
🌱Substrate PRO-MIX HP BACILLUS + MYCORRHIZAE - www.pthorticulture.com/en/products/pro-mix-hp-biostimulant-plus-mycorrhizae
Likes
7
Share


@GanjaFarmar
Follow
Day 57 and this plant has transformed from tiny to decent size. I dont know yet when to start flushing but it will be during the next 2 weeks!
Soo far everythings going good!

Likes
4
Share


@Sjvcultivator
Follow
It was official week four yesterday for the larger plants. The cherry cola and train wreck have shown sex. I’ve bent the cherry cola but it seems the trainwreck is growing very even with just tucking leaves and removing larger fan leaves blocking the light.
Likes
260
Share


@love_2_grow
Follow
D8.
We're at the start of the second week, and the first side roots are visible.
------------------------------
D11.
Zzzzzzzzzzz...
------------------------------
D14.
At the end of the second week, there's still not much to report.
Yesterday, I increased the DLI to 20 after forgetting to ramp it up earlier in the week.
------------------------------
Likes
18
Share

@Northern_Ent
Follow
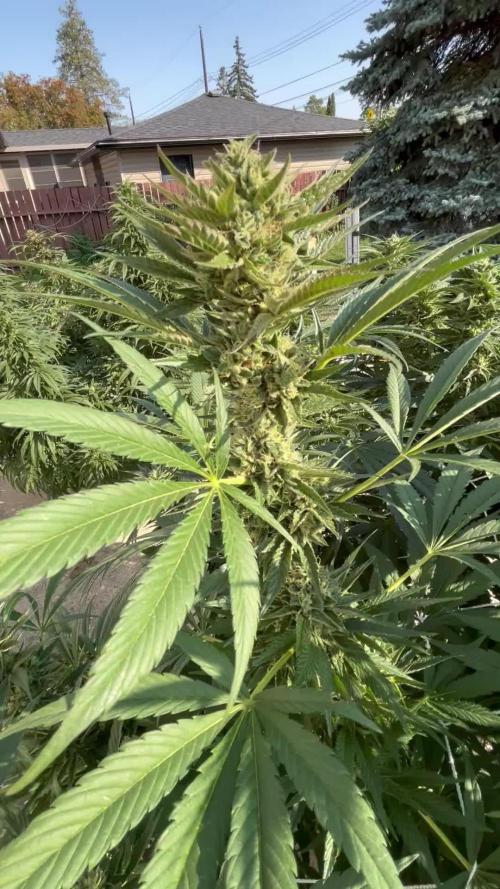
Sep 6: Tropicana Cookies FF is doing great. Maybe not as much flower maturation last week as I expected but we’re just starting week 8 of flowering. So likely the end of September which is fine for the late start on this plant.
Sep 7: decided on a final top dressing of malted barley and Power Bloom. Seems they need a bit more P.
Processing
Likes
24
Share


@Saven
Follow
It's now the start of Week 6. I defoliated like 4 fan leaves because they were disgustingly huge, 😅. So I added the "Defoliation" grow technique. 😆

Likes
12
Share


@GuaroMan
Follow
Esta semana recién empieza a ver signos de flora, hice poda de bajos y defoliación
Likes
4
Share


@HighOhioAn
Follow
Rainbow melon what can I say? Fast buds has outdone themselves with these fem photos I’ve grown a few other genetics, but fast buds checks all the boxes plants almost grow them themselves🔥💪
Likes
1
Share


@spanish420pasiongrow
Follow
Resultado muy bueno, fue con la tabla completa de Advanced Nutrient y funcionó la maravilla, volveré a repetir las cepas, sacaron tonalidades preciosas.

Likes
25
Share


@Dingle
Follow
Another good week of growth this week. 🌱🙂
The smell is certainly getting stronger changing to a sweeter smell indicating these girls are starting to produce trichomes.
More defoliating again this week removing any leafs blocking main bud sites also removing a few of the lower bud sites that will struggle to receive any light.
Light still set at 90% power also still rotating the pots every few days to help spread the light as best I can.
🙂✌️