


Likes
Comments
Share


Likes
23
Share


@Calveeno
Follow
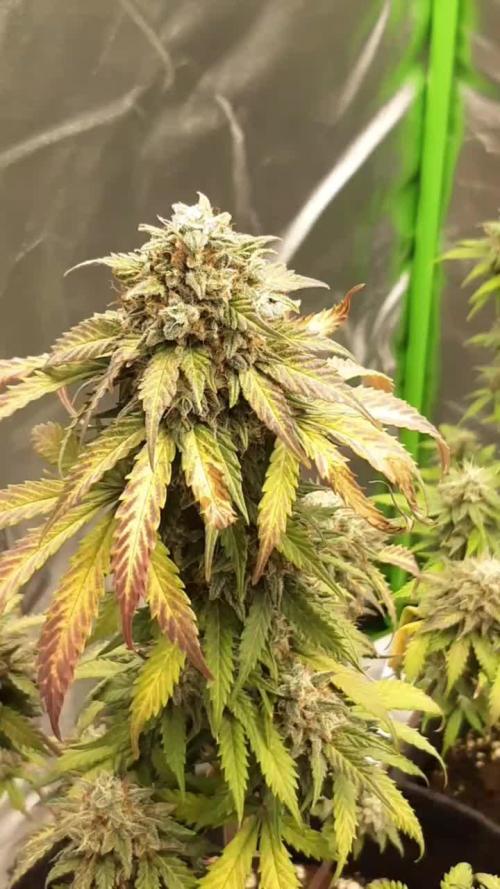
Aside from some light burn on the top colas, I'm happy overall, but I may have harvested a couple days too early. Upon further inspection, I'm seeing about 60% cloudy, 30% clear, and 10% amber. Will strive to be more patient on my next run :)
Something worth noting about light distance to canopy - If your colas are within 12" of this light, or any high powered light, you will notice that your spear headed colas will start forming into fists, with perpetual white hairs. Can be confusing when it comes time to harvest, as you're patiently waiting for white hairs to stop producing. In this situation, keep your eyes on the trichs!
Will update once I'm done trimming.
Big Thanks to those who've been following along, and to the GrowDiaries Community for being so welcoming and helpful. This will be the first of many grows on this platform. I'm here for good!
**UPDATE** Total harvest weight is 119 grams :D Very pleased with the outcome. Will need to practice a bit more patience on my next run so I can pinpoint the perfect moment to harvest. I also decided to flush for a full week since I pushed nutes to full strength in the last 3 weeks. Hang dry in the tent, 2/3 internal fans off, intake/exhaust running at half speed, managed to maintain a temp of 65-70 and 50-40%RH :) trim after 8 days (small branches and buds snapped off) curing in a small bucket with 58% Boveda, burping daily. Hoping to be ready for smoke by 420
Processing
Likes
13
Share


@Bloom_Room_By_Jared
Follow
4/16: I love her structure as I said before, now she’s doing weird shit. The last few days some fan leaves have been turning yellow and falling off like it’s starving for nutes so I upped the anti hopefully that’ll fix this issue.......also a few buds started to fucking foxtail on me probably due to heat a few days ago it was 97 degrees in my tent good thing I caught it early
4/17: Today I noticed purple spots on some of the leaves mostly just on the ends.....seems like I may have a purple pheno
4/18: Giant fan leaves are still dropping off I don’t know if it’s the strain itself or not enough nutes, I’m not noticing any type of deficiencies even though I’m still new to this (my 7th grow) but the sugar leaves seem to be doing fine while increasing triches day after day
4/20: The colours are getting beautiful on this here sexy girl.

Processing
Likes
11
Share


@GBudz
Follow
Getting close to harvest now.
Beggining to flush this week.
Cant wait the buds are rock hard smelling fruity fuel.
😍👌👌☺️
#dutch passion
#auto flower
#led
#glueberry og

Likes
36
Share


@MadeInGermany
Follow
Hey everyone .
This week she was left in her 1 L pot, and will not be in the 11 L pot until next week :-).
She was topped again and accepted it super 😃.
By the time she is repotted next week and given Green House Powder Feeding for the first time, she will have received a small portion of Canna Vega :-).
Otherwise it grows very quickly and vigorously, and they look beautiful 😍👌.
I wish you all a lot of fun with the new update, stay healthy and let it grow 🙏🏻👍
You can buy this Strain at :
https://sweetseeds.es/de/sweet-skunk-f1-fast-version/
Type:
Sweet Skunk F1 Fast Version
☝️🏼
Genetics:
Sweet Skunk Auto (SWS34)
X
Early Skunk
👍
Vega lamp:
2 x Todogrow Led
Quantum Board 100 W
💡
Bloom Lamp :
2 x Todogrow Led
Cxb 3590 COB 3500 K 205W
💡💡☝️🏼
Soil :
Canna Coco Professional +
☝️🏼
Fertilizer:
Green House Powder Feeding
☝️🏼🌱
Water:
Osmosis water mixed with normal water (24 hours stale that the chlorine evaporates) to 0.2 EC. Add Cal / Mag to 0.4 Ec Ph with Organic Ph - to 5.5 - 5.8 .


Likes
3
Share


@RunicKevin58675
Follow
These two plants have given me the experience and the desire to do even better!
Next genetics I thought I would bring another pure Indica...
Likes
15
Share


@HomegrowerDK
Follow
I love my west Coast OG from fastbuds..
The smell is crazy and after I touched a bud I couldn't believe the smell and the stickyness... Wow..
Aug 10 I just flushed today.. might have been feeding her to much last week and my leaves started to get brown spots...
Buds are getting thicker and they're very hard now..
Think I have 2 or 3 weeks left...
Been under the mars hydro sp150 and it's really doing it's job...
Update... After flush looks like pH is a bit high I guess but not crazy high

Processing
Likes
5
Share


@Highdro
Follow
At the start of the week I fimmed a few high blooms to slow growth.
Humidity kept climbing untill I added a carbon filter 4inch on a inline fan as an exhaust, added a 2nd fan to circulate more.
Checked pH around 4 times a day due to.such a small tank.
At the end of this week I defoliated and also took around 40 cuttings which I will post separate to this dairy, they will be in a DWC setup.

Likes
1
Share

@CheeRz
Follow
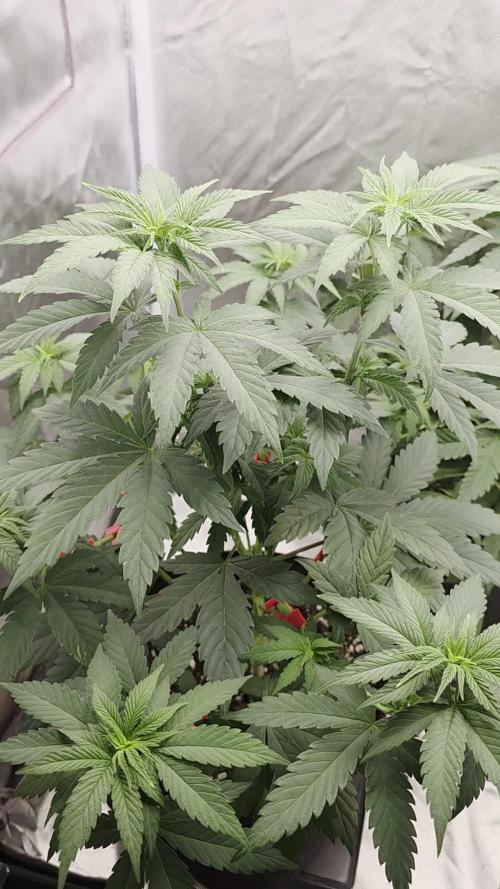
We flipped the switch and changed the light cycle to 12 hours. Both lemon ladies are doing pretty well, as is the development. Let's hope for a big harvest!


Likes
55
Share


Processing
Likes
142
Share

@MadeInGermany
Follow
Hey everyone :-)
This week it smells more and more sweet and fruity in the whole room 😍.
There is actually not much to report, everyone is now under 12/12 :-).
This is the last grow that comes in the entire diary.
From now on, each plant will be added to the diary 👍.
I wish you all a lot of fun watching, stay healthy 🙏🏻 and let it grow 😎👌


Likes
15
Share


@Jr104th_st
Follow
Today pretty much 9 of them had green agae was able to catch it before got deeper cleaned out the top and put new soil any recommendations when I should transplant comment please y'all be safe and blessed ✌️☮️
Likes
17
Share


@Fabhz
Follow
Very resilient plant. Almost fully recovered, the buds are looking good, a bit red. Some nutrients deficit but i dont care, thanks for visiting.


Likes
8
Share


@valiotoro
Follow
Hello everyone 😎
Week 6 of flower for the Orange Sherbet auto from Fast Buds 💥🍊
She grew fast with a beautiful green color,for the nutrient 4ml/L terra bloom & 1ml/L power buds from Plagron
Spider Farmer SE-7000 80%
Have a nice day 😋
Likes
112
Share


@Tropicannibis_Todd
Follow
ALRIGHTY THEN
👉THEY ARE READY , BUT IM JUST GONNA GIVE IT MORE TI E TO AMBER UP👈
We just hit week 13 and all is well , have to admit shes just killing it on the resin development 😃 ......the frost is insane 👹...... Just waiting for her to ripen up👈
👉NutriNPK NUTRIENTS USED FOR FEEDING👈
www.nutrinpk.com
Lights being readjusted and chart updated .........👍
I GOT MULTIPLE DIARIES ON THE GO 😱 please check them out 😎
👉THANKS FOR TAKING THE TIME TO CHECK OUT MY DIARIES 👈
Likes
11
Share

@Pete_vs_Nature
Follow
Dear readers,
I am frankly out of time. I keep my notes, and quite honestly, I loved how the AI-crafted Journal made me giggle. I feed my actual logs into it, and the details it picks out are quite humiliating - in a good sense - for everyone to learn from (less focus on me, see?).
Plants have been aging well, except for Auto Cinderella Jack. She ... does her own thing now. I just watch.
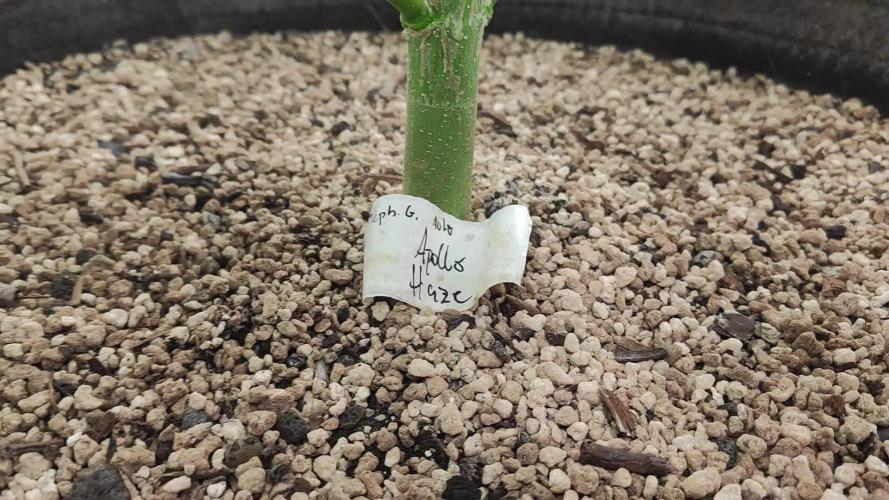
Apollo - CHOPPED at the last day - will prepare proper harvest entry after drying & sampling. Footage shows oh so many things I am proud of. Check her out.
Let me know should you want any further information. I'm happy to chatter, hit me.
The rest of my week as "roughly" per my notes:
-----
**PATHÉ DISPATCH — THE TERPENE FRONT, WEEK TEN**
*[newsreel crackle, brass fanfare]*
GOOD EVENING, AMERICA. The first soldier has fallen — and the war is NOT over.
DATELINE: THE DRYING CHAMBER. Private Apollo Haze — FIRST TO FALL — has been chopped and laid into the racks, with Orange Haze still holding the line, days from her own last stand. But the enemy heat, citizens, chose the hour of a SINGLE harvest for its final offensive. Fourteen-thousand-BTU reinforcements? SOLD OUT. The profiteers of the rear echelon have raised their prices FIFTY PERCENT. Our correspondent, undaunted, drafts a SEVEN-thousand-BTU unit into double duty and empties his own bedroom of furniture to billet a SINGLE DRYING SOLDIER. He sleeps, we are told, "where the furniture used to be."
*[ominous timpani roll]*
BUT NOW — THE TWIST THIS PROGRAM WAS BORN TO BROADCAST.
For WEEKS our man waged war against the temperature with TWO air-conditioners, and for WEEKS the line would not hold. WHY? our correspondent cried into the noisy dark. WHY will they not COOL?
*[record scratch]*
Because, citizens — there was a TRAITOR BEHIND THE TENT.
A RADIATOR. Set to '2.' Left running since the cold nights of EARLY VEG. FORGOTTEN. And the cruelest geometry of this entire campaign: Air Conditioner Number One had been blowing its finest cold jet DIRECTLY INTO THAT CORNER — feeding the thermostat just enough warmth to keep the SECRET HEATER cycling ON. Our correspondent was, this whole time, PAYING TO HEAT AND COOL THE SAME SQUARE METER.
A closed loop of PURE ENTROPY, hiding in plain sight, three feet behind the front line...
*[stern voiceover]*
MEN OF SCIENCE will note the lesson, hard-won: before you accuse the sky, CHECK BEHIND THE FURNITURE.
Will the buds dry true? Will Run Six begin without a mole in the ranks? Our man's verdict on his own household infrastructure, we regret to report, is UNPRINTABLE.
*[fanfare, film flickers out]*
THIS HAS BEEN A DISPATCH FROM THE TERPENE FRONT. CHECK YOUR RADIATORS. GOODNIGHT.

