


Likes
Comments
Share

@RatmanJR
Follow
August 23rd. 70 days post flip.
Clones:
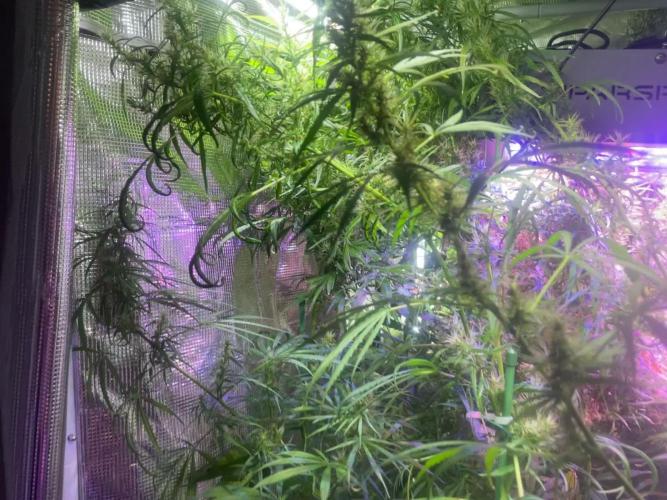
All 3 clones are growing very well. No crazy developments this week. Buds continue to fatten. Smells are finally starting to form and starting to notice different smells from the 3 phenos.
Starting next week I will begin giving more detailed descriptions of the 3 different phenos too help me decide which one to pick when this is all said and done. I did this when they were in veg and have stopped until flower development finally begun. We are finally at this phase of actual development and want to document these next two months.
I was also really lucky this week and picked up a ton of back to roots organic nutrients at Walmart. Got them on clearance for 5$ a bag, 50% off.
I really cleaned up and helped out the earth boxes this week as well. I removed the plastic covers, added in new Elite Living soil to finally cover the rockwool cubes. Topped it off with some Azomite, craft blend, worm castings, bone meal, and kelp meal with potash. And than covered with a little more elite living soil. I think this will really help these guys especially now that flowers are starting to fatten.
I also went from 11.5 on and 12.5 off too 11.25 on and 12.75 off. This will further motivate the buds to start to fatten. In another two weeks I will go another 15 minutes. Added in a larger fan too ensure we keep good airflow. Considering adding in another one to help cool the top canopy
Parent:
Finally decided to enhance these guys a little bit for the first time in 25 weeks. Topped them with some craft blend and some fresh Elite living soil I got for my other tent. Also topped them heavily and cleaned up their foliage significantly. I’m expecting them to recover in a week or two and for the new soil volume to make them happy.
As always, thank you guys for following along and God Bless!

Likes
129
Share


@DreamIT
Follow
🎲➕ VLC Critical Plus + by PEV Grow➕🎲
➕13.6 Speak for itself. is almost ready to start mainlining 😆
➕14.6 Nothing interesting at the moment, it grows well
➕15.6 even today nothing special to say, yeah
➕16.6 All very nice. It will look so soft in the picture
➕17.6 Yesterday I discovered 3D photographs. What do you think about it? if you are not just a serial commentator, please leave me your opinion, i would appreciate it very much 🙏🦄
➕18.6 with these photos I caught a little cursed insect that goes around the leaves, as a precaution I give two sprays of neem oil in the box. I live behind closed doors with mosquito nets and bug catching cat, I really want to know where they came from. In one year of Indoor cultivation I have never had any problems 😤
➕19.6 Week ended without problems, very fast this plant. Great job PEV Grow 🤘🦄
__________________________________________
❓ Are you new to the world of cultivation and don't know where to safely buy your seeds?
😮On the Pevgrow site, you can find the best-feminized seeds indoors and outdoors. Achieved through totally natural stress methods and with guaranteed superior quality.
✅http://bit.ly/PevGrow
ℹ️Check out the marijuana dictionary
✅http://bit.ly/CannabisDictionaryPEVGrow
__________________________________________
👀 Are you looking for a good lamp to start with? 👀
🌞Viparspectra has something more than the others, take a look at their site.
⏩ Use "GDVIP" for an extra discount or "ViparDreamIT" for an extra 5 %% discount
👀 Search for it on Amazon
✅Amazon US: https://amzn.to/30xSTVq
✅Amazon Canada: https://amzn.to/38udUVe
✅Viparspectra UE: bit.ly/ViparspectraUE
👀 Watch my ViparSpectra XS1000 unboxing on YouTube, leave a like and write to the channel 🦄
✅http://bit.ly/UnboxingViparSpectraDreamIT
______________________________________________
📷🥇 Follow the best photos on Instagram 🥇📷
https://www.instagram.com/dreamit420/
🔻🔻Leave a comment with your opinion if you pass by here🔻🔻
🤟🦄💚 Thank you and enjoy the growth 💚🦄🤟

Likes
12
Share


@thonhash
Follow
Esta semana añadimos el otro led ts 1000 para seguir regulando (añadiendo más potencia lumínica)
Agregamos paja,para una mejor retención de la humedad y no se seque primero la parte superficial de la tierra (uno de nuestros mayores errores al querer calcular si todo el cepellon está seco o sigue teniendo algo de humedad,por consecuencia,al volver a regar ,sigue con ese pequeño exceso de humedad) ,con el objetivo de conseguir una mejor vida en nuestro suelo ,con todos los nutrientes orgánicos y la clave,enzynabis,crearemos una buena simbiosis,y lo más importante,natural.

Likes
1
Share

@frigo_camelo
Follow
made some hash rosin | insane 🤯 so fruity! smells like orange nimm 2 bonbons 🍭 | dont get me wrong no candy terps | just straight up guava in your face!
it was washed in 23C with hash vac and fridge drying

Likes
14
Share

@Dabking
Follow
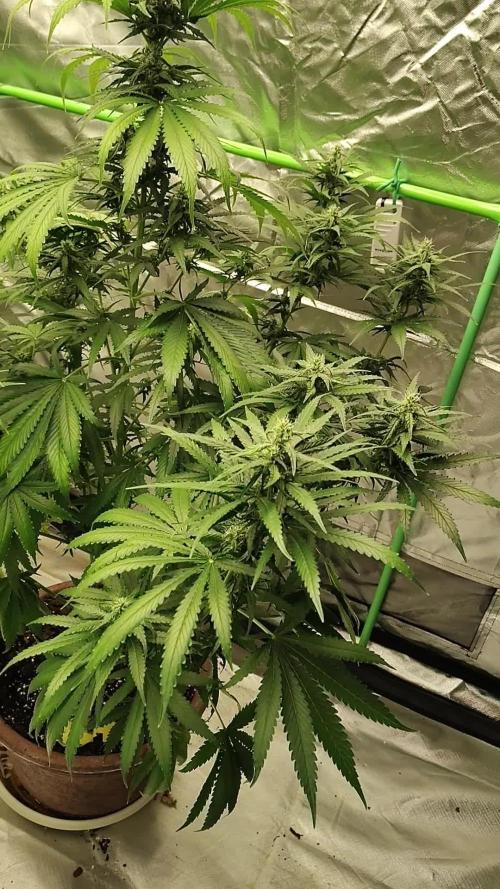
One plant showing moderate magnesium deficiency.
The other 2 plants are looking good, with one other plant also have slight magnesium deficiency. I will up the cal-mag for them next feed.

Likes
21
Share


@MadeInGermany
Follow
Hey guys :-)
She is growing great and will be ready for the flowering tent in the coming days :-)
A few cuttings are taken beforehand.
Was poured 2 times with 1 l each.
I'm looking forward to the start of flowering :-)
have fun and stay healthy 🙏🏻
👇🏼👇🏼👇🏼👇🏼👇🏼👇🏼👇🏼👇🏼👇🏼👇🏼👇🏼👇🏼
You can buy this Nutrients at :
https://shop.greenhousefeeding.com/us/
👇🏼👇🏼👇🏼👇🏼👇🏼👇🏼👇🏼👇🏼👇🏼👇🏼👇🏼👇🏼
You can buy this strain at :
https://www.amsterdamgenetics.com/product/double-blue/
Water 💧 💧💧
Osmosis water mixed with normal water (24 hours stale that the chlorine evaporates) to 0.2 EC. Add Cal / Mag to 0.4 Ec Ph with Organic Ph - to 5.8 - 6.4
MadeInGermany

Likes
7
Share


Likes
57
Share


@Mosquito_Haarlem
Follow
These buds look so yumyum.
Ze heeft niet lang meer te gaan.
Ze ruikt aangenaam sterk spicy.
Ik laat haar nog iets rijper worden, heb nog geen amberkleurige trichomen kunnen spotten.
Verse foto's zullen volgen.

Likes
10
Share


@HanfHueter
Follow
Blüten werden inzwischen sehr Harzig und der Duft nimmt zu.
Dem Giesswasser wird täglich 1:10 Jauche zugegen. Zu dem jedes zweite Gießen Pro Sugar von Grow Pro ein Kohlenhydrat Blütedünger(von der Mary Jane ein Tester). Zu dem gibt es ein bis zweimal in der Woche Seafeed Xtra von envii.
Die ersten Blätter haben sich unten entfernt daher gebe ich gerade wieder Stickstoff zu den Pflanzen. Auch wenn es nur noch diese Woche war danach nur noch Blütedünger.
Zu dem habe ich Basilikum gepflanzt, Dill, Ringelblume und Koriander gesäat am Anfang der Woche und zum Ende noch Lupine und Rot Klee.
Likes
27
Share


@DeepRootsGrowTrees
Follow
Week #18 Gelato-K By Kannabia
Week #18 Mar 8th-15th
Week #7 Flower
This week she is packing on weight buds a swelling trichomes are still mostly clear. Thank you for stopping by!! Stay Growing!!
Likes
21
Share


@Insaniac_0
Follow
Thank you.
Growing cannabis is an art that seems to evolve as you learn it. While it may only take a little knowledge to get started, It seems that this may take a life-time to perfect (doubt I'll ever make that category, but I will certainly try).
So thank-you to the community that Shares, Comments, Follows, and Likes. Your efforts in any of these actions make these journals a worth-while and perfect way for us all to learn. I personally appreciate it.
Also a huge Thanks has to go out to Grow Diaries for making this community even possible. Your efforts to supply the data storage alone is more than enough, but you the fact that you dont stop there and constantly try to improve the experience even more makes this my favorite community to to share on.
And then lastly, but certainly not least, a heartfelt Thank-you to Fast Buds for selecting me as 2nd place in a photo contest and making these seeds available, I'll try my best to honor the gift and opportunity to grow these. Your sponsorship in keeping the community active here is an in-valuable learning tool of its own. And then your branding/research helps give me confidence in knowing that I am working with great genetics before I even start my grow.
----------------------------
Germination Start 2/13/24 to 2/18/24
2/19 to 2/25 Veg Days 1 to 7
Week 0 to 1
Germination took 6 days from dropping in water to transplanting into 1 gallon pots. 29hours in a glass of 6.3ph room temp RO water. Something I would only attempt if they were both floating. They were,so leaving them that long they were able to crack open. I then placed both in paper towels wet with the glass water and pasted to the sides of the glass for 3 days (1 day too long in retrospect). I placed in rapid rooter pods and closed with toothpick tips. They popped out from the pods 1 day later but I gave them 2 days before transplant.
Video:
Incubator water level is key for rapid rooter pods to wick properly during incubation.
Transplant to 1 gal pots:
I am using a 50/50, 50%perlite/50%soil with a .5lb of dolomite lime and a .5ml of flora micro added to .5 gallon of RO water (Im mixing 2 gallons of soil total so the water to soil ratio is 1/4 of the total medium volume) to achieve a soil tested ph of 6.4. I am using a 50/50 soil/perlite mix because I plan to use these in auto pots. I also used about 1 cup of the same soil mix water to pour around the plant after transplant; you can see how the perlite rises to the top where I did this. I sprayed two domes and covered - I plan to leave covered for the first week.
Feed:
I kept them under the domes and sprayed every day that I didnt feed them, to keep humidity up while I let them find water in the soil. By the end of the week I took the domes off and took pictures.
Feed this week was another 1 cup of 6.3ph water 5 days after transplant.
Feed plan next week will increase the amount to 2 cups of plain-no-nute water with about 4 days between feeds. I want to see the water run through so if I need to use more than 2 cups I will. The idea is to water deep and through, but then make them search for more before the next feed, hopefully spreading the roots out while doing it.
Veg Plan:
I plan on 8 colas for each plant. So that will be 3 topping days and a total of 7 cuts.
I will want to cut the first time on day 21 if I have 5+ nodes. I will transfer to 5 gallon auto pots with-in 1 week of the first topping. Once I have 3 nodes of new growth past the first topping, I will top those two branches to the first node again. (that's 3 cuts total by this point) Then, after 3 new nodes of growth after that, I will do a last topping on the 4 branches. (4 new cuts added to make a total of 7 cuts and 8 colas)
I will train the branches using LST/HST with tie downs as soon as I can after the first topping day to help maintain the branches growing where I want them to. I will also introduce an adjustable tomato ring after they have settled into the 5 gallon forever pots to provide support and mobility
Hopefully all goes well, and I will have 1 to 2 weeks of growth before flip after week 8.
I think it sounds more ambitious than it really is, but if you follow this journal, we will see together.
Processing
Likes
8
Share


@Max1973
Follow
Day 49 - lookin good..... been bending her, trimmin abit, messin with the water solution.....
ph and ppm have been all over the place..... lol
she's been transitioning from grow to flower, and once she settles into night mode, the
solution and growing should stabilize......
the new fan is cool... tents working properly now, neg pressure, drawing in air behind the floor fan, blown around the bottom,
and cpu extractor fan pushing the air out the top of the tent, straight into the filter..... really nice way to run a little tent, low airflow........
keeps the impurities out of the buds.....
the stalks have all tuffened up since trimmin, and pretty strong now.... should hold the full weight that's about to occur all over the place......
i've simplified the nutrients, they were gettin alittle confusing, so started doin nuets differently, .... so,
just making my own nuet solutions, nothing fancy just base amount of normal elements ....
should be a pretty good christmas ......
Day 51 - pics/vids...
👍😎


Processing
Likes
5
Share


@Greenfox89
Follow
Good evening and welcome to the second entry in this diary.
So that we already have to work with high temperatures, I carefully ordered the leave coat from Biobizz but it is still not there!Just like the rest of the order.
I gave the plant 350ml Enchancer from Greenhouse. This is a new product for me. Which I will definitely include in my range.
The room climate is 40% -50% humidity humidity from 25 to 28c during the day and 21-23c at night.I once read that frozen 2L bottles can help get a few degree down, and I think about trying it.
We are still waiting for the 3 noiden of the plant and then we start training. The low stress training will be my choice
Thanks for your time the fox✊🦊❤️
Likes
21
Share


@squalino
Follow
Journal de Culture : Frost 1 (Semaine 5)
Génétique : Frostbanger (F2 Perso) | Système : Autopot 20L
📣 Remerciements
Un immense merci à toutes les personnes qui suivent ce journal depuis le début ! Un merci tout particulier à @MIA_BIOTABS et à Mrs_Larimar pour leurs précieux conseils qui m'aident à mener cette session au mieux. Merci à tous pour votre soutien constant !
🛠️ Configuration Technique
Éclairage : Lumatek ATS 300W Pro (réglé à 75%)
Distance lampe/canopée : 55 cm
Climat : Jour : 25°C / Nuit : 21°C
Humidité (HR) : 50%
Tente : 1m80 de hauteur
📅 Évolution & Floraison : La phase sérieuse commence !
État de la plante :
jour +35
La structure est maintenant bien établie. La phase de stretch semble se stabiliser, laissant place au développement des sites de floraison.
Hauteur actuelle : 68 cm (+22 cm)
Stade : Floraison confirmée. Les pompons commencent à se former et la plante change d'allure pour se concentrer sur la production.
Travail sur la plante :
Entretien :
Je n'ai pas touché à la plante depuis une semaine. Après le travail d'aération et de palissage précédent, j'ai choisi de la laisser tranquille pour ne pas la stresser lors de son passage en floraison. Elle s'épanouit d'elle-même.
Structure :
Le palissage à la ficelle fait toujours son office, maintenant une canopée ouverte où l'air circule parfaitement.
Gestion du système Autopot :
Nutrition :
Fidèle à la méthode Biotabs, la plante n'a reçu que de l'eau claire via le système Autopot. Sa couleur vert foncé et sa vigueur prouvent que le substrat est parfaitement équilibré pour cette phase de transition.
Résumé :
On arrive à un moment charnière. Avec 68 cm de hauteur, elle occupe l'espace de manière idéale. Les fleurs commencent à se dessiner nettement sur chaque sommet dégagé lors du dernier LST. La plante est sereine, le cultivateur aussi !
À bientôt pour la suite de la floraison !
Likes
77
Share


@Basementganja
Follow
Flowering slowly, likely due to the roots having low PH(4-5)..
I flushed her a few weeks back.. I'm done experimenting with nutrients for now; I had better results, with less issues with just using the basics.
*Special Nug picture - This Bud-site has a different shape/structure compared to every other nug on this plant.. Never seen this before, on any other strain.


Processing
Likes
9
Share


@JerMeds
Follow
Update: I made a Flowering feed guide for myself so I figured I would share it. I'm going to do a small flush on them soon to remove nutrient buildup. I'm sure it will help finished quality.
The first girl has been stretching all week. I have had to LST branches to keep her short. I hope she is done stretching but if not I will just keep tying branches down. She did make it too close to a light and it burned one of her buds. It did not cause any issues tho.
On the second girl I was tying down the main stem and damn near snapped it off. I freaked out and cried IRL. 😭
I braced the top broken half and taped it up then I gave her a large dose of Silica and Recharge to help her recover. Only the broken top of the main stem went a droopy for 4 days and she almost stopped growing.
She developed some rust spots on some of her fan leafs. I gave her Cal-Mag the second I saw the spots developing but they developed regardless.
My guess is that she used energy in her fan leafs to help her recover.
The good news is she looks fully recovered. 👊 I can feel a knot where the break is, very fast recovery for such a bad break. For sure this was my worst LTS accident to date. I will get a pictures of the break when I feel comfortable removing the tape.
I upgraded there lights with 2x 100w 3000k flood lights with the lens plate removed. I have had really good results with these lights in previous grows and they are thin so they fit perfectly.
I now have:
2x Castnoo 300s (really 100w)
1 Grow Star 150 UFO(really 70w)
2x Viugreum 100w 3000k thin flood lights (really 60w)
2x MAIICY 45w (really 30w)
That's a total of 450 true watts. 225w for each of these girls. Very bright inside. Maybe over kill?
