
Likes
Comments
Share

@Aleks555
Follow
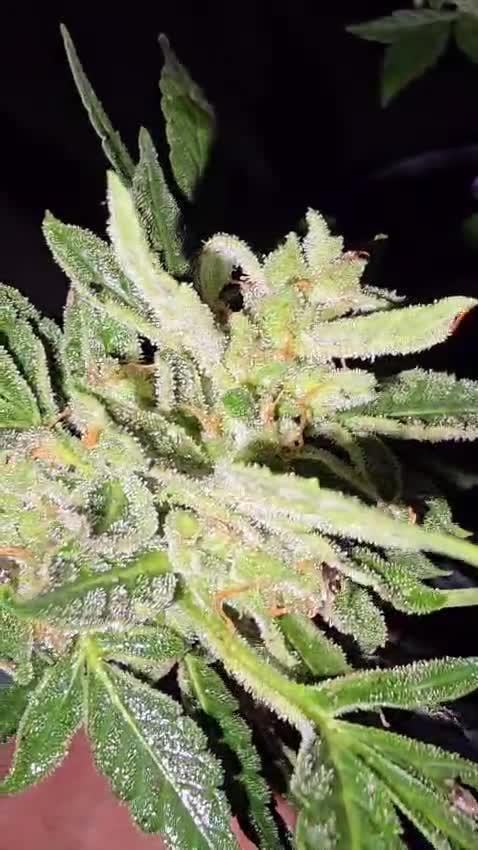
Hello friends, we are all good and we are already at the finishing stage. This beauty has been making us happy since the first day and she has not let us down, she has grown very sticky, tasty and most importantly she is very strong, the effect is just a bomb, strong and long-lasting, a very cool variety, thanks to Anesia Seeds for such cool genetics.

Processing
Likes
30
Share


@buddin_onna_budget
Follow
Coming along, for got to put calmag in prior feeding.


Likes
49
Share


@masterofsmeagol
Follow
6/15. Glad I listened to my intuition and held off watering. IT Rained andctheb again last night. Plants seem to be doingvreal well. Slight burn on lower leaves where it was before from being in the garage and I found on spot that LOOKED like it could've been caused by a pillar but it's right on a burn. I sefoliated one leaf. This is minor stuff. Next watering I'll be adding silica. I'm not giving nutes until the plants tell the need them. The 3 gallon ones may receive nutes first as they'll run out. I'll update as I progress.
Went back over at 8:30. It's just overcast with showers. Plants seemed to like it. They all look good. Noticed a chunk out of a leaf and a POSSIBLE pillar spot. I'm going to have to get the BT out and and give the girls an application. I'm waiting until they settle in a bit more though. I need to start LST as well AND the light dep. Unfortunately "life" has made things difficult. I'll get back over there today though and I'll start the light dep. Kinda makes me wonder though. The 1pth planet I wanted to light deo is tge same size as the others in the much bigger containers. The thought came that maybe I should just hold on to them as extras in case something happens. I also am going to start silica next watering but it will be a few weeks before any nutes are given.
UPDATE: WENT BACK OVER AT FIVE AND TOOK ACSHOT TON OF PICTURES. IM TRYING TO UOLOAD NOW. THINGS ARE POPPING OFF AND IM GETTING A NICE SWEET SKUNKY ODOR. WHILE I WASCTHERE WE GOT A QUICK SHOWER. DIDNT LAST MORE THAN TEN MINUTES BUT IT RAINED HARD. I FOUND A TEMPORARY SPOT TO LIGHT DEP THE TWO PURPLE PUNCH AND THE ONE TENTH PLANET. I DONT SEE ANY LIGHT LEALS AND ITS SURE AS HELL DARKER THAN IT IS AT NIGHT. I'LL SEE HOW IT GOES LEQVING THE COVER ON ALL NIGHT. IF IT DOESNT WORK I MAY JEED TO ADD A FAN OR CHANCECTHE SPACE. I ALMOST DIDNT WANT TO DO THIS AS THE 10TH PLANET IS KEEPING PACE WITH ITS SISTERS, DESPITE THE SMALLER POT. OH WELL I WANT TO GIVE IT A SHOT AND I DONT WANT MY CAGE OVER CROWDED. I'M LOOKONG TO DO A 6:30 TO 6:30 SCHEDULE.
6/16 First night of light dep for the three little ones. I won't be able to call them that soon. I'm currently trying to upload a video. My grow buddy mentioned the droopiness of a couple of my plants in this video and how I hadn't been watering. This kinda scared me so I ran over and checked the too few inches on the two that had a little droop and came out dry. I had some water already phed ready to go (I'm hoping that the ph doesn't change if it's stored a day or two) and used the gallon to moisten the dry topsoil. Looking back over my diary we have had nothing but rain. I then tried the "lift the pot method" and came to the conclusion that these bags were indeed still holding moisture. I assumed they would be considering the thunderstorms we've had. I held off on fullt watering because the weather said the next dry day is going to be Monday. Today is Friday so thats two solid days of rain. Three if you count today through the night. I concentrated my watering of the one gallon on the couple plants that appeared to droop. If it doesn't rain like they say it will I will need to water. I need to set up a decent watering schedule but I need it to hold off raining long enough to do so.
UPDATE: I WENT BACK OVER AND PUT THE 3 GALS IN FOR BED AND CHECKED OUT THE REST OF THE GARDEN. I WATERED THE 3 GAL GIRLS A LITTLE MORE SINCE THEY WONT BE OUTSIDE. THE BIT OF WATER I GAVE SEEMED TO HELP LIFT SOME OF THE GIRLS. AT LEAST I THINK IT DID. THE RAIN SHOULDVE COME ALREADY. I WOULDVE WATERED MORE HAD THE BAGS NOT BEEN SO HEAVY.
6/17 Rained all night which is good. Brought the three transplants out but left them under the overhang so they. Dont get soaked. So far light depoing is going good. Well its only been two nights but we'll see. I'll update as I go. Not feeling well today. Went back over and checked on the plants and did a video. Probably won't get uploaded until tomorrow. I'm giving it a shot. It's raining in good shape. Plants looked fine when I was there. I need to get my supports and my trellis in place. Video won't upload. No suprise. I'll get it tomorrow.
6/18 Uploaded videos if they fuck up from me editing I'm gonna be pissed. Anyway it's still pouring with high winds. I added a couple supports where it looked like it needed it. I need to put my trellis up. I've been able to keep up with the light dep and those plants haven't been used and abused. They stay in the building facing the sun when the weather is this bad. I think they're looking great. I may start a new diary just for them. Sun came out around four. Trying to upload a couple videos but doesn't look like it's going to happen. Tucked the three little ones in at six. It had stopped raining and the wind died down some. If adverse conditions create good plants then I'm on the way to a great harvest. Minor bleaching and burns on a few lower fan leaves and some wrinkling on some from wind burn other than that plants seem to be acclimated. Did a video but will have to wait until tomorrow to upload
6/19 It's not raining! We got four inches this past storm lol. Having the bags raised on pollens I believe has greatly helped. As did the high winds that help dry the soil in the bag. Had to add a few temporary supports. Light dep is going good. Adjusted amd found a better spot. I'm considering getting "pool noodles" or some other thing like a Hulu hoops or pvc pipe and making either a frame on the roof for the entire cage or on top of each individual plants posts so I could roll clear plastic over it when it rains. I'm thinking about later on in the fall when this could really help. I found a roll of plastic. Also thought about putting that up on the back wall but I didn't. What I'm doing right now is working. I just need to keep up with it. I also need a solid watering schedule to stick too. It's hard when each plants needs are different. Oh well. I'm just happy to be growing again. I pray to the cannabis gods and the Lord above himself that I'm not plagued with the problems of last year.
6/20. I'm sick as fuck but I got the little girls out in the sun. Light dep is going good. Plants look great. I'll update when I feel better and if I do anything. Still feel like shit. Luckily I looked up just in time to get to the grow and put the little ones to bed. They were thirsty (especially the bushy 10th planet so I gave them about 3/4 of a gallon of water. Got lots of run off from 10th planet. Didn't notice as much from the others but I was hurrying. I'll upload later. Still sick.
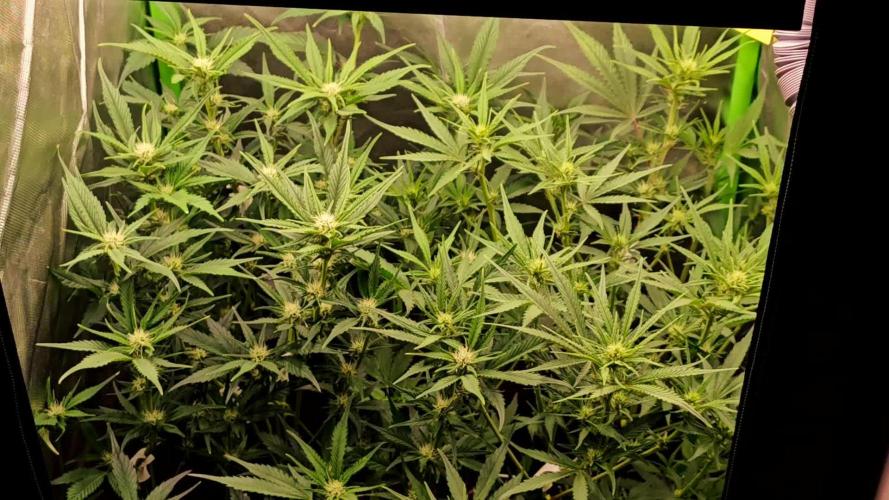
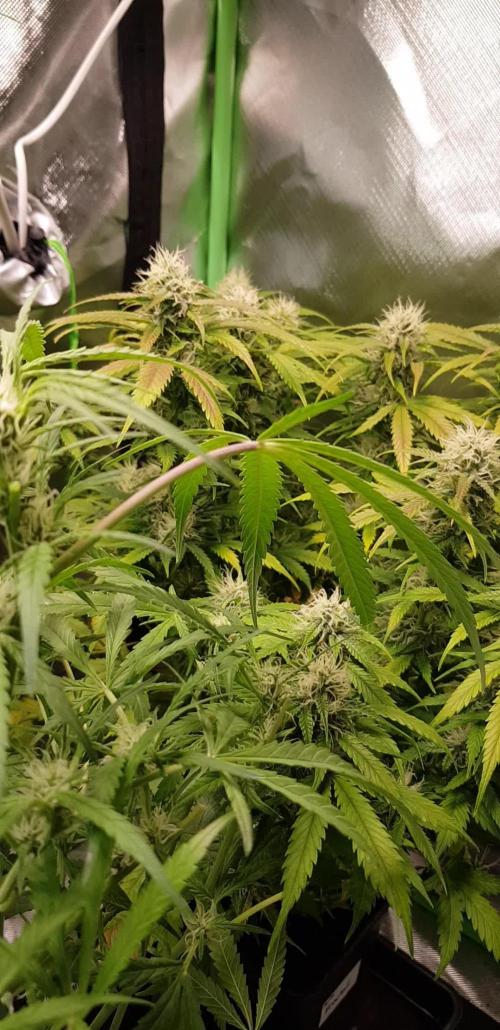
6/21 Plants seem to be doing great. I removed some lower growth on a few just to see how they respond. I'm going to do some defoliation down low and I want to see how the plants respond. I'm planning my first full watering Thursday as we have a real good stretch of weather after that. Grow bags are still heavy as hell so they have sufficient water. I'll be adding silica nextcl watering. Not time for nutes but I think it would be okay to start the silica and in another week I might start small doses of nutes. The light dep on the little girls is go8ng great! It's cool I'll get to sample some of these strains before fall. I'll update after I do something. Tucked the girls in at 6. I might need to think about transplanting that 10th planet in the 3 gallon. I watered until runoff yesterday and it's light as hell today. Plus I fimked it and it's bushy as hell. I've Bern turning it si it gets all angles of the sun. I have a bag of 707 left and a 5 gallon bucket with holes drilled all over it like an air pot and a ten gallon grow bag. This will take some thought. Hot af today. I wad able to lift the grow bags so I decided tomorrow will be the girls first real watering. I think I'll be adding silica and possibly kelp me kelp you due to the heat stress I've been noticing. Nothing bad just a few tacoed leaves. I've had several people that have seen my grow in person tell me that this is by far the healthiest (not biggest I've had bigger) but by farcthe healthies5 crop I've grown. They believe I'll have my best year ever this year. I hope they are right. Vid won't be uploaded until tomorrow.
6/22 WATERED TODAY. I'm still a little gun shy with watering. That fusarium last year pretty much traumatized me. I left the container plants alone. I gave them a little water but not enough to do much. I used a pump sprayer on a mist setting and went one by one and back around gently watering the entire medium. This took forever and I'll be finding a different way to water. I hope this was enough water. I'll check later on and if they look like they want more I give it to them. I started LST on the light dep 10th planet and tucked some branches of a another under the tomato cage. I had missed that earlier. I also went around and cleaned up the bottoms on most. Getting rid of things that will amount to nothing. I noticed what looked like thrip damage on ONE leaf on ONE plant. I also saw a chunk missing from a grasshopper bite and a finger of a fan leaf petiol was broken so I'm going to need to get my ipm up and running. I'm unsure whether I'll be using chemicals or predators. Probably BT and spinosad. That's what I've had the best luck with. I also noticed bottom leaves dying off on the bottom of a couple plants. It was where the burns were though so I'm almost 100% its just related to the light burns they got when i first put them up. I'll be updating the diary as I do more stuff.

Processing
Likes
41
Share


@Enki_Weed
Follow
Our beautiful girls have plant louses 😱
So yesterday we made a brew of garlic and sprinkeld all of the plants, also the
ground of the growbox - after cleaning up everything.
So we hope this works.
Have anyone experience with the small green monsters?
We would be grateful for some suggestions.


Likes
9
Share


@AlienScrOG
Follow
Fail .... Nitrogen fail ... And Red spider in final stage ... I think the roddy spiders were present in the soil used .. and they infested more plants ... .. despite all this, it is an excellent cannabis i grow again

Processing
Likes
20
Share


@STAYINGONMYMAINCBATORUNTWO
Follow
Critically correct lol seriously she smells so strong like stardawg tbh but danker 😉 and the buds are so dense already and I’m going to need to tie them tomorrow as I can see them snapping if they sway too hard with all that weight! End result I’m sure is going to be amazing!


Likes
7
Share


@Bills1995
Follow
Everything going as planned. Will take more pictures soon.day 85(getting phatter)


Likes
38
Share


@Danger90946
Follow
Day 106 12/25/2021 being of a new week and this will be more than likely the last week this lady gets any nutrients thinking Wednesday. After that will start flush with collected rain water. After checking trichomes they were about 85% cloudy about 10% clear and 5% amber which is right where she should be since the end is coming fast.
Day 110 12/29/2021- Started flush today and will continue to just feed rain water until next Wednesday. Will cut her down next Friday 01/07/2022.


Likes
11
Share


@Bread_n_Buds
Follow
Here we have a strain that has had great success in recent years and the Zamnesia one already has a great reputation among growers.
We also have Green Crack F1 Hybrid 2 plants but I'm showing you the other one in a separate diary now because it is even smaller than this one that is already in advanced flowering, there are many buds growing and we hope they swell well.
The structure created with mainfoldindg, mainlining, topping and lst vari is very pleasant, the plant is at medium internodal distance and flowers quickly so it is a plant on which I would feel like recommending these techniques that it is true that they can slow down the harvests but they give a satisfaction to the sight and an unparalleled fun in making them.
We are still using soil, fertilizers and all the additives recommended by Plagron 100% organic.
With her We have switched to the late flowering program that wants the additives Sugar Royal, Pure Zym for another week and adds the flowering stimulant Power Buds and the myth Green Sensation. Obviously the basic fertilizer is now Alga Bloom.
---- Decide on the right soil and calculate your fertilization program based on the soil on the official website. -- www.plagron.com
Try a seed of this strain that drives us crazy..
---- https://www.zamnesia.io/en/10677-zamnesia-seeds-green-crack-f1-automatic.html
Zamnesia Description // Forget what you think you know about cannabis. Green Crack F1 Automatic by Zamnesia Seeds is here to shake up the entire industry. Using F1 genetics, growing cannabis has never been easier. These plants offer uniform and abundant yields. Get ready to harvest high-quality buds, full of flavor and amazing effects.
All the best that mother nature has to offer is at ---- www.zamnesia.com

Likes
11
Share

@trelopoulos
Follow
Stretching started lets hope my tent can manage.. very vigorous plants!


Likes
23
Share


@GreenISR
Follow
Day 37 - At last it happened we in flowering stage .
*Added 1L water each one.
*Changing to light to 150W UPLUX
E27
17,200Lm
32,000h
*Light schedule 12/12 -
6AM-6PM DARK
6PM-6AM light
Dy
*Added filtlizer's to the set .
Day 38 - added water with filtlizer 0.5L .
Day 39 - added water 0.5 L
Day 40 - added water with filtlizer 0.5L .
Day 41 - added water 0.5 L
Well It just pass by me to lolipop so I did it :)
Hope it will turn good . .
Day 42 - added 2 L water with filtlizer's ,I have cut some thin brenches .

Likes
35
Share


@hornato420
Follow
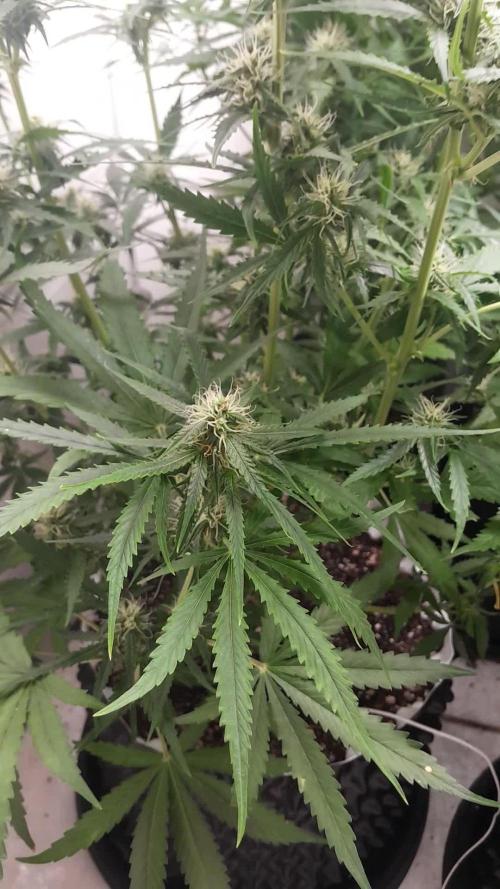
Week 3 the ladies had an exceptional growth spurt. The nodes on each lady are starting to become more defined with every passing day.
I kept the feeding relatively the same however towards the end of week 3 I slightly increased the big to 1.5 tsp per gallon and the grow big to 1 tsp per gallon. I wanted to keep it simple with feedings until they get another week of growth than I’ll incorporate the tiger bloom in a small dose and also start some LST.
Today is the final day of week 3 so I decided to Carefully top the girls. I didn’t completely take the top off cause I didn’t want to completely stress them out. I think they should be fine considering I waited day 19-20 to do it.
The bigger girl(#1) of the 2 is really starting to spread out. Her leafs are touching the top of the pot. The smaller girl is not to far behind her. I’m curious to see once they start to go Into flower if this size difference will stay the same or change.
There isn’t any smells coming from these girls yet but I did a gentle stem rub and I’m getting a tropical musty citrus smell 🍍🔥😍.
I have to admit it has been such a pleasure to finally get to experience fast bud genetics. The last time I got a chance to experience a Pineapple Express high was in 2008. Let’s just say the dispensary I got it from was always out. So this grow is going to be a treat once I complete this grow.
Would like to thank each and everyone of you for viewing my diary. This is my first one. I was extremely nervous and intimidated to start one, but it’s a new year so we have to do new things ‼️💯💚.
Thank you fast buds for creating this strain cause without you I wouldn’t have been able to have this experience 💚💯.


Likes
2
Share

@GERGrowDesigns
Follow
Welcome to Flower Week 2-3 of Divine Seeds Auto Black Opium
I'm excited to share my grow journey with you all as part of the Divine Seeds Autoflowering Competition 2025. It's going to be an incredible ride, full of learning, growing, and connecting with fellow growers from all around the world!
For this competition, I’ve chosen the Feminized Automatic strain: Auto Black Opium
Here’s what I’m working with:
• 🌱 Tent: 120x60x80
• 🧑🌾 Breeder Company: Divine Seeds
• 💧 Humidity Range: 50
• ⏳ Flowering Time: 60-63 Days
• Strain Info: 25%THC
• 🌡️ Temperature: 26
• 🍵 Pot Size: 0.5l
• Nutrient Brand: Narcos
• ⚡ Lights : 200W x 2
A huge thank you to Divine Seeds for allowing me to be a part of this amazing competition and Sponsoring the Strains. Big thanks for supporting the grower community worldwide! Your genetics and passion speak for themselves!
I would truly appreciate every bit of feedback, help, questions, or discussions – and of course, your likes and interactions mean the world to me as I try to stand out in this exciting competition!
Let’s grow together – and don’t forget to stop by again to see the latest updates!
Happy growing!
Stay lifted and stay curious!
Peace & Buds!

Likes
19
Share


@Mzsnoop2001
Follow
2da semana de flora y cambio positivo para las quebradas 😅 Blue Moby ni se enteró del supercroping accidental lo que si quedo con baja estatura que las demás. moby dick se recupero de la arrancada de la.punta principal 💪 viene un poco atrasada en flora en comparación a ww y bm pero viene remontando. Whithe widow viene súper bien y florando con cambios día a día 😍 está semana defolie las 3 por última vez y agregue una segunda malla de scrog para evitar el error anterior de quebrarla queriendola entrenar!
Como siempre acepto criticas y concejos gracias y buena semana!! 🤝

Likes
37
Share


@GreenHouseLab
Follow
Week 8 in the books, cruising to the finish line two more hard watering each and 48 hrs of darkness starting Friday.
Genetics: Natty Roots Seed Co
Instagram: @green_house_lab
Likes
3
Share

@Jardineiro_Br
Follow
Agora sem aplicações de técnicas, apenas fertilizantes e água, para que a energia da planta seja usada nos botões, quero ver lindos botões, densos e resinados. Assim como a Blueberry, essas planta tem uma semana a menos , mas está um pouco mais alta , por conta da genética sativa.
Likes
30
Share


@GrowInger420
Follow
I made a lot of mistakes till now, but at least i tried her to recover and she goes for it. I hope she will give some nice fruits when shes ready.
Have a nice week ✌️✌️