


By continuing to use the website or clicking Accept you consent to our cookies and personal data policy and confirm that you are at least 18 year old. For details please see Privacy Policy and Terms
Accept

Likes
2
Share


@High_Grade_Dadli
Follow
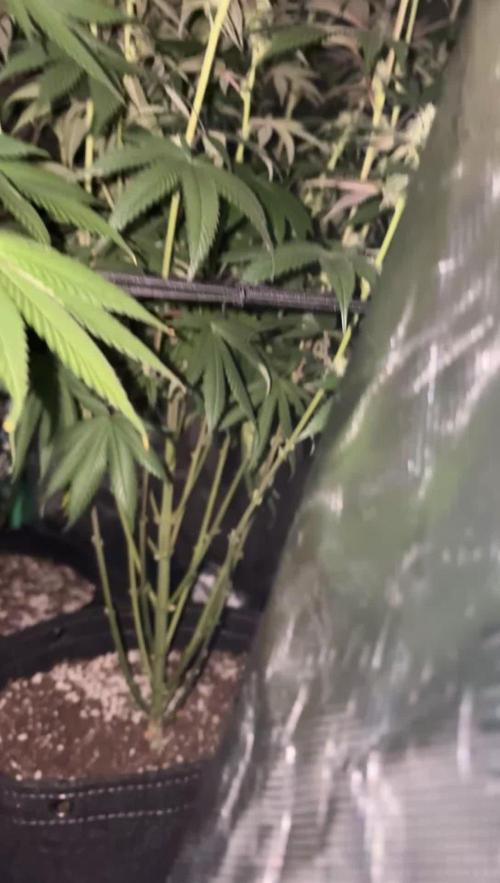
Growth has been great so far the main crown end up breaking .....see pic nxt week
Likes
56
Share


@Ledbelieve
Follow
Heading into week 8. Estimating about 10 days til harvest. Have 4 very different phenoms. Starting to really stink. Grow area smells like skunky grape gobstoppers. Can't wait to taste these ladies. Was gone for 3 days this week and came back to perfectly happy ladies. Best part of growing with LEDs. Can leave with little to no worries. Happy growing all!!!!!!

Likes
11
Share


@High_And_Hydro
Follow
- Ich hab die erste Woche des Biobizz Allmix Düngeschemas gestartet und gebe wie immer erstmal vorsichtige 100%, da meine Erde an sich durch den Kompost recht potent sein sollte.
- Außerdem hab ich mit meinem Calmag-Rechner mein Leitungswasser angepasst. Die Werte könnt ihr auf den Bildern sehen.
- Den PH-Wert passe ich ebenfalls auf 6,5 an.#
- Die Lampe bringt zur Zeit etwa einen PPFD-Wert von 350 - 360 µmol/s/m² bei 18 Stunden Beleuchtungszeit (DLI von 22 - 23 mol/d/m²). Sie wird aber nur eingesetzt bis es warm genug draußen bleibt. Tagsüber stehen sie jetzt schon draußen, sofern es nicht regnet oder stürmt.
Die Tropicana Cookies macht sich hervorragend und sie ist sehr uniform mit den anderen Fastbuds Strains bis jetzt. Sieht gut aus finde ich 💪😁👍
YT: www.youtube.com/@High-And-Hydro


Likes
23
Share


@Bossy_Marmalade
Follow
The time is quickly approaching, when these three girls will be harvested and whole-plant dried for like 2 weeks or so. I believe I will be harvesting this coming weekend after I check the maturity of the trichomes. I'm hoping that Big Lemon produces at least 2 LBS of dried flowers.

Likes
29
Share


@GrownwithLED
Follow
During week 8 the plants continue to grow nicely and devleop lots of side-branching and leaves. All 12 of my 'Fruity Terp'-babies have a nice healthy green color, which means the BIO NOVA nutrients are working well. I still follow the SOIL-CULTIVATION chart (at half strength of the recommended dose) when I fill up my 'FLEXITANK'-reservoir once a week with 100 liter of tap-water and add the nutrients from BIO NOVA in. The Autopot system with its 6 trays and 12 places (=2 per tray) is able to supply my 12 plants for one week from the 100 liter reservoir. The two SANlight EVO4-120 LED-fixtures are still hanging at 75 cm distance from the top of the plants and are tilted inwards by 11 degrees. This is the recommended way of hanging them and gives the PERFECT light for my Cannabis plants. At this stage I have the SANlight-lamps dimmed to 60% of power (=1 green light on dimmer ON), which is plenty of light and ensures a nice stretch at the beginning of flowering. I cant wait for the first female white hairs to appear on the babies...👊😎


Likes
5
Share


@BigGGrows
Follow
This week was good for the Cream auto. I performed some defoliation and undid the LST for a couple days as well as raised the lights to 24" to induce some stretching. I did selectively begin LST on the Cream towards the end of week 5. She has been getting 1/4 strength flower nutes and recieved a fresh top dressing of hot soil coco coir mix; as her roots were surfacing. So far so good. Atleast 20 budsites are visible and she has responded well to all the training and is coming into her stretch period. Now all we are waiting on is them white pistols to start shooting at the budsites. Hopefully week 6 will entail this! She should be at about half of her life span at this point. 4-5 weeks more of flower is expected before harvest.

Likes
12
Share


@Italianganya88
Follow
Alles läuft super buds fangen langsam an anzuschwellen hab eine 2 Lampe mit reingebracht um mehr lichteinwirkung in der Blüte zu haben. Die einzige Frage die bleibt sollte ich langsam anfangen zu entlauben. Bin mir bei autoflower unsicher.


Likes
12
Share


@SamDo
Follow
Hello,,, fin de semaine 10, semaine 2 de floraison.
Les plantes se portent très bien. Elles ont fait un beau stretch depuis le passage en 12/12. Presque 40cm!!
Un début de buds commence à se former. Les pistils blanc apparaissent doucement.
Je vais attendre la fin du stretch pour refaire une défoliation, Parceque la canopé est vraiment très très dense. Ce qui améliorera la pénétration lumineuse et qui aura aussi pour effet de faire baisser l’humidité, que j’ai du mal à faire chuter en dessous des 55% pour le moment.
J’ai aussi augmenté mon ec à 1.7 pour bien les nourrir, ce qui pour le moment semble leur convenir.
Pour l’arrosage, je suis toujours à un arrosage par jour.
Voilà pour cette semaine...
Happy grow...😎

Likes
52
Share


@Salokin
Follow
Hi Growmies,
the plant is doing good so far. I have upped the lamp output to 50% of the veg part for the coming week. I have put her straight away on a very heavy feeding schedule, so let's see how she will handle that. I am super stoked to grow this strain, as it was one of my favourites back in the day, when our market was flushed with it :)


Likes
1
Share


Processing
Likes
5
Share


Likes
10
Share


@couplethatgrows420
Follow
chopped on 11/19/2021
after wet trim got 604 grams of flower and 61 grams of trim
Processing
Likes
4
Share


@Ferenc
Follow
Lamp has changed. Veg stage is on, so 600W lamp is placed to be in the tent and the watering is 2 x 15 ml 2 x a day so 30 ml water per plant. Ventilation goes on at the same time like the lamp does. These girls grow so fast. They started smelling as well. Light schedule is 20 hours on and 4 hours off. Ventilation is
the same hours when the lamp is on the ventilation is on as well. When lamp is off I leave the ventilation on 15 min more. Fertilization will start also on Monday, Wednesday, Friday the same amount of water with bat guano mix. I will be back after 2 weeks from my holiday.

Likes
17
Share


@m0use
Follow
This was a fun project that was a few years in the making and a year later to see if they would last a season for this upload to happen. Before any of this I would bike aorund town grabbing up all the old Ikea solid pine bed slats that I could find and storing them in the basement. I have a lot of wood down there, any size worked as long as I have enough of them. The hot days to find them were the first and last of the months because that's when people where moving in/out. I also kept an eye on the free section on local online classifieds as well. The entire purpose of this was to recycle as much off the streets as I could before buying anything to finalize the project. In the end I only bought sealer, screws and some takeaway/beers. All the wood was 100% free and salvaged off the streets of Toronto saving it from the dumpster bin.
After collecting all the slats for about 2 years I was playing aorund with them on how I wanted to make this work. I had previously done a little project like this before but I messed it up and the boxes where crap. did not last longer then 2 seasons, they where thin and shallow as well could not grow much of anything in them. I Was talking to my friend who is renovating their house and we brainstormed some ideas on the boxes, I found some designs I liked online and said lets make something like this out of what I have here. We tossed out a few of the design features when looking at them as it would have been wasted wood and extra work not needed. If I had more wood them maybe it could have been an option but simple was the name of the game. They taught me what I needed to know like how the miter saw and sander worked, plus all the other tools I was using. They did help out with a table saw and creating the triangle support joints in the corners, They used some pine left overs they had while making a staircase indoors. I did not feel up to the task of using a table saw given all the relatives I know who have lost a finger to them.
In the end we decided the design would be three boards high and take an alternating pattern on corners. layer one short, layer 2 long, layer 3 short. Went with a galvanized and painted deck screw so it can take the weathering. Ran into some problems like making everything level as some of the boards were warped and other ones had undesired aspects like knots and tacky sticker goo I could not remove. So I used them for the base that will not been seen so much. Clamped everything down and called it a day.
Once it was all done and over with, I then brought them back home from my buddies work garage and started to seal them. I went with a boiled linseed oil as its a food safe option should the wood degrade into the soil I will plant in them. I will need to reapply it to the boxes year after year but the main coat is the most important one and I put it on 3 layers with a good dry in between coats. the inside of the boxes that where coated did not degrade at all as the sun did not hit them so it will not need a new coat just the outside. Overall the end result was very impressive for myself, I've never taken a woodworking class ever and It was a near perfect outcome for me. Heavy Duty Planter Boxes for all my gardening needs. I made a last min decision to add in a plastic liner to preserve the wood even longer and stapled that into the frame. it has held up quite well and may need replacing end of 2nd or 3rd year out in the sun. Used a thick moisture wrap plastic with UV protectors in its formula.
Lets see what I can grow in them this year!
m0use's haus of projects - garden box edition
Likes
7
Share


@Organic_LarF
Follow
High GD community,
Week 8
She aint big, but its all bud.
Im very pleasantly surprised by the outcome of this lady.
She does have almost the same size of top cola as her bigger sissters in the tent.
Thats it for the week,
Grow safe buds
🙏🍀🍀🍀🙏

Likes
19
Share


@Mzsnoop2001
Follow
Hoy fue la peor semana del cultivo y de mi experiencia cultivando, siendo el tercer día de la semana 5 se me desprendió el ventilador en el indoor y se me cae sobre una planta quebrando la punta principal (blue moby). día siguiente queriendo doblar el tallo principal lo arranque literal, ahora está en un mal estado, en comparación a la blue moby que recupero. Leo criticas y concejos! Bh
Likes
17
Share


@gottagrowsometime
Follow
Runtz Fem (mother) is on week 8. It's been a somewhat slow grow. But, I've been able to make a perfect pheno that changed early into a bigger pot does have fast growth for this pheno. It's strong. Hardy & quick to recover & nor easily affected by any issues. These are the perfect traits for my test. It's not about yield. It's about having a quality flower producing pheno. Which I can put 2 clones thar come off the same node set (pair) and are even as clones in appearance & more importantly as genes you can test with in this setting.
Week 8 Days 48-53
Day 50, she's ready to be cloned. She'll get 6 hrs of rest. I'll remove the clones and treat them in clonex with rockwool cubes. Have made a humidity dome as I can find the ones I bought years ago. But this will do till rooted in 4-7 days.
Day 51
Day 2 clones have survived and going strong at 36hrs later you see they're doing well behind a big pot in my tent (more or less ambient light with a bottle keeping up high RH above 85%. Refreshing air everyday). Keeping my eye on the wool to make sure everything keeps moist.
Will be putting both fully rooted clones into 7L pots of exact same mix of Promix soil & using the Terra line from plagron with power roots & Startup (which was gifted by my grow store). Only plagron will be used in these phenos. The mother will remain on Xpert Nutrients and not be given green sensation aswel ad 1 of the 7L clone pots obviously. 3 phenos of the same in all.
1 Xpert Nutrients (full line)
1 Full Plagron (with) Green Sensation
1 Full Plagron (without) Green Sensation
3 phenos 1 mother. 3 different results.
Let the fun begin.
DISCOUNT CODES
20% off XPERT NUTRIENTS & KANNABIA with code: GGST
20% off Oringal Sensible Seeds with code:
GGSTGD
20% off Zamnesias entire catalogue of seeds with code: ZAMMIGROW2024
