


Likes
Comments
Share



Likes
36
Share


@nonick123
Follow
Día 9 (10/06) N/A
Día 10 (11/06) N/A
Día 11 (12/06) Llueve mucho. Humedad alta por aquí. Eso les favorece
Día 12 (13/06) Se empiezan a desarrollar las hojas verdaderas a una buena velocidad! Todo en marcha! 💨
Día 13 (14/06) Riego ligero 100 ml sólo H20 EC 0,5 en previsión del trasplante en el día 15 de la planta
Día 14 (15/06) Se nota que estamos en el día 14 desde germinación y la mayoría de las plántulas van viento en popa!
Día 15 (16/06) Hoy procedemos a trasplantar a las chicas a su maceta intermedia de 6,5 litros
Se prepara con 5,5 Litros (85%) de sustrato PRO-MIX HP BACILLUS+MYCORRHIZAE + 1 Litro de Insect Frass (15%) + 65 gramos de Earth Vibes Super Soil (10 g/L substrato)
Se llena la maceta de sustrato con las manos (limpias) y rompiendo los trozos más gruesos, para que el sustrato esté aireado y esponjoso, sin presionar
Se coloca una maceta vacía de 1L para que quede la forma perfecta de la maceta donde están las plántulas (ver fotos)
Se espolvorea la parte proporcional de la probeta de microorganismos sobre el agujero de trasplante
Se saca la plántula de su maceta actual (bonitas raíces 😍) y se coloca en la maceta final
Se riega muy lentamente hasta percolación profunda con H2O EC 0,5 pH 6,5
Se coloca mulch (acolchado) de paja para evitar traspiración excesiva y cuidar a los microorganismos del suelo
A ver como reacciona al trasplante!
💦Nutrients by Lurpe Solutions - www.lurpenaturalsolutions.com
🌱Substrate PRO-MIX HP BACILLUS + MYCORRHIZAE - www.pthorticulture.com/en/products/pro-mix-hp-biostimulant-plus-mycorrhizae

Processing
Likes
12
Share


@BloodBath
Follow
I know that it may seem like a lot of nutrients at first. It’s not. A lot of those mycorrhizae ingredients are mixed into my soil well before the germinated seed goes into the pot. I make my own mix of soil using some of those ingredients. I like to use the great white mykos because of its powders consistency. Makes it easy for a clean transport from germinated bean to its forever home. For watering, they have been given only plain RO water with a neutral ph. Just yesterday I gave them a little tiny mix of Medusa’s magic, Zeus juice, and Gaia mania. I have used Oregon’s only brand products for a while now and I absolutely love them and better yet, I understand them. They have responded super well already to their first drink of bottled nutes with a ph of 6.3 . I’m keeping a RH between 50 and 60%. I’m also keeping a temp during the day at around 78-81°f. Right now I’m not worried about a night time temp but I do run cooler lights for about 4 hrs every day, dropping to around 70-75°f. Eventually I will add my second light boosting me from 600w too 1200w. Also they will begin a 20-4 hr light cycle. I find these autos do amazing with a little rest for 4 hrs. Allows me to pull more resin and color in later stages of life by dropping the temp lower than usual with the lights off. So please if you will, stay tuned and I’ll have much more info and much better videos and pictures for you to all enjoy. Thanks for looking! ✌️🏻


Likes
26
Share


@darb35
Follow
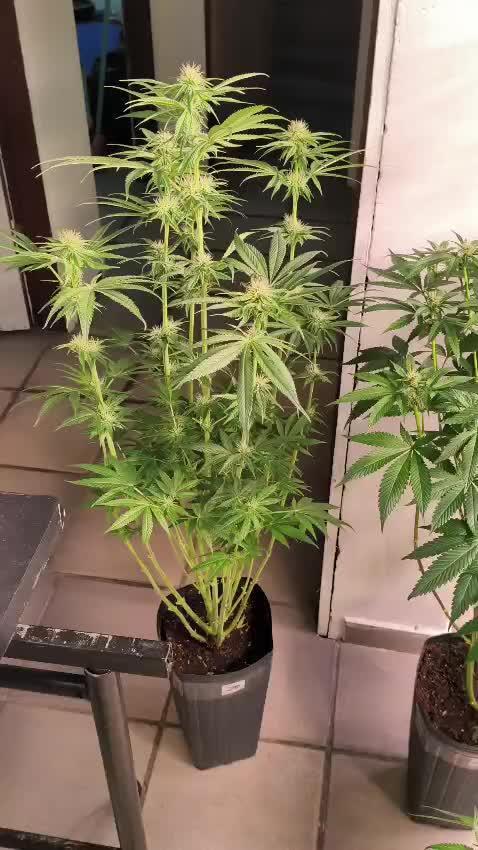
Day 14 - no water today, the girls seem to like their new pots (10 cm)
Day 15 - 300 ml water with Acti+Heaven+Grow (Ph 6.8)(11 cm)
Day 16 - litttle bit water (Ph 6.6)(13 cm)
Day 17 - 300 ml water with Acti+Heaven+Grow+Calmag (Ph 6.7)(14 cm)
Day 18 - 400 ml water + LST (Ph 6.6)(15 cm)
Day 19 - no water (16 cm)
Day 20 - 660 ml water with Acti+Heaven+Grow (Ph 6.5)(17 cm)
Day 21 - no water (starting to show preflower pistils)(20 cm)
Likes
18
Share


@TheGreenLeopard
Follow
happy out again this week at the shape of things. Sweet Sweeds dominant tent was down overall because of a F up on light regime. pins out of place lol. ok so all fixed. taking their topping and training like champs. merry christmas everyone. a lot of foliar spray to help the recovery. silicate a bit, algae mix.

Likes
22
Share


@medicalhydro
Follow
Flush week
Total system power 230w
Dim %10
UV-IR-FR Dim %100
PH:6.0
PPM 285
Processing
Likes
4
Share


@UK420hydrogrow
Follow
ok so ive repotted the clones into bigger pots and im thinking of moving them outside tbh i wanna get rid of this strain has done it for last 2 crops took a few weeks to notice any new growth roots forming etc but now plants are looking good and ready to be vegged properly

Likes
15
Share


@Lontra
Follow
Tag 29:
🌱: Beginn Woche 5. Da ich denke, dass wir mittlerweile in der Vorblüte sind, trage ich diese als erste Blütewoche ein. Es gab ganz leichte Anpassungen am LST, ich werde die Lady jedoch vermutlich von nun an in die Höhe wachsen lassen. Desweiteren wurden einige der untersten Fächerblätter, die bereits vollständig verschattet waren, entfernt. Auch 1-2 kleinere Blätter, die nach innen wuchsen und den Blüten die Sonne nahmen, wurden entfernt. Leider ist mir auch eines der größeren Fächerblätter abgebrochen, das ich noch behalten wollte, aber ich denke sie wird es verkraften.
💧: Die Erde ist immernoch feucht.
💡: Die Beleuchtung ist unverändert (DLI ~40, Abstand zur Pflanze ca. 35cm)
Tag 31:
🌱: Bisher lasse ich sie einfach erst mal wachsen, ich denke jedoch darüber nach die nach innen wachsenden Fächerblätter morgen doch noch mal zu entfernen.
💧: Die Erde ist immernoch feucht.
💡: Die Beleuchtung ist unverändert (DLI ~40, Abstand zur Pflanze ca. 35cm)
Tag 32:
🌱: Heute wurde erneut die Schere angesetzt und ein paar der nach innen wachsenden Blätter sowie ein paar kleinere Triebe im Inneren entfernt. Das LST wurde nur minimal angepasst, um eine einheitlichere Höhe zu erreichen.
💧: Die Lady wird so langsam etwas durstiger und so gab es heute wieder ca. 3 Liter Nährstofflösung. Diese wurde jetzt etwas erweitert und entspricht nun ca. 50% Bio Bizz Düngerschema. Zusätzlich dazu gab es dieses mal auch CalMag+Bittersalz.
💡: Die Lampe wurde ein paar klicks nach oben gehangen um die Werte in etwa konstant zu halten (DLI ~40, Abstand zur Pflanze ca. 35cm)
Tag 34:
🌱: Heute wurden nur die Blätte etwas sortiert, um den Blüten mehr Licht zu geben. Mittlerweile haben die höchsten Triebe etwa 20cm (vom Boden aus) erreicht.
💧: Die Erde ist noch feucht.
💡: Die Lampe wurde noch ein Stück weiter nach oben gehangen, um die Beleuchtung in etwa konstant zu halten (DLI ~40, Abstand zur Pflanze ca. 35cm)
Tag 35:
🌱: Ein paar der untersten, im Schatten liegenden, Blätter wurde entfernt, sowie 2-3 kleine Nachzügler Triebe aus dem Inneren. Das LST wurde ein wenig angepasst. Ich denke darüber nach noch ein paar mehr kleine Nebentriebe (vor allem aus der Mitte) zu entfernen, damit der vorhandene Platz besser für die größeren Triebe genutzt werden kann. Über Gedanken/Meinungen/Ideen dazu würde ich mich freuen 😉
💧: Zu Tagesbeginn ließ sie ihre Blätter ganz schön hängen und die Erde war ziemlich trocken, also gab es auch heute wieder etwa 3 Liter Nährstofflösung.
💡: Die Beleuchtung ist unverändert.

Processing
Likes
11
Share


@kcartel
Follow
It is very simple in cultivation, very fragrant, sweet taste, the effect is wonderful, I really like the cool variety I advise everyone !!! I would like to thank all who helped me achieve the result !!!
Likes
5
Share


@AustinRon
Follow
TH 1Q2025 - Week 8 - Flower 5
(ON Haze X Original Haze) X Northern Lights #2
“Todd’s Haze”
Objective
- 8 Female Plants, Topped ONCE @ Flip, 12” when topped
- Modified Sea of Green
Seeds Wet: 1139PM, 28.2.2025
Germinated: 2.3.2025
Flip: 21.3.2025
Harvest: 77 Days, DATE: 6.6.2025
_________________________________________
__
Fri Apr 25, 2025
TH 1Q25 36:F:5:1
Cleaned Emitters - Replaced Pump
Cleaned Manifold Filter = TWICE
Replaced IRRIGATION Pump with mini-sump
Photosynthesis plus produces enough biofilm to disqualify from running in the reservoir.
- Remediate: Apply half diluted to watering zone, every other day. Include PCAL 1660 for Add’l Calcium and Phosphorous
- [x] CEASED PHOTOSYNTHESIS PLUS IN RESERVOIR
- The BIO film is ‘orange/pink,’ PSP is the SUSPECT.
- [x] Harvest Dehu
- [x] Refresh Reservoir - 2 Gallons
- [x] EC: 2.3, 2.4
- [x] Primer A & B: [ 31, ml]
- [x] Silica Skin GEN 3: [ 16, ml]
- [x] SLF-100: [ 10, ml]
- [x] 1900: Measure Runoff
- [x] Amount: [ 1250 , ml]
- [x] EC: [ 2.3, mS/cm]
__
Sat Apr 26, 2025
TH 1Q25 37:F:5:2
- [x] Replace Main Feed (1/2 Silcone tubing) with 3/8” Black Chemical Resistant
- [x] Refresh Reservoir - 2 Gallons
- [x] EC: 2.3, 2.4
- [x] Primer A & B: [ 31, ml]
- [x] Silica Skin GEN 3: [ 16, ml]
- [x] SLF-100: [ 10, ml]
- [x] 1900: Measure Runoff
- [x] Amount: [ 950, ml]
- [x] EC: [ 2.4, mS/cm]
__
Sun Apr 27, 2025
TH 1Q25 38:F:5:3
- [x] Lower Defoliation in Preparation for Intra-Canopy Lighting Install
- [x] Harvest Dehu: 3.5 Gallons (None Yesterday)
- [x] Refresh Reservoir - 3 Gallons
- [x] EC: 2.4
- [x] Primer A & B: [ 48.8, ml]
- [x] Silica Skin GEN 3: [ 24.4, ml]
- [x] SLF-100: [ 15, ml]
RUNOFF: [ 950, ml, 2.4/5, mS/cm]

__
Mon Apr 28, 2025
TH 1Q25 39:F:5:4
Observations
- @ 2.4 EC is making for DENSE GREEN in the leaves. We DON’T lack nitrogen. ;-}
- Some Nitrogen Curling on NL2 Dominant (Pheno #2) - Will REDUCE EC if doesn’t abate today . . .
- We have some White filmy scum forming on top surface of res water. Suspect Silica. Will clean out res TUESDAY and restart w/Out Silica Skin. If we’re clear FRIDAY - Start Re-adding until and unless white scum forms …
Reducing EC: 2.3 # Will reduce Day by Day to 2.1
- [x] Harvest Dehu: 2.5 Gallons
Runoff
- [x] EC: [ TBD, mS/cm]
- [x] Amt: [ 950, ml]
__
Tue Apr 29, 2025
TH 1Q25 40:F:5:5
- [x] Install Intra-canopy Light 50% Dimmer
Note: After H2O2 yesterday, and 1 cup (in about 2 gals) today - the amount of scum is REDUCED SIGNIFICANTLY. I filtered with hand strainer until there was no more film or particularate (there wasn’t a lot) - The overall appearance is better.
Have refreshed with 3 Gallons and Primer A&B Only (and SLF-100). We’ll monitor. If it stays clean, we’ll test again with Silica Skin Gen 3.
__
Wed Apr 30, 2025
TH 1Q25 41:F:5:6

Refresh Reservoir
- [x] Amount: [ 2, Gal]
- [x] Primer A&B: [ 32, ml]
- [x] SLF-100: [ 10, ml]
Runoff
Amount: [ 2, gal]
EC: [ 2.9, mS/cm]
R&R Reservoir (Rinse components w/ 45% H2O2)
- [x] Disconnect MAIN FEED Line
- [x] Disconnect, Remove, and Clean PUMPS
- [x] Flush Chiller
- [x] Clean Reservoir
Reassembly
- [x] Reinstall components
NOTE: We have a SMALL amt of white slate like precipitate - Most Likely Silica …
__
Thu May 1, 2025
TH 1Q25 42:F:5:7
Mix 1 Liter of CalPhos for HAND APPLICATION Tonight
CAL50K, 1 ml yields .5 EC (250 ppm)/Liter, or .125 EC per Gal
~16 ml’s/gal - ~2.1 EC
- [ ] Mix and ApplyPCAL 1660 & CAL50K
- [ ] Photosynthesis Plus
- [ ] Quillaja 60
- [ ] Apply ~ 120 ml/plant
- [x] CAL50K to EC: 2.1 (4 ml/qt)
- [x] For 2.1 EC: [ 16, g] Cal50K
*** RESERVOIR EMPTY!!! ***
After REDUCING Per Event flow in Half - we STILL Emptied the reservoir …
SINCE we ONLY HAD 2 GALLONS, We’re good (Catchment is 2 Gal)
Last night I cleaned the manifold filter ~ 7PM (Start Time) and reduced to 18 minutes TOTAL time (9 Events, 2 minutes/event)
Runoff
Amount: [ 7600, ml] # We Emptied the Res Overnight, at 3 min/event - dropped to TWO ~2300
EC: 2.9
Refresh Reservoir: 2 Gal (Reclaimed DEHU)
- [x] SLF-100: [ 10, ml]
- [x] Primer A&B: [ 32, ml]

Likes
12
Share


@Jays_Not_Here_Man
Follow
Great week, the girls are doing fine without me. All I have to do is pop in and give them
Some water x2 a week. I increased their feed just a bit this week, I will start tapering the nutrients off soon, and will increase the amount of water going through them in hopes of getting a 10% runoff or so at least 3-4 times before harvest. Don’t even want to think about getting too far ahead, I’m getting very excited for these beautiful girls. These are quickly turning into the best homegrown I’ve seen yet! Happy Gardening 🇨🇦👊❤️

Likes
82
Share


@BigBadLion
Follow
Hey guys!
Sorry for the big delay since my previous grow! Right now I'm growing some babies from Royal Queen Seeds! Kali Dog! 😃
The first week was calm! The babies broke out from their shells rather fast and two babies grew out of their jiffy pods rather fast! Also, since the strain is Kali Dog I decided to name each of the plants with a different dog name! I'm still unsure about the names but the first two are called Roko and Max!
For the first time I also noticed the first buds looked... different? You'll be able to see them in the photos tho... and once again two of my babies are suffering from helmet head 😰 But eh, I'm used to it. Gladly it's an easy error to fix.
I'll try to make a longer timelapse (these were bad!) but I didn't know my camera battery wasn't enough for long sessions 😝
Anyway, thanks for reading! See you all next week! 👋


Likes
22
Share


@Albeginner420
Follow
The buds are really starting to pumping up and the smell too. She developed long branches during the stretch. She demands a lot of water as the 11 liter pot should be full of solid roots. Two weeks from now i Will start using the ripen as a booster instead of nutrients. 4 weeks to go


Likes
19
Share


@A_Rolling_Stoner
Follow
All plants are fully blooming and create frosty leaves.
Caution! Very Sticky!
Amazing smell from the apple fritter and critical.
Really intense.
Likes
18
Share


@TheItalianGrower
Follow
Hi guys, in the middle of this week I changed my 400w HPS to a 600w one. I also added another 600w HPS to give more light to the plants in these last 10 days of vegetative growth. So now i use 2 600w HPS.
So far everything has been fine. Plants begin to stretch after the stress of cutting.
If you know any good nourishment for the flowering phase, I listen to you, thank you.
Stay tuned 🦍😎

Likes
6
Share


@GanjaDjarin
Follow
Days 15 to 17, varying by plant: My journey of experimentation, aiming to refine and perfect my cannabis cultivation methods, continues. This venture’s ultimate objective is to position myself as a preeminent cannabis cultivator in my locale. As I navigate through the labyrinth of regulatory licensing, I’m conducting a trial run with my seedlings under continuous lighting conditions and a minimal nutrient regime. My primary goal during this phase is to identify any potential hiccups that could hinder the growth process and ultimately impact the productivity of my intended commercial operation.
As I delve deeper into this exploratory phase, I draw invaluable insights from the thriving cannabis community, whose collective wisdom informs my decision-making process. Given my geographical location and available resources, I’ve opted for a strategic shift in my cultivation strategy.
Previously, I’ve been procuring seeds at an average cost of $10 to $22 per seed, with a relatively broad success rate variance, ranging from 70% to 85%. However, an alternative presents itself in the form of local cultivators. These businesses offer cannabis plants aged between 2 to 4 weeks, boasting an impressive variety of over 100 strains.
These juvenile plants are offered at a cost-effective rate: an average of $100 for eight plants. With a success rate hovering between 70% and 95%, these plants offer excellent value. Essentially, I can access pre-grown plants at a substantial discount, in turn significantly boosting my chances of success.
Consequently, I am poised to transition away from growing cannabis from seeds to harvesting. By sourcing my plants from local cultivators, I stand to significantly reduce overhead and production time—an undeniably smart move from a business standpoint. This strategic pivot signifies the end of an era and the exciting beginning of a more efficient and cost-effective chapter in my cannabis cultivation journey.
I am currently outlining a plan to expand my cultivation by acquiring several juvenile plants, which should be happening between July 1st and 3rd. The new additions to my garden will include Acapulco Gold, Gelato, White Truffle, and Runtz. These will be cultivated in harmony with the existing growth, which comprises God’s Gift, Northern Lights, and the final surviving F1 Epsilon.
My primary objective is to establish the most efficient and cost-effective supply chain possible. I aim to achieve this through the use of an off-grid system that runs solely on solar power, which will ensure complete sustainability and renewability. From a business standpoint, this approach is advantageous as it allows me to leverage the growth of high-quality plants that are already in the cultivation phase.
The new plants are expected to arrive in about a week. If the growth rate of the currently cultivated plants doesn’t meet expectations, I’ll be incorporating several of the newly arrived plants into the hydroponics systems. This methodical approach aims to ensure an optimal growth rate and the highest possible yield.
I also wish to address the cannabis grower community directly. I hope that my decision to skip the seed-to-plant stage does not cause any offense. My intentions are simply focused on maximizing quality and output, while minimizing our carbon footprint. I believe this approach is in the best interest of sustainability and efficiency, without compromising on the quality that our community values so highly.
As we proceed with this venture, we’re currently in the phase of collecting equipment and navigating through the licensing process. To help lower our overhead and assist with consulting fees, we would greatly appreciate any donations, especially in terms of lighting equipment. Your support in this endeavor will contribute significantly towards optimizing our operation and will be deeply appreciated.
Disclaimer:
Let it also be known I am completely abiding by all state laws, and do not plan on selling any of this current bud. This is for research to avoid future growing "potholes" in the growing part of the business as we have a very small team. My end goal is to help change the current stigma around cannabis and provide a useful service that can help localize and reduce the inflation on cannabis prices in socal by providing a logical supply system. Again I intend on doing all things through the legal route as there is no need to do other wise given the laws on personal use and growing.


