
Likes
Comments
Share

@S3phwea
Follow
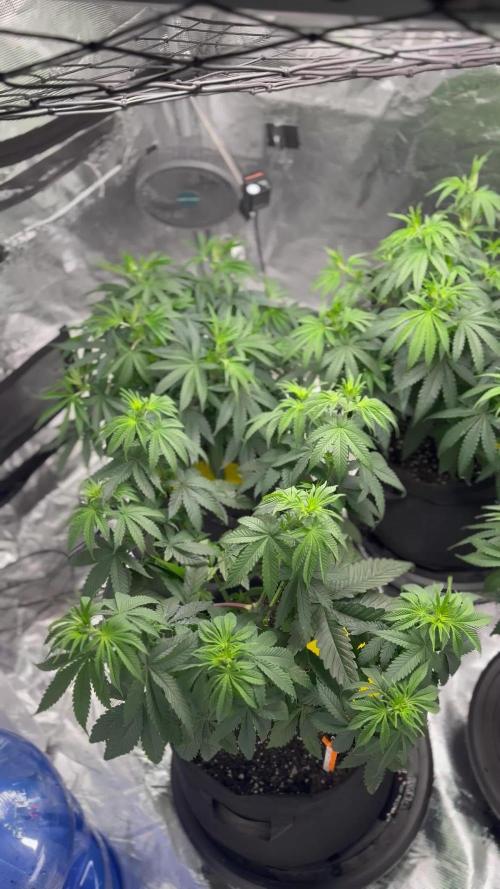
Going well. Think I may flip in the next week. Don't want the plants to become too unmanageable for my first crop. Really enjoying the learning process. Thinking a t-break starting soon would make it easier to enjoy the harvest. Looking at getting some bubble hash processing equipment and a rosin press, my prefered consumption method from right at home. At this size what would an experienced grower expect in terms of yield? The strains seem hearty.
Thinking-
Flip: September 7
Harvest Window: November 2 – November 15
Drying: November 2 – November 16
Cure Starts: November 16
First Smoke: Early December
Peak Quality: Late December – January

Processing
Likes
93
Share


@Ferenc
Follow
Week 6th started. I will add each plant 100 ml water 2x a day so 400ml altogether. I still always spray the topsoil also. The same fertilization method will be done, Monday, Wednesday, Friday 2x 100ml acacia honey and bat guano water mix for each plant. I changed their places so Purple Punch is the left side now and the Gelato Cookie D'ohpe placed to the right. I always rotate them to get equal light. Last day of the 6th week. Gelato Cookie D'ohpe doubled its height. I decided to make the Purple Punch flower but it is not autoflower I separated it for 36 hours darkness and then I will give 14 hours darkness and 10 hours light the first 7 days. So every night I will put it in the tent with the other one and remove in the morning to be in darkness. I also need to reset the timers. End of this week Gelato Cookie D'ohpe is 65 cm, Purple Punch is 35cm.


Likes
16
Share


@Mopish
Follow
I liked the taste, loved that the sugar leaves are filled with trichomes but it's just too little of a harvest for the effort.
BTW, math is all wrong on the g/watt
The Bestva 2000w doesn't use 1400w it uses around 390w
Also, I put 25m2 because that's the total size of the tent that I used, it doesn't mean that 1 m2 would need 4 of those lamps.
Also, it draws half of that when only veg is turned on.
So, the correct math would be
- 185w * 56 days of veg (18h)
- 390w * 70 days of flower (12h)
- 10g dry material
- Total space around 25% of the tent
Veg cycle:
185w / 1000 = 0.185 kW/h
0.185 kWh x 18 hours per day = 3.33 kW per day
3.3 kW per day x 56 day veg cycle = 186.48 kW per veg cycle for the whole tent
186.48 * 0.25 = 46kW for the area covered by the plant
Flower cycle:
390w / 1000 = 0.39 kW/h
0.39 kWh x 12 hours per day = 4.68 kW per day
4.68 kW per day x 70 day flower cycle = 327.6 kW per flower cycle for the whole tent
327.6 * 0.25 = 81.9kW for the area covered by the plant
Total:
46 kW (veg) + 81.9 kWh (flower) = 127.9 kW per entire cycle for the area covered by the plant
10 grams dried / 127.9 kWh = 0.08 grams per kW
---
Total Harvest
Total Harvest = 11g Choco + 66g KDA + 46g BC = 123g
Total kW = 186.48 + 327.6 = 514.08
123g / 514.08 = 0.23 grams per kw
Processing
Likes
19
Share


@Fire_Farmer
Follow
I'm like 5 days late with this update so I have had to pin videos that I took the same week while I was communicating with TRYHARD so ignore any dialogue that's out of context they aren't diary logs they are simply correspondence between myself And TRY, oh and sorry about my language I'm common as muck me.
The pictures are just random pics I took that week as oppose to my usual more organised method but hey ho I'll do a more tidy job next week.
The week went swimmingly barring some nitrogen deff on the lowers which I initially put down to the hot weather drying the pots too quickly and causing nute lockout with the salt buildup so I flushed then gave them a nice feed after they dried the pot at which point I noticed the most heavily afflicted by the N deff were also the quickest drinkers and had lower EC on the runoff so I have been giving them a slightly stronger feed than the others and it seems to have solved everything so I'm happy with that.
Bud development is nice, frost is nice, terps are through the roof right now.....
Zkittlez ones are really stinking of lime and candy bubblegum
Punch ones are stinking berry berry nice!
Grandpas Crush is smelling kinda hazey right now but I'm hoping the berries comes out of her too.
Little else to report really.
Thanks for reading
One Love 💚
Fire Farmer🔥👨🌾
Likes
16
Share


@DaddyPrime2
Follow
Switched to flower nutes too early. Back to full strength terp tea grow 711. Atleast for the next 2 weeks, maybe less.
5/1/24
Plant is stretching now. FYI just to clarify, I switched lights to 12/12 on 4/20 but I am considering her being in veg still until I see more pistils. Probably the end of this week. After a 2 week transition period
5/3
2 days later and I need to get my damn camera in the tent! This stretch is starting to look like nursery explained. She’s supposed to triple in size. I thought I tied her down too much and she would stay short. I swear she’s grown an inch over night. Starting to dominate the tent. Literally 2 days ago, I said that I didn’t consider this week to be flower and still the transition phase. Now she looks like she’s fully in the flowering phase. She’s beautiful and I’ve been impressed since veg. Since I chose her as a clone I liked the way she was. Hoping she follows through🌱💚

Likes
2
Share


@EyeMKing
Follow
As week 2 comes to an end 4 of the 5 have shown great growth 1 is behind (#5) but it also has a mutation and has a few 4 leafers on it. #3 is shorter and has wider leaves.


Likes
12
Share


@CannaDiaries420
Follow
30-01:
The first day of week 6 and I already saw a few small flowering hairs on every plant, which means that they are officially in the pre-flowering phase.
Now I have to say that I'm not super happy with how they look. I wanted them much bushier. So I started to google and landed in a rabbit hole of info about par, umol and leave light penetration.
So i ended up with an order of a Mars Hydro TS1000 and this will arrive next week. they will maybe not grow a lot in this phase but the budds should be wayyy bigger. In the last 3 weeks I will germinate 4 new brain damage seeds and start a 2nd grow report with the TS1000 from germination.
01-02:
Today I removed some leaves to provide the heart of the plants with full light again.
As you can see the ''side'' bud area's are already stretching upwards to get even with the main tops, in theory I should have 8 bud area's on each plant.
When they are almost in full bloom i will add an scrogg net to keep al the buds sides even in height trough there last stages.
When it comes to nutrition they have today 1L water with 2ml orgatrex + 2ml plagron terra bloom each plant. This is half the recommended maximum dosage for terra bloom. I will increase the dosage as by week.

Likes
11
Share


@hannabis420
Follow
fast growing auto, overloaded on nutes with this one but she still produced beautiful buds

Likes
6
Share


@gottagrowsometime
Follow
Was an easy week. More to come as i only huge it a few hours ago
. Updates incoming.

Likes
23
Share


@Piorkeed
Follow
Tenth week of flowering started.
I went out a week and at my return I discovered that the #2 is sick. The plant doesn't drink anymore and a lot of branches are falling down with limp leaves. I think that the missing defoliation, the height and the poor ventilation caused that. At the moment I removed her from the tent moving her out to the balcony.
I did a huge defoliation to the #1 and a massive LST in order to low the height of buds that reached the lamp that is at its maximum height.
So far I gave to the plant only water.
I think that the cause of plant disease is the high humidity level (at least 90%...). Tomorrow I will buy a dehumidifier hoping that this will help the remaining plant.
D63: changed the water into the pot. Added 15 ml grow, 30ml micro and 40ml bloom. [email protected] EC 1.2
D64: after the defoliation the plant seems to be healthy. The humidity into the tent is still high, tomorrow I will install the dehumidifier.
D65: I've put a dehumidifier into the tent, I've added 3 liters of tap water to the pot; the plant is drinking a lot so I think that she is fine. The plants produces a lot of fat buds, so I've checked the trichomes for the first time, they are clear for the majority.
D67: added 5 liters of tap water to the pot. The plant is drinking a lot


Likes
60
Share


@Clutch
Follow
Great strain, germinated after 24h in a glass water and came out of the cocosproutpad after like one day and a half later, started a bit slow because of overwatering (extreme heatwave here) but managed to recover very well. A nice fast growing plant in vegative stage with lots of big fanleaves and a pretty bushy under area. Transferred to flowering really fast and then had a little bit of stunt in growth, I expected her bigger but this has a lot to do with my growing conditions and overall temperature and air. Buds kick in really nice and start showing frost early and thickening buds around week 4 of 5. She can handle nutrients like a boss. Not one single sign of nutrientburn throughout the entire grow. The final 4 weeks were pretty tough to keep her happy since I had a lack of light, no good airflow and lots of rain. Also bugs and some budrot but I can't blame the plant for that. She fought her way through it and delivered nice buds. Not too compact but it's an outdoor grow. After 10weeks of flowering she looked done for me. I will grow her again next year and do better. Learned a lot on my first Growdiary experience 😊
Will update with smokereport and total weight/outcome after curing.
Many thanks to everyone who has been reading, following and mostly gave comments and answers. U guys and girls rock. See u next grow or in the commentsection of ur grow😉👊
Adios
Likes
5
Share


@TheGreenGroomer
Follow
Boom! We’re officially rolling into Week 2 of flower and things are looking dialed in across the board.
PPMs are sitting right where I want them, pH is locked in, and the PPFD is tuned to a T
Since the flip to flower, she’s been getting 3L of water each day, and she’s been taking it in perfectly with no signs of stress or runoff issues.
I did a heavy lollipop and defoliation about 4 days ago—cleared out a bunch of lower shoots and leaves under the canopy, plus some fan leaves up top that were covering bud sites and couldn’t be tucked.
Airflow is much better now, and light penetration has definitely improved.
The magnesium deficiency I had earlier seems to be under control. New growth is looking lush and vibrant.
She’s back on track and praying hard toward the light.
Really looking forward to Week 3 when the buds start forming and the magic kicks in!

Likes
3
Share


@Squaregrouper
Follow
This blueberry is amazing tried-and-true easiest cloner almost a hundred percent success rate when cloning with or without clonex

Likes
22
Share


@GR0WER
Follow
New week starts.
__________________
🌞19.04
Spraying by the 'Sea Weed' solution, but it's usual. Waiting for crone forming, doing nothing.
It's a last week of vegetation, next one will be 12/12 hrs of light.
🌞20.04
Nothing today except clean water spraying.
I was thinking about HST making to lower a middle brunches of my 'stack'. But I'm too scared to cause a lot if stress to my girls. They can become hermaphrodites, it's too risky.
Theoretically, I can wait one more week them to be healed from the lasd defoliation and then break some brunches. But I don't want to wait more.
🌞21.04
Nothing today, we just growing.
'RG'#2 has alot of yellow tips on its yong leaves. It's definitely a feeding deficit, but I already giving them nutrients in 80% concentration. Next feeding (two days later) will be 100%/full dose and then light schedule will be changed.
👉Upd: I made HST (Supercropping) to eight middle branches of 'HB' and 'RG'#2. They were too tall compared to others. Now they have five days for healing before light schedule will be changed. It will be a great experiment for future grow cycles.
👉Upd_2: All eight broken future colas turned themselves to the 'Sun'. HST procedure was successful. Now my garden is as flat as an 🌊🌊🌊 (almost).
🌞22.04
Nothing today, even spraying. I want them to heal faster, not to rot...
Broken branches of 'HB' and 'RG'#2 feels great. Leaves aren't withering, their stems are hard. They'll be OK after a few days. I think I'll made one more defoliation on wednesday. Wright after that I'll turn on 12/12 light shadule.
🌞23.04
Today I measured drainage water. There are too much sault was gathered in pots: 2.8Ec
I drained 60 liters of nutrients solution (20l each pot).
And EC fell to 2.6 only - it's too damn high numbers!
In wednesday I'll water my plants with 'GHE Pro Clean' before light schedule changing. It will clean them well.
Upd: 12hrs after this procedure they look much larger then they were before. I'm starting to run out of space in my box.
🌞24.04
Nothing today.
A soil is too wet, Ec is too high, the broken branches haven't healed yet. I'll wait for two days, then flush my girls with a 'Clean' solution.
Upd.: Light defoliation (~40 leaves total) was done at the evening to all except 'HB'. It was a last leaves cutting before flowering time. Details on photo.
🌞25.04
It's a last day of vegetation light schedule. I'll turn my lamps to 12/12hrs tomorrow. Also I will turn on a third 100W lamp in the box.
This was a normal week.
____________
Week ends.
Likes
22
Share


@Jwjoh
Follow
This was an interesting harvest. Everything was going great and the buds/trichomes were still piling on, when suddenly almost overnight plant "C" shifted to about 20% amber trichomes. So I harvested it, and because the other plant wasn't ready yet I decided to try water curing the first one for 7 days. Then at the end of the 7 days, I figured I'd hack down plant "D" and dry them both on the racks in the tent at the same time before moving into jars.
The water curing was a huge success! After the first day, the water was cloudy with a slight green tinge. Second day was about the same. Then the water was just a little cloudy each change, no green tinge. Compare it to the diary I just opened around water re-curing some cannabis I bought from the government store, where the water is diarrhea brown :O On day 7 of my water cure, the water was perfectly clear so I decided to hack down plant "D" and get them both drying on racks in the tent together.
While water-curing plant "C", I had its trim sitting in a bowl in the freezer. When I hacked down plant "D", I put its trim in the same bowl. After my typical wet-trimming, I hung up Plant "C"'s water-cured buds on the top rack, plant "D"'s buds on the 2nd rack for an old fashioned cure, and random trim from both plants spread out on the bottom 2 racks.
The water-cured buds dried within about 24 hours and went into a jar with a 58% humidipack. The buds are SUPER dense and potent! Nice clean high, doesn't kill my throat. The downside is that the taste is really weak and not that great. But everything has pros and cons. Almost no trichome loss in the bucket during the water curing as well -- I was really worried about that!
The other buds dried in about 36 hours and went into a jar with a 58% humidipack, where I burped it many times a day for a week. The smell and flavour are much more potent than the water-cured bud and it's a little harsher on my throat, but otherwise I'm not sure there's a detectable difference.
However, you can SEE there's a sharp visual difference between the water-cured buds and the jar-cured :) Of course the jar-cured will mature more with time as well.
Once the trim was completely dry, I put it in a bag in the deep freezer and dropped it to about -20. I didn't need to use a grinder this way -- I could just mash it all up in the bag with extreme ease! Sifted it through the kief screen, and pressed down 17 grams of lazy-man's hash!
After processing the trim through the kief screen, I decarbed in the oven at 200F for 1 hour (this converts THC-A into THC or something to that effect -- if you don't do this, the edibles won't get you very high). I put the trim into a big mason jar and back into the freezer along with my bottle of Everclear. Once they dropped somewhere down around -20, I poured in the Everclear, put the lid on, and shook as hard as I could, as often as I could, for 5 minutes or so. I noticed that as I shook it around, the contents inside would alternate between solid and liquid which was kinda cool :) Shake it one way and it freezes, shake it the other way and it thaws... or something to that effect, anyway. I was able to use a double-coffee-filter to extract about 2 cups of dragon tincture!
I threw everything in the coffee filter out -- next time I'm going to do a better job of it as there's a little pile of trichomes that forms at the bottom of the filter which I could put to use. Once I get that down next harvest, I'll have around 99% efficiency milking every last drop out of my harvests!
White chocolate is so yummy, as are candy canes... I wanted to combine the two to make some edibles. Looking around for candy cane crush, I decided to check out Amazon. They had the same candy cane crush I was looking at from popular stores, for only a couple dollars more, so I figured sure why not have it delivered. I was planning to get some white Baker's chocolate, but on checkout of the candy cane crush I got a deal for adding on white chocolate Lindt bars for $1.25 a piece LOL! So I bought 10 of those.
When the Amazon package arrived, I slowly boiled down 1/2 cup of my dragon tincture in a pot, then used a double-boiler setup to melt down 4 of the Lindt bars in the same pot. Once it was mixed well with the hash oil, I set it aside to cool for about 3 minutes before stirring in 1/8 cup of candy cane crush (plus I ended up adding maybe like a tablespoon more), pouring into a pan lined with parchment paper, and putting in the freezer for 30 minutes.
So now I have a nice big chunk of white chocolate candy cane crunch stuff where a piece the size of my thumb gets me super high for like 8+ hours; 17 grams of lazy-man's hash; and 88 grams of bud :) And still enough dragon tincture left over to make 3 more rounds of edibles -- not sure what I'll make next!
From now on I'm going to water cure a large portion of all my buds -- not just the ones I grow myself, but ones I buy from the Gummint too!

Likes
67
Share


@GanjaReaper
Follow
Day 40:
They got recoverd from overwatering.
Leafs got darker because I gave them more nutrients, but gained early signs of slightly overfeeding ( Burnt tips on leafs).
I had to boost them to fix it because there isn't much time with autoflowers. Now i only have to adjust my nutrient feeding with just 10 to 15% and its all good.
They did stretch again, some growers love it but i think it is ugly and you will gain weak stems.
Also the fans will not reach the plants properly, which is not good.
This time it is my fault, i didnt want to let my friend take care of them while i was busy. What happend is that i could had raise my lamps again.
When your lamps are to close to the plants( its not a big deal with LED but it is with HPS) your plants will get alot of heat and they will stretch.
So the secret of smaller plants is to keep your lamps high, but not to high otherwise they don't grow proper.
But never do this alot when they are in late flowering, because your buds will foxtail, unless you love to have foxtailed buds.
I have to do something about the heat soon, because i want my buds compact and not fluffy. This will happen due lots of heat.
Also due alot of stretching and other problems, I gained a messy cantopy resulting in many problems. For noobies the room looks awesome but pro's will see that because of this,
the stems and branches are weak and everything beneeth it has no use anymore because it gets no light.
The spaces between internodes are to far away, so there will not be huge buds.
I also have to start give them cal/mag, i saw first stages of deficiency. Not a problem when you are early with spotting it.
I didn't forsee that i had to work like 60hours a week suddenly while having autoflowers on cocos in 3 liter pots and you only can water them once per 2 days and can take care of them once per 3-4 days. That is not really ideal 😅
Positive thing is that the buds are starting to develope 😍
Thats all for now
Day 42:
I have been defoliating alot to get the air between the plants. There are still some leafs and branches i want to get rid off, but i don't want them to stress out to much.
Also i have killed of 23 smaller plants to make more space for the others. This is always painfull but stupid if you don't do this.
If the plants didn't stretch that far due heat and low placed lights, this would not have been the case. I would still have alot of small nice plants.
See you guys next week!
Likes
89
Share


@XII_XII_EarlyRaver
Follow
This past week nothing strange happend, she has a new home the marshydro 100x100x180 and new light from vipar the p2000 and she really loved the new gear so happy days !! She is going strong so lets continue like this 💪💪