
Likes
Comments
Share

@Cukito
Follow
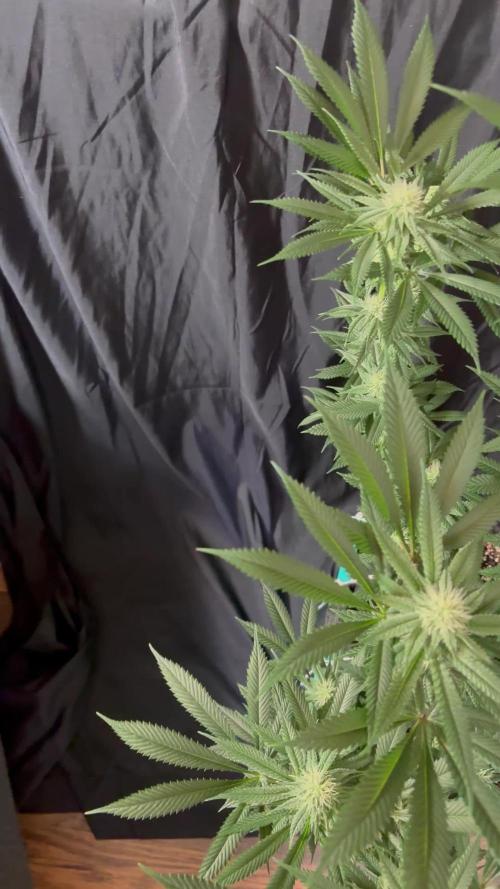
Just starting to smell really sweet!! The plant is doing perfectly and I hope it will have at least 8 main colas full of buds!!

Likes
6
Share


@Aleks555
Follow
Hello everyone. We started growing. ROYAL QUEEN SEEDS-Blue Gelato has been delighting us since the first days.

Likes
4
Share

@Ninjabuds
Follow
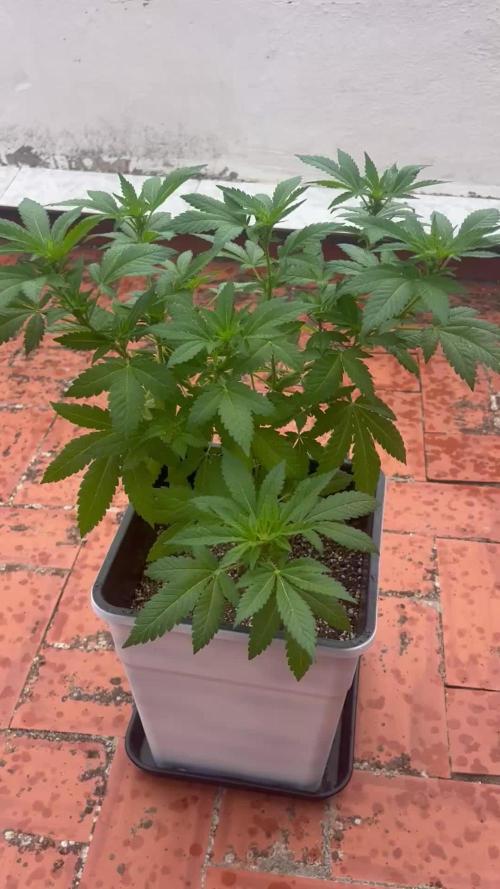
This plant is really healthy and is starting to come around. It has good stacking but is a short plant
Likes
17
Share


@Organic473
Follow
I’m wondering if I should feed her a little bit of nitrogen or defoliate…time will tell. Her smell is really becoming stronger I am impressed for a week 4 of flower.


Likes
10
Share


@BudBeat
Follow
Die Blüten der Deadryder entwickeln sich immer weiter. Das Abreifen der Haare wird jetzt immer stärker und der Geruch bleibt leider in dem säuerlichen Bereich. Was nicht schlecht ist, aber nicht ganz mein Geschmack trifft. Vielleicht ist der Düngeranteil zu hoch? Denn die Blätter werden an den Spitzen braun! Ich werde beim nächsten mal gießen, nur 50% des Düngers hinzugeben und den PH Wert auf 6.5 einstellen. Vielleicht bessert sich die Situation? Drückt mir die Daumen
Cheers ✌️


Likes
9
Share


@NanoLeaf
Follow
End of Week 8 (First week of flower)
Increased the CO2 to 1200ppm and the ladies love it, already started stretching within the first 3 days of flower which shows that CO2 definitely boosts the grow cycle of cannabis.
The main top-sites are popping up everywhere and everything looks evenly spread out. I defoliated again because the fan leaves are growing so fast and blocking bud sites. I also did one last lower canopy maintenance and removed small and stalky bud sites and stems below the trellis net to make sure I get maximum energy distribution to the main colas.
I also added some GHF BioEnhancer to make sure the soil-microbes are happy and that the plants reach their maximum potential.
Pest Report: EXTERMINATED!
Thrips VS Ladybugs VS Neem Oil...
I decided to fight fire with fire - I purchased Swirski-Mites from Koppert (They are beneficial insects that feed on the eggs and larvae of thrips and other unwanted pests). As for the adult thrips - I got very lucky and found about 10 Ladybugs in my garden and decided to introduce them into my grow room as they will feed on adult thrips and any other unwanted pests.
Then to be extra sure I know that neem oil hinders the life cycle of pests like thrips causing them to stop colonising in my grow room. So I sprayed the ladies every day during the dark period to make sure there are no pests that I or the Ladybugs have missed.
Mission accomplished. No more wilting and definitely no more thrips.

Likes
1
Share


@BruWeed
Follow
11/10 - comenzó su cuarta semana de floracion.
Su evolución fue muy notoria, de un dia para el otro se desarrolló mucho.
No tuve problemas en ninguna etapa, hasta el momento se encuentra perfecta.
Los cocos son muy resinosos y grandes.

Likes
54
Share


@Mr_Pgrow
Follow
Good week, no issues popping up.
Just watered when needed.
WCC
she is packing on weight, with buds stacked on buds and smells amazing.
C4
Very strong girl, nothing has fazed her from the beginning. Beautiful purple plant and the smell is floral. And packing some nice looking buds.
Gelato
Pretty much the same as C4, very strong, looking amazing and the smell is delicious. Bud sites aplenty.
SBP
Small bud sites are developing with a few white hairs. More just growing her on as a little experiment really she how she turns out. Not expecting much, but we'll see
Likes
5
Share


@HighOhioAn
Follow
Buds are stacking nicely on every plant starting to get smells now. Cannot wait until they Start fading. It is one of my favorite parts of growing cannabis and fast bugs. Really knows how to steal the show when it comes to fade.🔥💯
Likes
17
Share


@AlpineGoat
Follow
Aaaah che settimana ASSURDA. Ovviamente questo è tutto un work in progress, non si finisce mai di migliorare..
Adesso ho dovuto sostituire la luce cinese che mi si era rotta dopo 3-4 giorni, facendomi maledire la volta che ho deciso di andare low budget >:S
Poi ho spento la ventola, che buttava dentro (eh si, perchè invertire i poli non fa effetto) aria fredda, e l'ho sostituita con una piccola stufa, che mantiene la temperatura costante sopra i 20°C.
Primo di allora avevo 16-15°C costanti tutto il giorno, la terra non si è mai asciugata come si deve e le ragazze hanno avuto problemi a fare fotosintesi, probabilmente dovuta alla scarsa qualità dei led cinesi :(
Iniziamo con un breve recap:
La runtz auto è andata. Probabilmente è affogata :(
Le tre auto del mio amico per lo stress di questi giorni sono entrate in fioritura! Mannaggia, mi sa che non ci tiro fuori neanche un bonsai :/
La girl scout cookies auto è germogliata nella serretta! Che bello, son cosi contento! Ho dovuto metterle una stampella per tenersi dritta, ma piano piano crescerà..
Le mie in veg, la banana sherbet e la critical 707, le trovate nel loro diario - purtroppo hanno avuto un arresto di crescita, dovuto a vari problemi di freddo e luce..
Le due gemelle Bruce Banner stanno bene, sembrano piante pronte a crescere in maniera gigantesca! E' probabile che una di loro la cederò ad un amico che mi restituirà poi dei cloni in futuro!
La monster skittlez sta benone, una pianta che darà ottime soddisfazioni! Sembra un pò carente in qualcosa, ma mi darò un'altra settimana prima di cominciare a pensare di cambiare illuminazione o fertilizzanti..
Il mio amico dovrebbe prendere casa a inizio mese, spero che riesca a sistemarsi entro le prime settimane in modo che possa avere il tempo per far crescere ancora di qualche internodo prima di toppare e fare cloni per me e i miei amicissimi :))

Likes
241
Share


@Still_Smoq
Follow
📆 Week 13, 16-22 April 2024
16-20 April - Let the plant grow.
21 April - Increased light power to 100%.
22 April - Let grow and observe for signs of light stress.
This week her bud began to grow in length, so I decided it was time to turn up the light intensity to help manage this process. This will bring the DLI to 60. Understanding this is a high level I do closely watch and observe. Because the light has increased the heat will raise some, so there may be a chance of burn to look out for. I dont expect either one because of the distance from plant to light, but am aware. Her water consumption will also increase.
🍶 16 April changed nutrient solution
🍽️ 16 April updated feeding schedule
💧 Using reverse osmosis water with EC/TDS at 0
🐉 Nutrient Solution EC 2.6 at 69 degree F
🔆 Light power at 100%, DLI 55-60 canopy coverage at 12hrs
😤 Using General Hydroponics, HGC728040, Dual Diaphragm Air Pump, 320 GPH
That is it for this week. Thanks for the look, read and stopping by.

Likes
15
Share


@Charly_grower
Follow
Bueno esta hermosa gorila girl de sweetseeds! Esta muy poderosa esta regada con la linea de fertilizantes de top crop con un nivel de ph 6.5... Esta preciosa no presenta plagas
Estoy mu feliz de cultivarla es muy linda 💚
Charly grower 👨🌾
Likes
6
Share


@Dieselnutz
Follow
So far so good, starting to get a nice smell comin from the tent. Pheno 3 is still the frostiest n chunkiest but very leafy. Number one has the least frost but the colas are stacking nice. I think number 4 is starting to look the best buds are catching up to number 3 but not as leafy/ gonna b easier to trim
Likes
67
Share


@AsNoriu
Follow
Day 22. Last 3 girls got final house. 20 liters pots for those late runners. They look sad, but maybe big house and other girls will encourage them to kick in.
I took last NL away and now humidity and lightning are a lot better. Will drop lights down in few days, but not a lot ... 16 girls again in one room ;))))
I changed names of diaries, because I will try to finish them indoors ...
Happy Growing !!!


Likes
5
Share


@pzwags420
Follow
I had to top Cantaloupe haze and White widow as they were too close to the lights and I didn't want to loose any ppfd on my lowers. My GSC seems perfect for not topping. next time I would top those strains at least once. I have been flushing the CH and getting run off around 1200ppm which seems like the max she can take the others like it stronger so I have been flushing them every 2-3 days. CH is tough to keep happy but will continue to monitor. All plants are in week 4 of flower 12/12 from seed.

Likes
1
Share


@IgyDaJiggy
Follow
So it is officially Day 28, start of week 4. This girl has been EXTREMELY STINKY since her 2nd set of leaves, a trait I have learned will generally yield some GASSY and DANK flower. I decided to remove all the fan leaves but the last 2 all the way at the top. The goal is to have all the internodes turn into multiple branches that can be clipped and cloned. No issues so far. Will keep everyone posted. I also applied some LST clips to the lower internode offshoots.

Processing
Likes
7
Share


@xX_The_Chef_Xx
Follow
Moved some small clones after sitting in an aeroponic cloner for 2 weeks. We waited until they had 3 <--> 4 inch roots before transplanting them into the 6 site system. This is our first time growing with a hydroponic sysyem and first time indoors also. Running 4 weaker clones in fox farm's ocean floor blend to see the difference in growth rate between the 2 mediums.