


Likes
Comments
Share

@Weedman268
Follow
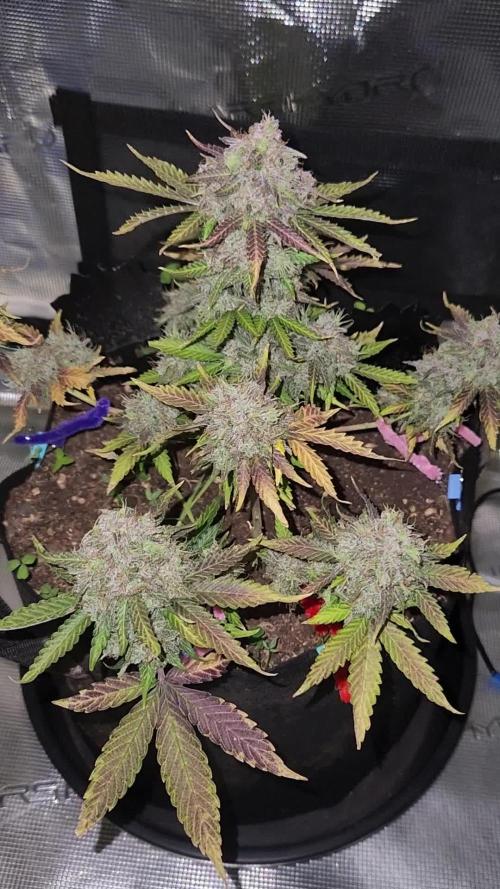
Looking and smelling beautiful, she is getting close to the finish..


Likes
11
Share


@PanGrower
Follow
I think about the fact that it is no longer necessary to cut leaves. I cut it a lot, but I notice that many people cut a bunch of leaves at one time, although somewhere I read no more than 10% at a time.
When I gave fertilizers, I always diluted them with water even more to reduce ppm
Day 68: I added cal-mag to the diet because the leaves are really turning yellow from the bottom. 0.5 ml
Day 70: I added 1 ml cal-mag
Likes
38
Share


@DomanAtrik
Follow
(UPDATE) Not bud rot, cabbage worms. Lame. Purchasing some BT killer. The week was going good until I (may have had a delusional) found some potential Bud Rot! I took photos and asked a question, no answer yet. So I cut the potentially infected area away and will monitor very very closely.

Likes
14
Share


@Fullmeltalchemist
Follow
D71/F19 - 11.25 - Got them all defoliated. Everything is looking open, lots of light for the flowers, lots of room to grow and good airflow. I've got a couple co2 bags hanging in there too now.
D75/F24 - 11.29 - Responded well to defoliation. Getting chunky! <3


Likes
13
Share


@GoodTimesOrganics
Follow
Welcome Back liebe Community 🌱💚
Double Gum von White Label Seeds on the Run!
Die fünfte Woche ist vorbei und die Pflanze entwickelt sich super.
Sie ist nun 55 cm hoch und die Pflanze zieht sich trotz dem durchgeführten Topping gut in die länge.
Im Vergleich legt die Sorte einen starken Wachstumsschub hin mit längeren Internioden Abständen. Bei ihr werde ich definitiv noch LST anwenden, da ich die Höhe der anderen Pflanzen sonst nicht gleichmäßig anpassen kann
Nachdem ich die Pflanze nun als Weiblich identifizieren könnte, bekam sie ihren Endtopf mit 9 Liter Volumen.
Die Umgebungsgegebenheiten sind aktuell gut:
—————
🌞 Temp: 26
🌚 Temp: 18°C bis 19°C
💨 RH: 64%
VPD: 0,83 kPa
💡ppfd: 330 mpm
—————
Viele Grüße 👋

Likes
252
Share


@Tropicannibis_Todd
Follow
Well folks we chopped the Ztrawberriez 😁
And the second of the Strawberry Blast 🍓 🍓 🍓 🍓 Shes a killer for sure , incredibly frosty , and sticky , not the best of nugs as I said a bit airy , the smell is sweet and berry-licious ......
FC4800 from MarsHydro Lights being readjusted and chart updated .........: 1:I've added a RU45 to the mix : 1:
www.marshydro.ca
👉I am using Agrogardens for nutrients for my grows and welcome anyone to give them a try .👈
👉 www.agrogardens.com 👈
Agrogardens Cal MAG
Agrogardens Grow A B
Agrogardens Bloom A B
Agrogardens Bud Booster
Agrogardens PK13/14
I GOT MULTIPLE DIARIES ON THE GO 😱 please check them out 😎
👉THANKS FOR TAKING THE TIME TO GO OVER MY DIARIES 👈
Would you like to hang with the growdiary community 👉 https://discord.gg/gr4cHGDpdb 👈

Likes
6
Share


@StarSkream
Follow
Week 1 24 hours ethos popped and began to stretch
Temp 76 humidity domes on top 5 of 5 out going directly into pots and 24 hour lighting on day 3! gonna run 24/7 for 30 then switch over hopefully. Nothing added but FishShit and rootdrench to pop


Likes
76
Share


@Roberts
Follow
Purple Ryder is doing great. She is bulking and has a nice smell and frosty resin layer going. She is growing great under the Medic Grow Mini Sun-2, in Agrogardens nutrition. I did a solution change on her 4 days ago. Minor ph fluctuations, but it is mostly stable at the moment. Thank you Agrogardens, Medic Grow, and Doctor's Choice 🤜🏻🤛🏻🌱🌱🌱
Thank you grow diaries community for the 👇likes👇, follows, comments, and subscriptions on my YouTube channel👇. ❄️🌱🍻
Happy Growing 🌱🌱🌱
https://youtube.com/channel/UCAhN7yRzWLpcaRHhMIQ7X4g


Likes
29
Share


@yvet_te
Follow
Ladies are looking (and smelling) pretty good! Loving my Christmas trees lol. Few weeks left, should be ready to harvest around the new year. No mold and no pests so far, fingers crossed for a strong finish!
Likes
16
Share


@MadeInGermany
Follow
Flowering days 27
since time change
to 12 / 12 h
Hey guys :-)
The ladies look beautiful and are growing very well.
The sweet smell starts to blow through the whole tent :-) .
This week it was watered 3 times with 1l each (nutrients see table above)
Nothing else happened this week. Everything has been checked and verified.
A lot fun and stay healthy 💚🙏🏻
👇🏼👇🏼👇🏼👇🏼👇🏼👇🏼👇🏼👇🏼👇🏼👇🏼👇🏼👇🏼
You can buy this Nutrients at :
https://greenbuzzliquids.com/en/shop/
With the discount code: Made_in_Germany you get a discount of 15% on all products from an order value of 100 euros.
👇🏼👇🏼👇🏼👇🏼👇🏼👇🏼👇🏼👇🏼👇🏼👇🏼👇🏼👇🏼
You can buy this strain at :
https://www.ripperseeds.com/en/feminized/kmintz-feminized-cannabis-seeds
Water 💧 💧💧
Osmosis water mixed with normal water (24 hours stale that the chlorine evaporates) to 0.2 EC. Add Cal / Mag to 0.4 Ec Ph with Organic Ph - to 5.8 - 6.5
MadeInGermany
Likes
38
Share


@MariRemediesLLC
Follow
Nothing to report. Seedling. I use chop sticks to hold up the plants until they are strong. Prevents them from blowing over.

Likes
10
Share


@nonick123
Follow
Día 35 (10/06) N/A
Día 36 (11/06) Se va a quedar un pequeño gran cogollo porque ya se ha detenido el strecht
Día 37 (12/06) N/A
Día 38 (13/06) Avanza la floración para estas pequeñas
Día 39 (14/06) Riego 150 ml de H20 pH 6,5
Día 40 (15/06) N/A
Día 41 (16/06) 500 ml de Té de Floración con Healthy Harvest 8 ml/L + Insect Frass 16 ml/L + Melaza 1 ml/L
💦Nutrients by Lurpe Solutions - www.lurpenaturalsolutions.com
🌱Substrate PRO-MIX HP BACILLUS + MYCORRHIZAE - www.pthorticulture.com/en/products/pro-mix-hp-biostimulant-plus-mycorrhizae
Likes
31
Share


@TheStrainAlchemist
Follow
This is my first induced flowering growth.
I always grow weed outdoors with big satisfaction on yield and nature contact, But I have to say that training plants is real fun and I can’t wait to see the buds first appear and then fatten up.
On day 5 of flowering she started to appear a little stressed, I think is a little overfeeding because her leaves are a little burned on the tip and a little underwater too but this morning end of day 6 appear to be recovering has the timelapse show on the end.
Happy growing to you all brothers and sisters ☮️☮️☮️✌️🏼

Likes
Comments
Share


@c1note
Follow
30.11 runter mit Pk13/14 auf 0.75ml von 1ml. Hoch mit Boost von 1ml auf 2ml /L. Sie ist mir ein bisschen zu grün geworden. Darum runter auf Ec. 2.2.
2.4 (Vortag)
28.11 Canna pk kommt morgen rein + HesiBoost statt CannaBoost (leider leer). Dli 38-42. VPD 1.20.
27.11 Start Woche 4 Blüte. 2L mit 2.25 Ec. Dli 38-42. VPD 1.22.
Processing
Likes
6
Share


@macrocefalo
Follow
Third week we can say that the overtert has been solved. Vegetative growth is in full swing. G4 has recovered but is apparently 1 week late than the other 3 we will see next week.

Likes
141
Share


@Eyeduno
Follow
I killed one transplanting it, not quiet 2 weeks yet either about 9-10 days
