Processing
Likes
Comments
Share


@Cannibalgardens
Follow
Well not to much to report this week had a lot of tiny issues with the grow , the temperature was a big problem . Getting that fixed improved the overall health of this girl .. besides the cold she also had some air circulation problems as well plus lol the light switch for timer was put on 24h for a few days by the wife so I'm hoping for the best ..no hermies I hope ...cheers canna family

Likes
10
Share


@Papastroumf
Follow
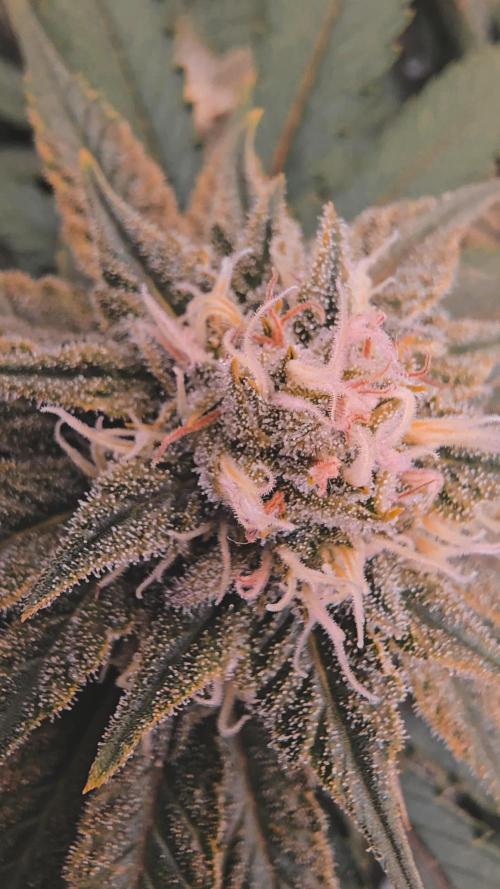
Day 66 : Her buds are full of crystals and are so dense. The smell is really strong stinky skunk like GZ , but GZ smell is more acidic. Her crystals are milky and soon will start to amber. Breeder refers that will be pretty mature in 70 days. Not in my case :D we will see in 4 days, in next watering. For now no ambers. I prefer to cut when we have 15%-20% amber and 80%-85% milky, because after the smoke is very heavy for my taste.
Edit Day 70 : She watered with juices and i continue until i see first signs of amber trichomes. Still no ambers. She has gained so much weight , side branches cant lift their self. I think she will be the heavier. You can understand her weight if u lift it.

Likes
57
Share


@Mr_und_Ms_Lue_Roots
Follow
Hallo und herzlich Willkommen in Woche 16/ Blütewoche 4
So die dritte Woche und somit eine sehr aufregende und spannende ist vorüber. Der Phosphor und Kalium Bedarf erhöht sich in dieser arg und zu einem (N) Stickstoffüberschuss, haben wir gestern festgestellt, dass es anfängliche Mangelerscheinung im P+ K Bereich gibt. Bisher betrifft dies die Sonnen- Segel die eher auf mittlerer Höhe sind.
Nach dieser Feststellung haben wir uns den Flowa Bloom JU JU Royal Dünger von der Zusammensetzung genauer angeschaut. Fazit: Das Verhältnis an (N) in dem Blütedünger ist bei 5 und somit bekommen wir selbst nur mit dem Blütedünger den Stickstoff nicht reguliert.
Ergo alte Schule, da wir keinen reinen PK 13-14 im Hause führen bleibt uns im Moment nur die alternative auf den Bloom Dünger von Biobizz zu gehen, da das Verhältnis bei dem nur bei 2 liegt.
Damit der Stickstoff auch durch P+K verarbeitet werden kann, benötigen wir Zucker, morgen soll dahingehend Top Max eintreffen. Wir hoffen, dass das Rausarbeiten des Stickstoffs durch oben genanntes gut verläuft, vielleicht etwas langsamer, weil wir immer noch einen kleinen Anteil an Stickstoff darin haben. Anderes Blatt Gut sieht in Ordnung aus, bis hierhin.
Wetter:
Da sich durch die Anfangs mistige Erde sich alles um gute 2 Wochen nach hinten verschoben hat, befinden wir uns jetzt in einer Periode mit sehr hohen und Trockenen Temperaturen.
Demnach und das war auch schon lange ein Wunsch, haben wir jetzt ein Klimagerät installiert. Unser Streben darin werden keine absoluten Idealtemp. sein sondern so, dass es den Pflanzen nicht zu unangenehm wird. Das bedeutet das die Höchsttemperatur im Innenbereiches des Zeltes ca. bei 29- 30 Grad Celsius liegen wird.
Ja ansonsten sieht es ganz okay aus :-)
Die höchstwachsende Cola haben wir ein wenig zur Seite runter gebunden und passt jetzt schön zur Höhenebene der anderen Lebensgefährtinnen.
Bisher sind auch keine Anzeichen von HEMA und auch die Trauermücken wurden von den Nematoden Sichtlich unterdrückt.
Zu den Thripsen: Trotz Blausticker müssen einige noch vorhanden sein.
Ansonsten war es das erst einmal und wünschen somit allen Growmies einen schönen chilligen Sonntag und eine Erfolgreiche neue Woche!
Vielen Dank im Voraus, an all diejenigen die den unseren Report Besuchen, kommentieren und oder auch liken!
VG!

Likes
3
Share


@Dunk_Junk
Follow
Day 63 - Flowers just starting. They're looking nice. Through the week I've chopped quite a few leaves off her to allow light penetration.

Processing
Likes
7
Share


@vertex8
Follow
First day of my first Grow Diary, friend gave me these so I thought I would see what they got, 4 x washing machine and 2 x Jaffa Cake, I will be scrogging, topping and performing some LST to open them up.
Transplanted cuttings straight into the 12lt pots, I used the white shark powder around the root area during transplant.
Food Making Notes:
1. Canna A, Canna B, Startbooster
2. Measured E.C at 1.2
3. pH'd from 6.5 down to 5.8
4. Added White Shark (just a sprinkle)
Feeding was done primarily around the root zone, after a few days I will begin to saturate the whole medium.
Update (+3 days):
- Washing Machine have really settled in and has had some great growth, I have started doing LST and topping at the 4th node, video and pictures added.
- Jaffa Cake not doing so well at the moment, they seem to have transplant shock, I am taking it easy for the moment, spraying them with a Super Thrive foliar spray, within the next feed I am planning to reduce the E.C to 1.0 and add super thrive to the food, along side the start booster and great shark.
Update (+6 days)
- Washing machine growing really well, got two growing perfectly and two of growing three leaves and many branches.
- Jaffa Cake is now recovering from it's transplant shock, made a dome for them to create a high humidity environment while rooting in the pot, dome was sprayed with a mix of water and super thrive, I also made up a different batch of food with 50% of the nutrients, E.C around 1.0 (500pm).

Likes
13
Share


@DaisyNabis
Follow
cada dia mas glotonas mis bellas, estoy aplicando riego casi día por medio, solo una vez a la semana las abono, el resto solo con agua. hice algunos amarres a los tutores ya que están en pleno crecimiento

Likes
32
Share


@AsNoriu
Follow
Day 77. Forced one, noticed nanners and bud rot. So had to take fast actions !!!
Easiest trim jail ever ! ;)))
Two down, one left for extra week.
Day 82. Last one is down ! Very smelly and hairy ;)
Day 85. First two in jars !
Day 89. Last one went for curing. 347 g from 3 plants !
Happy Growing !!!

Likes
15
Share


@Shizzlemanizzle
Follow
First week of flower started with a bit downs :/ leaves were hanging and I didn’t know why but some guys helped me here ❤️ changed the watering habit now. Started watering with feeding when pots were dry/light and watered until I got 5-10% runoff - next watering when pots are dry/light

Likes
13
Share


@Alpha_Green
Follow
Some of you may have wondered:
Why do I use CO2 at average 950 ppfd μmol/m2/s (moral flow)?
The answer is quite simple. Because of lack of space in some regions of my cultivation area, I simply cannot keep the ideal distance to my Sanlight high-performance lamp, due to some height growth of various strains. And so some of the main colas have ppfd values of 1250 μmol/m2/s and even more...
So this is how I manage to achieve and compensate for such high radiation levels even with a CO 2 balance. And I have to say, my strategy to avoid various light stress symptoms works just fabulously. In combination with CO 2 implementation, my babies are simply unbeatably insensitive to light. Thats it!
Beginning of 3rd week flowering:
Again feeding my babies by 36 hours fermented potions of Bio Tabs Kompost Tea PK-Booster (15 g pro Liter) and added:
5ml Orgatrex/Liter
1 Spoon of Bactrex
1 Spoon of Mycotrex
1 Spoon of Mycco-Vital
1 Spoon of Dynomyco
A little tip for those who are interested in small modifications that have a big difference or influence - on the result - effect - beauty - health - taste! Before adding microorganisms or beneficial bacteria or Mycorrizae and Trichodermas, please use oxygen-saturated water. On the one hand, unwanted chlorine gases evaporate and the small world of the microbiome becomes even faster and more rewarding in compost tea to sprout.
Last but not least for this week, I would like to introduce my reasons, why I prefer growing biologically and sustainably.
First of all, it’s something which suits very well in these times/days we are living now. Sustainability is a big need and task for our planet. 🌎 Nature means life. Our home, the air we breathe and everything that surrounds us. Not just today. Hopefully tomorrow as well.
Maybe I'm starting to protect our environment on a small scale, but maybe I can also make a big difference at all.
If you change the way you look at things, the things you look at change...
I thought about what’s the difference, between Mineral Feeding and Super Soil Feeding.
It’s very easy. Biologically Growing is a similar process than the natural soil activities out there in the lap of nature’s. So plants has to work and interact with the microorganisms and microbiomic communities in the soil. So the plants will never get lazy like the lazy ones of mineral feeding growers.
If you grow biologically, you will feed the soil first and the microorganisms will support every parameter next to your plant conditions. And that will generate an unbelievable spectrum of Terpenes and Trichomes you will never forget.
It’s the same comparison, when you daily visit McDonalds and you eat only fast food. How does your body and mind react on this shit for money?!?!
May I invite you to think about it…
See you next week dear Growmies! Have a nice Weekend and take care…
Peace out!
Addendum for Day 53:
At the moment we unfortunately have another winter onset here in Germany. This means that I am forced to take additional heating measures due to structural facts in order to be able to keep the temperatures constant. After all, just tonight the thermometer climbs again to -1 degree Celsius.
In addition, my exhaust air system runs out of my bedroom terrace and I therefore grow winter and summer with the patio door open. Well, sometimes I experience real weather-related challenges. But all in all, no problem...
"Where there's a will, there's a way."
Addendum to pouring out the fermented PK tea: I always administer half a liter of lukewarm aerated water with 3.5 ml of cannazyme per liter to each plant. This means that the "root machine" is not supplied with supplies unprepared and the nutrient solution can thus also be better distributed in the soil. Since I also work with cloth shoes, I spray them evenly moistened everywhere with water that is also warm before pouring them out from the outside. This has the advantage that the moisture stays where it should: in the pot!
... I did the math today ;-) We are still in week 7 until this Friday. And week 8 starts on Friday! OMG... still so much time yeahh!
Today my Fast Buds Sour Jealousy and Sweet Seeds Big Devil and Dark Devil Automatics arrived. I'm looking forward to it.
This time Fast Buds next Time Sweet Seeds. Love them too. Very beautiful genetics.
Today a review video of the beginning of week 3.
At the time of the pictures, I had minor signs of nitrogen excess. (Light peaks first at the crown of the roof and then slightly continuing to the middle section.) I then painstakingly racked my brains as to why this could be. I found that very slight dry spots had formed and therefore the root found small accumulations of nitrogen that caused its problems. But then, when I carefully homogeneously checked the moisture content in the substrate, the problem evaporated again. However, they had not shown any loss of growth rate during this time. Nevertheless, they developed as expected.
They Strawnanas had no problem with that.
In the end, I always have a hard time killing them. But I guess that's the way things go.
We live and die.
We come and go.
But it's not there yet. ;-)
Tomorrow is day 56.
Tomorrow’s updating day!
Can't wait to see their progress.
Have a good time and see you tomorrow… 🏽🕊️
🏽 ☮️🕊️

Likes
46
Share


@MrJones
Follow
OSS Sherbet Moonrocks
🔹⊱╮🔹╰⊰🔹 GROW Started 03.10.24 INFORMATION 🔹╰⊰´🔹⊱╮🔹
🌞Environment - Maintaining 80F and 65%Humidity
🌾Training - The girls are recovering from last week's Pruning and Defoliation,
⚱️2-Gallon 📊6.2 PH
💧 Feeding - Using Horti Bloom and Horti Cal 12-0-0
🌞Medic Grow Smart 8 760 Watts
🕷️ IPM - CannControl from Mammoth and Mosquito Bits as needed
🔹⊱╮🔹╰⊰🔹 PLANT UPDATES 🔹╰⊰´🔹⊱╮🔹
📝 Notes - I am still not getting the vertical growth that I want before I flip, so I changed my light cycle to 18/6 and will be doing another defoliation and pruning of a few side branching - remember, I am looking for tall plants with little horizontal growth.
Fertigation injects fertilizers into an irrigation system to supply dissolved nutrients to crops.
🗓️04.20.24 Today, I flipped the ladies into flower. I Have let them veg out as much as I feel the grow space can handle. I am sure there will be a bit of pruning and super cropping in the near future. These girls will grow untouched other than the 2x daily fertilization, but I am switching out the Horti-Grow with the Horti-Bloom, feeding at Hort-Bloom @ 2.7 GRMS Per Gal and Horti-Cal @ 2.5 GRMS Per Gal.
🗓️04.21.24 Today fed with Hort-Bloom @ 2.7 GRMS Per Gal, and Horti-Cal @ 2.5 GRMS Per Gal.
🗓️04.22.24 Today fed with Hort-Bloom @ 2.7 GRMS Per Gal, and Horti-Cal @ 2.5 GRMS Per Gal.
🗓️04.23.24 Today fed with Hort-Bloom @ 2.7 GRMS Per Gal, and Horti-Cal @ 2.5 GRMS Per Gal.
🗓️04.24.24 Today fed with Hort-Bloom @ 2.7 GRMS Per Gal, and Horti-Cal @ 2.5 GRMS Per Gal.
🗓️04.25.24 Today fed with Hort-Bloom @ 2.7 GRMS Per Gal, and Horti-Cal @ 2.5 GRMS Per Gal.
🗓️04.26.24 Today fed with Hort-Bloom @ 2.7 GRMS Per Gal, and Horti-Cal @ 2.5 GRMS Per Gal.
╰⊰🔹╰⊰´🔹⊱╮🔹╰⊰🔹╰⊰🔹STRAIN INFORMATION🔹⊱╮🔹╰⊰🔹╰⊰🔹╰⊰🔹⊱╮
Introducing our latest powerhouse, Sherbet Moonrocks, one of our strongest weed strains to date, setting a new bar for potency and effect. A combination of US genetics, Sherbet Cake, and Purple Moonbow create this potent sedative with THC levels above 30% that will take you to celestial bliss.
An exquisite terpene profile offers a tempting treat of sensational fruity tastes, flavors, and aromas that will seduce your mind and body and take you to a serene place of pure tranquility. Ocimene, Caryophyllene, and Limonene are the predominant terpenes; they produce an incredible array of sugary berry fruit flavors with floral hints and spicy undertones.
Growing these feminized seeds is effortless and straightforward regardless of your growing skills, and at harvest time, you will be generously rewarded. Plants will mature to a manageable height with a flowering period of 65 - 70 days and will develop thick, dense buds glossed in thick layers of THC resin crystals packed with indica power that will lure into a deep relaxation. Expect an indoor yield of 600 - 700 gr m2 and outdoor production of over 1 kilo per plant.
Likes
12
Share


@Growbody
Follow
Tag 29: Die Watermelon Candy F1 Automatic von Zamnesia Seeds bleibt kompakt und kräftig. Durch den starken Blattwuchs werden die noch kleinen Ästchen beschattet. Diese in die richtige Position zu bringen ist ziemlich filigran.
Tag 31: Die SF-Nematoden Kapseln für 6 Wochen Langzeitschutz sind gekommen. Beim Einarbeiten in den Boden muss es passiert sein, die Spitze ist gebrochen. Die Bruchstelle hat schon braune Ränder, kann also auch sein, dass ich das Biegen vor 2 Tagen übertrieben habe.
Tag 33: Einer der oberen Seitentriebe hat die Aufgabe der Spitze übernommen und rennt los.

Likes
13
Share


@Lfuego22
Follow
Day 18 veg from clone
Water temp 69.6
Ph 5.9
Ppm 724
Ec 1.6
Room temp 66.8
Light temp 74.4
Humid in room 48
Over light 42
Day 19. Full flush.
PT 1
Start ppm of RO (filtered/nestle) 146
Ph 7+
Final ppm 880
Ph 5.9/6.0
Temp 70°
Room humidity 50%
Light 45%
Light heat 73.0
Room heat 68/70 depending on if heater on or off
Likes
9
Share


@DoctorCannas
Follow
Miei cari amici,
L'estate incalza e finalmente il tempoi permette di trasformare ad hoc. Secondo i gusti il giardino, la terrazza e i due balconi.
Un lavoro duro e intenso con i 25/30 gradi che il NW in questa settima sta proponendo e che spero vivamente durino tanto.
Travaso storico e professionale.
Vediamo ciò che l'armadio dice.
Questo travaso probabilmente ritardera di due o tre settimane il raccolto, ma andava fatto e ne varrà sicuramente la pena.
28/06
My dearest friends, comrades and farm partners.
Doc. Cannas is extremely happy to introduce you to the 5 wonders of Expert Seeds.
Still my most heartfelt congratulations for their genetics,
between photos and videos you have seen what a wonder these little girls are growing.
Today they have been introduced to LST, an art halfway between Astana yoga and BSDM.
Being their first time there was a need for love and passion.
So it was.
At the next update farmers

Likes
5
Share


@CannaBossBizz
Follow
Yesterday i took off some Leafs down there.
Looks Like a Bouquet now 😄
She's responding great to the Training i have her. I'm pretty exited how she'll do in the Future weeks 🤙🏽
Likes
6
Share


@GuerillaGorilla
Follow
5th September
It will be a few exciting days. Thunderstorm is coming. She was trimmed for airflow and has good support.
Lets hope for the best!


Likes
2
Share


@Elguacho420
Follow
Muy buenas a tod@s... Octava semanita de las critical... Ya estamos en los días finales, hermosas y pretas flores, rico aroma y bastante recina... Una limpieza y listo... Hermosa planta... Me encantó... Buen finde para tod@s y buenos humos... 😎💪🏻🇦🇷🤝🏻🇪🇦💨💨💨
Likes
45
Share


@OGBOBBYBUSH
Follow
First week of flower is in the books. All 3 plants stretched about 6" and grew tons of new branched. Really starting to thicken out. Been battling a more problem with sns217 sprayed at beginning of night cycle. 1 confirmed female while it's still to early for the other 2 although they look female. Only problem now is I'm starting to run out of height so hopefully they don't have too much more stretch in them.
From here on I will be doing individual weekly updates on each plant they will be labeled AH1, AH2, and AH3
AH1 30"
topped once biggest and strongest plant
Female
AH2 26"
Kind of a boring one 1 main stem not much other growth
AH3 22"
The mutant! Probably On of the craziest plants I've grown. Has 3 main colas and a bunch of strange leaves with no training. Bushiest of the group
Had a 4th AH that was only about 18" and struggling confirmed male and chopped 10 days into flower
Likes
10
Share


@BelgianBudtender
Follow
Hey growmies!
This is always amongst my favorite weeks of growing, week 4 of flower. The stretching stops and our flowers start the long, beautiful process of fattening up!
throughout this week I kept pulling off fan leaves, I know it's controversial with autoflowers, but this girl is big and has a lot of fan leaves.
I started using my PK booster this week, lil buds are getting stickier and fatter every day, check out the timelapse!
If this flower finishes nicely then the competition is already a W for me, since we would be looking at a decent harvest and weed is a great reward in itself!
hope to see you next week