


Likes
Comments
Share

@Borberad
Follow
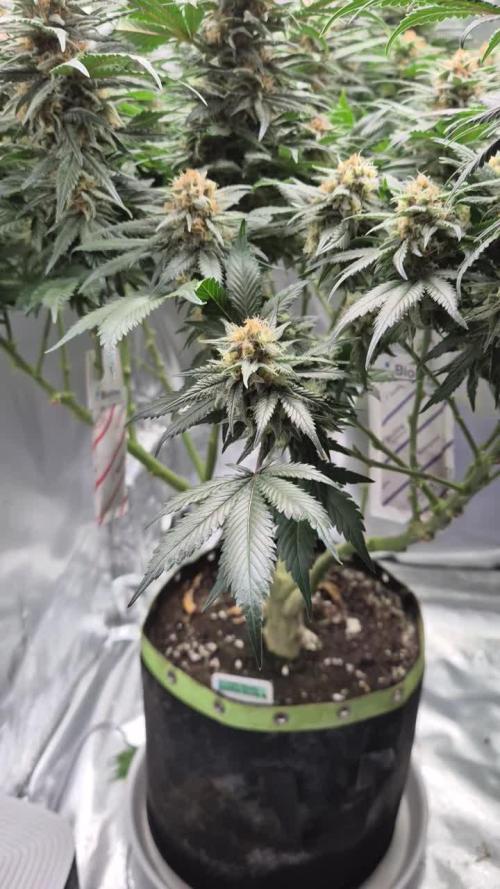
Mehr Sonne bitte!
Die anderen Bilder zeigen einen Steckling der Pflanze indoor.

Likes
22
Share


@Kloud9gardenz
Follow
Doubled the nutes and the plant grew 8" in a week span and its not in flower. I may have to transplant to 20 gallons next week if it is measured around 40". I did a lot of defoliating to get rid of some huge fan leaves covering up bud sites and I also trained a lot. She is very wide and almost 3ft tall with a lot of pulling down, I'm very pleased


Likes
123
Share


@MrHightimes
Follow
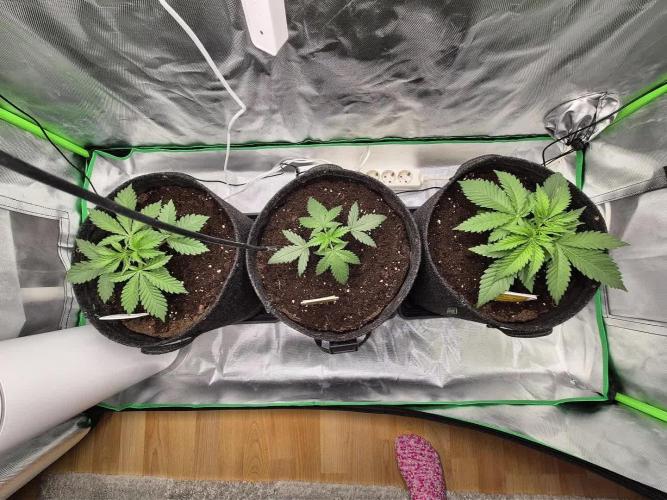
Well My friends gave me a bigger tent so I got a little more time to let them develop!
I'm very ready to take them down just waiting a bit longer for a few more amber trichomes.
I'm still feeding them ripen but i wish last week i'd given them a feed in addition too.
They look nice in the new tent, there is loads more room, and while the lighting didn't go up as much as I'd like,
They have a nice big fan oscillating on them now and room to stretch.
________________________________________________________________
I suppose I'm glad I waited. I wanted to take a few more pics and get one last video in! I'm def seeing a bit more amber in the trics and
i think it will make em a bit better for these 2 extra waterings! Probably gonna chop them soon!!!!


Likes
41
Share


@TerpTurtle
Follow
HLG 350R hanging with the Mars Hydro UR45
-added a clone of a Malt Milkshake
-clones I took from these plants, majority have rooted so far and transplanted

Likes
17
Share

@masterofsmeagol
Follow
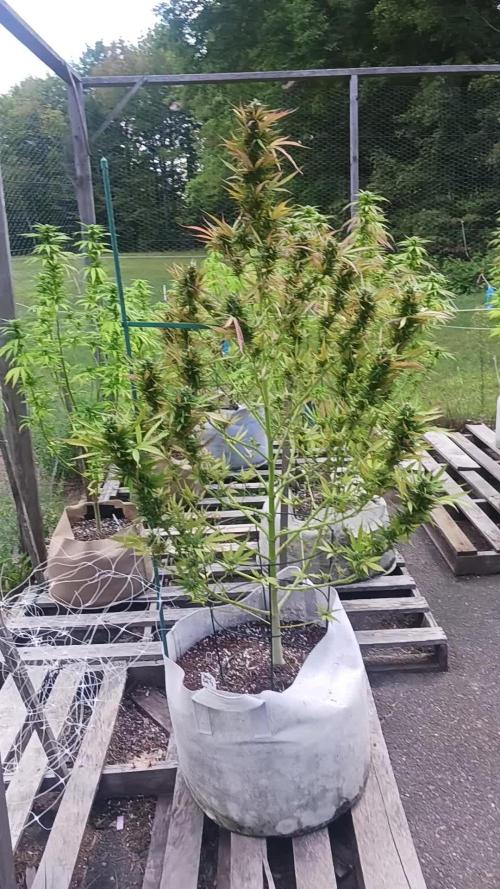
8/30 Rained yesterday and pretty much all night. Plants looked happy this morning. I'm thinking about feeding today or tomorrow. The late flowering special kush doesn't have much longer and it will be done. I'm going to need to do another treatment for the thrips. Nights are so cold that I think they aren't a major problem. No signs of septoria either. No signs of ANY molds or mildew. Even where I took the pillar out but I removed a lot. I am noticing (especially on the pink kush and the special kush in the back) the wierd "top hat" lower buds like I previously did. I don't think it's the chipmunk. It's like they eat fresh buds and leave the top there. I think it might be earwigs but I haven't seen ANY. Birds have been keeping my garden pretty clean. Almost everytime I walk down there it's like a flock of birds takes off lol. I was watching the little finches all perched on my cage. I've seen them dart in and grab a snack. It's pretty cool how it works. Symbiotic relationship. I feed the birds amd they help keep my garden pest free.
EDIT: Went to check the girls around 430. It seems like everytime I see the flowers they've swelled in size. Especially the natural mk ultra. Everything is really coming together. Pink kush is behind but it's starting. I'm getting lots of fall colors but I'm losing lots of leaves too. I wouldn't have defoliated as good as I have if I hadn't had problems. I thought the plants were done getting taller or stretching but after this rain they ALL seem taller. The buds are swelling as well. I'm on the home stretch with the early special kush. Few more weeks. Everything looked amazing tonight. I wanted to take some pictures but I left my phone. Smell is greatly increasing.
8/31 I don't get how we got NO rain the ENTIRE summer but it's rained the past few nights? Maines bipolar weather I guess. I see the same shit as prior years. Something crawls up and eats small shoots and developing buds but leaves larger ones alone. I thought it was earwigs before. I'm not sure now. I'll have to go look at night and figure out what's eating shit. It's just small secondary shoots mostly. Stuff I should've pruned but I leave on so the won't eat my fucking colas. I got some work to do but I'm getting closer.
9/1 Well we made it to September. Pink kush is finally STARTING to form little buds. After some research (and watching those fucking locusts try to fly into my cage but can't because they are to fucking big. I was lucky I found that enormous one on the stalk of the furthest special kush right where the tip cola starts. Luckily I was able to get him. Didn't have to take pics or a video or even check if they need water. It rained a little last night and the buds were a little wet. I'm planning to feed when I get back. If they need water I'll give it to them. My early special kush is getting real close. I want to harvest at peak timing but sometimes exigent circumstances screw that up. However i think I'll be able to let this girl finish properly.
EDIT: Went back over to check weights and everything was super heavy. Plants are all turning fall colors. I checked the trichs on my special kush, mk ultra and 10th planet. Everything looked great in the sun! Everything is swelling and getting frostier everyday. I'm hoping that the pink kushs will finish. My early special kush LOOKS like it should be done but it's not. Looking at the trichs and stigmas it needs more time. I've found on several plants that between the; giant caterpillars, earwigs and pillars that they can take a whole branch and pretty much decimate it in a night. I chased one of those giant locusts around my Cafe and it finally got out. Bastard was almost the size of a small bird! I should feed tonight and possibly do a treatment for pests.
9/2 Had to shake to plants off again. Bags are still heavy. I'll probably feed tonight. I'm noticing tons of damage on lower and interior branches. The grasshoppers or locusts or whatever they are can strip a whole branch! They can even bite through little stems. I'll never grow outside without floating row covers again. The special kush is getting really close. Sometime this week I'll look for a mature tester bud. Both MK ULTRAS are exploding in flower and getting frostier daily.
9/3 We are going to be getting some rain. I noticed the grasshoppers or whatever really like the special kush. After seeing her in the sun I made the executive decision (after one more peak at the trics) and decided to chop her. I feel like that was a good decision. Even more so as I got going. I bet if I let it ride I would've ended up with half as much. The fan leaves had all dropped. I wish I would've kept a clone of this pheno. Smells amazing! I did a quick wet trim with branches and cut little buds (which there weren't many) went in a paper bag the rest was hung to dry. Minus the top cola and a bud or two I brought home to look at and manicure. The roots were really dry. The others seen heavy but I haven't watered in a while. I'm planning on watering and feeding tomorrow. Things are really exploding and conibgvti life! I feel so much better having that plant inside.
9/4 I was definitely right to take that plant. It just SEEMED to early. Went over today and found more damage from those grasshoppers or locusts, whatever the fuck they are. I used to just hear that noise at night but now it's morning noon and night. Some can't hear it but it's this high pitched buzzing (them rubbing their legs together) which wad heard occasionally with crickets at night. This hear it's a CONSTANT sound. Considering I'm in late flower I'm not sure what to do. I don't think there's much u can do. At least it seems like they prefer the special kush and target that. So at least that huge mk ultra and the natural one and the 10th planet's should be fine. Pink kush is finally flowering. Whether they'll have any nodes left by the time they finish is an unknown. WATERED TODAY. EVERYTHING GOT A GALLON BUT THE 10S. EVERYBODY GOT A QUART OF FOOD. IM CONSIDERING UPING KOOL BLOOM. Didn't take pictures or do a video. I will later. I'll review the special kush I took when I take the others. I'll be back over later and I'll update. No rain as of 2pm. I watered because I took the rootball apart of the special kush I harvested and it was dry as a popcorn fart! I lifted a couple and they were light bit I didn't lift everything. The water sat on the top for quite before it would drain. At least they had a good dry cycle. That plant I took looks and smells amazing. I can't wait to try it.


Likes
7
Share


@HookahCli
Follow
d33
Hoy subo fotos unos días antes de esta semana, mejor, tendremos más fotos.
Hoy me he puesto a revisar un poco las plantas y me he dado cuenta de que las Lemon Krystal son hermafroditas, la que estaba en la parte de dentro, solo tiene unos pocos sacos de polen que todavía no están maduros, se los he arrancado y cortado 2 ramas que tenían mala pinta con eso, el resto de ramas parece estar bastante bien y son flores macho, la Lemon Krystal que esta mas cerca de la puerta del armario, esta bastante mal y la tendré que desechar ya que no quiero que polinice al resto de plantas.
También una Kandy Kush, la de la derecha, le he quitado 2 flores macho, no parecía tener más, unas flores espontáneas, pero semillas a granel a veces pueden pasar estas cosas, no es lo normal, pero parece que la cepa de Lemon Krystal esta un poco jodida... Para añadir, la LK que parece que podremos sacar adelante(pero bajo supervisión) tiene una rama que tiene 4 cogollos en vez de 2, mola, pero si no se pone a sacar flores macho, la podremos continuar haciendo seguimiento.
Tenemos un cogollo de la Kandy Kush(planta del centro) que es doble.
Puede ser que tengamos algo polinizado en el Indoor, pero pues es algo que ha pasado, espero no tener muchas semillas mermara la calidad...
d35
Unas fotitos rapidas...
Parece que estan progresando las deficiencias, a final de semana añadiremos un poco m'as de abono a ver como responde
Likes
6
Share


@FumateAlgoo
Follow
¡Primera semana y seguimos con buena positividad! Las plántulas ya empiezan a crecer y a abrirse, se ven fuertes y ojalá sigan así. Todavía están dentro del propagador para mantener una buena humedad, ya que en esta etapa las raíces apenas están formándose. La mayor parte del agua la absorben por las hojas, así que no se necesita tanto riego, sino más bien mantener alta la humedad en estas primeras semanas.
Likes
42
Share


@MrGrow
Follow
17.12.2021
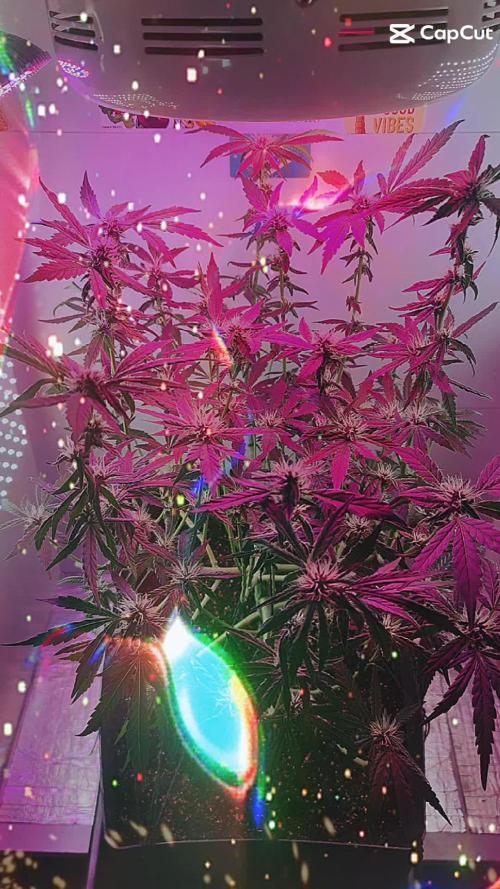
65 giorni di vegetativa dal clone.
La talea è stata presa da una pianta madre in piena fioritura e fatta rivegetare. La struttura della pianta è fantastica, cresce cespugliosa ma con un allungamento più vicino a sativa.
Con 6 piante il box sta completamente esplodendo! Questa settimana faccio lo switch e le mando in fioritura🌻

Processing
Likes
51
Share


@Silverback_Guerilla
Follow
12/21:
Raised the lights as high as they can go...
12/22:
Fed today and rearranged the garden. Did some supercropping, and lassoed the GG4 (bitch is wild i tell ya)
12/26:
Fed today and did some more supercropping...

Likes
14
Share


@Cannabot
Follow
Hasn't been much side branching,smelling pretty good coming through.Hoping they get a bit more stretch to them.
Likes
1
Share

@KyGrow42
Follow
I wanna see what’s different and how much better this new RF3 is if it is the seeds was definitely different the RF3 seed was huge compared to the old one the both germinated about the same but the new one popped out the dirt first so we’ll see I Put all three in a paper towel and 24 hrs later they popped and 24 hrs after in the soil both purple punch’s have popped up and the gorilla cookies is just about too I’ve got my fox farm soil all mixed up and my new fabric pots should be here any day I’m going to transplant into them I’ll keep yall updated happy growing peace hope you enjoy all advice or pointers is welcome #KYGROW will get you 15% off your whole fastbuds order and will help me out a lil to so remember the next time you put in a order
Processing
Likes
33
Share


Processing
Likes
20
Share


@Mr_nugs_lover_David
Follow
She's looking so beautiful,very nice strain to grow for sure,I'm trying to give her a good shape before flowering starts. I add organic liquids nuts only once a week and looks like she loves it,let's keep up the work!! 💚💛❤️🌱🤩

Likes
14
Share


@AndrewC
Follow
So this is the Tear Down week. The timing of it makes it so i will need to the harvest flag in a few days when I can weight and test the plants.
I have included the Cleaning, and Cutting and some Root Porn.
I will make the harvest post in about 4-5 days, when I can trim these plants. There is a lot of Plant here. I got way more than I was expecting. I don't have a scale that measure this amount of plant, without taking like 10 measurements and then adding them together. So I will just be posting the dry weight. I will post the wet weight as dry weight * 1.65.
Autopots: Wow, what a great product. I have been blown away by how well and how easy it was to work with them. They really did solve the watering issues. Excellent product. If you are a beginner, start with Autopots.
-= Lessons Learnt =-
- Overdrive the air to your Autopots. In my control plant, I used a small rectangle air stone (instead of a standard air dome). This lead to root rot and some other issues, it also put significantly less air into the water. The root rot, give the material for the Brown Algae to grow. Using a huge Air-disc-Air-Stone would be an excellent combo to mix in with the air dome itself. Something like this: https://www.amazon.ca/Pawfly-Diffuser-Suction-Hydroponics-Aquarium/dp/B01MY3AQ33 at the bottom and the air-dome on top of it, will be what I do with my next experiment.
- Air stone in the reservoir. I had two instances where algae grew into the res. An air stone would have helped. It would have also helped my control plant get less root rot. Given the amount that the air-domes and air sources got engulfed, having the water have more o2 in it would have only been beneficial.
- Don't grow 6 plants in a 4x4. Since my control plant was about 1/8th the size of the others, I think I could have grown 5 in the shape of a 5 (on a 6 sided dice)⚄ This placement would give a much more spaced canopy for airflow and more importantly light. The sides of some of the plants were lighter green and produced larf due to lack of light penetration.
- This tent was on 19-5 schedule. This worked out very well for this strain. After every lights on, they were in the praying position, so this strain was able to recover in that 5hrs off. If I had more seeds, I would run these again, and try 20-4. I think this strain could handle it. All for all, I think I'm going to 19-5 as my default timing. This kept up a solid DLI.
- Staring at .9EC (really .7 EC cause my water here is .2 EC) Then bumping up at .1 a week, until 1.6EC worked out VERY well. I experimented on this crop all the way up to 1.9EC, which burnt the tips of this plant. I think if I did this strain again, I would do 1.6EC until 3-4 weeks left then crank it to 1.9. It did plump them up when I went to 1.9, however it left them looking rough. Bulk was added though.
- Sticking to 6.0PH for all of veg, and 2 weeks into flower worked great. The plant had solid and consistent color and leaf shape . The plant's did get hurt, due to some issues (as noted on the weeks). I switched to 6.5 PH in the last 3-4 weeks and it helped them recover, and plump up noticeably.
-VPD. The #1 thing I focused on was VPD. I keep it .9kpa range, as best as humanly possible. It was honestly, HUGELY noticeable compared to my other grows. I know truly understand the value of properly dialed in VPD. This is the one lesson that will stick with me forever.
- Super-cropping: On the plants I give the chiropractic treatment too, had much thicker stems as much larger channel internally. I did this treatment to 4 of the 6, and the 4 that had it done has larger buds and recovered from defoliation faster.
TLDR; VPD is king. Super-cropping is worth the time. Keeping PH and EC dialed in were all wins. Autopots kick ass.