
Likes
Comments
Share

@Northern_Ent
Follow
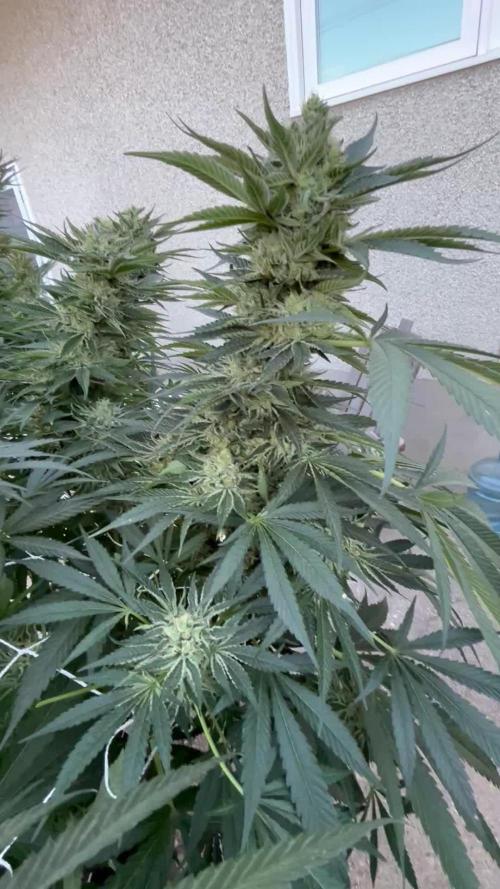
Sep 20: Lemon Cream Kush smells great and the buds are looking really nice. Nice big and hard buds covered in white trichomes. Life is good.
Did a second flush as the buds need another week and I like how the first flush went. Otherwise just pHed water.
Sep 24: removed some more fan leaves to let more light onto the ripening buds.
She has picked up some nice frosting in the last few days and smells really great. Will likely keep going as long as the weather is good. Maybe three more weeks at most.
Sep 25: harvested the tops. Maybe a bit early but today was a good day to do it before 3-4 days with cool rainy weather. Put 310 g into freezer and 1040 g in the washing machine. Total 1350 g wet buds harvested is equivalent to 340 g dried. There is still a lot on the plant to leave for another couple of weeks, and she will be well over a pound dried weight. Hashwashing recovered 56 g of beautiful light tan coloured wet resin.

Likes
4
Share


@Elguacho420
Follow
Buenas a tod@s... Otra semanita más ya en flora, van creciendo muy bien, uniformes, hermosas y fuertes... Ricos aromas ya están formándose los cogollos de a poquito, van tomando forma de a poco, me encantan, se las ve muy bien y aguantan muy bien la temperatura ya q hay veces q hace bastante calor, se toman otras medidas en ese caso pero de momento van muy bien... A seguir creciendo, me está gustando la evolución de este cultivo, y el siguiente, mejor... 💪🏻⚡💀😎
🇦🇷🤝🏻🇪🇦

Likes
24
Share


@Richard_Harrow
Follow
Hello everyone. The Red Mandarine🍊🍎counts the days of flowering and becomes very beautiful. As you can see my tent is very green and dense)))🚀💚There are 6 different phenotype plants. 2 auto and 4 feminized. A tiring but enjoyable process🔥💚🔥
Processing
Likes
20
Share


@GrimbolTheDruid
Follow
Grow Specs:
Breeder: Mephisto Genetics
Strain: Cosmic Queen F4
Nicknames: Timantha - CQ1
Genetic heritage: Spacedawg From TGA Seeds x Chemdogging F4
Indica/Sativa: 30/70
Est. cycle time: 65-75 days from sprout
Medium: CQ1 = Soil, Mephisto Genetics Super Soil, Worm Castings. CQ2 = Soil, home made Subcool Super Soil variant, worm castings
Lights: 132W actual LED
Update schedule: I will try to send out the updates every Saturday or Sunday.
For more frequent updates, add me on Instagram @grimbolthedruid
Grow Schedule to Date:
Sprout: 3/1/17 (Full moon)
Age: Day 25 as of 3/25/18
Updates/Observations:
- Water only for this last week and next. Soil is very hot so I don't need to cycle any of those nutrients down right now.
- Plants showing light burns on lower foliage but nothing serious yet.
- Trying to keep the soil always slightly moist and never let it dry completely to keep microbes (and by extension the soil) at optimum health.
- CQ1 is still miniaturized and has shown sex so I think she is going to finish very small, if she makes it at all. I am worried the hot soil will burn her down because she wont ever get big.
- CQ2s leaves show a very strong Sativa expression and I love it.
- CQ2 is growing very vigorously.
- All plant showing sex (F).
Worm Feeding:
- This week I fed my worms about a pound or so total of: Banana, mango, dill, tomatoes, carrots, strawberries, aloe filet, green beans, covered in a dash of oyster shell and alfalfa meal.
- I layer down some canna leaves, layer diced up worm food, sprinkle dry amendments (kelp, oyster shell, neem, etc.), layer canna leaves, then replace bedding and they are happy!
- Creating the food layer protected by the green manure gives the worms a nice buffer zone to move freely through eating as much as they want.
- This method is inspired by HerbinFarmer on Youtube. I really enjoy his videos so if you have time, check him out!
Cheers!
G

Likes
11
Share


@Gamestationx360
Follow
April 28th, 2021
8th week of flower. Only adding Shine bloom booster at 1.5 grams per gallon. PH'd to 6.0


Likes
75
Share


@Roberts
Follow
Gushers grew great during the grow. She loved the Spider Farmer G5000/UVR40 lights. She has a sweet fruity smell. Looks like some frosty nuggets of goodness will be my end results. Very eager to get to the smoke report. This grow was pretty smooth, and looks good. Thank you Spider Farmer, Athena, and Royal Queen Seeds. 👸 🤜🏻🤛🏻🌱🌱🌱
Discount code:GROWERS20
Thank you grow diaries community for the 👇likes👇, follows, comments, and subscriptions on my YouTube channel👇. ❄️🌱🍻
Happy Growing 🌱🌱🌱
https://youtube.com/channel/UCAhN7yRzWLpcaRHhMIQ7X4g
Spider Farmer Official Website Links:
US&Worldwide: https://www.spider-farmer.com
CA: https://spiderfarmer.ca
UK: https://spiderfarmer.co.uk
EU: https://spiderfarmer.eu
AU: https://spiderfarmer.com.au
G5000 Light Amazon Link:
amzn.to/4643esa
UVR 40:
https://www.amazon.com/dp/B0BR7SGTHS
Discount code: saveurcash (Stackable)

Likes
24
Share


@SaulGoodman420
Follow
Hot dry weather, so having to water every other day. Harvesting the StarDawg this week :)


Likes
9
Share


@simps
Follow
Deep impact I did two Plants of this strain I Collett double impact one double impact to double impact one growing very well showing lots of growth already has five leaves double impact to growing OK a bit slow but I think it will takeoff here soon all is well
Pheno 1 is growing a little fast then pheno 2 but all in all going pretty well so far starting to see some nice branch growth starting to happen looking like this is going to be a nice bushy little plant
Likes
37
Share


@GODSGIFT_2005_JM
Follow
For LIQUIDS ******GREEN BUZZ LIQUIDS***** also organic.
Also i’m using their LIVING SOIL CULTURE in powder form!
MARSHYDRO ⛺️ has large openings on the sides which is useful for mid section groom room work. 🤩
☀️ MARSHYDRO FC 3000 LED 300W
💨MARSHYDRO 6” in-line EXTRACTOR with speed-variation knob, comes complete with ducting and carbon filter.

Likes
5
Share


@Mrpickles774
Follow
So end of week 4 and I’ve lst and growing in coco ... got a friend in tne tent !!!
This auto is just starting to show some hairs now. There’s 8-10 good bud sites so hoping for a nice plant here .

Likes
26
Share

@GERGrowDesigns
Follow
Dear Growers ,
Welcome to Week 9 or Flower week 6 // Day 63-70 from Sweet Seeds Orange Apricot Xl Auto.
Project Setup & Conditions:
• Brand/Manufacturer: Sweet
• Tent: 222cmx150cmx150cm
• Light: 2x 720 Watt Full Spectrum
• Humidity: 50%
• Soil: Narcos Organix Mix
• Nutrients: Narcos Products
• pH Value: 6
If you want Germinitation results like mine , check out Kannabia Seeds with my link [https://www.kannabia.com/de?ref=61966] and grab the germination device or the strains I used . Trust me – it’s worth it for sure !
Get another 20% Discount at all products using the code [GGD] at the Checkout .
Stay curious and keep up Growing —we look forward to welcoming you back for the next chapter soon!
Likes
44
Share


@PotCasso
Follow
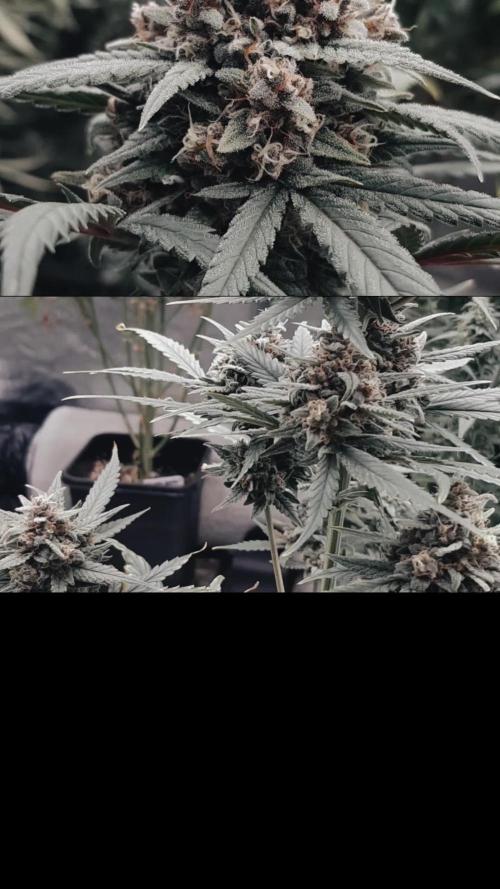
This was the last time running this strain/retired and boy oh boy did she finish Strong. I never got her to be this colorful any other time and she tastes of a distinct orange🍊flavour.


Likes
11
Share


@Chubbs
Follow
420 Fastbuds
Amnesia Haze Auto
Week 11
This week has been good I did one final trim of the fan leafs. I'll give them probably a couple more days to allow the flowers to swell and mature just a little more. Still no nutrients up to this point besides what was in the Roots Organic 707 soil. Watering daily about 2 liters or so depending how light the pot feels. Smells is pretty powerful and pungent for sure.
All in all Happy Growing
Likes
119
Share


@Natrona
Follow
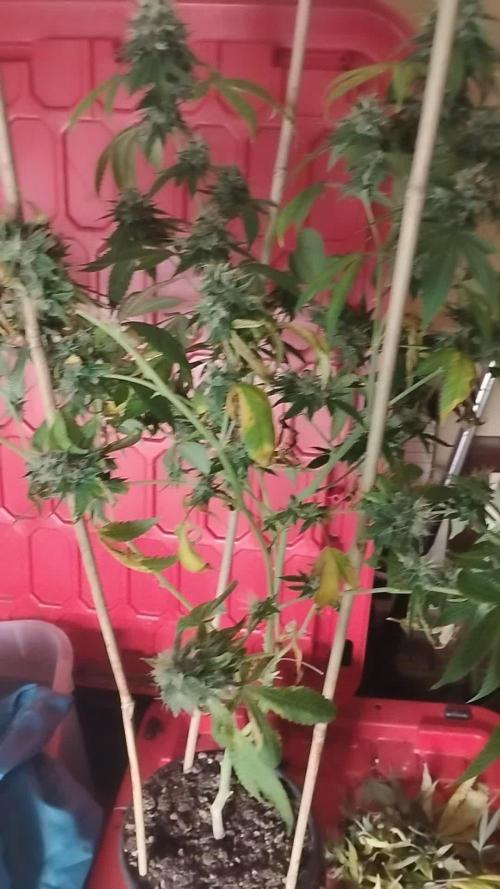
Week 20 8/11-17
For my outside ladies, Opium, Auto Opium, Fractal, and Lemon Cake not much changed. They and with the trichomes just starting to form and 2 more moths to go. They continue lovin life outside. These ladies are maturing as many fans are yellowing and falling off.
Temps are comfortable following Storm Debby, in the 80s with low humidity. Buds are fattening up, trichomes are minimal at this time but some fragrance is starting to be noticed.
These ladies had a long vegetation phase. They germinated April 1 so I could get them hardened off before I went on vacay. The colas are large, trichomes forming and with 2 more months to go, my expectations for these are heavy yields and sticky dense buds.
Thank you @DivineSeeds
Thanks for the visits, likes and comments, I appreciate all the plant love💚.
Have fun & love what you grow 💚
Sending you good vibes of love, light, and healing 💫
💫Natrona 💫

Likes
9
Share


@TiRobotProds
Follow
8e Semaine de floraison impeccable grossi bien chargé en résine irrigation a l'eau uniquement durant les 2 dernières semaines. J'ai vérifié les colas es celle-ci c'est fait polinisé par le male Sour tangie dawg mais rien de grave quelques graines, cela me permettra d'avoir une nouvelle génétique issue de ces deux plantes donc a voir ne pas ce précipiter. Elle dégage une plus douce odeur durant ces derniers jours.


Likes
2
Share


@High_Grade_Dadli
Follow
#1 is the one that had most growth in the the lower branches the week before she is still doing well being that she is in the same condition
#2 I moved her to a different location running extra light and with the lst....she took off now she's the one with the most growth
Till nxt time #happy growing
Likes
11
Share


@Zurban_Poison
Follow
here they are! 2 beauties.
I plan to apply all existing stress techniques to them. topping LST HST Mainlining and so on. Most likely I hang them in one pot. I have experience growing 2 plants in 1 pot and it works great.


Likes
14
Share

@AestheticGenetix
Follow
Gave me a couple nanners. She also has a couple balls early on. To be expected with old sour cuts though.
Likes
Comments
Share


@Daddysnacks
Follow
All water. Smells amazing and I started to flush the zombie death fuck. Probably too soon as I want 60% Amber's and it's barely 5%