


Likes
Comments
Share

@Ninjabuds
Follow
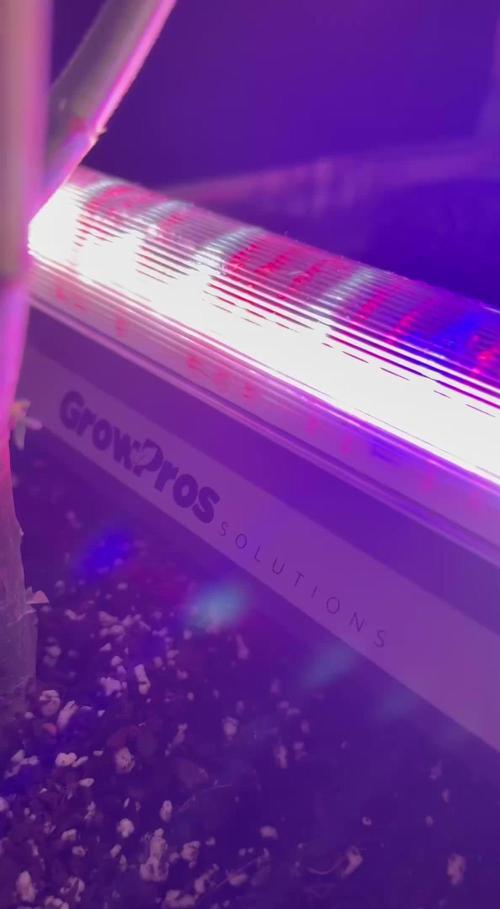
My nine Week 7 flowers are thriving under the new GrowPro Solutions under-canopy lights. The lights have really brought out some amazing colors in the buds. It's so cool to see how much they've changed in just a day! I'm excited to see how they develop even more in the coming weeks

Likes
12
Share


@NoProbation4Weed
Follow
- Day 63 of Flower Light reduction to 50%
- Day 65 of Flower Last time Watering
- Day 67 of Flower Lights out for 3 days
- day 70 of Flower Harvest
Trichomes are about 10% amber and 80% cloudy with 10% clear
Temperatures for drying gonna be 19°C and RH around 55%.
She is looking beautiful and her Smell is so intensive you cannot unsmell it. Its Loud!
Has Some Sweet doughy, Stanky, Cheesy and Garlic notes to it.
I cant wait for the smoke.
Has Some Fruity (Plum or Tangie like), Soapy and Floral Notes to it.
I cant wait for the smoke.


Likes
52
Share
@Schafe1001
Follow
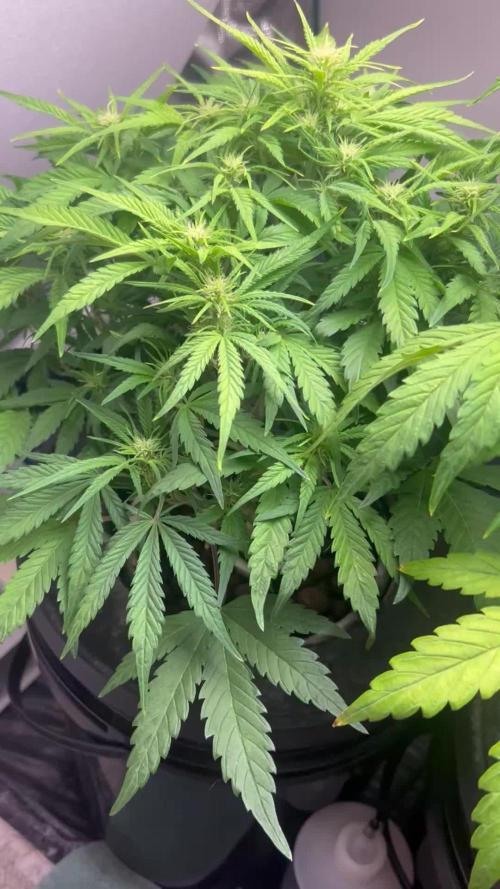
I’m probably really a week behind number eight, but I just can’t contain my excitement. Lol everything‘s looking pretty good. The roots are plentiful in the nice shade of alabaster.


Processing
Likes
37
Share


@MG2009
Follow
Happy gardening.
07/21/2018
Wow unseasonably cold last night got down to 48° brrrr. No signs that the cold bothered the girls posting photos in a min.. And video. Phew took me awhile to upload.
07/24/2018
Mid week update
Back to hot and, steamy summer weather.
#1, tops are just about 39.5", going to try to get all super cropped to about 30", I expect that they will be double their size at harvest.👍.
On a side note hours of light will soon be at 14.5 hope they initiate flowering,as it will give me almost 3 months of flower!👊
#2 is 43.5" looking like a Christmas tree,still some supercropping to spread out the lower layers.
#3, is 35.5" And no training just picking her dead,yellowing leaves
#4, is 41.5" also no training #5, is 30" , and still stinkiest 😎 of all gonna take a clone today.
Likes
89
Share


@Njanne
Follow
I found this seed in bud that I harvested from my Barney's Liberty Haze plant. It was grown in my grow room and you can see my GrowDiary log of that plant. I am not sure exactly how I ended up with seeds... maybe there was light or temperature stress which resulted in a herm. In any case, I decided to grow this seed as a fun experiment. I didn't even know if the seed would germinate... but it grew just FINE. I didn't top it, or give it any special treatment. I guess you could say she grew 'native' or 'au natural.' I have never grown outside before, but I had space in the garden, and the seedling looked healthy, so I hardened her off and popped her into the dirt. She ended up going into a huge monster of a plant. Standing over 9 feet tall I had to laugh out loud each time I climbed the ladder to inspect her top cola LOL. I had so much fun growing this plant.
I called her Majestic Haze (we live on Majestic Drive) because I'm not sure if Barney's would want me calling her Liberty Haze. I can't verify the genetics for sure :) I wonder how plant breeders handle those kinds of things??...
This bud is fun for parties and conversation. It starts out with an energetic vibe and then settles into a relaxed chill stoned feeling. We vaped our dried bud, and then we tried some of our hand rolled hash... then we settled in for the night. Woke up a sit high still LOL but it's Saturday and we don't need to go anywhere so it's all good LOL... This one is the bud of choice for house parties and silly Netflix watching. PS if you haven't see The Good Place... you need to get stoned and watch it.
The total dried weight of bud from this plant was just under one pound @ 310g and we also ended up with around 120 g of frosty trim. We also rolled up about a gram of hash which has some serious kick :)
Likes
Comments
Share

@Chucky324
Follow
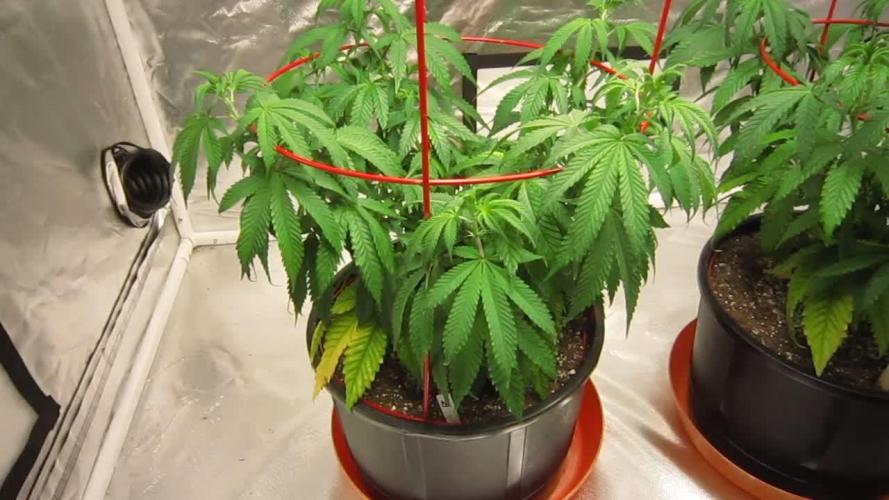
Hello. This is the end of week 8 and the beginning of week 9 of veg.
Going good here.
Got the top branches pulled down under the bottom rung and spread out.
Another couple of weeks before flipping to flowering.
OK. Keep Growing Straight.
Chuck.
Likes
4
Share


@Adam22
Follow
Needed to go in big pots will sort that tmro watered late today they will be fine again once in bigger pot these have been on 12/12 for a few days. Will pl out the gavita they need some hear for a week or 2 led lights not powerful enough now for the plant age it's not growing much now fed today water tmro with transplant
Likes
7
Share


@Eaegifts
Follow
No major growth, in fact she’s kinda slow so I fim’d her today and have been doing minor lst to work on stem strength and bushing out, maybe she’ll show off during flower which is one week away

Likes
15
Share


@MrJones
Follow
Mr. Jones Fast Buds Moby Dick
╰⊰´🌿 ╰⊰´🌿 ╰⊰´🌿 ╰⊰´🌿 ╰⊰´🌿 ╰⊰´🌿 ╰⊰´🌿
🏡Indoor - 3"x2.5"x 4" Custom Built Grow Closet
🌾This strain likes to stretch, so a heavy training regiment will be needed.
🗓️Germenation - Soaking in Water Strait into Amended Soil.
⚱️3-Gallon Pots 📊6.4 / 6.8 PH
💧 Feeding - Gaia Green Grow / Bloom
🕷️ IPM - We will be using Green Cleaner" 1 OZ per Gallon, and CannControl from Mammoth alternating between products each month for Integrated Pest Management.
🌿╰⊰´🌿╰⊰´🌿 PLANT UPDATES 🌿╰⊰´🌿╰⊰´🌿
🗓️Sunday 12.31.23 Harvested plants today, the WPM came back, I did my best to get rid of it, but I believe my outcome was affected and will grow this one again,.
╰⊰´🌿 ╰⊰´🌿 ╰⊰´🌿 ╰⊰´🌿 ╰⊰´🌿 ╰⊰´🌿 ╰⊰´🌿
📝 Notes - Original Moby Dick Auto is a world-renowned Sativa-dominant giant created from two of the most popular strains ever, the White Widow and Haze cannabis strains which are known for the huge delicious aroma, huge size and yields; It’s an extremely easy-to-grow variety highly recommended for growers of all levels seeking for maximum yields with minimum effort as this strain grows up to 150cm and yields up to 650 g/m2 in 10 weeks without extra maintenance. Thanks to its 23% THC, this marvelous hybrid is all about happiness as it will melt your worries away while boosting your mood, leaving you with a big fat smile on your face and ready to get things done as soon as you take the first hit, making it an excellent choice for social scenarios and busy workdays. The Sativa effect comes hand-in-hand with a mix of lemony, piney, and woody terpenes that translate into that classic aroma every stoner loves.
╰⊰´🌿 ╰⊰´🌿 ╰⊰´🌿 ╰⊰´🌿 ╰⊰´🌿 ╰⊰´🌿 ╰⊰´🌿


Processing
Likes
14
Share


@WooderIce
Follow
Great veg week. Its an increased nutrient week. Only issue was slightly high ph in soil, so I added a little more vinegar to my water. On previous grows, I would do my LST tie downs on approx day 31-33, but growth was really good, and over 10" on 7 of 9 plants, so tied down early on those 7, on day 28. Great color and stalk girth so far.
Likes
16
Share

@Zdenda
Follow
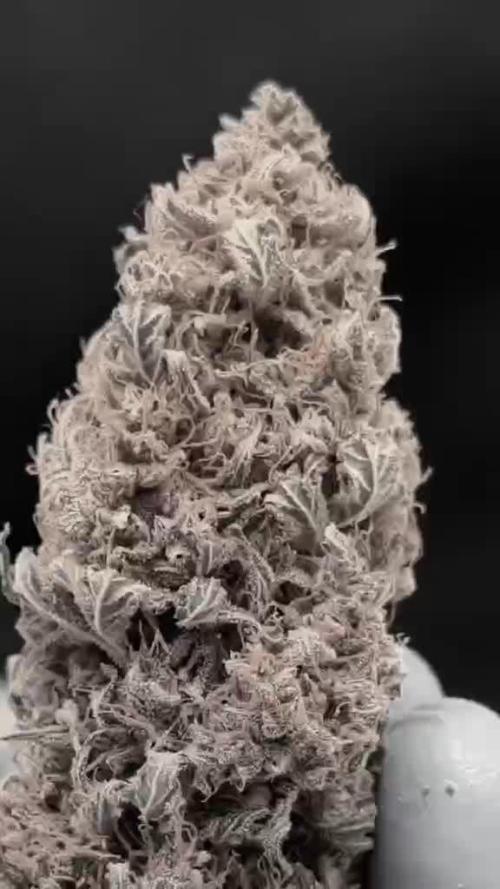
Před čtyřmi dny jsem sundal která jednu už byla.. trichomy už začaly mít i jantarovou kterou nechávám jen trochu..ani né třetinu.Světlo jsem dal na 75%..No a dneska jsem sklidil zbytek. Prorostlé a tvrdé. Lepkavá brokolice mi voní a vypadá to pěkně.. těším se na kouř. Pověsil a nechám schnout.. potom zvážím až suché a ostříhané.

Likes
31
Share


@TheHighentist
Follow
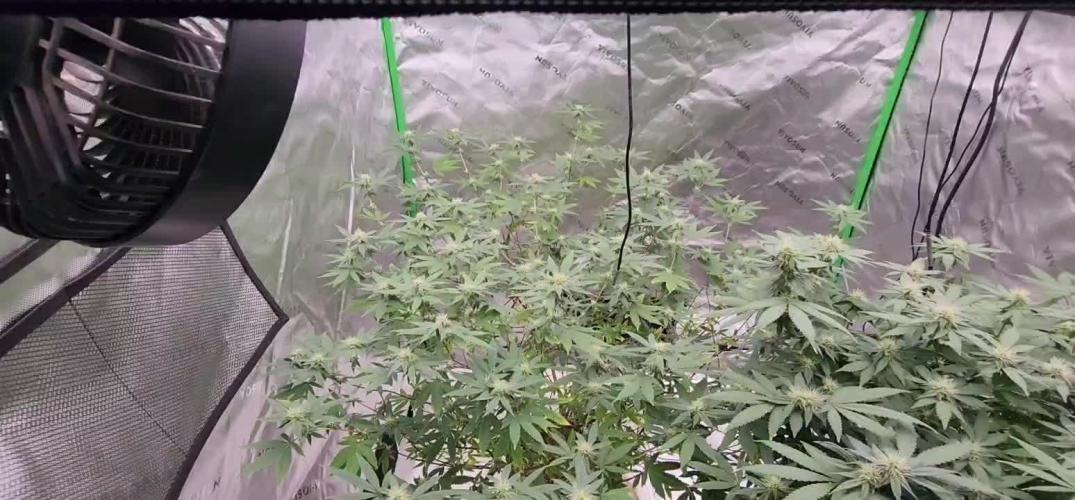
23/5* Water day 275ML with Biobizz Grow and Fish-Mix
-Temps 24-25 Day / 21-23 Night
-Humidity 70-75% RH
Correction to LST / Letting the bigger restraints go
24/5 Freed them of LST as i want to let them grow higher
-Temps 24-25 Day / 21-23 Night
-Humidity 70-75%RH
25/5 Showing good growth
-Temps 25-27 / night 22-24
-Humidity 70-75%RH
26/5* Water day 275ML with Biobizz Grow and Fish-Mix as usual
-Temps 23-25 / night 22-24
-Humidity 70-75&RH
27/5 - Got my humidity controller
-Temps 23-25 / night 22-24
-Humidity 72% (+-5)
28/5 - Did some super super cropping and a bit of light "Chiropractic" (Kyle Kushman method) and a bit of lst on the branches i wanted to get more light
-Temps 24-26day /22-24 night
-Humidity 72% (+-5)
29/5 Water day*
As a first time, i watered them before they went to bed, as i wanted to give some nutrients to get over the supercropping stress
275ML (+ 2ml/L Fish mix + 2 ml/L grow)
-Temps 24-26day/22-24night
-Humidity 72% (+-5)
***********I will put them into flowering in about a week***************
Light to plant distance:
d.28/4 53 CM to light (kept the same distance rest of the week 1)
d.2/5 50 CM to light
d.3/5 42 CM to light
d.7/5 40 CM to light
d.19/5 38 CM to light
d.22// 34 CM to light
__________
My lights distance and PAR value:
24" / 60 CM = 237 PAR (umol m2s1)
18" / 45.72 CM 412 PAR
12" / 30 cm 811 PAR
6" / 15.24 CM 1816 PAR




Likes
9
Share


@Luv2Grow
Follow
Day 39 - Did a little defoliating today, I’m hoping it won’t stunt too much. Last two grows, I just let it go but seemed pretty crowded so want more light deeper.
Day 40 - It appears the defoliation has really stunted her so will keep an eye on her. She’s starting to smell a bit fruity and I’m loving it.
Day 41 - No major changes today, still looks and smells amazing.
Day 42 - Looks and smells good still!
Processing
Likes
27
Share


@Jungle_James_Grows
Follow
6/7 Done a load more training tonight. That's it for the next week or so.
8/7 found some mammoth P, it's 2 years old so not sure how the viable it still is. But I'll give it a try and see.
10/7 introduced some molasses today at a rate of 5ml/L.
There are some pre flowers starting to form now hence the introduction of molasses
12/7 nearing the end of week 4.
Nice even canopy except for one that I
topped. The canopy is thanks to the LST that I did on them. Trying to keep them the same height so the light reach and penetration will be uniform across the whole tent.
Likes
22
Share


@PrairieFrostGrow
Follow
*
********* Week 10 - June 13 to 19, 2020 - Days 64 to 70 from germination ***********
*
Adding in the pictures for now.........
GSC has had a good week but also a slow week like the other girls growing right now. Her buds are plentiful and the hairs are long and white........she just isn’t filling in as she should.......and I suspect wants to........damn pH issues are persisting with her as well. She was transplanted into plastic pots but her runoff numbers are still over 7 while max going in was roughly 6.0.🤬🤬 This is true for both the GSC girls. They received a 25L flush of 3.7pH water this week and that bearly pulled down the pH to 6.7???
GSC2 is paying a price and it sucks but there are always trade offs in life😃 She wants to be in 82 degrees and a 65 percent humidity but she is in with girls wanting 70’s and 50’s😢😢😢 Her leaves have become very dark green and brown spotting with further lockout issues. Her buds have very white hairs and we will keep on the same path.
GSC has filled up the tent and with the controllers and other light in place she has been in a perfect environment of 82 degrees and 63 percent humidity. With the little SP-150 and the HLG she has roughly 280 watts to keep her swelling and firming up. By the end of the week she is showing signs of improvement and buds are gaining weight again!!!!
The frost coming out on GSC has been very very impressive so far!! The high pH will hurt the yield but she appears as though the buds will be sticky👍 Have to run these girls again in a proper environment......I really want to see her potential realized. The big buds are in there......just not as visible this run😃 Fast Buds girls have been really solid and very impressive!!!!!
Little more detail............
June 13/20 - Day 64
- AM feeding - plain tap water adjusted to 5.1 pH....275ppm
- 2L for GSC and 1L for GSC2
- PM feeding - Overdrive, Rezin, Vitathrive @ 2ml, Liquid Wt, Dual Fuel @ 1.5ml, CalMag @ 1.5ml = 1450ppm
- GSC took 4.5L and GSC2 took 2.5L
- runoff numbers in the pots before feed was 1700ppm and 7.1pH.......WTF?
- brown spotting on leaves so increasing CalMag.
- tent dialled in and hold temps and humidity now.
June 14/20 - Day 65
- letting the pots dry out a little more so can give a flush to work on reducing pH,
- both girls had a good night and swelled more.
June 15/20 - Day 66
- big flush day......each girl given 26L flush of water pH to 5.0
- striving to get them down to the 6.1 range.......
- they are still going to be fed but pH will be lowered.
June 16/20 - Day 67
- mixed 7L of water with Overdrive, Terpinator @ 2ml, Vitathrive, Liquid Wt, Rezin, CalMag, Dual Fuel @ 1.5ml = 1400ppm and pH to 4.0
- GSC given 4.5L and GSC2 took 2.5L
- Moved another light in this tent to increase wattage.
- Added sugar and yeast CO2 to this tent now as well.
- GSC2 looking really good today.....leaves up and happy.
June 17/20 - Day 68
- mixed 8L water with Rhinoskin @ 1ml, Terpinator @ 2.5ml, Overdrive, CalMag @ 2ml, Vitathrive, Liquid Wt, Rezin, Dual Fuel @ 1.5ml = 1450ppm and 4.1pH
- GSC took 5L and GSC2 took 3L.......there was fair bit of runoff,
- GSC buds getting bigger and nice color in the leaves.
- GSC2 looks taller and leaves up😀
June 18/20 - Day 69
- only GSC fed today,,.,..,.,5L with Terpinator @ 3ml, Overdrive, CalMag @ 2ml, Vitathrive, Liquid wt, Rezin, Dual Fuel @ 1.5ml = 1475ppm and pH to 4.5
- GSC only took 3L though so will keep the other 2L for tomorrow.
- for the most part left them alone today.
- letting GSC2 dry out for a day.
June 19/20 - Day 70
- GSC fed the 2L of mixture left from yesterday.
- GSC2 given 1L mixture of Rezin, Liquid Wt, Sensyzime @ 2ml = 385ppm and 4.5pH.
- GSC is a BEAST! Stacking her buds and filling in her colas👍💪
- GSC2 is really happy today!
Likes
5
Share


@Abendkraut
Follow
Yet another week is past and I slightly increased the Terra Bloom ratio to 3ml per Litre Water
I went and removed a lot of the lower leaves
Probably ready in 3 weeks

Processing
Likes
9
Share


@Kushizlez
Follow
Harvest:
Everything dried up to 347 grams + 96 grams of super high quality trim. Overall I am not too pleased with the smoke of the product. Although the bud size, bag appeal, smell and taste are pretty much all there, the shitty burn is a deal breaker for me and the majority of this weed is quite frankly useless. Another downside is while smoking I’ve found 4 seeds in an ounce from almost every strain. Light leaks? At least I learned a ton, including how to get super good burn for my next crop. I’m hoping that curing for a month or so will improve the burn but I wouldn’t really count on it. I have seen weed dried for 4 days with no cure and no flush smoke clean and not go out once. I have been told that the key to white ashes/clean burn is proper mineral content in the soil and there is tons of scientific studies on cigar ash going back 100 years. Plants grown in a medium with high levels of decomposing organic matter, phosphorus, magnesium, chlorine and heavy metal ratio tend to produce black/grey ash. Whereas plants grown in a medium with a higher ratio of trace minerals like calcium carbonate and potassium in the form of wood ash, rock dusts, oyster shell flour and lower levels of decomposing organic matter will produce a dense, uniform white ash that rarely goes out. But this is still all theory until I test it to confirm for myself a few times. My last few outdoor harvests did not improve with curing at all so I’m hoping this will be the missing link. Plain peat moss and coco clearly lack essential minerals that help burn. If said theory is correct I should find a synthetic nutrient line with more trace minerals. Makes me wonder if growing if rockwool/basalt rock could improve burn in a hydro setup.
I think I did a fairly decent job for my first grow. I went wrong in a million different places but I still stuck it out and got some decent herb. Things went wrong early when I got black spot mold, nitrogen/magnesium deficiencies and powdery mildew. I corrected most of it but things didn’t get really bad until mid veg when I intentionally skipped a few feedings and defoliated quite heavily stunting the plants. I also didn’t even top or start LST until the 6-9th node which was really stupid and hurt my yield. My temperatures were all over the place from the learning curve. I was severely overwatering without realizing it. 100% peat moss is a shitty medium. I also fed way too late in flower (not what caused shitty burn). I also used synthetic nutrients in soil.
Zkittlez bonsai
Yield: 1.9g
Smell: 7/10 - sweet, candy, berry, gassy, piney hints
Bag appeal: 7/10 - slightly leafy/stemy
Crystal coverage: 7.5/10 - very impressed
Ash: 6/10 - flaky, mostly white/grey
Fire holding: 4/10 - stays lit for 10-30 seconds
Smoke: 6/10 - taste is decent, needs curing
High: 6/10 - indica dom
Comment: looks nice, smells nice, tastes nice, burns like shit.
43.5/70 = 62% 👎🗑️
Black Garlic #1
Yield: 53.6
Smell: 8/10 - gassy, piney, earthy, skunky
Bag appeal: 7/10 - slightly leafy/stemy
Crystal coverage: 7.5/10 - very impressed
Ash: 8/10 - thick, uniform white ash
Fire holding: 7.510 - stays lit for 45+ sec
Smoke: 7.5/10 - taste is good until the end
High: 7/10 - sativa dom
Comment: looks nice, smells nice, tastes nice, burns great but quite leafy.
52.5/70 = 75% 👍🔥
Black Garlic #2
Yield: 42.3
Smell: 7/10 - woody, earthy, tea
Bag appeal: 6.5/10 - slightly leafy/stemy
Crystal coverage: 7/10 - impressed
Ash: 6/10 - flaky, mostly white/grey
Fire holding: 4/10 - stays lit for 10-30 seconds
Smoke: 6/10 - taste is decent, needs curing
High: 8/10 - sativa dom
Comment: looks nice, smells nice, tastes nice, burns like shit.
44.5/70 = 63% 👎🗑️
Zkittlez
Yield: 39.4
Smell: 7/10 - sweet, candy, berry, gassy, piney hints
Bag appeal: 6.5/10 - slightly leafy/stemy
Crystal coverage: 7.5/10 - very impressed
Ash: 8/10 - thick, uniform white ashes
Fire holding: 8/10 - stays lit for seconds
Smoke: 7.5/10 - taste is decent, needs curing
High: 7/10 - indica dom
Comment: looks nice, smells nice, tastes nice, burns great but smalls didn’t fill out.
51.5/70 = 73% 👍🔥
Blackberry Breath #1
Yield: 57.5
Smell: 9/10 - sweet, grape, berry, gassy, earthy, hashy
Bag appeal: 8.5/10 - dense, sparkly buds
Crystal coverage: 9/10 - super impressed
Ash: 5/10 - flaky, mostly grey/blackish
Fire holding: 4/10 - stays lit for 10-30 seconds
Smoke: 5/10 - tastes like chalky shit
High: 6/10 - indica dom
Comment: looks amazing, smells amazing, tastes like shit, burns like shit.
46.5/70 = 66% 👎🗑️
Blackberry Breath #2
Yield: 76.1g
Smell: 6/10 - musky, tea, berry, herbal
Bag appeal: 8/10 - slightly leafy/stemy
Crystal coverage: 7.5/10 - very impressed
Ash: 5/10 - flaky, mostly grey/black
Fire holding: 4/10 - stays lit for 10-30 seconds
Smoke: 5/10 - taste is shit
High: 6/10 - indica dom
Comment: looks nice, smells shitty, tastes shitty, burns like shit.
41.5/70 = 59% 👎🗑️
Slurricane #4
Yield: 34.5g
Smell: 8.5/10 - gassy, deep piney, fuel, earthy,
Bag appeal: 8.510 - slightly leafy/stemy
Crystal coverage: 7.510 - impressed
Ash: 6/10 - flaky, mostly white/grey
Fire holding: 4/10 - stays lit for 10-30 seconds
Smoke: 6/10 - taste is decent
High: 6/10 - indica dom
Comment: looks amazing, smells amazing, tastes nice, burns like shit.
46.5/70 = 66% 👎🗑️
Badazz OG Cheese
Yield: 43.5g
Smell: 6.5/10 - musty, woody, cheesy, piney hints
Bag appeal: 6/10 - slightly leafy/stemy
Crystal coverage: 6/10 - very impressed
Ash: 5/10 - flaky, mostly white/grey
Fire holding: 4/10 - stays lit for 10-30 seconds
Smoke: 6/10 - taste is decent
High: 6/10 - sativa dom
Comment: looks like shit, smells decent, tastes decent, burns like shit.
39.5/70 = 56% 👎🗑️


