


Likes
Comments
Share

@Hempface86
Follow
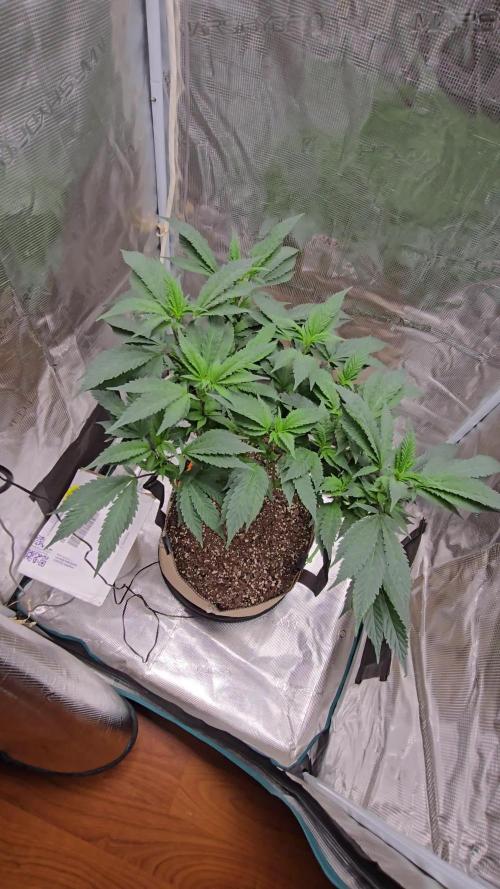
Ladies and gentlemen, this girl is officially flipped.. The stretch has commenced, and now we wait.. I'm hoping this girl does not outgrow my tent. I have a feeling it's a possibility. The good news is, I'm not using my old nutrients. Because if I was she definitely would with that being said sorry for my lack of being on here. I would blame it on work.But to be honest, i'm blaming it on grow diaries, because it's just such a pain to use it's not enjoyable. It's a real pain if you're using a phone like myself and I do not have a cheap phone, so it is definitely not me. It's almost like the people don't have their heads screwed on straight and every six months they just change everything up, thinking that they're making it better not realizing that they're driving people away.. With that being said, I hope everyone is well and I hope they are able to navigate this site better than I am, because i'm losing interest very quickly

Likes
6
Share


@Krautbauern
Follow
On day 38, we topped the top shoots of the chimera again because she is getting way to gig already. Then, after 40 days in the vegetation phase, we sent them into flowering.
From now on 12/12h Day-nightcycle
We cut some Clones at day 47 because we had to wait until our clonex arrives.
Likes
3
Share


@Organic473
Follow
Transplanted her to a 5 gallon pot. Gave her some root stimulator, fed her some nitrogen and just look how lovely they are taking off, my plans are to veg her for a very long time.

Likes
29
Share


@Jjthejetplane79
Follow
Looking happy and healthy, fastbuds autoflowers in a living soil bed 8th run in same old soil.

Likes
12
Share


@BeHappyNtoke
Follow
This week has went by ok beach ball is growing well new growth has come in pretty well the other plant is not happy with the pot slow growing plant
Likes
9
Share

@DogDoctorOfficial
Follow
💜 8×8 Adventure – Week 12
Purple Haze by Zamnesia – Pheno B
The Little Frosty Queen Is Still Shining… Even When She Hides From The Camera 😂❄️💜👑
Welcome back to another chapter of the 8×8 Adventure! 🌱💚
And...
well...
I have a small confession to make.
😂📸
Somehow...
SOMEHOW...
I managed to miss the individual photographs of our Purple Haze Pheno B this week.
Again.
🤦♂️😂
I know.
I know.
After all the talk about how much I love documenting these girls, here we are...
with no dedicated photo stack of our little Frosty Queen.
Apparently, she decided:
"You've photographed my sister enough.
This week, I'll be mysterious."
😂💜❄️
But before anyone thinks she's disappeared...
she hasn't.
She's right there in the room.
She's growing.
She's beautiful.
She's developing.
She's doing exactly what she has been doing throughout this entire adventure.
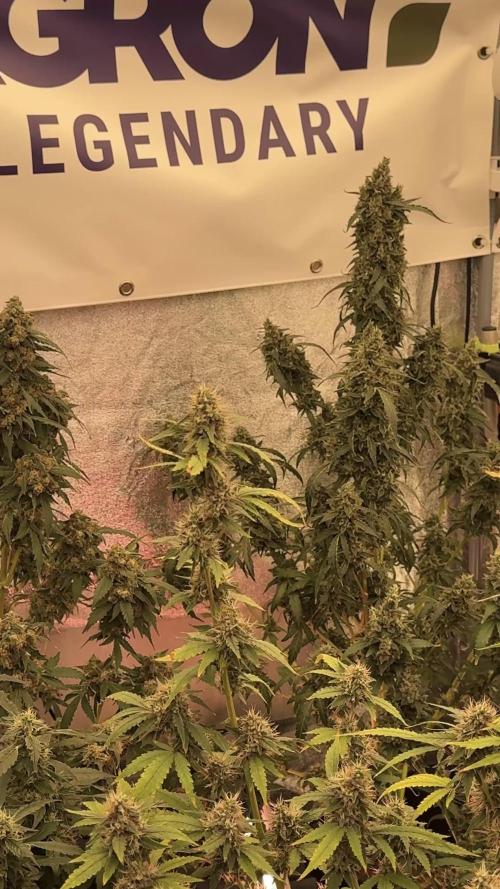
And thankfully, we do have general room photographs and a video showing the whole 8×8.
So if you look closely...
you can still find our little Purple Haze girl in there.
👀💜🌿
And I may still find the missing photographs.
I've been digging through different folders because I genuinely believe I took them.
So...
if they suddenly appear from some mysterious photographic dimension...
I'll come back and update this week with her individual photographs.
😂📸🕵️♂️
For now, though...
we work with what we have.
And honestly?
Even without the dedicated portraits...
I know this girl.
She's still beautiful.
She's still shining.
She's still growing.
She's still doing her thing.
She's simply doing it a little slower than her sister.
And that's perfectly okay.
So let's give our little Frosty Queen the spotlight anyway.
❄️💜👑🌿
────────────────────────
🌱 WEEK 12 – THE GIRL WHO DOESN'T NEED TO RUSH
────────────────────────
Purple Haze Pheno B continues to be exactly who she has shown us throughout this adventure.
Compact.
Beautiful.
Frosty.
And...
slow.
😂💜
Especially when you put her next to her sister.
Purple Haze Pheno A has apparently discovered the accelerator pedal and refuses to let go.
🔥💜🚀
Pheno B?
She's driving with the windows down and enjoying the scenery.
😂
And that's okay.
Because when I look at Pheno B, I don't see a plant that's failing to keep up.
I see a plant following her own rhythm.
She's developing.
She's flowering.
She's continuing to build.
She's maintaining her beautiful appearance.
And she's slowly becoming more substantial.
She's simply doing it on her own timetable.
That's one of the most important things this 8×8 Adventure continues to teach me.
Not every plant needs to move at the same speed.
────────────────────────
💜 SMALLER THAN HER SISTER – BUT STILL A BEAUTY
────────────────────────
There's no question about it.
Purple Haze Pheno B is smaller than her sister.
And right now, she's also somewhat behind her in visible flowering development.
But that's not a criticism.
It's an observation.
And there's a huge difference.
Her sister is moving extremely quickly.
The flowers are becoming enormous.
The week-to-week changes are dramatic.
Pheno B is taking a different road.
She's more compact.
She's slower.
She's developing at a more measured pace.
And yet...
she's beautiful.
That's what matters.
Because if I walked into the room without knowing which plant was which, I wouldn't look at her and think:
"What's wrong with this plant?"
I'd look at her and think:
"There's our little Purple Haze."
😂💜🌿
She has her own appearance.
Her own structure.
Her own rhythm.
Her own identity.
And that's exactly what we want to document.
────────────────────────
❄️ THE FROSTY QUEEN IS STILL FROSTY
────────────────────────
If there's one characteristic that has remained impossible to ignore with this girl...
it's the frost.
❄️❄️❄️
Even without this week's individual macro session, I know what I'm seeing when I look at her in the room.
That beautiful resin-covered character is still there.
The flowers continue developing.
The surrounding sugar leaves continue carrying that frosty appearance.
And when the room lighting hits her from the right angle...
she catches the light beautifully.
She's not the biggest girl.
She's not the fastest.
But she has something that makes you stop.
You see her.
You look closer.
And there she is.
Our little Frosty Queen.
😂❄️👑
That's her identity now.
And honestly...
I wouldn't change it.
────────────────────────
👭 TWO SISTERS – TWO COMPLETELY DIFFERENT CLOCKS
────────────────────────
The contrast between Purple Haze Pheno A and Pheno B continues to be one of my favourite things about this project.
Same genetic line.
Same room.
Same lighting.
Same general environment.
Same irrigation philosophy.
Same nutritional foundation.
And yet...
completely different development speeds.
Pheno A is flying.
🚀🔥💜
Pheno B is cruising.
🚗💜😂
And that's exactly why having both in the same room is so valuable.
If I only had one Purple Haze plant, I might look at her development and think:
"This is how Purple Haze behaves."
But because we have two phenotypes sharing the same environment...
we can see that there isn't necessarily one single expression.
There are differences.
There are personalities.
There are rhythms.
There are individual plants.
And Pheno B is giving us a beautiful example of that.
────────────────────────
🌿 SLOW DOESN'T MEAN STOPPED
────────────────────────
This is something I want to repeat because it is important.
She's slower.
She's not stopped.
😂💜
There's a massive difference.
She's still developing flowers.
She's still changing.
She's still growing.
She's still using the environment.
She's still building.
She's simply doing it more slowly than the girl standing beside her.
And honestly?
That's okay.
Plants don't read our weekly schedules.
They don't know that we've labelled something "Week 12."
They don't look at the diary and think:
"Shit, better hurry up."
😂📖🌿
They have their own biological timing.
And this girl has made her timing pretty obvious.
She takes her time.
She does her thing.
And eventually...
she gets there.
────────────────────────
📸 THE GREAT PHOTO HUNT
────────────────────────
Now...
let's talk about the elephant in the room.
😂📸
Where the hell are her photographs?
I genuinely think I took them.
I've been looking through folders.
Different folders.
Old folders.
New folders.
Folders that apparently contain everything except the photographs I'm actually looking for.
😂🗂️📸
So I'm still hunting.
And if I find them...
I'll come back and update this week's diary with her individual photographs.
Because she deserves them.
But for now, we have the general room photographs.
And we also have a video showing the entire room.
And she's in there.
You can see her.
You can find her.
You just need to play:
"Where's Purple Haze Pheno B?"
😂🔎💜
It's basically a grow-room version of Where's Wally.
Except Wally is a frosty little Purple Haze plant.
😂💜❄️
And honestly...
I'm sorry, girl.
You deserved your own portrait session this week.
────────────────────────
🎥 SOMETIMES THE WHOLE ROOM TELLS THE STORY
────────────────────────
The funny thing is...
although I always prefer having dedicated photographs of each phenotype, the general room photographs and video actually give us something different.
They show context.
They show where she sits.
They show her relationship with the rest of the canopy.
They show the scale of the room.
And they remind us of something important:
This isn't twelve separate grows.
It's one 8×8 environment.
Twelve individual plants living inside it.
And Purple Haze Pheno B is part of that larger picture.
She's there.
She's growing.
She's developing.
She's simply not standing in front of the camera this week saying:
"Look at me."
😂
Maybe she's shy.
────────────────────────
💡 SAME PHOTONS – DIFFERENT RESPONSE
────────────────────────
The environment hasn't changed specifically for her.
The upgraded lighting remains in place.
The two additional Future of Grow Black Series 600W fixtures continue providing the extra lighting capacity.
We've kept the output controlled rather than simply running everything at maximum.
We're still working around:
💡 ~59% power from the plug
with approximately:
☀️ ~1,500 PPFD across the upper canopy
and naturally varying intensity according to height and position.
And Pheno B is receiving those same photons.
Just like her sister.
Just like the rest of the room.
But look at the result.
Her response is different.
Her development speed is different.
Her structure is different.
Her timing is different.
And that's the beautiful part.
The photons are the same.
The plant's interpretation isn't.
😂☀️💜
────────────────────────
☀️ MORE LIGHTING CAPABILITY – CONTROLLED
────────────────────────
I continue to really like the additional lighting setup.
The point was never simply:
"Let's make the room as bright as physically possible."
😂☀️🔥
The point was to increase our capability.
More available lighting.
More flexibility.
More control.
And then find the level that makes sense for the room.
The additional Future of Grow fixtures gave us that headroom.
We don't have to run them flat out.
We can control the output.
And that means we have more capability without automatically turning that capability into wasted electricity.
Purple Haze Pheno B gets the same opportunity as everyone else.
What she does with that opportunity?
That's her story.
────────────────────────
🌸 THE FLOWERS ARE STILL MOVING
────────────────────────
Even without the dedicated photographs this week, the general room images and the video show us something important.
She's still developing.
She's not suddenly standing still because her sister is moving faster.
She's still part of the flowering progression.
The structure is continuing to develop.
The flowers are continuing to gain definition.
And her overall appearance remains beautiful.
That's what I want to emphasize.
We shouldn't confuse:
"not moving as quickly as Pheno A"
with:
"not progressing."
Those are completely different statements.
Pheno B is progressing.
She's just doing it at her own speed.
And that's okay.
────────────────────────
⚗️ NUTRITION – NOW WE START EASING BACK
────────────────────────
As we move further into the later stages of the flowering cycle, we're also beginning to change the nutritional approach.
And this is something I personally prefer to do gradually.
I don't like the idea of working with mineral nutrition and suddenly going:
"Right.
Zero everything tomorrow."
😂
That's just not how I prefer to approach the transition.
Instead, I like to start reducing the nutritional input progressively as the plants move toward their final stages.
Small steps.
Controlled changes.
Watching the plants.
Allowing the transition to happen rather than slamming the door shut overnight.
And that's what we're beginning to do across the room.
Pheno B is included in that gradual transition.
We're not trying to force her because she's slower.
We're simply allowing the entire room to move forward while continuing to observe each plant individually.
Her development may be slower than her sister's...
but her needs are still her needs.
And that's something I always want to respect.
────────────────────────
🌡️ WEEK 12 – ROOM CONDITIONS
────────────────────────
The room continues to remain broadly stable around:
🌡️ Day temperature: ~26.5°C
🌙 Night temperature: ~26°C
💧 RH: ~61%
🌱 Substrate temperature: ~25°C
💦 Nutrient solution: ~25°C
⚗️ pH: ~6.02
💨 CO₂: ~693 ppm
💡 Light schedule: 12/12
💧 Irrigation: ~1.45 L/plant/24h
? Pot size: 15 L
The important thing here is that the room remains the room.
We're not changing everything because one plant is slower.
We're maintaining the overall environment while paying attention to the individual responses.
And Purple Haze Pheno B continues to tell us:
"I'm good.
Just give me time."
😂💜
Fair enough, girl.
────────────────────────
🌿 DOING LESS – SEEING MORE
────────────────────────
This is becoming one of the biggest themes of the 8×8 Adventure.
Earlier in the grow, there was plenty to do.
Training.
Canopy management.
Defoliation.
Positioning.
Adjustments.
Decisions.
Now?
A lot of the job is observation.
And I actually love that.
Because when the plants are healthy and developing, you don't need to invent work.
You need to pay attention.
Look.
Measure.
Listen.
Watch.
And if something is needed...
respond.
Otherwise?
Let the plant grow.
Purple Haze Pheno B doesn't need me constantly touching her.
She needs time.
And she's getting it.
────────────────────────
💜 HER SISTER MAY BE FLYING – SHE'S STILL SHINING
────────────────────────
This is probably the biggest thing I want to leave with everyone this week.
Yes...
Pheno A is absolutely flying.
😂🚀🔥
Her flowers are becoming enormous.
Her weekly changes are dramatic.
She's moving incredibly quickly.
But that doesn't make Pheno B less interesting.
Quite the opposite.
Pheno B gives us the comparison.
She's showing us another expression.
Another pace.
Another architecture.
Another flowering rhythm.
And when you put both girls into the same room...
that's when the experiment really comes alive.
One says:
"Let's go!"
The other says:
"Relax."
😂💜
And both are beautiful.
────────────────────────
🔬 THIS IS WHY THE 8×8 ADVENTURE EXISTS
────────────────────────
This is exactly why I wanted to run these plants together.
Not to prove that one phenotype is better.
Not to make every plant behave identically.
But to watch what happens when different plants receive a shared environment.
The room becomes our constant.
The genetics become the variable.
And the plants provide the answers.
Purple Haze Pheno B is giving us a particularly interesting answer.
She's smaller.
She's slower.
She's frosty.
She's compact.
She's beautiful.
And she's completely herself.
That's enough.
More than enough.
────────────────────────
👑 THE LITTLE FROSTY QUEEN STILL DESERVES THE CROWN
────────────────────────
Even without the photographs...
I'm not taking the crown away from her.
😂👑❄️
Because she continues to shine.
She's not the biggest girl.
She's not the fastest.
She's not trying to compete.
But she has her own presence.
She has her own look.
And when you know the plants well enough...
you can spot her.
You know her structure.
You know her rhythm.
You know that frost.
You know that little compact personality.
She's become recognizable.
And that's one of the coolest parts of following a plant for twelve weeks.
You stop seeing a label.
You start seeing a personality.
Purple Haze Pheno B.
The little Frosty Queen.
💜❄️👑
────────────────────────
🔮 WHAT COMES NEXT?
────────────────────────
More development.
More flowers.
More resin.
More evolution.
And hopefully...
more photographs.
😂📸
I'm going to keep looking.
And if I find her missing photographs hiding somewhere inside the chaos of my folders...
they're coming straight into this diary.
But even without them, the journey continues.
We'll keep watching her through the general room photographs.
We'll keep watching the videos.
We'll keep watching the plant itself.
And most importantly...
we'll let her decide her own pace.
No rushing.
No forcing.
No pretending she's moving at the same speed as her sister.
She's not.
And that's perfectly fine.
────────────────────────
💭 FINAL THOUGHTS – STILL SHINING WITHOUT THE SPOTLIGHT
────────────────────────
Week 12.
And Purple Haze Pheno B?
She's still here.
😂💜❄️
She's still beautiful.
She's still developing.
She's still frosty.
She's still growing.
She's still doing her thing.
She's simply doing it at a slower pace than her sister.
And this week...
we somehow managed to forget her photographs.
😂📸🤦♂️
My apologies to everyone following her diary.
And especially to the little Queen herself.
If I find those photographs hiding somewhere in the endless folder jungle...
I'll update this week.
Until then, we have the general room photographs and the video showing the whole 8×8, where our little girl is still there doing exactly what she's supposed to be doing.
And honestly?
That's what matters.
Because the plant doesn't stop being beautiful just because I forgot to take her portrait.
😂💜
She's still shining.
She's still evolving.
She's still catching photons.
She's still building flowers.
She's still showing that beautiful frosty expression.
And she's still giving us one of the most interesting contrasts in the entire room.
Her sister is flying.
Pheno B is taking the scenic route.
But both are telling us something valuable.
Same genetic family.
Different expression.
Same room.
Different rhythm.
Same photons.
Different response.
And that's the 8×8 Adventure.
💜🌿❄️👑
So keep shining, little Frosty Queen.
Take your time.
Keep building.
Keep doing your thing.
We'll be watching.
And next week...
I promise I'll try to find the damn camera roll. 😂📸
────────────────────────
🙏 THANK YOU
────────────────────────
As always, thank you so much to everyone following the 8×8 Adventure. 💚🌱
Thank you to GrowDiaries for giving us the space to document these individual journeys and share these stories with growers around the world.
Thank you to Zamnesia for the Purple Haze genetics and for giving us the opportunity to discover two such different expressions from the same genetic family.
Thank you to Plagron for supporting the room with the growing media and nutrition throughout this adventure.
A huge thank you to Future of Grow for supplying the additional Black Series 600W fixtures and allowing us to explore this expanded lighting setup in the 8×8. 💡☀️🌿
Thank you to Lumiflora for helping bring additional light into the deeper and lower areas of the canopy.
Thank you to TrolMaster for helping us monitor and manage the environment behind the scenes.
And finally...
thank you to everyone following along.
Every comment.
Every question.
Every message.
Every person stopping by to watch these girls develop.
It genuinely means a lot. 💚
Even when I occasionally forget to photograph one of them...
😂📸🤦♂️
This adventure continues to teach us something every single week.
Twelve plants.
One room.
One shared environment.
And twelve completely different stories.
Purple Haze Pheno B is writing hers slowly.
Quietly.
Beautifully.
And with plenty of frost.
💜❄️👑
So let's give her the spotlight anyway.
Let's let her shine.
Let's let her take her time.
Let's keep those photons flying.
And let's see what this little Frosty Queen decides to show us next.
And if I find those missing photographs...
you'll be the first to know.
😂📸💜
Growers Love, my friends. 💚🌱
See you next week in the 8×8 jungle...
where one Purple Haze sister is apparently racing toward the future...
while the other is still enjoying the scenery.
😂💜👑❄️
And honestly?
I wouldn't have it any other way.
Processing
Likes
15
Share


@AK1210
Follow
The tricombe production on this strain is ridiculous! It looks amazing under my microscope. The heads are mostly milky coloured so this may be finishing sooner than expected.
The space in the tent is getting a bit tight so I'll be glad to have more room when this lady has done her thing.
Likes
101
Share


@DogDoctorOfficial
Follow
.
So were should i start lol they all growing and streaching as they should.
I tested my run outs ( since they all drink and eat diferent i've been testing all of them😅) and some are coming out a bit too hy for my taste (EC at 2,86 in one of them) so i'm going to start and do alternade feedings. one time with nutrients onother just water and test again to see if the numbers are more of my taste lol , PH is coming out at 6.1, that one i liked 😄
Apart from that yesterday i gave them a good air cut to help the ligth pass and to take out everithing i thout wasent nessesaire. they loved lol
I intruduce a bag of CO2boost, the boost buddy bag, this will help incrissing what ever CO2 numbers i have in there ( need to by a CO2 monitor )
Girls:
1-BlueBerry
2-Alaskan Purple
3-Poyote Gorilla
4-Hindu Kush
5-Whitw Mango
6-Super Glue
7-Badazz Cookies
8-S.A.D.
tent -8x8 / 2.4x2.4 but i'm only using 1/2 so 4x4 / 1.2x1.2
Led - Lumatek 465w Compact Pro at 100%
All i Grow is medicine for myself,
Stay safe, stay tuned and B Happy
Peace out
D


Likes
12
Share


@Bread_n_Buds
Follow
Our Purple Urkle by Zamnesia has reached 16 buds. I'm growing it a little more to make sure it doesn't go into flowering with small brunches but now we're there, a few days and it will go into flowering and it will be very exciting you can bet on it.
The Topping worked very very well the plant at the moment of topping went into overfertilization due to the obvious slowdown in growth, so I slowed down the fertilizer for growth but it was about to go into crisis, so we are starting to give fertilizer again. When topping is a delicate moment it is probably better to do what I explain below.
The ideal when topping is probably to start with a gradual release fertilized soil or start preparing the soil for a period that is at least enough for the vegetative phase at most by adding a bit of alga grow which by itself I must admit gives me some problems at least in this case if the plant grows straight much less or rather nothing.
We are always using soil, feeding and all the recommended additives from Plagron 100% organic, we have only lowered the amount of grow in this topping phase for the reasons mentioned above.
---- Decide on the right soil and calculate your fertilizer sheet based on the soil on the official website.
-- www.plagron.com
Try a seed of this strain that drives us crazy..
---- https://www.zamnesia.io/en/11168-zamnesia-seeds-purple-urkle.html
Zamnesia Description // A direct descendant of a Mendocino Purps phenotype, Purple Urkle is a high-performance cultivar from Zamnesia Seeds. This feminized, indica-dominant strain is sure to win over any cannabis grower. With a THC content of 20%, Purple Urkle has a lot to offer from seed to harvest and beyond. A grape-flavored adventure, Suitable for indoors, outdoors or in the greenhouse, Purple Urkle is a very resilient strain. Growers will be impressed by how easy this cultivar can be managed. Purple Urkle can reach 120cm indoors and 160cm outdoors, but if you want more control over the height you can use the LST technique.
Purple Urkle has fantastic flavors and aromas that intensify during the flowering phase. Regardless of the method of consumption, Purple Urkle offers tangy, fruity flavors that lean towards notes of grapes, berries and plums. The effects of this strain are soothing and relaxing, with uplifting sensations that make the experience suitable for any occasion, whether in a social setting or alone.
All the best that mother nature can offer is on ---- www.zamnesia.com
Processing
Likes
20
Share


@Hawkbo
Follow
Couple got a little burn I think maybe a little too much soil in there with the coco on top of the light feed? I got all the final pots filled up today they will go in 3 gal bags either today or tmm. It's a Greentree pro ultra coco/perlite mixed with some roots organic soil about 70/30.
Likes
34
Share


@SalocinSpecial
Follow
D68 (28/01/2021): First official day of week 6 in bloom and first official day (second in reality) of pre harvest flush. The smell is strong when I open the tent! It does not take long for the whole room to smell dank and even outside the room.
- temp: 24-25C light ON ; 20-22C light OFF
- no water
- RH: 49-52% light ON ; 49-50% light OFF
D69 (29/01/2021): I did a first proper flush today by running approximately 2.5 gallons of water trough the medium. There is still a lot of nutrients in the medium. I might do the exact same flush tomorrow. The PH of the run off is high (around PH7-7.1). This is an other reason to flush again tomorrow. I also reduced the light ON schedule by two hours. So now 18h hours ON and 6 hours OFF. I will continue reducing the ON period until they are ready for a complete dark period. I also try to reduce the air temperature.
- temp: 24-25C light ON ; 19-20C light OFF
- water: PH6.4, 135PPM, 2.5 gallons each
- run off: PH7 and 680PPM for Glue Gelato ; PH7.1 and 560PPM for Banana Kush
- RH: 47% light ON ; 48-53% light OFF
D70 (30/01/2021): I did a second flush since I was not satisfied with run off PPM of yesterday. Today, the run off PPM is under 300 which is what I wanted. The run off PH is still high with 7.1. Banana Kush is ripening with the pistils slowly turning brown. Glue Gelato look sooooo yummy and I can't wait to harvest it. There is a small color change in some leaves but I'm expecting more in the next days.
- temp: 23-24C light ON ; 19C light OFF
- water: PH6.4, 125PPM, 2.5 gallons each
- run off: PH7.1 and 260PPM for Glue Gelato ; PH7.1 and 250PPM for Banana Kush
- RH: 46% light ON ; 46-48% light OFF
D71 (31/01/2021): Glue Gelato is changing color. I'm checking trichomes everyday on both girls and no amber yet.
- temp: 23-24C light ON ; 19C light OFF
- no water
- RH: 45% light ON ; 49-50% light OFF
D72 (01/02/2021): Well well well...the clock is ticking for those girls. Glue Gelato is now having a couple of amber trichomes. Banana Kush don't have any. Overall Banana Kush has less trichomes and fluffier buds. This girls is not ready yet but I will need to chop her down at the same time has the Glue Gelato because my drying space is the tent I'm growing in. I will try to push the Banana Kush to ripen faster by lifting up the lamp at 16 inches from top bud and by reducing of 2 hours the day period for a 16 hours light ON and 8 hours light OFF. But at least all Banana Kush trichomes looks milky.
- temp: 23-24C light ON ; 18-19C light OFF
- water: PH6.2, 123PPM, less then a gallon each
- run off: PH7.4 and 200PPM for Glue Gelato ; PH7.4 and 287PPM for Banana Kush
- RH: 45% light ON ; 40-45% light OFF
D73 (02/02/2021): I gave water probably for the last time today. Trichomes on Glue Gelato are starting to amber on top buds. Not a lot of amber but you can see that all the trichomes are starting to degrade by curling down slowly. Trichomes on Banana Kush are not amber at all but they all look milky. Glue Gelato is ready to harvest but Banana Kush need more time. It's tough to make a decision to chop or not since they are not at the same stage of growth. I want to place them in a complete 48 hours of darkness before harvest. 1h less light today for a 15h light ON and 9h light OFF. The lamps are now at 20 inches.
- temp: 23-24C light ON ; 18-19C light OFF
- water: less then a gallon each
- RH: 45% light ON ; 40-45% light OFF
D74 (03/02/2021): Glue Gelato is ready for 48h of darkness. I will take her out of the tent and place her in an other room without light. I will try to maintain a proper environment in this room and if it smells to strong or if the condition are not good I will replace her in the tent and both will start the 48h darkness. The idea is to give Banana Kush 2 more days to ripe and swoll more. After 48h, I will chop Glue Gelato and place her in the tent to start drying. Banana Kush will then start her 48h darkness. I don't know if this strategy is good but I will monitor everything closely and react if something is wrong.
- temp: 22-23C light ON ; 19C light OFF
- no water
- RH: 47% light ON ; 43-45% light OFF


Likes
100
Share


@AsNoriu
Follow
Day 111. First is ready, second week behind, third maybe even 3 weeks behind ....
Plus they are LEAFY ,!!!!
Trim jail ...
Wet trim for all of them - no doubts !!!
Day 115. Still hanging, slowly drying and result should be decent at the end ... A week more I guess, very humid in UK ...
Day 118. First trimmed - 175 g. Other is chopped ! One still grows ...
Day 136. Chop day for the last one !!! Long run ....
Happy Growing !!!
Likes
1
Share


@DillyGenetics
Follow
Transplant into 1 gallon plastic pot mycorrhizae for less transplant shock with coco coir had to buffer a brick for 18 hours submerged in calcium after couple days went organic for less of a headache of wasting money on nutrients to make it simple and effective control system 1 plant is showing deficiency working on bring it back to optimal used compost tea with silica , fish fertilizer Neptune , soil recharge every week ph to 5.8-6.0 1 gallon 1 cup water per plant bigger plants get 2 cups want less run off after 2 week to get the calcium out from the buffer solution added 2-84 geia green and 4-4-4 1 tsp per plant of each dry amendment water every day so coco doesn’t get dry roots are healthy on the bottom of gallon pot you see new growth soon thinking of transplanting for better results during flowing stage currently photo and auto soon cross breed some of them during flower for new future projects ,
Processing
Likes
11
Share


Likes
7
Share


@Riddle
Follow
After 2 weeks I chose my favorite plant of the three and prepared her for the Autopot. Now she needs to root this pot for another 2 weeks before we can turn on the Aqua Valve and the tank.
DLI 30

Likes
3
Share


@603grower
Follow
Haven’t been updating lucky this grow is on auto pilot. All I’ve done is use the vegbloom line and si until week 6. Everything is just about done I’m flushing now. The gorilla chem need another week she is still being fed. Going to harvest all hit her this week!





Likes
5
Share


@BudBrewerz
Follow
I'm very pleased with how this Pink lady is turning out. She packing very nice looking colas and the smaller buds are looking very good too and all of them are feeling very dense and sticky 😍🤤
I'm giving her another week or so... I started flushing a week ago. So guess we're good to go🙏
Likes
13
Share


@cookingwithninja
Follow
Week 7 day 3. I stopped giving soluble nitrogen today. 1/2 reduction in soluble pk. Adding solubles in water drops my ph perfect so I don’t use ph down in flower. Now today I start adding a little ph down as the 1/2 strength soluble pk brings water to about 7.4, so reduction to 6.9
Likes
Comments
Share

@MrGanjah
Follow
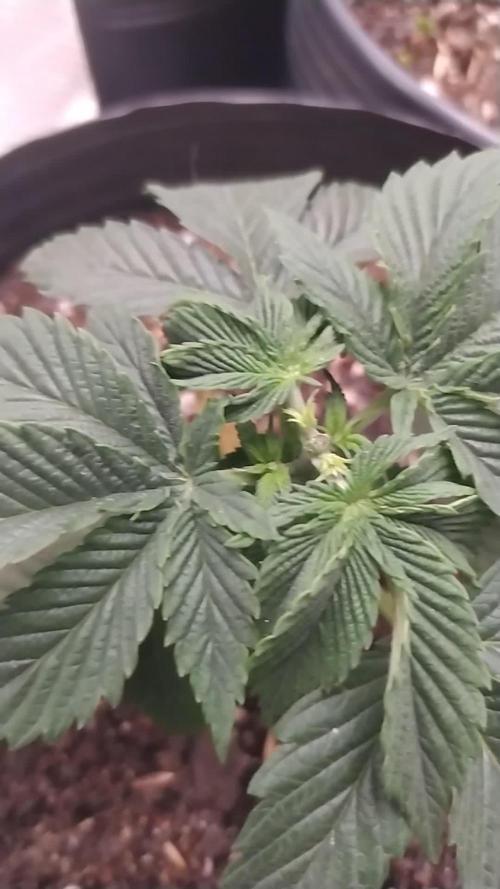
I did the topping after the fourth node, they are healthy, I watered 500ml each with em1, trichoderma and biogrow. 400ppfd

Likes
10
Share


@Kinghaze
Follow
The first week of flowering went well, no defects or anything.
I put up a second trellis with small compartments.
And a dehumidifier to keep the humidity between 50% and 60%
I have also started the flowering nutrition , including the New 'powerbuds' from plagron.
Does anyone happen to have any experience with that?
Now it is waiting for the plant to stop stretching.
Around day 20 I will defoliate the plants one more time