


Likes
Comments
Share

@Firefly
Follow
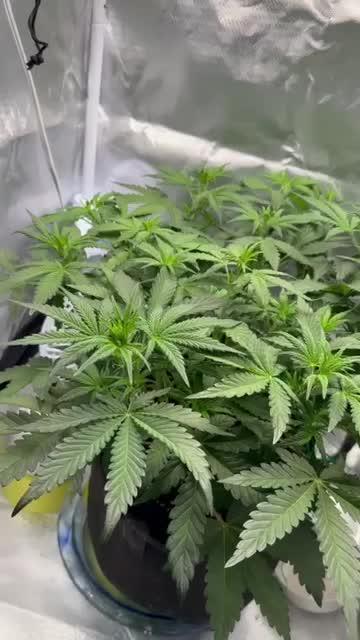
Week 5! End of Veg? Preflower? Flower? Very eventful week. Throughout this week at ever watering the plant got a round of LST+Tucking. At this point I'm trying to maximize the amount of growth sites getting light exposure and also trying to keep the canopy relatively flat/level. Full strength nutrients per normal. About this point I was getting really worried about space, particularly giving the genetics of this plant tend to the larger side. Impulse purchased a net and on 9/17/25 the ScrOG net was installed and I did my best to use it to curate the canopy. ~placed about 8" from the top of the pot and besides that I just gave it my best go, not exactly sure if I did it right or not. Towards the end of this week pistols become pretty apparent on most of the plant! Some very light defoliation was done, just a couple of oversized fan leaves that weren't getting much light anyway. LED was set to 100% (and slightly raised) per manufacture specification towards the end of this week.
Wouldn't be a first grow without a scare of the week. 😵 Last week we had an accidental topping, this week we have roots growing all outside the pot. On 9/16/25 I noticed the root growth out the bottom of the pot. My wildly unintelligent drain pan setup used bows to space the pot up and they collected runoff, leaving the roots with a nice bath of runoff water to grow into. Learning every week, this week I learned about air-pruning. Went ahead and cut these root growths off, purchased a 1$ Lowes runoff pan, and returned three bowls and a nice Pyrex dish back to the kitchen. About the same time of my root issue, within the next 2 days a good amount of leaves had slight yellow tips...

Likes
3
Share


@Ogbangbang2981
Follow
I harvested my pollen sacks plant looks healthy at this point I dont feed till harvest just water every 3-4 days. think o got 21 more days to go b4 harvest but until then I'm just checking out my trichomes so that I dont harvest to late .....one love and dont forget weed is love so share the love with those you know .......

Likes
5
Share


@LeedsCityFarmz
Follow
This week all the plants started to take off in flower. Buds swelling up by the day. Stopped feeding flower burst and added Pk9-18 and advanced meta boost to aid with flowering. Smell has started to increase but not to potent as of yet. EC also increased to 1.6 for increased demand in flower. Also stopped spraying IPM this week as it don't want it to effect the bud smell or taste come harvest.
Likes
2
Share

@Growfather2
Follow
Hello everyone,
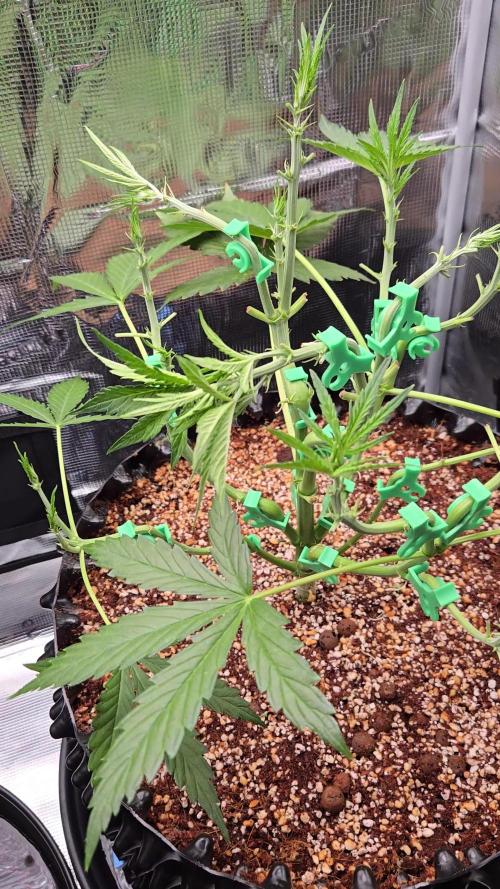
The 3 Afghan skunk plants are doing well 2 of them are growing fast and will put the one in the 10 gallon airpot (39 liter) into flower next week.
The other 2 plants need to be transplanted to the 10 gallon airpot and will need to sit in it for at least two weeks before switching into flower.
Thanks for stopping by and have a great day.
Best regards,
Growfather


Likes
9
Share


@Canadian_Growology
Follow
Plants are growing fine. I'm more focusing on soil prep at this point in the season.
Cheers!


Likes
10
Share


@blueberrykk
Follow
Amnesia Lemon is nuts!
Love the fresh taste, smell and an amazing kick!
Likes
80
Share


@JamMAKEcan
Follow
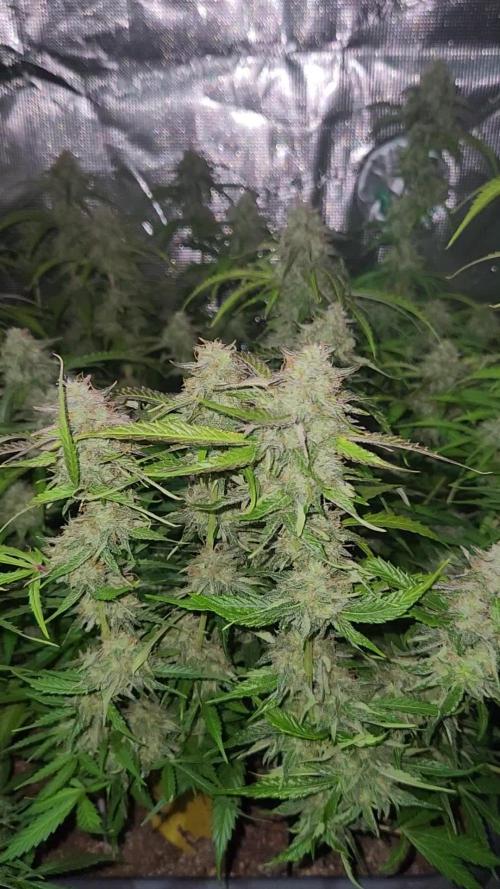
Well 8 week into flowering. STATISTIC says 8-10. But everything stat wise went out the window😳😳 now im strictly looking at crystals and hair with yellowing of leaves.. Im still waiting on my loupe to see crystals.. Smell is weak if any..



Likes
165
Share


@Tropicannibis_Todd
Follow
💩Holy Crap Growmies We Are Back💩
So what do you say we have some fun 👈 We got some EXOTIC SEEDS 👉 👻👻👻MONSTERMASH👻👻👻 😛
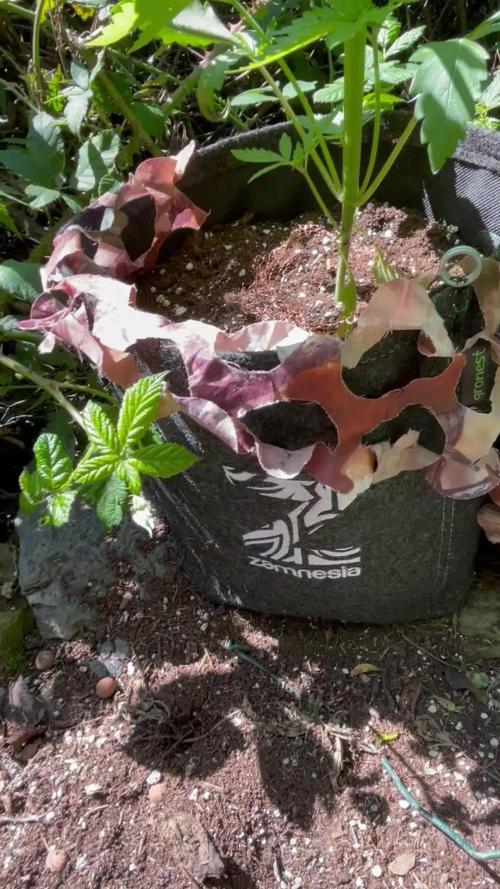
Well my friends we are just at the 28 day mark and as you can see shes doing great 👈
👉 So now i felt i need to start training her over to maximize her growth by doing some LST 👈 Just noticed she's starting to preflower 😛
Lights being readjusted and chart updated .........👍
👉I used NutriNPK for nutrients for my grows and welcome anyone to give them a try .👈
👉 www.nutrinpk.com 👈
NutriNPK Cal MAG 14-0-14
NutriNPK Grow 28-14-14
NutriNPK Bloom 8-20-30
NutriNPK Bloom Booster 0-52-34
I GOT MULTIPLE DIARIES ON THE GO 😱 please check them out 😎
👉THANKS FOR TAKING THE TIME TO GO OVER MY DIARIES 👈



Processing
Likes
22
Share


@CenturionGrower
Follow
26/07/20 (Sunday)
Plants were starting to exhibit signs of light burn so I switched back to the 75W bulb. SVG never seemed to recover from having it's cotyledon damaged so I decided to take a risk and fed all of the seedlings 20-20-20 nutrients except the D.R. which I thought would've suffered shock, so I just watered it.
27/07/20
Decided to mist the plants with a homemade pesticide mix today because they're readying to be introduced as full time outdoor plants in a week or two so their sun basks are getting longer.
28/07/20
Noticed what looks like new growth from the first true leaves of the SVG, fingers crossed it's making progress.
29/07/20
The new growth from the SVG has split into two on both sides leading me to theorize that it's abandoned it's main stem (for now at least) and started two new stems. All other plants are working on new nodes and are showing a steady growth of .5cm a day. I've decided to revert to the 100W bulb because I believe I've misdiagnosed the light burn.
30/07/20
Today I left them outside for their longest sunbask to this point; 7 of their 18 total hours was provided by sunlight. The SVG now has two new 3-leaf true leaves on each new stem confirming my theory. Also starting to see signs of a minor mite problem on one of the leaves of my TT plant (Though it's new growth that wasn't sprayed with my homemade concoction.)
31/07/20
New growth has already begun sprouting from between the new true leaves of the SVG with no visible progress on the 'abandoned' main stem. Also had a power outage for 2 of the plants 18 hours.
01/08/20
Today the plants again stayed out in the sun for longer than previously making 8 hours in direct sunlight. I've decided to keep them in the grow tent for a further week because when I went to retrieve them the Jam was blown down flat by winds and had started to grow bent towards the light, so I doubt it's stem is ready for that daily beating. I raised the soil level and massaged it back into shape and it seems to be back on track. The D.R. is slowly beginning to bounce back from being stunted in the seedling tray and from it's third node (from the bottom up) of 3 leaf true leaves has turned into 5 leaf leaves. The SVG has made a major recovery and seems to be on it's way to even surpassing the others by the end of the week. The TT is officially the sturdiest of the younger seedlings and it's growing right behind the Jam in terms of node development. All in all this week was an overall success growth wise and I'm looking forward even more to week 3.
Likes
2
Share


@Sundown
Follow
As you can see it's not a very photogenic plant at the moment, thats why i didn't took her to many pics with quality, but she is getting hugeee.
The smell is like a strong mix of haze and something really sweet.

Likes
25
Share


@MaxMo8
Follow
I transferred it to a half-gallon pot and I mixed the organic fertilizer with the soil.


Likes
16
Share


@Marijuanaisland
Follow
Alguns ataques de bottritis e corte no top Bud mais consegui controlar com desumidificador alimentando com( ripen ) GHE desde o dia 50 caminhando para a colheita
Likes
7
Share


@delta_420
Follow
Borked the time tracking on the previous diary weeks, both are still going strong. Grapefruit is developing a lot of new internode fan leaves, but she's too late into bloom now to defoliate etc. and don't want to stress the GG XL either.
Latest GG XL photos are in Week 5. Microgreens are also coming up fast.
17/07: Forgot to take Day 42 photos for both girls, my apologies as my wrists have been giving me hell but will get some more up soon. I've been keeping with the same watering schedule, some bud sites are being shaded by fan leaves so I'm trying to VERY carefully bend them down to prop up the little bud sites better. I've rubbed my fingers on some of the fan leaves to get rid of whatever weird white dust is ending up on my leaves, probably just debris from the air and the fan might need a cleaning soon but holy shit my fingers smell strong like Pomegranate and fruits. It's getting quite addictive to smell the bud sites and rub that resin of her fan leaves, I wish I could describe it better but damn it smells good. If the resin is any indication of the final smoke I know that the Grapefruit is gonna be dank. Can't wait till drying + harvest time :))
18/07: Plucked off some lower burnt leaves that were really old, snipped off two more big fan leaves shading new bud sites and removed the stumps from old leaves rather making those closely cut down stubs instead so no bug invaders can get a free home. :P
Humidity has been ridiculously high today >~65% and dropping now in the evening after the rain has stopped to <~60%, I added some Sodium Bicarbonate in plastic jars around the tent to help pull out water from the air. (18/07: Seems to be helping, I'm seeing about a ~2-5% drop overnight and this morning, usually the humidity in the morning before+after rain is ~60-65%)
20/07: The paper ref regarding RH and Bicarb. of Soda: W.-Y. Kuu et al. / International Journal of Pharmaceutics 166 (1998) 167–175 / PII: S0378-5173(98)00049-0 - I don't know how or why but keeping temps at ~21-23C drops the RH down to a stable mid-low 50's range. Thank fuck now I don't have to drop tonnes of money on a huge dehumidifier... Occam's razor baby :)
21/07: Had to move the light, fan, carbon filter and literally everything. Some minor shit for the cover broke on top of the CaCl -RH% and the bicarb got knocked over. Wiped, sprayed down and cleaned out the fan filter as well. What a fucking start to the day...
31/07: GG XL is in Week 7 now, so getting well into flower, growing at an exponential rate and starting to give off a very subtle smell, Grapefruit smells quite noticeable now too.
03/08: GG XL ending week 7, getting massive. ~77-78CM now. Had to defoliate the Grapefruit since leaf miners were still assaulting her, hopefully this helps get more light and airflow into the bud sites, been having humidity issues but can't do much.


Likes
11
Share


@adam_pawloski87
Follow
Pre98 Bubba , oh how I’ve missed you for so many years! These ones came out absolutely gorgeous! Loving the the purple phenos 😍 ! These ladies liked to stretch quite a bit so you’re gonna want to use some LST on em but I also recommend topping at least 6 times to get a better bang on your yield ! Expect nice tight purple buds with a tremendous amount of frost covering, some of the frostiest Bubba I’ve ever had! Over all I give it 10 stars an would definitely over an over run this strain!

Likes
6
Share

@Skynets_Growing
Follow
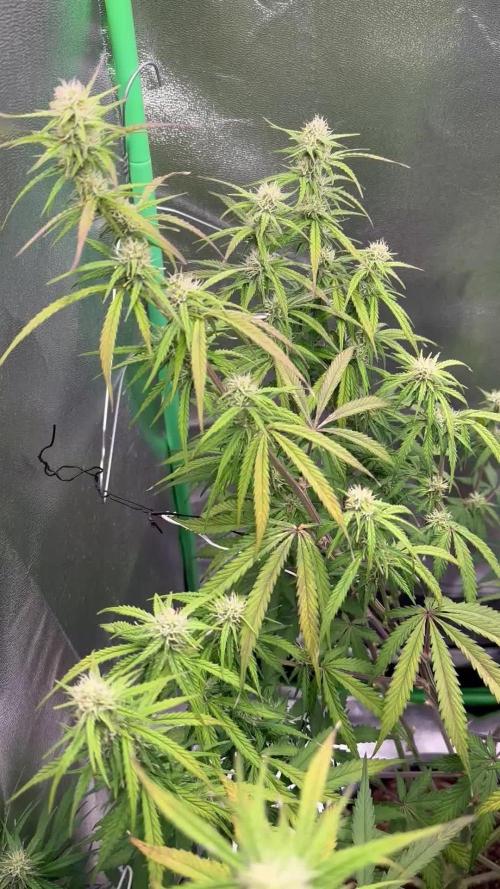
I cannot say what is going wrong with Elsa an my grow. I give her water every day hothing more, because she live in living soil. But you can see on the Picture… every day she looks more and more destroy. But on day 71 were i thought to end this grow with Elsa you can see that she fight… and I will fight to for her. The grow went in week 11 …
Likes
1
Share

@Day_1
Follow
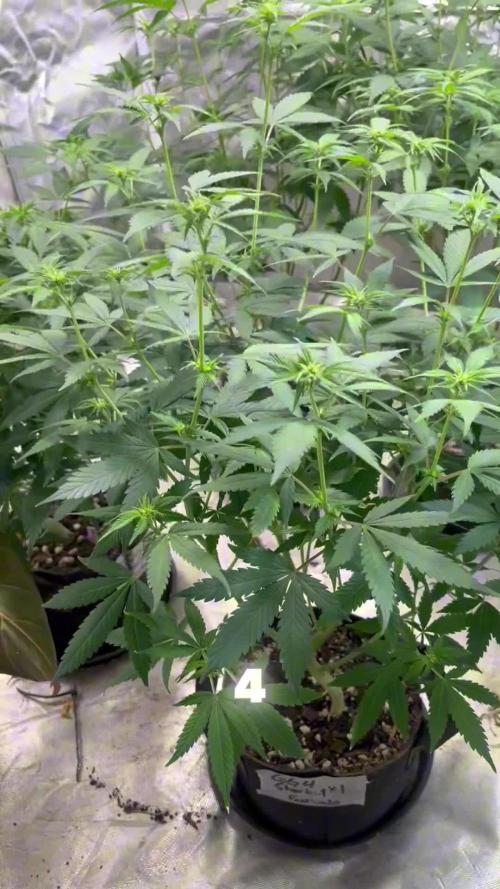
Ladies are doing amazing. First week of flower. I’ve went ahead and topped dressed with worm castings Gaia green 444 and 284 and Bone meal also water them with stash blend.