
Likes
Comments
Share

@Nony_grows
Follow
I have a cal mag deficiency I’ve already treated it. We are on cruise control at this point, just waiting in the finish line.


Likes
19
Share


@lakocinka
Follow
Hello, little quick update :)
people what do you think, I'm still keeping them in veg stage


Likes
68
Share


@Natrona
Follow
Divine Seeds Auto V.2 Contest
Auto Black Opium
W5V5 7/6-12
Black Opium had a spurt and grew 3 inches and now 8 inches tall. I used pins to tie down the limbs and cleaned out all the under growth. giving ph water only.
7/6 2 liters ph 6.5, ppm 238 to get the pot wet.
7/8 1 liter ph 6.6, ppm 262 pics & video
I included videos of the ph meter with water, iridium glass & iridium glass and copper. When in water only, the ph meter climbs steadly, in iridium, there is slight jumping in the register. When the readings are taken with copper and iridium, the ph meter jumps up and down in wide ranges. So there is marked energy emanating from the glass and from the copper. What is it doing? I don’t know but stay tuned thru the grow to find out.
As aways, thank you all for stopping by, for the likes and most of all growers’ love and support.
Stay green, growers love 💚🌿o
💫Natrona💫

Likes
11
Share


@NiBaMeCa420
Follow
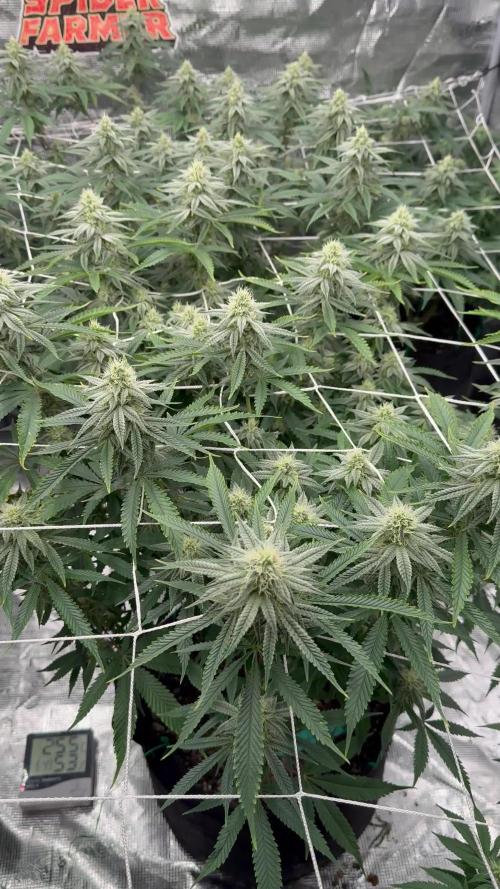
They are going incredibly fast I have removed the nets because it is a lot easier to work instead of crawling under the net I can now just walk through it which makes my life a lot easier in a few days I will remove a lot of leaves and leave them alone for the rest until now I like growing on rdwc very well now that I understand better
See you guys next week hope you are doing fine in this weird world

Likes
Comments
Share


@Weedwithwes
Follow
Week 9 day 65 autoflowers
Royal Queen seeds organic living soil.
Tropicana cookies was top dressed 4 tbs of Gia green 284 power boom and 1 tbs of glacier rock.
Watered with recharge ph 6.00
Granddaddy purple not top dressed late into flower already
North thunderfuck not top dressed. Do not like the slow growth, structure, amount of leaf in veg. Hoping m for big stretcher or bud packer

Likes
5
Share


@AK1210
Follow
This week the weather has been nice and consistent. Today has been the hottest on record in the UK reaching 37 degrees. This girl has loved it. She has bounced back nicely from her topping making the way for more bud production. fingers crossed this weather continues. 🤞

Likes
9
Share


@StickyFingah420
Follow
Día 34 y casi final de esta quinta semana de desarrollo.
Las plantas se ven bien sanas y fuertes, sobre todo esta Wedding Glue que desarrolló una estructura grande y fuerte.
Espero todo siga así de bien y estas bellas damas se expresen a su antojo!
Buenos Humos!

Likes
30
Share


@CanadianFillmore
Follow
Howdy growfessors! Another week has come and gone with the outdoors grow. The ladies took a bit of a beating from the tail end of tropical storm Ida. Going to build a partial greenhouse roof to help keep the rain off them, which will hopefully lower the chances for mould.

Likes
2
Share


@ValleoGrow
Follow
Just maintaining the tent, and she is doing so well, think she is gonna be my highest yielding auto to date, looking beautyy

Likes
24
Share


@MadeInGermany
Follow
Hey everyone 😃.
Today it continues with the
Flowering day 49
Today the tent was cleaned, the humidifier refilled, and the health of the plant checked.
Flowering day 50
Today she was watered with 1.2 l (see fertilizer table), and checked for her health.
Flowering day 51
Today fresh oamose water was poured into the tanks and the plant was sprayed.
Flowering day 52
Today was a pure control day where all the technology was checked.
Flowering day 53
Today the room was cleaned, the tent cleaned and the humidifier filled.
For this purpose it was poured with 1 liter today.
Flowering day 54
Today was again a pure control day :-).
Flowering day 55
Once again the plant was checked for health and sprayed.
The tent was also cleaned.
I wish you all a lot of fun with the update, stay healthy 🙏🏻 and let it grow 🍀
You can buy this Strain at
https://www.amsterdamgenetics.com/product/kosher-tangie-kush/
You can buy this Nutrients at
https://greenbuzzliquids.com/
Type:
Kosher Tangie Kush
☝️🏼
Genetics:
Kosher Kush
X
Tangie
👍
Vega lamp:
2 x Todogrow Led
Quantum Board 100 W
💡
Bloom Lamp :
2 x Todogrow Led
Cxb 3590 COB 3500 K 205W
💡💡☝️🏼
Soil :
Canna Coco Professional +
☝️🏼
Fertilizer:
Green Buzz Liquids :
Organic Grow Liquid
Organic Bloom Liquid
Organic more PK
More Roots
Fast Buds
Humic Acid Plus
Growzyme Big Fruits
Clean Fruits
Cal / Mag
Organic Ph - Pulver
☝️🏼🌱
Water:
Osmosis water mixed with normal water (24 hours stale that the chlorine evaporates) to 0.2 - 0.4 EC. Add Cal / Mag 2 ml per l water every 2 waterings . Ph with Organic Ph - Pulver to 5.8 .

Likes
176
Share


@DevilsBud
Follow
Week 6 of flowering cookies Gelato by RQS
Hallo again brother and sister Growmies and homies . I will be making the diaries somewhat individual per strain. They're in same tent but not same strain lol . In the beginning didn't know what i was doing 🤣🤣 and had both diaries the same but from now on I will treat them as different plants/diaries 💪🏻 so this will be same as the other diary because there's nothing to talk about yet lol
Fresh new week ahead . I am excited let's do this 🤘🏻🤘🏻
Day 35 Cookies Gelato
New start of the week.
The Cookies Gelato looking mean, green and sticky as hell . Getting my better microscope in tomorrow so i can check on the progress. I had a small microscope but you have to ram that one into your eyes to see through it lol . This morning i gave them 1L water with the full range of awesome advanced Nutrients. I am very happy with these nutrients! They are perfect for me!
Come look at my other diaries! I appreciate it a lot 🤘🏻
I am running this fully marshydro
Marshydro GT 100X100X180cm tent and
Marshydro TS-1000 LED lamp
Day 36 Flowering Cookies Gelato
Cookies have good time next to the Critical's i am very excited to try this one. They don't sell in shops here but if they do, you pay 40 euro per gram and i ain't that dumb lol.
Gave the plants 1.25L 🌊 pH 6.6 and that's it I let them do their thing. Also trying out my new microscope it's definitely a learning curve to focus in with not steady hand lol . Sorry for the first blurry pics 🙈
Come look at my other diaries! I appreciate it a lot 🤘🏻
Come visit www.marshydro.eu
for your best gear and use the PROMO CODE: DEVILSBUD
And you will get a nice discount.
Day 37 Flowering Cookies Gelato
Got some leaves away that were droopy . Nothing special, made new video today so take look if you want 🤘🏻.
Come look at my other diaries! I appreciate it a lot 🤘🏻
Day 38 Flowering Cookies Gelato
The Cookies Gelato
Frosty Town in cookies gelato ally
3 big main ones going on with cookies Gelato#2 this one was topped and the cookies Gelato #1 i think was fimming and has 2 main ones and nicely grow below . Same issue with critical tho low bud structure . its definitely Going to be better to cut the top when they're done and let the lower grow continue for a week or so . Today i Gave the cookies gelato water with advanced Nutrients with pH 6.5 ppm the same as critical i forgot right now what it was lol
Day 39 Flowering Cookies Gelato
Moved the big branches more to the light and tied them to the ScrOG netting definitely more light created now 🤘🏻🤘🏻
Come look at my other diaries! I appreciate it a lot 🤘🏻
Come visit www.marshydro.eu
for your best gear and use the PROMO CODE: DEVILSBUD
And you will get a nice discount.
Day 40 Flowering Cookies Gelato
Been bizzy trying to get cookies gelato under the microscope is quite a task . The best way for me is to cut 😱😱😱 something off and lay it down. it works but still need to fine tune it a little better but amazing what you can see up close 👀 some leafes had a lot of ambers on it but the buds (not photography) are still clear so it has some way to go still.
Day 41 end of week 6 of Flowering
Week 6 is over Growmies what a wonderful week!!! Getting the microscope under control and starting to see the milkyway . But still a lot of clear trichomes so i will wait with flush this week . I think next week i can start the flush of cookies gelato 🤘🏻
I appreciate all the comments, likes, views and tips you guys are an awesome community 👍🏻👍🏻 .
Have great time growing and see you in the other week
guys and girls Growmies and homies
Come look at my other diaries! I appreciate it a lot 🤘🏻
Likes
62
Share


@BrediniGreeny
Follow
4/18/25
They started a new week now so to say🙂.
They are all looking wonderful, between 11 and 12 cm tall. 😍🍅🍅💚
Grow babbbbiieess😍🍅💚
4/21/25
So I transplanted them today in a soil mix with 70% tomatoes soil (store bought) and 30% old soil with perlite. Also on top of the soil i put some volcanic stone.
They got their spot on the balcony now and my "little balcony garden" concept is starting to take shape. Almost done but all the plants must now just grow😊🌱💚
They got watered with plain water PHed down to about PH 6.🍅🍅❤️💚🌱
4/23/25
They are all super happy and bathing in the sun. They look strong, lush and growing. My balcony garden concept is coming slowly true. 😁😍
Grow babieees growwwwwww💚🍅😍😍
Processing
Likes
113
Share


@Skunky
Follow
Update from last week that I forgot: I gave her a final feed at 75%...
WEEK 25 DAY 1 ... omg... 😂😂😂
It really took me half a year to finish this one... unbelievable... 😅
Well, so far I'm still super happy. Everything seems to go just fine but I'll never do this again..haha.. (vegging under a 50W bulb xD)...
Soooo... looking at the trichs, I think the harvest window has just opened. There's still a lot of clear but the cloudy ones are starting to come and there's already a little amber on the leaves. I suppose I'm really close to harvest now. I'll be flushing her next time for sure.
First, I'll feed her a low nutrient solution, maybe around 25% and half of the usual water quantity because I'm not that sure about when she really finishes so she dries out more quickly. Next, I'll use Grotek Final Flush right before I'll chop her down. I don't want to use this right away because last time my plants were dying a bit too fast so.. not to be repeated ;)
Getting impatient now. Hopefully it will be a White Christmas...haha!
DAY 2
Gave her one last feed at 25%. Poured only half of the usual water quantity. Left the BloomComplex totally aside because she seems like she's doing a little 'clawing'. Maybe there's too much Nitrogene? Trichs are beginning to get cloudy, with a little amber in between.
I'll flush her with plain ph'd water tomorrow probably or should I wait some more days? What do you think? I'm never sure when the time is right... :/
DAY 3
I just took some more pictures with a macro lens attached to my iPhone. Seems like the buds in the middle do have way more amber than the other ones around which have swollen more compared to the ones in the middle but have less amber. The last days, I didn't check the ones in the middle so I changed my mind. I just flushed her with Grotek Final Flush. I'll wait for some hours for the solution to break down the salts and then I'll flush again to get rid of the flushing solution.
I'm also gonna switch the timetable to 8/16. (16 hours of dark) and I'll drop the temperatures some 2 more degrees.


Processing
Likes
5
Share


@Rushif90
Follow
Buds plumping up now the tallest of the 3 strains I’m running now but it’s also the least in diameter and canopy density but it’s good for the density it has I still have to defoliate but no where near as often as say the Alaskan purple witch I have to pull 5 to 8 leaves a day and no matter how many you pull the center of the plants like a jungle.
Likes
Comments
Share


@Organic473
Follow
White Label Seed Company I hope this OG Kush makes it by the end of the week...I've been trying with some purple haze all 3 failed. This is 1 of 3 in the OG Kush I would love to see more leaf development for energy. Not a good start with her premature leaf structure.

Likes
10
Share


@Fibro_Witch
Follow
Gave the photos a haircut today. Removed some fan leaves and lower branches that wouldn't amount to much. Gave the branches to my horse because he loves them! Tried enticing the ducks with fan leaves but they weren't having any of it. They prefer lettuce, not "The Devil's Lettuce"😂
I added in a little 5-1-1 fish fertilizer to my feeding regimen as well. Still picking off inchworms.
And as you can see I made it to the hardware store and put up this baby almost completely by myself. I only asked my husband to hold the center roof panel support while I screwed it in. Couldn't have been better timing since hurricane Dorian came through yesterday and we had plenty of rain. Of course it didn't fully protect them but the majority of the rain hit the roof. And then it got down to 49 F last night. It's really Fall now!
This girl is frosty and she ain't near done, those pistils are like a white walker! So looking forward to this finish, because it's gonna be better than last year for sure!
Likes
30
Share


@TightNugs
Follow
Budding like crazy under the new light,getting frosty.
Plant 2 now catching up a bit,no purps though 😡 dropped temps.
Around 20 days since first pistils
No issues 🤞🏴🍁
🍁🍁🍁🍁
Breeder-White label purple bud auto
🍁🍁🍁🍁
Light-Voost VST 240(discount code TightNugs) https://voost.com/
Likes
5
Share


@eldruida_lamota
Follow
Que pasa familia, vamos con la segunda semana de floración de estas GG4 Sherbet Fast Flowering, de FastBuds.
Agradezco a Agrobeta todos los kits obtenidos de ellos 🙏.
Ya veis que llevan buen ritmo ya tiene un color espectacular.
Vamos al lío, El ph se controla en 6.2 , la temperatura la tenemos entre 21/24 grados y la humedad ronda el 50%, 7 litros de sustrato. Iremos viendo cómo avanzan.
Agrobeta:
https://www.agrobeta.com/agrobetatiendaonline/36-abonos-canamo
Hasta aquí todo, Buenos humos 💨💨💨