Likes
Comments
Share
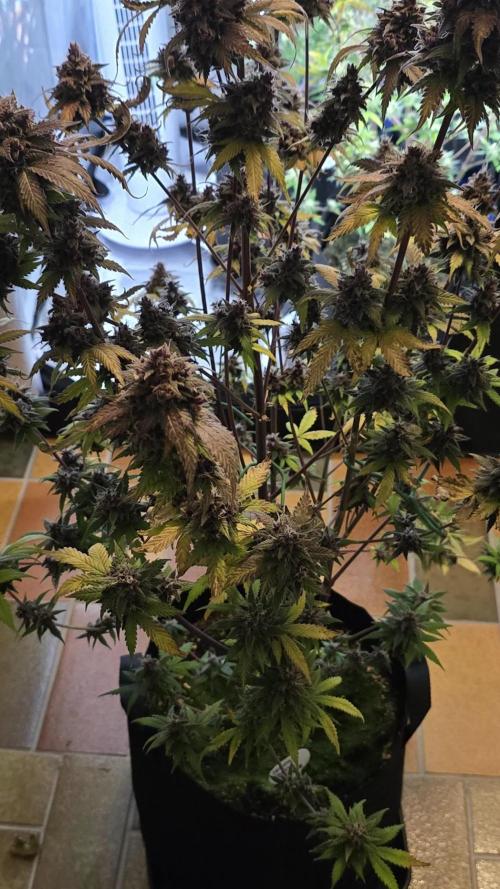
Bonjour à tous les padawans et maîtres jedis Jour84 arrosage avec 2 litres d'eau ph6.3 Jour86 arrosage avec 2. 5litres d'eau ph6.3 Jour89 arrosage avec 2 litres d'eau ph6.3 LE MEILLEUR MOMENT POUR RINCER SON CANNABIS Le rinçage commence en général deux semaines avant la récolte. Si le plant a une période de floraison de huit semaines, le rinçage doit commencer six semaines après le début de la période de floraison. Il est préférable de regarder de près les trichomes sur le plant pour déterminer quand votre cannabis est prêt à être récolter. Si les petits trichomes commencent juste à passer d’une couleur transparente à une teinte laiteuse et blanche, c’est une bonne indication que les plants peuvent commencer à être rincés. Il faut s’arranger pour que la majorité des trichomes aient changé vers la couleur désirée pour la récolte après deux semaines – ça devient plus facile à faire avec l’expérience, alors accrochez-vous ! Le rinçage peut également être un bon moyen de remettre à zéro la terre quand un plant est toujours en phase de croissance végétative. Parfois, un cultivateur suralimente par accident son cannabis, ce qui provoque un changement de couleur et un flétrissement du bout des feuilles. Ceci est appelé une « brûlure par nutriments ». Rincer la terre peut éliminer les nutriments excédentaires, ce qui aide à résoudre le problème. Cependant, c’est une mesure drastique à ce stade de la culture, alors assurez-vous que le problème soit bien une brûlure par nutriments et non quelque chose d’autre. Le rinçage ne concerne pas que le moment de la récolte. Cette technique peut aussi être mise en place durant la phase de croissance afin de débarrasser le sol des nutriments. Bien évidemment, les nutriments permettent à votre plante de rester en bonne santé et vous assurent des rendements maximaux, mais une trop grande quantité peut causer une accumulation et un état statique durant lequel la plante ne peut plus y accéder. Le blocage des nutriments peut être causé par une accumulation saline ou des niveaux de pH incorrects. Ces deux causes peuvent être résolues par un rinçage de votre plante à l’eau claire. Les fluides viendront pousser les nutriments en dehors du substrat et le débarrasseront de l’accumulation, permettant ainsi aux racines de pouvoir accéder à nouveau aux nutriments. EMPÊCHER LE BLOCAGE D'ABSORPTION DES NUTRIMENTS AVANT QU’IL NE POSE PROBLÈME Au mieux, le blocage des nutriments peut être un problème, au pire, il peut être un vrai désastre. Comme le dit l’adage, il vaut mieux prévenir que guérir. Il vaut mieux prendre de l’avant pour empêcher le blocage des nutriments plutôt que de s’y atteler lorsque c’est trop tard. Empêcher le blocage des nutriments peut se faire par le biais d’un rinçage de routine. En rinçant vos plantes une fois avant la floraison et une fois au milieu de cette dernière, vous minimiserez l’accumulation de nutriments. LES ENZYMES À LA RESCOUSSE Après le rinçage pour contrer l’accumulation ou le blocage des nutriments, vous remarquerez peut-être que vos plantes ont une apparence vert foncé, c’est le signe d’un excès de nutriments. Dans ce cas, certains cultivateurs choisissent d’ajouter une formule riche en enzymes à leur substrat. Au cas où vous auriez oublié vos cours de biologie, les enzymes sont des protéines qui catalysent les réactions. Elles aident à rincer le substrat en décomposant l’amidon, les glucides et les nutriments. Il existe sur le marché toute une variété de produits qui contiennent des formules d’enzymes très efficaces. Si l’eau ne suffit pas à vos plantes, ces petites protéines ne feront qu’une bouchée de l’accumulation de nutriments ! COMMENT BIEN RINCER SON CANNABIS Rincer votre plant de cannabis est un processus simple. À chaque fois que vous apporteriez normalement des nutriments, vous rincez à la place. De l’eau du robinet non traitée est tout ce dont vous avez besoin pour rincer, assurez-vous juste que son pH est sans danger pour le cannabis. La plupart de l’eau de puits a un pH sain et ne nécessite pas de traitement, mais s’il est nécessaire de traiter l’eau de rinçage pour avoir un pH adapté, faites-le. Les ajustements du pH seront donc la seule chose à considérer. Inonder la terre avec autant d’eau fraîche qu’elle puisse contenir. Laissez l’eau durant quelques minutes pour qu’elle puisse absorber les nutriments, puis inondez la terre encore pour rincer les nutriments loin du plant. Si vous cultivez en intérieur dans des pots, notez la couleur de l’eau qui s’échappe du fond des pots. Elle sera tâchée et aura une couleur sale. C’est à cette étape qu’un appareil de mesure des TDS (Total des Solides Dissous) est utile. Si vous récupérez et mesurez le TDS de l’eau « évacuée », elle devrait avoir un taux de 1300ppm, ce qui est assez élevé. Il est important de rincer le plant jusqu’à ce que total baisse à un niveau de 50ppm, ou du moins qu’il s’approche du TDS de l’eau fraîche que vous utilisez pour rincer le plant. La couleur de l’eau d’évacuation va s’éclaircir et apparaîtra plus propre. Vous devez tirer autant que possible de minéraux dissous du plant. Comment et Quand Rincer les Plants de Cannabis Rincer les plants de cannabis avant la récolte peut faire la différence entre les meilleurs têtes ou la plus rude pour la gorge. Cette petite tâche est simple et facile à faire. Ajoutez juste de l’eau ! Attention car le moment du rinçage joue un rôle critique. Le b.a.-ba du rinçage de ses plants de cannabis. Sommaire: 1. Qu’est-ce que le rinçage ? 2. Le meilleur moment pour rincer son cannabis 3. Empêcher le blocage d'absorption des nutriments avant qu’il ne pose problème 4. Les enzymes à la rescousse 5. Comment bien rincer son cannabis 6. Comment rincer ses plantes en hydroponie 7. Les résultats du rinçage de son cannabis 8. Quand éviter de rincer son cannabis Vous avez enfin fini vos cultures et vous vous retrouvez avec un magnifique plant couvert de super têtes, maintenant sèches, vous avez fait le curing et vous êtes prêt à fumer – et pourtant quelque chose ne va pas. La weed semble ne pas vouloir se consumer et quand vous tirez une bouffée, c’est comme si on vous avait donné un coup de poing dans les poumons et vous toussez en craignant pour votre vie ! Le goût est rude et décevant. Si c’est une situation que vous avez vécue, il y a des chances pour que vos plants n’aient pas été rincés correctement avant la récolte. Cette fumée bien loin d’être agréable est provoquée par la présence dans le plant des nutriments et minéraux utilisés lors de la culture, ce qui altère la façon dont le plant se consume. Rincer le plant élimine ces nutriments restants, ce qui améliore la qualité des sensations. Heureusement, le rinçage des plants de cannabis se fait facilement et sans effort, et cela vous permet de produire des têtes douces et délicieuses en un rien de temps. ARTICLE LIÉ Comment Utiliser les Nutriments pour Cannabis QU’EST-CE QUE LE RINÇAGE ? L’acte de rincer un plant implique d’utiliser de l’eau pour éliminer tout nutriment présent dans la terre. Une grande quantité d’eau est passée à travers la terre et drainée sur une base régulière. Tous les minéraux et nutriments présents dans la terre sont rincés avec le temps avec l’eau, ce qui laisse une terre propre. Mais pourquoi vouloir éliminer tous les minéraux de la terre ? N’est-ce pas mauvais pour la récolte ? En fait, cela aide à la récolte de manière significative. Quand les nutriments sont éliminés de la terre, ceci force le plant de cannabis à utiliser tous les nutriments toujours présents dans le plant. C’est comme pour le corps humain. Quand on consomme beaucoup d’aliments, ce que nous n’utilisons pas est transformé en graisses. Dans les situations extrêmes où la nourriture est rare, le corps s’appuie sur cette graisse stockée pour tirer de l’énergie. Comme rincer force le cannabis à utiliser tous les nutriments restants dans le plant, aucun ne devrait rester et altérer les têtes récoltées. Cependant, si vous le faites trop tôt, cela peut nuire à la santé du plant, le moment est donc clé. LE MEILLEUR MOMENT POUR RINCER SON CANNABIS Le rinçage commence en général deux semaines avant la récolte. Si le plant a une période de floraison de huit semaines, le rinçage doit commencer six semaines après le début de la période de floraison. Il est préférable de regarder de près les trichomes sur le plant pour déterminer quand votre cannabis est prêt à être récolter. Si les petits trichomes commencent juste à passer d’une couleur transparente à une teinte laiteuse et blanche, c’est une bonne indication que les plants peuvent commencer à être rincés. Il faut s’arranger pour que la majorité des trichomes aient changé vers la couleur désirée pour la récolte après deux semaines – ça devient plus facile à faire avec l’expérience, alors accrochez-vous ! Le rinçage peut également être un bon moyen de remettre à zéro la terre quand un plant est toujours en phase de croissance végétative. Parfois, un cultivateur suralimente par accident son cannabis, ce qui provoque un changement de couleur et un flétrissement du bout des feuilles. Ceci est appelé une « brûlure par nutriments ». Rincer la terre peut éliminer les nutriments excédentaires, ce qui aide à résoudre le problème. Cependant, c’est une mesure drastique à ce stade de la culture, alors assurez-vous que le problème soit bien une brûlure par nutriments et non quelque chose d’autre. Flushing Le rinçage ne concerne pas que le moment de la récolte. Cette technique peut aussi être mise en place durant la phase de croissance afin de débarrasser le sol des nutriments. Bien évidemment, les nutriments permettent à votre plante de rester en bonne santé et vous assurent des rendements maximaux, mais une trop grande quantité peut causer une accumulation et un état statique durant lequel la plante ne peut plus y accéder. Le blocage des nutriments peut être causé par une accumulation saline ou des niveaux de pH incorrects. Ces deux causes peuvent être résolues par un rinçage de votre plante à l’eau claire. Les fluides viendront pousser les nutriments en dehors du substrat et le débarrasseront de l’accumulation, permettant ainsi aux racines de pouvoir accéder à nouveau aux nutriments. EMPÊCHER LE BLOCAGE D'ABSORPTION DES NUTRIMENTS AVANT QU’IL NE POSE PROBLÈME Au mieux, le blocage des nutriments peut être un problème, au pire, il peut être un vrai désastre. Comme le dit l’adage, il vaut mieux prévenir que guérir. Il vaut mieux prendre de l’avant pour empêcher le blocage des nutriments plutôt que de s’y atteler lorsque c’est trop tard. Empêcher le blocage des nutriments peut se faire par le biais d’un rinçage de routine. En rinçant vos plantes une fois avant la floraison et une fois au milieu de cette dernière, vous minimiserez l’accumulation de nutriments. LES ENZYMES À LA RESCOUSSE Après le rinçage pour contrer l’accumulation ou le blocage des nutriments, vous remarquerez peut-être que vos plantes ont une apparence vert foncé, c’est le signe d’un excès de nutriments. Dans ce cas, certains cultivateurs choisissent d’ajouter une formule riche en enzymes à leur substrat. Au cas où vous auriez oublié vos cours de biologie, les enzymes sont des protéines qui catalysent les réactions. Elles aident à rincer le substrat en décomposant l’amidon, les glucides et les nutriments. Il existe sur le marché toute une variété de produits qui contiennent des formules d’enzymes très efficaces. Si l’eau ne suffit pas à vos plantes, ces petites protéines ne feront qu’une bouchée de l’accumulation de nutriments ! Comment et Quand Rincer les Plants de Cannabis COMMENT BIEN RINCER SON CANNABIS Rincer votre plant de cannabis est un processus simple. À chaque fois que vous apporteriez normalement des nutriments, vous rincez à la place. De l’eau du robinet non traitée est tout ce dont vous avez besoin pour rincer, assurez-vous juste que son pH est sans danger pour le cannabis. La plupart de l’eau de puits a un pH sain et ne nécessite pas de traitement, mais s’il est nécessaire de traiter l’eau de rinçage pour avoir un pH adapté, faites-le. Les ajustements du pH seront donc la seule chose à considérer. Inonder la terre avec autant d’eau fraîche qu’elle puisse contenir. Laissez l’eau durant quelques minutes pour qu’elle puisse absorber les nutriments, puis inondez la terre encore pour rincer les nutriments loin du plant. Si vous cultivez en intérieur dans des pots, notez la couleur de l’eau qui s’échappe du fond des pots. Elle sera tâchée et aura une couleur sale. C’est à cette étape qu’un appareil de mesure des TDS (Total des Solides Dissous) est utile. Si vous récupérez et mesurez le TDS de l’eau « évacuée », elle devrait avoir un taux de 1300ppm, ce qui est assez élevé. Il est important de rincer le plant jusqu’à ce que total baisse à un niveau de 50ppm, ou du moins qu’il s’approche du TDS de l’eau fraîche que vous utilisez pour rincer le plant. La couleur de l’eau d’évacuation va s’éclaircir et apparaîtra plus propre. Vous devez tirer autant que possible de minéraux dissous du plant. COMMENT RINCER SES PLANTES EN HYDROPONIE Le rinçage des plantes en hydroponie est bien plus simple que de se débarrasser des nutriments en terre. Les cultivateurs en hydroponie pourront simplement drainer leur système et le remplacer par une eau au pH neutre. Le rinçage des plantes en hydroponie est aussi un processus bien plus court. Une fois que la réserve d’eau aura été modifiée, les plantes en hydro n’auront pas accès aux nutriments externes. Pour cette raison, un rinçage de deux jours suffira. LES RÉSULTATS DU RINÇAGE DE SON CANNABIS Après la récolte des têtes, prenez du temps pour bien faire le curing pour atteindre le potentiel le plus élevé. Un affinage correct par curing permet de réduire encore plus le côté rude des têtes, en éliminant des choses comme un excès de chlorophylle. Vous serez étonné de voir la différence que ce petite effort peut avoir sur votre produit. Tout votre travail se sentira dans la première bouffée de cette weed douce comme de la soie, qui caresse la gorge comme du miel. Le plus doux de la nature. Vous pouvez donc améliorer la qualité de votre cannabis en ajoutant juste de l’eau ! QUAND ÉVITER DE RINCER SES PLANTES Le seul moment où nous recommandons d’éviter le rinçage de son cannabis est lorsque l’on travaille avec une terre biologique amendée ou un super soil. Ces substrats ont été développés avec précaution afin d’héberger des micro-organismes bienfaisants tels que des bactéries ou des champignons. Cette délicate biodiversité pourrait être éliminée et endommagée par le rinçage. Une fois de plus, l’absence de rinçage ne devrait pas poser de soucis, car aucun nutriment externe ou synthétique n’aura été ajouté au substrat. À la place, les plantes comptent sur les micro-organismes pour décomposer la matière organique et la livrer aux racines. May the force be with you 💪
Likes
23
Share
MATARO BLUE by KANNABIA Week #18 overall Week #4 Flower She's doing great this week looking good and her buds are starting to dense up she's getting nice trichome coverage as well. Stay Growing!! Kannabia.com MATARO BLUE
Likes
34
Share
@Canna96
Follow
This is my second run of Dutch Passion with my first being a monster Blueberry Auto. Massive plant, and her pungent odor overtook my entire home while trimming her today. While trimming her it smelled like I was in an earthy Pine Forest with a hint of berries, and it was one of the strongest smelling plants I've ever run. Very easy to grow, responded to all training methods with VIGOROUS growth. I topped her above the 7th node and removed the bottom one so I had 12 mains total. It took me almost 8 hours and I even had help for 4 hours.. Trimming is definitely my least favorite part of cultivating this species. I am super impressed with this strain and really everything Dutch Passion. They have not even sent me a single seed or even acknowledged me on here but this is my second run of their autos and I anticipate each will be a massive yielder. I will probably take a month off then start a run of a few photoperiod mainlines. I will be back with a final smoke report after she's cured, Stay Safe and Blaze On!!! 💪 Website: https://medicgrow.com/ https://growdiaries.com/grower/medicgrowled
Likes
16
Share
@Tezza2
Follow
The gorilla glue auto is taking up most of the room in the tent if i didnt have the big purple lemonade auto in there the gorilla glue would take up most of the tent its flowering hard it has alot of tops and lots of bud sites and the purple lemonade auto is flowering nicely i believe it is coming into the fourth week of flower for the purple lemonade auto i had a small sample of the purple lemonade when i trimmed up the bottom half of the plant all the small buds that came off i dried out i smoked the buds and man O man it smashed me hard i had one joint and it made me pass out i cant wait for it to be ready for harvest
Likes
12
Share
@Kirsten
Follow
26.12.24: I have noticed light stress on my plants. I had moved the lights further away and increased the light intensity to 70%. Unfortunately that created some issues. Namely severe palour of the leaves. To try and rectify the situation, I've dimmed the lights to about 30%, staying at the same distance, about 30 inches away. I measured the par levels, after I did this. They should a reading of anywhere between 40 and 150, at the canopy of the plants. They are all different sizes. This seems to have improved the colouring on all plants. After this evenings watering, I will monitor recovery and increase lighting intensity again slowly. I am also using the light cycle of 21/3, so the plants have many hours more light to absorb, than for example 12/12 or 18/6. 29.12.24: So I finally gave LST a shot, it's probably a bit too late, however I really want to get the most of the triploid pheno, and I went a little crazy and LST'd all plants except 2, as they're too small. I did that late last night, this afternoon I was amazed to see the plants turn their leaves back to the light source. I'm glad I overcame my fear of trying it. I'm very excited to see them adapt and progress! 😁 there are videos above with before and after of my LST process. I am pleased with the progress, considering all of my mistakes! Thanks for checking out my diary 🍃 ✌️
Likes
11
Share
In her last days. Flushing her and letting her ripen up. The main cola is bigger than my fist, but the lowers are all popcorn. Super stinky and resinous. Unlike any plant I've grown. Stinks up my whole house when i leave the grow room door open.
Likes
9
Share
@Le_Druide
Follow
nouvelles recette d'un amis qui a l'habitude d'utiliser metrop la mienne était tro riche en aditive je suis ces consseil.sa ce passe plutôt bien pour info metrop colosal cest 3 grame pour 100l d'abord incorporé dans un verre d'eau tiede avant incorporation tank. mon ec ne monte plus et mon ph ne fait plus le yoyo. aucun signe d’hermaphrodite contrairement à mon ancien run avec des graine de blueberry cup cake H.S.C j'ai eu 5 herma sur 9
Likes
10
Share
Endspurt!! TICHOME CHECK! Laut der Sorte sollten die Pflanzen nach etwa 60 Tagen mit der Blütephase durch sein – bei mir wäre dieser Zeitpunkt inzwischen erreicht. Ich habe mir allerdings die Trichome genauer angeschaut und würde den Pflanzen noch ungefähr eine Woche geben, da bisher noch nicht viele bernsteinfarbene Trichome zu sehen sind. Ansonsten gieße ich aktuell alle zwei Tage etwa 2 Liter Wasser. Mehr mache ich im Moment eigentlich nicht. 😊 Aktuelle Werte: VPD: 1.4 Humidity: 50% Temp: 33°C DLI: 50 1055 PAR
Likes
Comments
Share
3 days ago I watered the plant but didn't realise the bottom of the pot was still quite damp. This resulted in me overwatering it. I only realised when the plant dropped all its leaves and looked like it was dying... I was so panicked I forgot to take a picture! I fixed the issue by having my small USB fan on the plant and soil for 2 days straight and it seems to have worked. The plant has shot up and also the leaves have picked up alot. The only issue is there was some slight colour loss from the edge of the leaves which is I think because of too much water.. I'm hoping when I next water and feed this could correct itself
Likes
1
Share
D 22+ 2g Mykorrhiza D 23 Ich hab mich dazu entschieden beide pflanzen umzutopfen Airpot 4L= 5L Stoff topf + 3g Mykorrhiza, Biobizz Root Juice und Green power 5 in 1 Dünger total 400ppm Die Erde würde am tag 18 in Wasser getaucht und erst am tag 23 gab es wieder Wasser. D23 verwendete Lampe Mars Hydro 150w Die Quick One hat Bären krallen und weniger Wurzeln gebildet, die erde war in der ersten Woche zu trocken.
Likes
8
Share
@trustno1
Follow
Hi 👋 Blüte Tag 20 Die Lady Broccoli ist gut in die Breite gegangen. Morgen werden noch ein paar Mini Triebe entfernt, und die Haupttriebe geknickt. bis zur nächsten Woche Gruß M.
Likes
48
Share
@xbrico
Follow
D50/FD22 - Right, water change day (Evening). Right and proper f**ked off with the light doing me over (See D49/FD21 Comment for that epic story!!!). Where stretch had stopped (I thought), plants are back in the lights AGAIN!!! Blaming the light giving a near 24hour session and some other broken sessions of light over the last 48 hours!!! So had to pull out the extraction as getting LED burn on leaves that are touching! Blowing through the Carbon Filter and can't really smell anything so that's not bad. Everything a wee bit noisier with the fan not being muffled in the tent but need the space and got around a foot. Not prefiltering the fan as I have the new Cloudline to go in for next grow. Hopefully they grow no more and its all thickening buds from here so as I have space for the UVB in there in a week or 2! Slight change in feed. Dropped the roots booster as Wilma can't take any more...its full!!! Dunno how I am still getting 50L of water in there!!! Added PK9/18 (At half strength). Should probs drop the calmag (Or Kind Base down a bit) to drop nitrogen but am still seeing some copper spots here and there that looks like wee calcium deficiencies (Not much, but its there) - I do have some BioBizz CalMag (Which is Nitrogen Free) but it leaves the tank stinking with precipitate and dirties the roots. Think this is the 1st grow I have had where all the stems staying green so plants generally healthy. Cherry Pie still not budding up as quickly or as thickly as the Red hot Cookies but looks like its maybe running only a couple of days behind in growth so no biggie. Few weeks left for it to catch up and surprise me at the end! 😁 Now just to make sure I see no signs of re-veg...as per the D49/FD21 comment, I'll be scowling at GeekLight this week. Digital Timer in there now to ensure no bleed through - power gets hard cut like old times. Unfortunately though, when the light comes on via power-on (and not app timer mode), UV & IR comes on too so have a timer set to stop it after 1 min (Its about all the app being used for now!!! Apart from turning on my IV at midnight for 4 hours - which is, I have just seen, still working). Think that's all the s**te I have to talk for now! Happy Growing all!!! 💪
Processing
Likes
8
Share
@leliantu
Follow
60 días desde la germinación. 10 días de floración. Se aplico defoliación a comienzos de semana, se retiraron todas las hojas grandes salvo las mas bajas. Esta semana se comienzan a formar las flores en la copa y brazos laterales por lo que se empiezan a aplicar los abonos de floración. La Orange 1 sigue recuperándose de la quebradura del tallo central, como consecuencia de esa herida comenzaron a crecer con fuerza los brazos laterales lo que es bueno pero creo que el stress producido va a afectar en demasía a la producción final. Orange 2 sigue creciendo de forma vigorosa al igual que la Northern 1, la Northern 2 crece lente pero se ve sana. Si bien se realiza un riego con abono y luego 2 riegos con enzimas se siguen presentando signos de sobre-fertilización en las puntas de las hojas. Se agregan 40 gramos de SuperGuano por planta.
Likes
Comments
Share
@MrIssa3x3
Follow
Day 22 Def the most stretched girls I’ve grown to date. Still no real complaints. Watering between every and every other day. Good bud sites. Lights on a 7 maybe 14 in a way at strongest.
Likes
7
Share
She just has massive leaves shading stuff out so had to massive prune I didn't want to train her cuz I'm training every other auto out I wana see what does better trained or non trained I've been using bud clips from bud trainer to do training it's been awesome I haven't used them on this cultivar jus some garden wire tune in to the podcast on youtube @sundaesesh
Likes
39
Share
Excelente experiencia, volvería a cultivarla nuevamente.
Likes
4
Share
@Ensign420
Follow
|»» LOG DISCLAIMER: Not intended as a grow guide. Grow log entries are usually posted 3 weeks later and are for my learning reference. ««| Introduction - Week 13 Summary - Ensign's log, stardate 17529.7, Ooo yea! Summer is definitely here! Been a hot and humid week! But wow growth has been thriving and vibing in the garden! Feels like the tropics in the lung room, but the higher humidity seems to be perfect for vegging plants! By the end of the week, the canopy is almost full, so decided to flip to flower in 7 days! To prep for flower, slightly increased the VPD levels which are also helping to lower the humidity down a bit. Defoliated both ladies and been tucking and training the top growth. To preserve these genetics, started the cloning process and took cuttings. By the end of the week, the cuttings were transplanted into Coco Coins for rooting! Topped and defoliated all mother plants in the veg tent which lowered the canopy by a good 5-6 inches. But by the end of the week, the canopy is stretching upwards again and growth is looking beautiful! For this grow cycle, instead of a top dress, been researching about fungal dominant compost teas and plan to stew and brew up my first batch soon which will probably be in a week or so. Anyways, one more week until the big flip to flower! Let’s go! Onwards to next week Ensign! [START OF WEEK 13] ========================================================== ---------- [ 4x4 MAIN TENT ] ---------- Heady OG BX1 #1 [Round4 ~Wk6] - WEEK 13 - Full Veg TKO [Round2 ~Wk11] - WEEK 13 - Full Veg ----------- [ 3x3 VEG TENT ] ------------ Garlic Budder OG#1 - WEEK 05 - Full Veg Garlic Budder OG#2 - WEEK 05 - Full Veg Gorilla Goat #1 - WEEK 05 - Full Veg Gorilla Goat #2 - WEEK 05 - Full Veg 07/14/25 → 07/20/25 This Week's Estimated Goals ---------------------------------------------------------------------------------------------- DLI: ~19 mol/m²/d PPFD: ~300 μmol/m²/s VPD: ~1.0 kPa This Week's Meter Readings & Averages ---------------------------------------------------------------------------------------------- Light On/Off: 16:00 - 10:00 | Wattage: ~326.5W [LV04] Distance From Canopy: ~31”, 31” DLI: ~23.39 mol/m²/d PPFD: ~361 μmol/m²/s VPD: ~0.80 kPa Soil %: [49.6, 37.7, 49.4, 49.6, 42.0, 43.1, 43.0, 43.6] ========================================================== Day 01 - Monday - 07/14/25 - Total Days: 092 ----------------------------------- Daily Averages ~[+01:00] - Temps: 85.8°F [29.9°C] - Humidity: 81.9% - VPD: 0.77 kPa - Soil %: [49, 38, 49, 50, 41, 42, 43, 43] ----------------------------------- - [+00:07]: Night check on the 4x4 tent. --- Ca-Caw! Ahh yea! The garden is filling in nicely! --- Heady OG (BX1 #1) has pretty much filled in the front right corner already and is raging with new growth! --- TKO continuing to explode with growth! She has almost filled the back quadrants. Beautiful! At this rate, will probably be flipping to flower in a week or two. Getting hyped! - [+00:35]: Tucked and trained the top growth. --- Flattened and widened the canopy out a bit more. --- Going to need to work on TKO a bit more. Growth is really dense in the middle of the canopy. - [+00:37]: Checked the Ecowitt soil moisture sensor data: ------------------ [ 4x4 MAIN TENT ] --------------- ------ 48% - [CH01 FT » G30 - Heady OG BX1 #1] ------ 38% - [CH02 FB » G30 - Heady OG BX1 #1] ------ 50% - [CH03 BT » G20 - TKO] ------ 50% - [CH04 BB » G20 - TKO] ------------------ [ 3x3 VEG TENT ] ---------------- ------ 42% - [CH05 BL » GR7 - Garlic Budder OG#1] ------ 44% - [CH06 BR » GR7 - Garlic Budder OG#2] ------ 44% - [CH07 FL » GR7 - Gorilla Goat #1] ------ 42% - [CH08 FR » GR7 - Gorilla Goat #2] --------- Veg: 38% - 45% | Flower: 45% - 55% --------- General: 30% [Dry] «| 45 - 60% [Moist] |» 70% [Wet] - [+00:41]: Checked the 3x3 veg tent. --- Looking great in the mother tent! --- All growth is perky and wow the canopy is already getting close to the grow light. - [+00:47]: Super-cropped and bend the top growth. --- Lowered the canopy by a few inches. --- Pots are looking great and no signs of gnat infestation. - [+00:57]: Checked the humidifiers. --- Tanks are still full and no leaks found. Day 02 - Tuesday - 07/15/25 - Total Days: 093 ----------------------------------- Daily Averages ~[+01:00] - Temps: 84.6°F [29.2°C] - Humidity: 80.0% - VPD: 0.81 kPa - Soil %: [50, 38, 49, 50, 41, 42, 43, 44] ----------------------------------- - [15:55]: Been researching about organic growing and am looking into fungal-dominant compost tea brewing. --- Also got the 5-gallon bucket kit from TeaLabs (via BuildASoil) and am stoked to start stewing and brewing! --- Been learning about the soil food web and the information is absolutely fascinating. Shout out to Dr. Elaine Ingham! Her methodology and growing concepts are very similar to that of Masanobu Fukuoka and the concepts I’ve learned about regenerative farming has helped to improve my understanding about healthy soil and compost. --- These concepts are also applied to brewing good aerobic fungal-dominant compost teas. --- Plan to feed straight RO this week, but may try brewing my first batch of compost tea in a week or so. --- Anyways, - [16:23]: Evening check on the 4x4 tent. --- Looking beautiful my ladies! --- Wow Heady OG is healthy and more tops have growth through the scrog netting. Great! --- TKO is just out of control with top growth! - [18:46]: Tucked and trained the top growth under the scrog netting. --- Took my time and focused on TKO. Tucked the larger fan leaves and re-directed growth to fill in the back two quadrants a bit better. Tried to spread out the dense top growth in the middle. --- Heady OG also got tucked and widened out a bit. - [18:46]: Checked the Ecowitt soil moisture sensor data: ------------------ [ 4x4 MAIN TENT ] --------------- ------ 47% - [CH01 FT » G30 - Heady OG BX1 #1] ------ 38% - [CH02 FB » G30 - Heady OG BX1 #1] ------ 46% - [CH03 BT » G20 - TKO] ------ 50% - [CH04 BB » G20 - TKO] ------------------ [ 3x3 VEG TENT ] ---------------- ------ 40% - [CH05 BL » GR7 - Garlic Budder OG#1] ------ 43% - [CH06 BR » GR7 - Garlic Budder OG#2] ------ 48% - [CH07 FL » GR7 - Gorilla Goat #1] ------ 41% - [CH08 FR » GR7 - Gorilla Goat #2] --------- Veg: 38% - 45% | Flower: 45% - 55% --------- General: 30% [Dry] «| 45 - 60% [Moist] |» 70% [Wet] - [18:48]: Checked the 3x3 veg tent. --- All mothers are vegging and looking great! Growth is perky and green! Day 03 - Wednesday - 07/16/25 - Total Days: 094 ----------------------------------- Daily Averages ~[+01:00] - Temps: 85.7°F [29.8°C] - Humidity: 81.9% - VPD: 0.76 kPa - Soil %: [50, 38, 50, 50, 44, 48, 44, 44] ----------------------------------- - [+00:32]: Night check on the 4x4 tent. --- Looking great my ladies! --- Heady OG is filling in the netting and more tops are stretching beyond the netting! --- TKO is stretching upwards and looking beautiful! - [+01:07]: Tucked all top growth. --- Evened out the canopy and everything looks incredible! - [+01:10]: Checked the Ecowitt soil moisture sensor data: ------------------ [ 4x4 MAIN TENT ] --------------- ------ 45% - [CH01 FT » G30 - Heady OG BX1 #1] ------ 38% - [CH02 FB » G30 - Heady OG BX1 #1] ------ 47% - [CH03 BT » G20 - TKO] ------ 50% - [CH04 BB » G20 - TKO] ------------------ [ 3x3 VEG TENT ] ---------------- ------ 42% - [CH05 BL » GR7 - Garlic Budder OG#1] ------ 46% - [CH06 BR » GR7 - Garlic Budder OG#2] ------ 41% - [CH07 FL » GR7 - Gorilla Goat #1] ------ 42% - [CH08 FR » GR7 - Gorilla Goat #2] --------- Veg: 38% - 45% | Flower: 45% - 55% --------- General: 30% [Dry] «| 45 - 60% [Moist] |» 70% [Wet] - [+01:10]: Checked the 3x3 veg tent. --- All mothers are raging with growth! Probably could super-crop, but plan to top and defoliate tomorrow. --- Pots look good and no gnats! - [+01:14]: Checked the humidifiers. --- Tanks are still full and no leaks found. Day 04 - Thursday - 07/17/25 - Total Days: 095 ----------------------------------- Daily Averages ~[+01:00] - Temps: 85.5°F [29.7°C] - Humidity: 80.4% - VPD: 0.82 kPa - Soil %: [50, 38, 49, 50, 41, 42, 42, 43] ----------------------------------- - [17:00]: Evening check on the 4x4 tent. --- Wow looking beautiful my ganja gals! --- The garden is looking incredible! --- Heady OG is filling the canopy beautifully and growth is ramping up --- TKO has almost completely filled the netting and growth is healthy but really dense. --- Ca-Caw! Wow Heady OG’s under canopy is bushing out with growth! --- Okay! Time for a bit of clean up! Let’s go! - [17:04]: Using my hands and a pair of trimmers, --- Defoliated Heady OG’s lower growth. --- Also chopped and dropped the cover crop. --- Wow! Looking good girl! --- Could have lollipopped her more, but plan to defoliate again before flipping to flower (18/6 to 12/12). --- Decided to also start the cloning process. - [17:57]: Filled a measuring cup with 1.5 cups of RO water. ------ Added 1/8tsp of Horticultural Aloe --- Mixed the solution and poured it straight into a clean solo cup. - [17:59]: Time to take the cuttings! --- Using a pair of trimmers (AC Infinity), --- Gently cut a healthy clone cutting from each pheno. --- Trimmed and cleaned most of the nodes leaving the top node or two. --- Did not cut any leaf tips. --- Made sure the tip of the stalk had a slanted cut (about 45-degree). - [18:13]: Placed each cutting into the cup of aloe solution. --- Also made sure to tag each cutting with the name and number. - [18:15]: Placed the fresh cuttings into the tent. --- Have the cup raised off the floor and is placed on top of the 5-gallon mulch bucket. --- Going to let these cuttings soak for a day before refreshing with straight RO water. --- Let the two-day soak begin! - [19:37]: Tucked and trained the top growth under the scrog netting. --- Also started to defoliate the top growth. --- To increase air circulation, only removed the larger fan leaves. --- Also continued to spread the canopy out evenly with nodal growth. --- TKO is looking a lot better now! --- Heady OG is also spreading out quite nicely! --- Pretty have decide to veg for another week before flipping to flower. --- Getting hyped! - [19:37]: Checked the Ecowitt soil moisture sensor data: ------------------ [ 4x4 MAIN TENT ] --------------- ------ 48% - [CH01 FT » G30 - Heady OG BX1 #1] ------ 38% - [CH02 FB » G30 - Heady OG BX1 #1] ------ 54% - [CH03 BT » G20 - TKO] ------ 50% - [CH04 BB » G20 - TKO] ------------------ [ 3x3 VEG TENT ] ---------------- ------ 40% - [CH05 BL » GR7 - Garlic Budder OG#1] ------ 46% - [CH06 BR » GR7 - Garlic Budder OG#2] ------ 42% - [CH07 FL » GR7 - Gorilla Goat #1] ------ 41% - [CH08 FR » GR7 - Gorilla Goat #2] --------- Veg: 38% - 45% | Flower: 45% - 55% --------- General: 30% [Dry] «| 45 - 60% [Moist] |» 70% [Wet] - [19:41]: Checked the 3x3 veg tent. --- Ooo yea! Looking good in the mamma tent! --- Ladies are raging upwards and the canopy is bushing out! --- Decide to thin out the canopy and top the upper growth. - [17:45]: Using a pair of clean trimmers, --- Topped and removed a good 5-6inches of upper growth. --- Also defoliated some of the lower growth and removed a few of the larger fan leaves. - [20:32]: Looking great my girls! --- Mulched the trimmings. --- Could have taken clones too, but going to try to veg the current clones (Heady OG and TKO) in solo cups for a bit before up potting. --- Still hunting for mothers to keep and eventually breed. --- Anyways, --- Pots look great and gnat population is still under control. Nice! - [20:44]: Checked the humidifiers. --- Tanks are still full and no leaks found. --- Ooo yea! What a great day in the garden! --- Getting hyped for flower! Day 05 - Friday - 07/18/25 - Total Days: 096 ----------------------------------- Daily Averages ~[+01:00] - Temps: 86.4°F [30.2°C] - Humidity: 81.6% - VPD: 0.80 kPa - Soil %: [49, 38, 49, 49, 42, 43, 43, 44] ----------------------------------- - [21:59]: Night check on the 4x4 tent. --- Wow the garden is looking healthy and growth is green and perky! --- Ca-Caw! All I see is green! Heady OG is starting to ramp up with growth! The front quadrants of the canopy is almost full! --- TKO has bushed out again and growth is looking incredible! She’s more than ready to be flipped to flower, but going to continue to wait for Heady to fill in the front area. --- Clones are looking great too! Both are looking green and healthy! --- Alright! - [22:08]: Time to swap the aloe water out! --- Replaced the solo cup with a clean one filled with fresh RO water (1.5cups). --- Placed the cup back into the tent. --- Going to let this soak for another day before transplanting into a Coco Coin for rooting. - [22:53]: Tucked and trained the top growth under the netting. --- Canopy is flat and looking great! --- Surprisingly, the higher humidity levels have been helping with the heat. But going to start increasing VPD levels a bit closer to veg conditions. - [22:56]: Within the AC Infinity App, --- For the Main Tent [4x4] controller, --- Adjusted the 'Vegetative [18/6]' Schedule for the humidifier. ------ Increased the VPD target value from 0.8kPa to 0.9kPa - [22:59]: Checked the Ecowitt soil moisture sensor data: ------------------ [ 4x4 MAIN TENT ] --------------- ------ 46% - [CH01 FT » G30 - Heady OG BX1 #1] ------ 38% - [CH02 FB » G30 - Heady OG BX1 #1] ------ 51% - [CH03 BT » G20 - TKO] ------ 49% - [CH04 BB » G20 - TKO] ------------------ [ 3x3 VEG TENT ] ---------------- ------ 41% - [CH05 BL » GR7 - Garlic Budder OG#1] ------ 46% - [CH06 BR » GR7 - Garlic Budder OG#2] ------ 40% - [CH07 FL » GR7 - Gorilla Goat #1] ------ 45% - [CH08 FR » GR7 - Gorilla Goat #2] --------- Veg: 38% - 45% | Flower: 45% - 55% --------- General: 30% [Dry] «| 45 - 60% [Moist] |» 70% [Wet] - [23:05]: Checked the 3x3 veg tent. --- Mothers are looking beautiful! Growth is still recovering, but most of the growth is perking up nicely! --- Pots are gnat free and looking good! - [23:10]: Checked the humidifiers. --- Tanks are still full and no leaks found. Day 06 - Saturday - 07/19/25 - Total Days: 097 ----------------------------------- Daily Averages ~[+01:00] - Temps: 86.0°F [30.0°C] - Humidity: 81.3% - VPD: 0.81 kPa - Soil %: [49, 37, 50, 49, 43, 43, 43, 43] ----------------------------------- - [08:24]: Ca-Caw! Quick morning check on the 4x4 tent! --- Looking great my ladies! --- Heady OG has about 3 more rows to fill in the entire front left quadrant. --- TKO continues to bounce back day after day! She’s already stretching upwards again and looking beautiful! --- Both clones also looking incredible and green! --- The Heady OG clone is a bit droopy, but she’s still green. - [20:11]: Night check on the 4x4 tent. --- Looking great my girls! Growth is blowing up and more squares are filling in! --- Almost want to flip to flower next week. But will still continue to wait a week more. --- Clones are looking healthy and green! --- TKO is definitely a lot perkier than - [20:14]: Okay! Need to start the rooting process! Let’s go! --- Configured the controller on the AC Infinity Propagation dome. --- Made sure the settings were correct for vegetative growth: ------ START/END times were set to 04:00PM/10:00AM ------ Light intensity was set to 1 (out of 10). --- Also made sure the propagation light controller’s time was in sync with the Controller 69 Pro. - [20:25]: Filled a measuring cup with 1.5 cups of RO water. ------ Added a pinch of Quillaja Saponaria Extract [60] ------ Added 1/64tsp of Horticultural Aloe ------ Added 1/32tsp of Mycrobe Complete --- Mixed the solution thoroughly. - [20:32]: Dropped 2 Coco Coins into the measuring cup. --- The coins immediately started to expand. --- [~10 minutes later] --- Took each fully saturated Coco Coin and temporarily placed them in half-cut solo cups. - [20:58]: Using a squeeze bottle filled with Clonex, --- Gently filled each pre-made hole with Clonex rooting gel. - [21:03]: Time to plant the cuttings! --- Using a pair of clean trimmers, made a final 45° cut. --- Also stripped and scrapped some of the stem’s outer membrane. --- To help with planting, gave each Coco Coin a squeeze to loosen the coco. --- Made sure to insert each stem straight and snug with the tip about a 1/4 inch from the bottom of the Coco Coin. --- Also secured the stem by pinching and pressing in the top of the coco coin. --- Once each cutting was planted, - [21:16]: Placed each pheno into the propagation dome’s tray. --- Made sure to keep each clone properly tagged. - [21:19]: Added 1/2 cup of RO water to the bottom of the tray. --- Placed the side extensions onto the tray. - [21:21]: Misted the sides of the propagation dome with distilled water. --- Sprayed the top of the propagation dome before covering the cuttings. --- Vents are fully closed. --- As far as PPFD, --- At the current light intensity, the PPFD is around 108 μmol/m²/s which gives a DLI of 7.00 mol/m²/d --- Will check back daily to cycle the air under the dome. - [21:26]: Checked the 3x3 veg canopy. --- Growth is looking healthy and perkier! --- All mothers seem to have fully recovered from the intense topping. --- Pots also look great and gnat population is still low. Also no signs of flooding. Great! - [21:38]: Ca-Caw! Back to the main 4x4 tent. --- Time start training! - [22:47]: Tucked and trained the top growth under the scrog netting. --- Flattened the canopy and kept spreading out the growth to fill in more squares. - [22:52]: Quickly checked on the auto-watering system. --- System is still charged and no leaks or kinks found in the tubing. - [23:07]: Checked the humidifiers. --- Tanks are still full and no leaks found. Day 07 - Sunday - 07/20/25 - Total Days: 098 ----------------------------------- Daily Averages ~[+01:00] - Temps: 85.9°F [29.9°C] - Humidity: 81.0% - VPD: 0.81 kPa - Soil %: [50, 37, 50, 49, 42, 42, 43, 44] ----------------------------------- - [08:07]: Quick morning check on the 4x4 tent. --- Looking green and healthy in the garden! --- Both Heady OG and TKO are looking great! - [08:11]: Checked on the 3x3 veg tent. --- Mothers are vegging along with healthy growth! --- Quickly checked on the propagation dome. --- Looking good! The dome is humid and growth looks green! --- There’s slight signs of yellowing leaf tips on TKO, but growth looks great! - [19:08]: Night check on the 4x4 tent. --- Wow the garden is lush and green with more growth! The canopy is definitely going to be full in a week. Stoked for this flower cycle! --- Heady OG is healthy and filling in her squares! --- TKO is ready for flower! She’s looking beautiful and green with tops and crowns everywhere! --- Time for more training! - [19:57]: Tucked and trained the top growth under the netting. --- Wow the canopy is flat and full! --- Just a few more squares in the back right quadrant and three rows left for the front left quadrant. - [20:05]: Checked the Ecowitt soil moisture sensor data: ------------------ [ 4x4 MAIN TENT ] --------------- ------ 54% - [CH01 FT » G30 - Heady OG BX1 #1] ------ 37% - [CH02 FB » G30 - Heady OG BX1 #1] ------ 48% - [CH03 BT » G20 - TKO] ------ 49% - [CH04 BB » G20 - TKO] ------------------ [ 3x3 VEG TENT ] ---------------- ------ 42% - [CH05 BL » GR7 - Garlic Budder OG#1] ------ 44% - [CH06 BR » GR7 - Garlic Budder OG#2] ------ 43% - [CH07 FL » GR7 - Gorilla Goat #1] ------ 46% - [CH08 FR » GR7 - Gorilla Goat #2] --------- Veg: 38% - 45% | Flower: 45% - 55% --------- General: 30% [Dry] «| 45 - 60% [Moist] |» 70% [Wet] - [20:12]: Checked the 3x3 veg tent. --- Mothers are looking beautiful! Growth is perkier and starting to stretch upwards again! - [20:13]: Checked propagation dome, --- To refresh the air, lifted the top off for a bit. --- Wow growth looks healthy! Both clones are looking great! --- Heady OG seems droopy, but still green. --- Using a spray bottle, misted the top growth with RO water. --- Covered the propagation dome. --- Checked the pots and no signs of flooding! Gnats are also no - [22:57]: Oops! Forgot to take the weekly PPFD levels and measurements! ------ All phenos were around 361 μmol/m²/s which gives a DLI of 23.39 mol/m²/d under an 18/6 light cycle (at ~326.5W). ------ All phenos were about 21.5" tall. ------ All phenos were about 31" away from the grow light. - [23:05]: Checked the humidifiers. --- Tanks are still full and no leaks found. --- Another week done and the garden is healthier than ever! --- Plan to check the clones for roots next week and will transplant into solo cups as soon as roots develop a bit in the tray. --- Oh yea, --- One week before the big flip to flower! Ca-Caw! Let’s go! --- Onwards Ensign to next week! [END OF WEEK 13]
Likes
11
Share
@BudBeezy
Follow
Welcome to week 11 of my grow diary. The plant has clearly enjoyed the weather this week. The branches have become so strong that half of the metal hooks have been pulled out of the soil. As the plant is now so overgrown, I think I will have to defoliate again in the next few weeks to minimise the risk of mould in the coming weeks of flowering. Unfortunately there is no picture from Friday this week as I wasn't at home and only came back late on Saturday evening. See you next week ✌️