
Likes
Comments
Share

@Kaya666
Follow
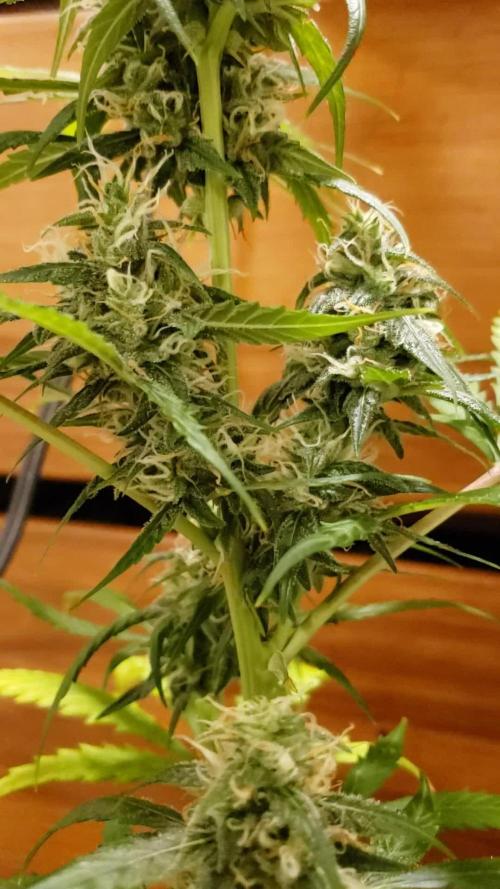
Week 11! Day 77. Gotta be nearing the final lap now. Old fan leaves are turning yellow & pistils are turning brown. I did a few trial runs of "ice flushing" but with just one ice cube at a time last week lol. Maybe 2-3 cubes per day. Figured it'd help imitate colder conditions outdoors if nothing else. Still doing the slow, small waterings as she definitely prefers them to dumping a whole bottle-and-a-half in there at once.
The smell is more noticeable than before, but still not where you'd expect for the size & maturity. My smaller plants both smelled stronger, and MUCH earlier. One of them was a Solo cup grow all the way to the end & neither exceeded a paltry 4.3 grams dry. (Maybe I've just had COVID one too many times since then but this plant is as odor-free as can be). Frost level is moderate compared to popular strains & bud sites are abundant which is my main concern. I don't smoke weed for the taste or smell, though I know terps play a role in the final effects. This girl couldn't smell any LESS like Skittles, berries or chocolate if it tried, leaning much farther in the skunky/pungent direction.
Planning to do a wet trim & staggered harvest, cutting the top into 3 sections 24 hours apart to hopefully avoid/reduce stress. Then I'll leave the bottom part to grow another week or so. With a plant this tall and lanky, there is a real difference in maturity of buds. Plus my lights are weak af. Not sure how I'll get the temps down in the 60-70 degree range for for TWO separate drying periods, but we'll try. (I'm cold-natured & would have to run the AC 24/7 since it's still warm & muggy here, and that gets expensive. But I'll also have my ceiling & oscillating fans, some baking soda to absorb moisture & windows to open on cool nights. Gotta keep the temp AND humidity in the right range!
I looked at her the morning after applying a small amount of potassium humates & noticed a bunch of brown rusty spots on the upper sugar leaves. So I cut them off. Would be curious to know what it most likely is though. Also found a dead bug on her. Little black thing with wings... looks like he died happy lol.
10/29/25:
Ice flush + stem-splitting initiated. Next is 24 hours of light before adding more ice (half as much, if that) plus 36 hours in the dark before (partial) harvest. Landlord scare this morning had me scrambling to hide everything! Hence the bent cola on top--she wore the black garbage bag "hat" again lol. No bottle/chemical nutes so this isn't technically a "flush" in every sense... more of an end-of-life stressor/imitation of outdoor conditions (if we weren't frying due to climate change, heh). Hoping this staggered harvest thing works out. I wouldn't likely be doing it if not for the time crunch & fact that I need to whittle this plant down to a more manageable size.
Next few days should be eventful, check back. 😉


Likes
61
Share


@PEAKYPLANTERS
Follow
AFTER TWENTY LONG YEARS HAPPENED TO TURN GRASS FROM THE AGE OF 15 YEARS, IN JANUARY OF THIS YEAR I FOUND IN THE EXPERIENCE I DREAMED TO DO FROM A LIFE ... (AND BELIEVE ... EXPERIENCES I HAVE MADE MANY). BUT THIS AND ALWAYS HAS BEEN THE DREAM OF A WHOLE LIFE AS A DISTINCT CONSUMER OF CANNABIS.
I WAS DREAMED IN MY DRAWING TO CULTIVATE AND SMOKE THE GRASS MADE BY ME FROM A YOUNG MAN ... AND NOW THAT I HAVE REALIZED THIS MAGNIFICENT EXPERIENCE I WANTED TO SHARE IT WITH YOU ALL OF THE COMMUNITY THAT IN PART YOU HAVE BEEN MY MENTORS
MANY TIMES I TRIED TO PLANT THE SEED OF HAPPINESS BUT FOR A PROBLEM OR ANOTHER I HAD TO THROW EVERYTHING .... WELL ... NOW DEAR FRIENDS ... I KNOW WHAT I HAVE LOST FOREVER.
THIS TIME I HAVE INVESTED MONEY ... I HAVE PUT ALL THE DEDICATION AND A FUCKING PATIENCE THAT I HAVE NEVER BEEN GOOD TO HAVE ... it's THERE I MADE IT !!!
Likes
17
Share


@Ton_Trichomen
Follow
Bruce Banner#3
See of green project
Featured grow by:
Original Sensible Seeds, BTB Grow Supplies &
exclusive for Mars Hydro
Day 49 07.00
all good no problems the plant does what she should do, today i give her water again, substrate measured ph 6.4 so everything is good again...
oh yes yesterday each of my babes had 400ml of pure coconut water as a cure that stuff does magic work 😉
Day 50 07.00
today checked everything again after I fertilized yesterday with a full dose ... everything ok substrate ph and ppm are top new circle fan ensures more wind and better air circulation and yes that's it for today
Day 51 10.00
everything on top level, you can now see trichome formation all over the place and the smell, fantastic ... maybe I'll hang a lamp with me, just wait and see
Day 52 7.00
all good, nothing else to report actually you can see it by yourself .. good weekend all of you...
Day 53 07.00
I wish you a wonderful sunday morning, the babies are fine, no special occurrences, they dance in the wind and get nice and frosty
Day 54 12.00
think that I'll defoliate something again tomorrow, otherwise everything is on top level at the moment, I see no bugs or other problems, they dance and get fatter, that's exactly how we want it, yesterday took another full load of fertilizer and they also tolerated that well again...
so see you again tomorrow ...
Day 55 09.00
good morning weed lovers, what can I say see for yourself ... there's really nothing to report except that the lady's are getting fatter and no we are not putting them on a diet, we keep popping the calories in until the end of day's 😂
Lights: 12/12
Humidity: 57%
Ph : 6.0
Water: 35l 23°C
CO²: No Mercy Tabs
Ppm: 900
Plagron: Terra bloom 140ml
Plagron: Green Sensation 35ml
Plagron: Sugar Royal 25ml
Plagron: Pure Zym 00 ml
Plagron: Power Roots 00 ml
Light distance: 35-40cm
1x MarsHydro eco 120 220w
1x MarsHydro TS 3000
Air Van: 800m³ Prima Klima
AKF : 800m³ prima klima
3 l water cooling airco Diamant...
3.3l humidifier
1.8l dehumidifier
Humidity control: Inkbird IHC-200
Temp control cooler - heater: Inkbird ITC-308
1.5x1.5m² Custom Grow Room
All seeds comes out #originalsensibleseeds
so they have 100% of 100%
Bruce Banner the 3. hits the ground and i really hope he gets angry as fuck and shows me the green big guy sleeping inside him ...
S.O.G.
☠️☠️☠️🌶️🌶️☠️☠️☠️
Thx to Linda Seeds, BTB Grow Supplies, Mars Hydro as our exclusive sponsor of our group The High Community & Zamnesia for supporting this grow.
Zamnesia unconsciously because they sent me my seeds 2 times but I'm very grateful for that...
Likes
24
Share

@BunnyBud
Follow
31 Aug. I start the third week of my autoflower. The plant is growing well, but I noticed small yellow spots on the leaf tips, which seem like a mild calcium deficiency. This is probably due to the fact that so far I have been giving water with a slightly low pH, around 6, while the ideal range would be 6.5–7.
At the beginning, to lower the ppm of the tap water (which was around 211 ppm), I mixed it with demineralized water. This brought the ppm down to about 109–140, making it harder for the plant to absorb the available calcium. Additionally, the soil I am using, Biobizz Light Mix, is lightly fertilized but does not contain enough calcium to correct this small initial deficiency.
For this week, I will not add any fertilizers. I simply want to raise the pH to 6.5 and use water with higher ppm, so the plant can better absorb the nutrients already present in the soil.
The lamp is positioned about 35–36 cm from the plant and so far there are no burn issues. Temperatures range between 25 and 30 °C depending on the day, while humidity in the room stays between 40–60%. The humidifier is always on because I keep the window open, but the dehumidifier is not being used, as it is not necessary at the moment.
I also have a new oscillating fan arriving to replace the current fixed one, and I’m waiting for a regulable extractor (90–145 m³/h), which will allow me to control the air perfectly during winter if needed.
This week my main goals are:
Increase the water ppm without overdoing it
Adjust the pH to 6.5
Keep observing the plant without adding any fertilizers
Everything else seems fine and growth is regular. With these corrections, I expect the new leaves to grow healthy and free of spots.
==UPDATE 31/08==
To control the calcium deficiency, I will administer an eggshell solution until I reach 300 ppm (I will boil some eggshells and administer the solution in tap water).
==Update 4 Sept==
By mistake, I adjusted the pH twice, once to 7 and once to 8, and obviously the plant immediately showed symptoms of incorrect pH. At the next watering, I'll give Biobizz Grow with a little Biobizz Bloom since the plant has entered pre-flowering. I'll adjust everything to a pH of 6-7 and a ppm of 450-500.
Likes
14
Share


@Greenmartini
Follow
Till now all good! Except gg#4 …. Don’t want get in flower….
Add some dolomite powder and turn light at 100%
………………………………………………
040523: all plants are good! Gg#4 still not flower….
Likes
19
Share


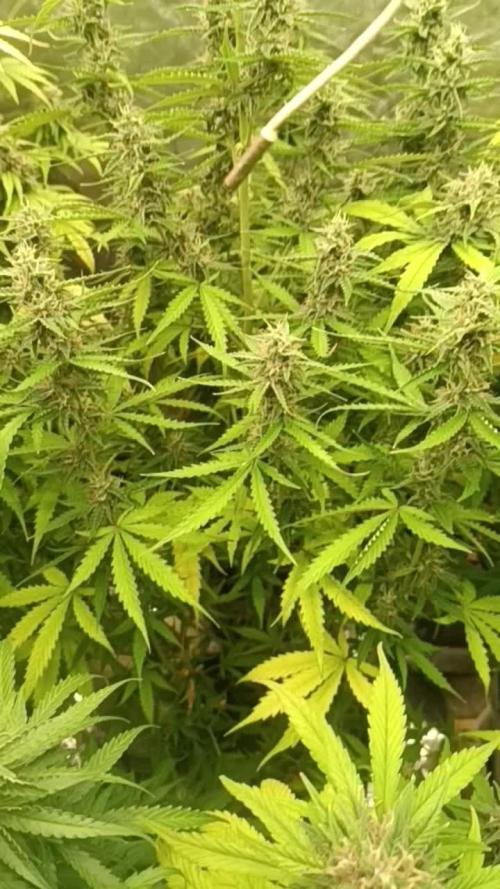
Week 7 is upon us! What we have here is a couple of storms, but still some mad sun shine at the same time. You can see the plant is budding nicely and starting to fill in but plenty more growth to go on this one.
End of the week is upon us, week 8 incoming next week and what a lovely young lady she's growing up to be! Hopefully she'll be ripe as anything in 4 weeks 😝

Likes
14
Share


@MG2009
Follow
03/25/2021
Day#1 more pics later.
More lite bending for shaping, looks good gave 2 liters of banana peel tea supposed to be good pk boost throughout flowering period till 2 weeks before harvest so we will see how it works I will be given her tea once a week till week 6 then plain water till chop!


Likes
6
Share


@Jack22
Follow
What do you think about these first days? The humidity is not much stable but I’m planning to buy a humidifier in the next week.

Likes
1
Share


@GaliforniaWeeds
Follow
Día 5/10/20 día 29 de floración
Acaba de amanecer un nuevo día y todo continúa bien. Seguimos alimentando las nenas con 1,6 de ec y 6,1 de ph. De momento el engorde no es abrumador pero si constante y si nada cambia obtendremos unas buenas flores!!
Día 7/10/20 día 31 de floración
Hoy nos vemos forzados a retirar algunas hojas que tapaban demasiada luz y que podríamos considerar sumideros de nutrientes. Por otro lado el riego de hoy ha sido solo de agua más zyco kleanse así prevenimos la sobrefertilizacion.
Día 9/10/20 día 33 de floración
Hoy preparamos un nuevo tanke de nutrición y lo hacemos a 1,75 de ec y a 6,1 de ph. En los siguientes días observaremos cómo se adaptan a esta nutrición x si tenemos que realizar cambios. No te lo pierdas!!
Día 11/10/20 día 35 de floración
Hoy te reina la semana 5 de floración y lo hacemos preparando un nuevo tanque de nutrición con el tanque totalmente limpio. La solución está a 1.8 ec, 6.1 ph y a 20 grados. La temperatura de la sala se mantiene a 23 6 la humedad al 47% para evitar la aparición de hongos en sus últimos días de maduración , algo que se puede apreciar en el avance de sus flores. No te lo pierdas!!


Processing
Likes
15
Share


@donovanliam
Follow
I'm doing terrible. The plant hasnt done anything bad it's all healthy (super strong stock) it's all me. Trying to prolong its veg and restricting its height. But the other plants have caught up so switching to flower next week the week after ones a clone so it's already. But ones only 6 weeks. In the video I posted there is my white widow I'm confused why its stock it so tiny
Processing
Likes
65
Share


@ASCBOOGS
Follow
Day 68 few fan leafs on the strawberry stardawg goin game yellow from
Edges taking time to ripen as 90% of hairs are still white 1 of the critical jack Is ready for harvest and is currently is it's 72hr darkness period


Likes
3
Share


@Ninjabuds
Follow
The sticky rice is one of the smaller plants but it is very healthy I’m looking forward to how it turns out
This past week was smooth sailing I topped all the plants


Likes
64
Share


@Natrona
Follow
Sponsored grow 👉Weed Seed Express👈
Love Potion Auto Week 5 2/9-15
Love Potion Automatic is just starting flower. Delay in flowering due to topping week 3 of veg.
She grew about 3 inches this week maybe more but I’ve pinned her limbs out as much as possible. At the beginning of the week, she was 11 inches tall, 2/13 she is14 inches tall.
I’ve moved the pins out to the edge of the pot. For future training, I must add some wires through the pot holes to keep the branches lower. I’ve spread the top out and a few limbs are taller than the others.
I reduced nutrients to half strength in the feed solution and will continue the same formula thru til flush. I added Green Sensation this week then read the instructions said add in 4th week flower. Love Potion Auto is an auto to be an 11 week flower from seed to harvest. If I wait till the 4th week, it will only be used for 2 maybe 3 weeks. Would that benefit the plant? So I think I will add some each time but a 25% strength. Calls for 4ml/g I will use 1ml. They are autos and I should be lowering the nutes anyway. Pinned more branches and lightly defoliatied. I didn’t want to take too many leaves off this time. I add 2 gallons of water to the T700 humidifier daily to keep the VPD in line.
2/9 & 11 4 gal fed 2 liter each nutrients added at ½ of recommended amount. Making 4 gallons since I have 2 pots of carrots and a Dill in the back.
Bloom Juice 45ml
Plant Juice 75 ml
Royal Rush 15 ml
Power bud 15ml
Green sensation 7.5ml
Recharge 2.5ml/gal
4 ml
Cal Mag
5
Ppm 333
Ph 7.02
Temp 66
2/13 5 gal
Bloom Juice 60ml
Plant Juice 60 ml
Royal Rush 20 ml
Power bud 20ml
Green sensation 10ml
Recharge 2.5ml/gal
4 ml
Cal Mag
25
Ppm 538
Ph 6.6
Temp 66
Your likes and comments are appreciated. Thanks for stopping by.
Growers love 💚🌿
💫Natrona💫

Likes
23
Share


@Fatnastyz
Follow
10-18
Water. Let her dry out a bit. Seems i got heavy handed. Ugg. Lifting pots from here out!
Seems she a little mad at me, but still holds course.
10-19
This am, burn and yellowish. From over feed and water.
Flushed, uggg 1213 ppm to 550ish
Full dry backs. Uggggg. Hated to flush since I just watered. But just got it done, before more burn. Should be ok. 🤞
Likes
Comments
Share

@GoodTimesOrganics
Follow
Welcome Back💚
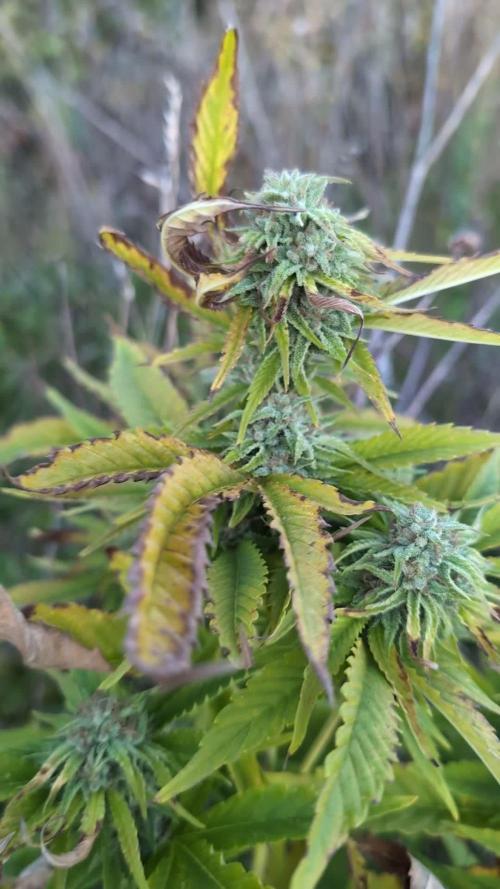
Heute war es an der Zeit, den letzten Besuch bei den Outdoor Ladies durchzuführen.
An sich hätten die Pflanzen nochmal etwas länger stehen können.
Im Outdoor Grow unseres Breitengrades muss man jedoch Kompromisse eingehen, bevor die Pflanze nämlich abstirbt und den Frost nicht überlebt, ist es an der Zeit zu ernten.
Grüne Grüße 🌱
