


Likes
Comments
Share
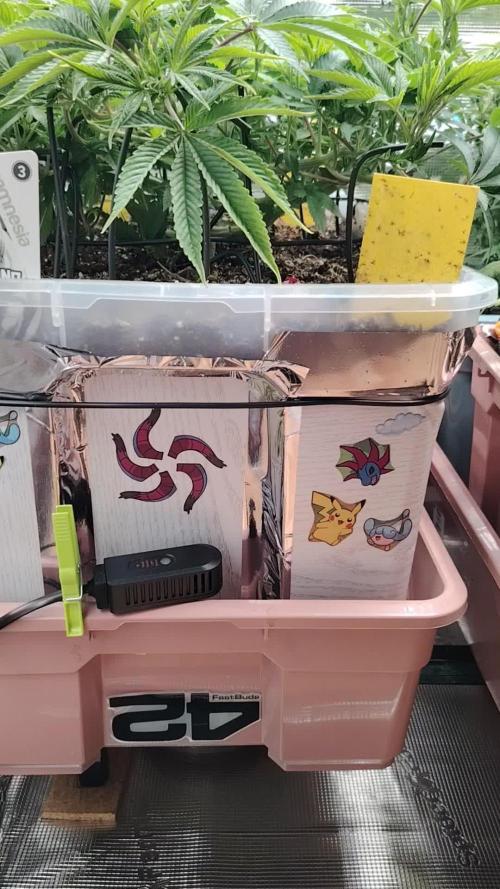

@All_our_small_plants
Follow
4000 ml alle 2 Tage
PH-Wert: 6
EC-Wert: 1,1
Temperatur: 22ºC
Luftfeuchtigkeit 62%
Schädlingsbekämpfung: Nematoden und Raubmilben
PPFD: 500
DLI: 32,4
Düngemittel: Mineralischer Dünger 10-4-7
Besonderheiten: Wurden direkt in die erde gepflanzt in einer Kokos-Quelltabletten.
-Tag 65 Heute erhielt sie 4 l Wasser, versetzt mit 2,5 ml Calmag und 6,5 ml NPK 10-4-7. Der EC-Wert lag bei 1,020 mS/cm und der pH-Wert bei 5,9 😻
-Tag 67 Heute haben wir sie mit 4000 ml Wasser gegossen, angereichert mit 3,5 ml Calmag, 7,5 ml NPK 10-4-7, 10 ml HY-PRO Rootstimulator sowie 0,64 ml HY-PRO Generator. Der EC-Wert betrug 960 mS/cm und der pH-Wert lag bei 5,9 😙
-Tag 69 Wir haben heute denn licht Zyklus auf 12/12 gewechselt und sind gespannt was der Stretch diesmal mitbringt. Sie hat heute auch wieder Wasser mit Mikroorganismen bekommen

Likes
14
Share


@Kakui
Follow
11 Noviembre: Primer riego con 2.5EC y 5.9pH, runoff de 2.9EC y 6.2pH, en una semana más ya deberían estar recibiendo 3.0EC y seguir con esa concentración por todo el cultivo. Alturas están entre 15cm y 20cm.
13 Noviembre: Riego 2.5EC y 5.9pH, runoff de 3.3EC y 6.2pH. Hoy se removieron los primeros nodos de cada planta y se les hizo poda apical.
14 Noviembre: Riego 2.5EC y 5.9pH, runoff de 3.3EC y 6.2pH en la mañana. En la tarde se realizó transplante a maceteros definitivos de 5 litros con 4 litros de sustrato aprox. el cual fue pre cargado hasta la capacidad de campo, con 3.0EC y 5.8pH, desde este punto se debe esperar un par de días hasta que el dryback(secado) del sustrato sea de un 35-40%, lo cual vendría siendo el primer P3 del cultivo, una vez se alcance ese porcentaje de secado, se comenzará con los primeros riegos de precisión llamados P1.

Likes
Comments
Share


Likes
24
Share


@FlynnRyder
Follow
HOLY CANNOLI! seriously man these things won't give me a freaking break. the good news is that I think chalking my first journal up to a failure led me to flip sooner and dang are these ladies tall! I'm talking WNBA tall lol. Don't hate me but I had no choice with the room's size and learning from the mistakes last time this plant will be under this first SCRO for up to week 3 of flower lol. It gets too dang big otherwise and even though it may be dumb I thought it best to try and I ended up breaking a lot of limbs haha. I taped up some though and I figured this would be the best learning experience in the opposite direction to see just how rough I can be with Vegged plant being flipped. I'm also going to be on top of nutrients better and get that Canna PK in there before the top shooter, booster, and bud Xl. I also have the RH on lock a lot better with a bigger drain bucket for the dehumidifier so it can run continuously with so many plants. I also decided to have some fun and bring the SCROG out and work under the canopy to get something bigger. I do regret the way I overlapped a lot of colas in the corners but it can't be helped with their height. Wish me luck and yell at me yall lol. Also, does anyone have a good example of what a bud should really look like throughout flower. a pheno that matches mine really.

Likes
4
Share


@Aleks555
Follow
Dutch Passion - Melonads Runtz, 120 days from seed and 72 days in flowering. The trichomes are still clear, so we will continue to wait until at least 20% of the trichomes turn brown before harvesting. Our beauty is still being fed with Xpert Nutrients, which keeps her in excellent condition.
I want to express my huge thanks to Dutch Passion for such an incredible strain! And of course, a special thank you to Xpert Nutrients for their fertilizers that help the plant develop and show its full potential at every stage of growth!

Likes
40
Share

@DE_BW
Follow
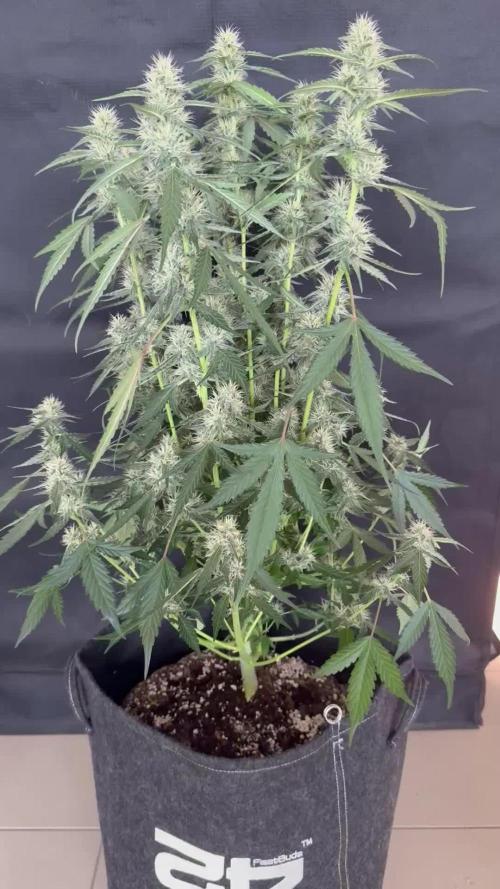
The Guava Runtz continues to develop exceptionally well, with strong bud stacking across the entire canopy and excellent overall structure. Frost production is now becoming more noticeable, as the sugar leaves and bud surfaces are steadily coating themselves in resin. With plenty of fresh white pistils still present, she appears to have a lot of potential left for further swelling over the coming weeks.

Likes
Comments
Share

@frigo_camelo
Follow
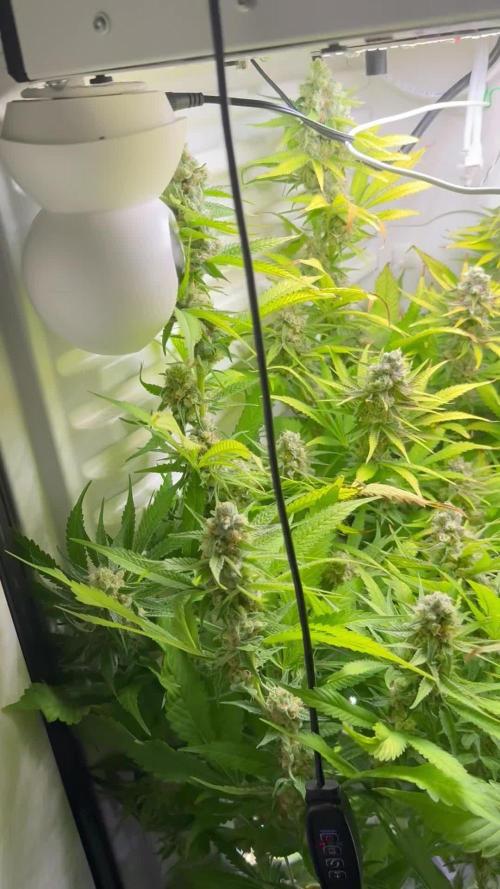
end of week 6 flower | slight deficencies | starting to purple a bit | nice dante smell already
Likes
28
Share


@radguyjohn
Follow
9/17 - Day 30
Flowering! Both shooting pistils with Mace pulling ahead of GG's schedule even more.
GG started showing what appears to be a P deficiency on largest fan leaves. Took it as a sign to feed for BAS nutrient tea and bottom feeding some Buddha Bloom.
Mace shows some mag def, increased calmag.
9/18
Added slight LST to GG, mostly to guide the main cola/stalk away from growing straight into the light.
Elevated blumat res to increase warer rate.
9/23 - Day 36
Humming along! Added pics.
Likes
35
Share


@MadeInGermany
Follow
Info:
Unfortunately, I had to find out that my account is used for fake pages in social media.
I am only active here on growdiaries.
I am not on facebook instagram twitter etc All accounts except this one are fake.
Flowering day 29
since time change
to 12/12 h.
Hey guys :-)
Once again a nice week has passed in which the lady has developed super :-).
The buds start to grow and are now getting more pk.
This week it was poured 3 times with 1.2 l each (nutrients see table above).
Fresh osmosis water was filled in canisters for the next 2 weeks.
Everything was cleaned and the plant was checked for health :-).
I wish you a lot of fun with the update and stay healthy 👍
You can buy this Nutrients at :
https://greenbuzzliquids.com/en/shop/
With the discount code: Made_in_Germany you get a discount of 15% on all products from an order value of 100 euros.
You can buy this Strain at :
https://greenhouseseeds.nl/
☝️🏼☝️🏼☝️🏼☝️🏼☝️🏼☝️🏼☝️🏼☝️🏼☝️🏼☝️🏼☝️🏼☝️🏼
Green House Seeds Company Cup Clone 🏆
Type:
Wonder Pie
☝️🏼
Genetics:
Wedding Cake x OG Kush
👍😍
Vega lamp: 2 x Todogrow Led
Quantum Board 100 W
💡
Flower Lamp : 2 x Todogrow Led
Cxb 3590 COB 3500 K 205 W
💡💡☝️🏼
Earth: Canna Coco Professional +
☝️🏼
Nutrients :
Green Buzz Liquids :
Organic Grow Liquid
Organic Bloom Liquid
Organic more PK
More Roots
Fast Buds
Humic Acid Plus
Growzyme Big Fruits
Clean Fruits
Cal / Mag
Organic Ph - Pulver
☝️🏼🌱
Water: Osmosis water mixed with normal water (24 hours stale that the chlorine evaporates) to 0.2 EC. Add Cal / Mag to 0.4 Ec Ph with Organic Ph - to 5.8

Likes
36
Share


@SAC87
Follow
Hi Growers.
Everything is going well. Earlier this week I did another super light feeding, the same as last week. I raised the light to 50” and increased the light to 80% and will adjust accordingly per plant and environmental needs. I did notice a bit of yellowing on the PE and yesterday decided to do a stronger feed and go from there, but no problems with the Blue Dream. I don’t want them starving and getting stressed into flower. After the first light feeds they popped up nicely so I’m interested to see how they like the higher feed.
Environment wise, I turned on the oscillating fan to just help them strengthen their stocks and branches and still have the humidifier on. Temps & RH are good, no hot temp is a bit cool but it’s only 4 hrs.
What week do you growers start training autos??
Thanks for stopping, leave a like or comment if you’d like. I appreciate them.
Happy Growing 🌱
Likes
104
Share


@OrganicNature420
Follow
Germination date 🌱 28/11/2021
Day 77 16/02/2022
Strain 🍁 Solfire Gardens Bahama Bussdown
(Runtz x Bahama Mama)
THC% • Unknown
💡 Mars Hydro FC-E6500
• Power draw 650W + 5%
• Max coverage 5 x 5
• LED 3978 pcs high quality chips
• Max Yield 2.5g / watt
• Noise level 0 DB
• Removable Driver & Light bars
• Daisy chain
• Fast cool system
https://marshydroled.co.uk/ 🇬🇧
PROMO CODE • (organicnature420) DISCOUNT
https://www.mars-hydro.com/ 🇺🇲
PROMO CODE • (ORG420) DISCOUNT 👍🏻
⛺ Mars Hydro 150 x 150 x 200cm
📤📥 AC infinity 6inch
💧 10lt dehumidifier
❄️ 3.1kw air con system
💉 Nutrients Living soil (dry amendments)
Grow
Bloom
Bloom2
MycoBoost
Barley
🌱 Growing Media • Soil
💡 80%
Notes 📝
They smell amazing. Very sweet. Need to buy a air freshener for the landing as these girls are very pungent 👃.. all having their top feed so i expect some decent progress this week. Happy growing fam 🌱💚
Discount codes in bio for Mars hydro

Likes
11
Share


@HuckingFot
Follow
This strains aroma is intoxicating, first test on 8/26. Smoked 3/4 of a big bowl And the high is a 8/10. Will cure for another 2 weeks and reassess..... at 66% humidity right now, Amber jar burping 1-2 times a day.
9/9 second test. same great taste and smell. Accidentally got too high and forgot to cover jar so humidity is around 48%. Smoked 3/4 of a small bowl and was really high all night.



Likes
12
Share


@Papabro2k
Follow
Overall the plant grew just great topped one time let it grow totally natural with the boost tablets smelly great n very frosty happy growing all and thanks to who tuned in on my diary’s
Likes
9
Share


@Rock_n_Roll_Randy
Follow
DID SOME MAJOR DEFOLIATION TO SLOW THE GROWTH ABIT. IM GOING TO PUT THE 15 PHOTOPERIODS IN THE 8X8 TENT TO FLOWER BUT I NEED TO HARVEST THE AUTOFLOWERS FIRST.
FOR EVERYTHING MARS HYDRO VISIT:
www.mars-hydro.com
www.marshydroled.ca
PROMO CODE: rocknroll
VISIT THE ALIEXPRESS STORE:
@marshydro_aliexpress
Instagram: @marshydropenny
Thanks for taking the time to read and check out my diary🤜🤛
TS3000 FEATURES:
WIDEBAND SUNLIGHT FULL SPECTRUM LED GROW, Infinite close to natural sun light, suit for all plants whole stages indoor growing, rapid plant response from seed to flower, achieve maximum quality and quantity, much better than traditional HPS grow systems.
HIGH REFLECTIVE & NOISE FREE-Fanless LIGHT BOARDS design will make your growing life easy and quiet, quickly heat dispersing material aluminum reducing light lost to aisles and walls, increase the light intensity up to 20%, allowing your plants receive more energy and without burning your plants for maximum headroom.
HIGH EFFICIENCY ENERGY SAVING PLANT LIGHT, high-power NEW LED grow, Compares to traditional 3000 watt HPS lamp and other brand led grow light while only 450 watts true output with 1016 LEDs, more scientifically and energy-efficient! Perfect for 5' x 5' veg stage, 4' x 4' bloom stage, higher intensity in a MARS HYDRO grow tent, reflective area, or by crossing over using multiple TS3000.
BOOM YIELD LARGE GROW LIGHT, NEWEST SMD LED technology provide highest PAR/LUMEN output(1095.6umol/), makes you get 30% higher yield compare OLD led lights, can get max yield at 2.5g/watt, less pay but get more yield, bring a amazing grow trip to any home grower as it beams huge amounts of light energy to plants below.
COMMERCIAL LED GROW LIGHT, Updated easy dimming & daisy chain function, main light controlled, especially come with two waterproof and dimmable Mean Well Drivers, auto sensing power supply works on both 120VAC and 240VAC and 277VAC, suit for Large Rooms and Commercial Setups.
Low Energy-Consuming LED Grow Light: Consuming 300w and also mounted with 1016 chips, TS3000 has the ability to replace a 450w HPS light while reducing 40% power intake.
High Efficiency LED Grow Light: With overall light output PPF 343umol/S as well as amazing PPE 2.3 umol/j, it's 50% even more photon efficient and can assure a 30% more return than the old HPS/MH lights.
Patent Highly-Reflective Hood Shape: The reflector design on TS3000 is patented, which can effectively gather the light dispersed in all directions to enhance its light intensity as well as assist plants in absorbing more light.
Full Spectrum Plants Favorite Spectra: By the unique mix of spectra that makes most light in the 400-700nm waveband, incredibly conducive to plant photosynthesis. Adequate IR(730-740nm) is additionally consisted of in the range to generate larger buds.
Dimming And Daisy Chain Feature Available: Upon an independent dimming button on the external driver, backing 0-100% settings adaptation and up to 30 LEDs daisy-chained in a group, it supplies different light levels for various plant stages meanwhile saving energy.
Safety Certifications And Service Warranty: CE, ETL, RoHS, UKCA security certifications accepted, 50,000 hours durability, 5-year service warranty, and local after-sales repair
5x5 GROW TENT:
LOCK ALL LIGHT INSIDE MARS HYDRO Indoor Grow Tent interior is made of diamond mylar which is highly reflective. (Other brand's mylar and reflective rate is as low as 50%, won't provide efficient light. )MARS HYDRO 1680D canvas, being double stitched, it is tear proof and has perfect light locking. Mars Hydro's grow tent keeps 100% lighting beams inside and helps your plant absorb more lights. EXTRA-THICK --No light leaks or rips at all
DURABILITY GROW TENT Stable metal corner adapters and poles are the trustful supporters of the tent, standing sturdy, neither rusting nor paint-falling, quick easy tool-free installation. Mars Hydro's heavy-duty metal zippers, with double layer black lining, are the best on the market which create a light-proof seal
EASY OBSERVATION FOR YOUR PLANTS. Special observation windows are made by double layers of cloth. Observe the growing conditions of your plants without opening the tent and avoid disturbing plants. The observation window also serves to dissipate heat and ventilate air
AUTOMATIC 6 INCH EXHAUST FAN KIT W/ CONTROLLER:
Mars Hydro 6'' Inline Fan uses a mixed-flow design to maintain peak performance in a high static pressure environment.
GROW TENT FAN: MARS HYDRO inline fans are designed to ventilate hydroponic grow rooms, transfer heating/cooling, cool AV closets, and exhaust odors.
EFFECTIVE VENTILATION: Variable speed controller for easy fan speed adjustment. Optimal ventilation for your planting.
LOW NOISE LEVEL: Durable plastic fan housing and blades for extremely low noise(32dB-A); create a truly quiet growth environment.
EASY INSTALLATION: Removable duct ends with locking tabs for quick removal and easy maintenance and a cord length of 4.9 feet for hassle-free setup. This grows tent fan with a controller for easy fan speed adjustment.
BASIC PARAMETERS: Ventilation exhaust fan size: 6” | Dimensions: 315mm*225mm*210mm. | Weight: 2.7. | Airflow: 402CFM | Noise: 32dB-A | Bearings: Dual Ball.


Likes
5
Share


Likes
4
Share


@KannaGrowing
Follow
Ya estamos en plena floración y con las luminarias a max potencia... Evidentemente el aire acondicionado también está trabajando durante la fase de encendido.
Flowa-Bloom es la estrella de los nutrientes a incorporar, pero todos son importantes... Así que sigo la tabla de fertilización de JUJU Royal al pie de la letra.
Eso si, primero humedezco bien el sustrato con agua, para aprovechar bien la solución con los nutrientes y que no filtre por las macetas textiles.
Riego cada cuatro días.

Likes
15
Share


@XperencdGmanXG
Follow
well these girls are filling nicely and are in need of another tea, but this time Ill be brewing a new banana peel bio bomb recipe I am working on. Lets see if we can makes these girls go into overdrive,
Processing
Likes
4
Share


@Andres
Follow
cloudy week she looks healthy but slow ... the temperature has dropped ... I think she will be even slower outdoor ...

Likes
15
Share


@SkunkyDog420
Follow
Hallo zusammen 🤙
So das war es für Sie habe sie heute geerntet.
Wir sehen uns in 3 Wochen mit dem Erntebericht wieder.
Bis dann 🤙
