Likes
23
Share
@Prilyfe13
Follow
July 29, 2024 So I was going to wait to harvest at the end of this week, but a friend of mine said I should harvest now. I agreed after looking closely at the trichomes. Sour Diesel A weighed in at 20.5 Oz wet weight. No trimming. Sour Diesel B weighed in at 19 Oz wet weight. No trimming. Sour Diesel C weighed in at 23.5 oz wet weight. No trimming. Sour Diesel D weighed in at 18 Oz wet weight. Partial wet trim. The cola is solid, so I couldn't access a lot of the stems from the fan leaves. It'll be a pain to trim I think. The environment should be around 65° and the humidity just below 60%. I'll strive to keep it that way. I shouldn't have a problem with the humidity still being high in my room. I'll be back in 10 to 14 days with a final yield and smoke review. July 30, 2024 Quick update with estimates. The environment in the tent is off by a lot today. I'll have to open the tent once or twice a day to let the super high humidity out. I hate my portable AC. So based on the 81 Oz wet weight and my previous runs, the weight retention after trimming should be around 13%. That should be a total of around 10 oz. It may be a tiny bit more or less. With Sour Diesel D being partially wet trimmed and being so dense, it might increase the total dry weight a little bit. But it could be as low as 8 Oz. We shall see. July 31, 2024 You know, it really sucks when the humidity still spikes and now the tent is too warm. However, as I'm writing this, the central air kicked on. This should fix it all, but I'm still running into super high humidity at night and in the morning while the AC is off. I really hope this doesn't mess up the final product. August 2, 2024 Day 4 of drying. Everything looks good so far. The humidity is still way too high and I'm thinking I should've wet trimmed just because the humidity is so high. Too late now. Anyway, I'm monitoring closely. The exhaust fan is maxed out to help keep air flow constant. That way there's less chance of mold and mildew. I also have both oscillating running below the plants with a small dehumidifier in the middle. It's not keeping the humidity down to a reasonable level, but it IS keeping it lower than it would be. With the fans running, it's evenly leveled out through the tent. The only issue is the temp. It's a bit on the warm side. I'd like it to be at 65°. Currently it's hovering between 69° and 70°. August 4, 2024 Day 6 of drying and these ladies are taking their time. Unfortunately it's because of the super high humidity we ran into the day I harvested. So I'm fighting with 71% humidity in my bedroom. It's crazy. The portable AC is doing absolutely nothing except keeping the temp below 70°. That's good, but it's not good enough. Oh well. I'll just keep opening the tent up with the bedroom light set to green to ensure they air out and let fresh humidity in. Lol. I'll keep checking in until they are done drying. August 6, 2024 Quick update. These ladies have been drying for 8 days now and they aren't ready yet. I'd say another 5 to 7 days. With the humidity being so bouncy, I feel like something will get messed up. It probably won't. I have the exhaust fan up and the oscillating fans going. Should be safe from mold and whatnot. But still. Currently, the temp is at 63° and the humidity at 60%. Hopefully it stays that way for the next few days. At least during the day. I have an idea for night time. It gets pretty humid at night. So I'll turn both dehumidifiers on when I go to bed and turn them off when the AC kicks on. That should technically keep the humidity down, but the temp may go up. However, I do run the portable AC at night to keep my room cool enough for the plants. That brings in a lot of humidity. Still no clue why, but it does. Anyway, the whole idea should work. I just have to remember to shut the dehumidifiers off when the central AC kicks on. August 8, 2024 We are at day 10 of drying. Still another few days left. So a good thing to note is the size of the buds. They didn't shrink all that much. To be honest, they look like they've only lost about 25% of their size. Not a bad thing in the slightest. Hopefully with that being the case, the yield will be even bigger than I calculated. I'd also like to make a correction with my original calculation. My average yield is 15% of wet weight. That being said, I should be looking at closer to 12 oz total. 81 oz. x .15= 12.15 oz. We shall see how close I am now. August 10, 2024 It's now day 12. These ladies are nearly done. I'd say another 2 to 3 days. Not much else today. Just a quick one. I weighed Sour Diesel D. She weighs 4 oz now. A 78% drop in weight. That being said, I think I can safely say this one will yield around 2 oz. Maybe a hint less. Which completely messed up my calculations. Now I don't know. I think I'll go back down to 8 to 10 oz. And if I get 12 oz, what happy surprise. I also made sure to check them for mold as I do every day. So far it looks great! No signs of anything unwanted. Just beautiful trichomes glistening in the light. Update: Sour Diesel A was the first to finish up. She had a perfect snap. Dry trimmed yield is 67 grams. 2.4 oz. Around what I thought I was gonna see. I'd say the rest will be trimmed over the next 2 to 3 days. August 12, 2024 What a couple weeks. We are talking like 14 days. At the end of it all, I ended up with 10.65 oz. Right around where I was thinking. Sour Diesel A 67 grams Sour Diesel B 78 grams Sour Diesel C 79 grams Sour Diesel D 77 grams. For a grand total of 302 grams. Weight retention 13.15%. almost exactly what I calculated. What's funny is that they are all roughly the same weight except for A. The plants were all different and still yielded roughly the same. C was the largest, while D was technically the smallest. All of the plants have solid buds. B has airy but hard buds. It's not perfect, but this plant had the most foxtails, so I'll have to remember there was some sort of issue. I'm thinking it was the heat stress. Must have been a pocket where the air didn't flow. I'll have to fix that next run. The smoke is fantastic. Super fire. Great high and lasts quite a while. 30 days of curing and then storage. I'll be using Grove Bags. August 15, 2024 Quick update and then some bad news. I fit each plant in its own 1/4 pound grove bag. They are now curing in a box. The average temp is around 68°. Humidity is perfect at 62% I haven't sampled each plant yet. Only A and B. I'll be sampling C and D next week. All in all, I'm pretty happy with this run. The yield was a bit lower than I was hoping for in the beginning, but it's still not too bad. Especially because I had some issues along the way. Now for the bad news. I'm losing my home in a couple months and won't be able to grow anything for a while. I have no idea how long it's going to be before I get a new home, and it could take up to 2 years given my situation. But I will be back when I'm able. Thanks for all the support and compliments. On a more positive note, I still have a good pound of weed to hopefully last me til I get a new home. I don't smoke a ton, so it'll last quite a while. Later my growmies.
Likes
14
Share
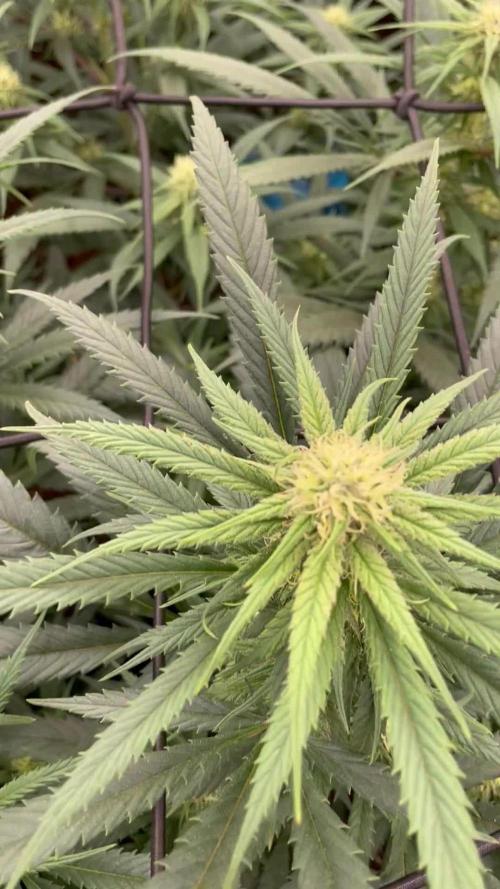
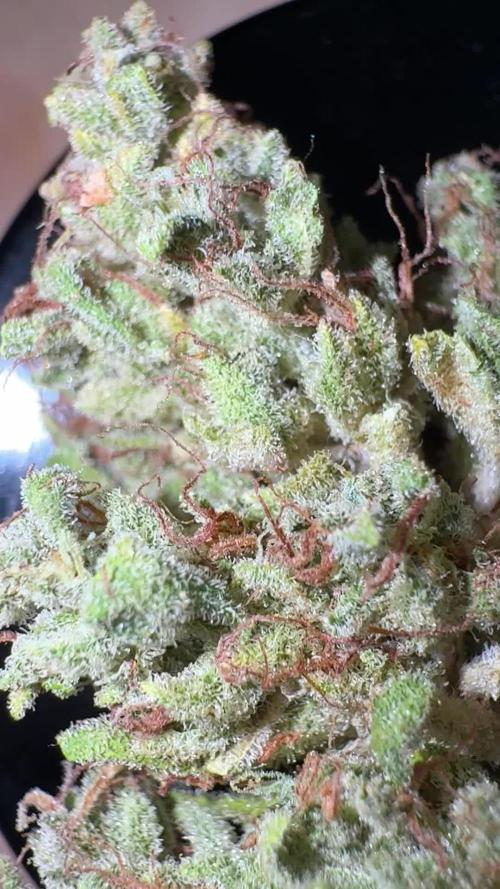
Aloha Freunde der Sonne 🙏 Wir sind kurz vor dem Ziel und das kann man schön deutlich sehen. Die schönen Farben und der Zuckerbesatz lässt sich sehen.
Likes
8
Share
Finally we cut this plant 13 weeks plant, it isn't a 8 weeks plant this is my main complaint about it, the bank should change the information because most of the people select this strains because are "faster".
Likes
4
Share
Likes
2
Share
@Antarctic
Follow
This grow started on October 20, and today is December 26, which puts the plants into Week 9 of the overall cycle. The last defoliation and pruning was done around December 16. After that, I made a conscious decision to stop cutting and stressing the plants. Earlier in veg I definitely over-stressed them — too much training, too many interventions. In hindsight, that slowed things down instead of helping. From this point on, the goal was to let the plants recover, grow freely, and build momentum in order to reach the flowering stage as smoothly and quickly as possible. Lesson learned for future grows: less stress fewer unnecessary cuts more patience Sometimes the hardest part is not touching the plants at all, especially when your hands are itching to train and optimize everything. Week 9 is about recovery, structure, and preparation for flower. Next week marks the start of flowering.
Likes
2
Share
@EyeMKing
Follow
Started the first top dressing of Gaia Green All Purpose and Power Bloom at a 50/50 ratio of 1tbsp/gal each.
Likes
25
Share
TEMPERATURE ISSUES MADE ME FEEL UNCONFORTABLE BUT THE PLANTS ARE RUNNING SUPER GOOD. LETS SEE IF THEY CAN GET FATTER WITH THOOSE HIGH TEMPERATURES. CHECKING THE CRYTALS EVERY DAY, NOT READY YET. PROBABLE 1-2 WEEKS FOR THE FLUSH AND 1 MORE FOR HARVEST. MUCH LOVE GROWMIES. FEEL FREE TO COMMENT YOUR PAST EXPERIENCES OR YOUR TIPS. GROWSHOPS ARE CLOSED AND I LOVE HEARING TO THE GOOD BREADERS, ALWAYS LEARNING. 12/05/2020---> HE REGADO CON TOP BLOOM Y TOP CANDY A LA GORILA LST Y AL LEMON HAZE PORQUE ESTABAN DEMASIADO AMARILLOS Y AUN QUIERO AGUANTARLAS 1-2 SEMANAS MAS
Likes
3
Share
Week to of flower ad she already smells like a bouquet of flowers...Perfect time to pollinate her with the male skunk polle
Likes
10
Share
@Calveeno
Follow
Feast your eyes :) I love the purple hues developing on this plant. Getting very close to harvest, I want to say another week to ripen before I chop. Full Flush twice a week with only filtered water. Stay Blessed! 🙏👽
Likes
1
Share
#1-03/02/23 the first one to come down!!! Will update as I chop them down!!!
Likes
85
Share
Start of day 49 ...... Nov 27 Start of week 7 ........ 23 DAYS INTO FLOWERING Check out the full grow video on latest weekly update Super Exceptional Growth Daily Still adjusting LST when needed and leaf tucking....... Water Only when needed but its drinking more every otherday and adjusting lights when needed...... Rain Water Only ....... ( DAY 54 AND IT SHOWS ZERO DEFICIENCIES ) IM ALSO DOING VERY LITTLE, SLIGHT DEFOLIATION ( DAY 49 AND RESIN PRODUCTION HAS STARTED ) ( DAY 54 AND ALL IS GOOD , THERE FATTING UP ) I hope you enjoy my growlog...
Processing
Likes
5
Share
@Ensign420
Follow
Week 02 Introduction This week has been a bit of a struggle. Had my first experience dealing with slime and brown algae. But I think adding enzymes and increasing the beneficial bacteria helped to fix the issue. Also experienced nutrient burn for the first time. My nutrient solution strength got as high as 671 PPMs. So backed it down to about 430 PPMs during the end-of-week reservoir change. Also cut Hydroguard (expired?), CaliMagic, and Superthrive from this grow. Now she's still stunted, but is starting to recover. Hopefully... [START OF WEEK 02] Day 01 - Monday - 08/10/20 - Total Days: 008 ----------------------------------- - [0830]: Still looks a bit yellow. But getting larger! --- Solution strength was at 248 PPMs. --- Just topped off with a bit of distilled water --- PH went up to 6.1 so PH'd down to 5.8 --- Ran the top feed for a bit to wet the hydroton. - [2130]: She's looking even more yellow now. --- Even the new leaves are really yellow. --- Decided to add more base nutes. --- Added 4ml of Sensi A --- Added 4ml of Sensi B --- Now at about --- Solution Strength went up to 304 PPM. --- PH was at 6, --- Also raised the water level a bit more. --- I really hope it's a nutrient deficiency and not an over-watering issue. --- Please live! Day 02 - Tuesday - 08/11/20 - Total Days: 009 ----------------------------------- - [0830]: Looking less droopy. But still yellow. --- Decided to do a reservoir change. --- 4.5gal of distilled water --- 8ml of Sensi Grow A --- 8ml of Sensi Grow B --- 8ml of Voodoo Juice --- 4ml of B-52 --- 4ml of CaliMagic --- 4ml of Hydroguard --- 4 drops of Superthrive --- PH'd down to 5.8 --- Solution strength: 302 PPM --- Since I didn't want to risk over-watering the rockwool, I did not to do a top feed, may do one tonight after the sleep cycle (lights are still set to go off at 10am and back on at 4pm). --- As I was doing a reservoir change, I noticed that the tubes and bucket were a bit slimy. Didn't really stink or anything. Is this normal? Maybe due to the Hydroguard and Voodoo Juice? --- I hope she gets better soon! - [2215]: Getting larger! But still yellow. --- Also can see a root growing through the net pot! Tiny little thing but it's there! Will have to start dropping water once more appear. --- After looking over a few DWC diaries using AN nutes, seems like my solution strength is still too low. Most around this stage average around 500 PPMs with about 4ml per gallon. --- Top fed for a minute to wet the top of the hydroton. --- Solution strength went down to 263 PPM. --- Added 8ml more of Sensi A --- Added 8ml more of Sensi B --- Now base nutes are at 16ml for 4.5 gal of water. --- PPMs went up to 411. --- Still lower than 500 PPMs, but that's okay. --- PH was at 6. Not sure if I should adjust PH using AN nutes. So going to not ajdust unless PH goes above 6.1. Day 03 - Wednesday - 08/12/20 - Total Days: 010 ----------------------------------- - [0830]: Looks like more root growth! --- She still looks yellow. But leaves are perky. --- PH was at 6.2 so lowered down to 5.8. --- Solution strength was at 394 PPMs --- Since roots are still growing, I decide to lower the water level a bit. Now water level is a bit below the net pot. - [2200]: Root is getting longer! --- Slime is returning. Not sure why. --- Solution strength: 357 PPMs --- PH: 6.1 --- Decided to add an enzyme along with more beneficial bacteria to hopefully cure the slime. --- Added 16ml of Sensizym --- Added 5ml of Hydroguard --- Added 8ml of Voodoo Juice --- New solution strength: 430 PPMs --- New PH: 6.1 --- Top fed for a minute. --- This slimy residue is really freaking me out! I hope the added enzymes will help eliminate the slime. --- Going to do a full reservoir sterilization/nutrient change over the weekend. Please survive until then girl! Day 04 - Thursday - 08/13/20 - Total Days: 011 ----------------------------------- - [0930]: I think the enzymes worked! There is little to no slime now! --- Although I think the root was also dissolved in the process. It's now just a little stub sticking just below the net pot. The enzyme is also suppose to dissolved dead roots too but guess that root was too weak? Not sure what happened there. But I think the slime is cured! --- Solution strength went down to 395 PPMs. Decided to add more base nutrients. --- Added 8ml of Sensi A --- Added 8ml of Sensi B --- Added 4ml of B-52 --- Solution strength went up to 598 PPMs. --- PH was at 6.1 --- As long as the PH is between 5.5 and 6.3, I'm not going to use PH Up or Down. But still will monitor PH levels. - [1715]: Checked up on her after her nap and shes looking alive but stunted. But no slime! --- Decided to add some sugars to help maintain the enzymes and beneficial bacteria. --- Solution strength was at 587 PPMs. --- PH was at 6.2 --- Added 8ml of Bud Candy --- Solution strength went up to 671 PPMs. --- PH also went up to 6.3 --- Lowered water level a bit to hopefully promote more root growth. --- Top fed for a minute. --- She is getting bigger, but still looks yellow. Day 05 - Friday - 08/14/20 - Total Days: 012 ----------------------------------- - [0915]: Leaves look a little burnt on the tips. Still no slime. --- Going to back off on the PPMs to hopefully fix the nutrient toxicity. --- Solution strength was at 632 PPMs --- PH was at 6.3 --- Added/Removed water until PPMs were at 536. --- PH was still at 6.3 --- Raised water up a bit, then top fed for a minute. - [2200]: Looking better. Still yellow though. --- Solution strength: 514 PPMs --- PH: 6.5 --- Added PH down. --- New solution strength: 518 PPMs --- New PH: 5.2 --- PH was kind of high. So decided to PH down. Had to use quite a bit to bring it down. But eventually got it to drop down to 5.3. A little low, but so far, the PH has always gone up so wanted to start it really low. --- Ran the top feed for a minute to re-saturate the top of the hydroton. Day 06 - Saturday - 08/15/20 - Total Days: 013 ----------------------------------- - [0830]: She looks stunted. leaves are still yellow. --- Solution strength: 514 PPMs --- PH: 5.6 --- Top fed for a minute. --- Not sure what to do at this point. Going to do another reservoir change soon. Hoping she lives until then. - [2145]: Looking pretty much the same. --- A bit of slime has returned. Since I've been diluting the nutrient solution, the enzyme ratio has dropped. So I guess this is expected. --- Also noticed that slime build up was on the air-stones. Never really checked the stones so not sure how long that has been there. Looks brown too, which can't be good. --- Going to do an H202 sterilization of the system (minus the net pot) tomorrow so did not add anything. --- Lowered the water level to below the net pot. --- Then top fed for a minute. Day 07 - Sunday - 08/16/20 - Total Days: 014 ----------------------------------- - [0900]: STERILIZATION DAY! --- Decided to skip today's night cycle for a deep clean. --- I'm hoping that skipping a night cycle won't be too stressful. --- Temporarily moved her to a new bucket. --- Used about a half of gallon of straight distilled water to flush out the net pot. --- Drained the system and wiped up all the brown sludge. Also removed the air stones and cleaned up all the goo. --- Filled the system with 2 gallons of distilled water and at least 30ml of food grade hydrogen peroxide (35% strength). --- Yea its a lot, but since I'm not going to sterilize the system overnight, I went with a really high doseage. Basically I kept adding until I started to see little bubbles start to form. --- Then I ran the water pump. - [0915]: Boiled the air stones in tap water for about 10 min. Then reconnected them to the airlines. --- I let the air stones and hose soak in the sterilization solution for about 5 minutes so the peroxide can absorb into the stones. Then ran the air stone to help mix and agitate the solution. --- Occasionally, I'd repeat the process of turning the air pump off for a few minutes to let the stones soak. - [1000]: Covered the top two row of holes of the net pot with some aluminum tape. Hopefully this solves the light leaking in through the hydroton. - [1200]: Used an old toothbrush and scrubbed the pump clean. Then drained the system. --- Refilled with more distilled water and peroxide. Again added a lot. --- Ran system again to sterilize even more. - [1530]: Drained the system and refilled with distilled water to rinse. --- Ran the system for a few minutes, then drained and rinsed again. --- Did this a few more times over about an hour. - [1630]: Added 4 gallons of fresh distilled water. --- Added 15ml Sensi Grow A --- Added 15ml Sensi Grow B --- Added 12ml of B-52 --- Added 16ml of Voodoo Juice --- Added 16ml Sensizym --- Solution strength was at 430 PPMs --- PH was at 5.6 --- I was going to add Hydroguard, but I think the bottle is expired. Since 2017 or 2018!? I think Hydroguard is good for up to 2 years from the date on the bottle or 6 months after opening. So not going to use from now on. I wonder if this could have contributed to the slime build up. --- Also removed the CaliMagic and Superthrive too. Going to only use AN products to eliminate the chance of incompatible nutrients. --- Placed her back in the bucket and top fed for a minute. --- Here's hoping for the best. Going to let it ride until morning! Please feel better! [END OF WEEK 02]
Likes
15
Share
Vhq starin , strong one. Easy for many techniuqes . 💯 Just Grow it
Likes
51
Share
@nonick123
Follow
Día 71 (30/12) Christmas holidays. Only watering Día 72 (31/12) He recibido mi nueva lampara Mars Hydro FC1500 EVO Led Grow Light (2024 NEW FC 1500-EVO Samsung LM301H 150W LED) - https://marshydro.eu/products/fc1500-evo-led-grow-lights/ - https://www.amazon.de/dp/B0CSSGN5D8?ref=myi_title_dp Procedo a instalarla, de modo que tengo la tienda de 120x60 cm perfectamente cubierta con las DOS (2) lámparas FC1500 EVO Es ideal tener dos lámparas, porque así puedo ajustar la distancia a la lampara en función de la altura de capa planta Ajusto ambas lámparas al 75% de potencia (Total 225W), que es más que suficiente para cubrir el área de 120x60 cm Día 73 (01/01) CBD Auto 20:1 #1 - Muestra una ligera deficiencia con algunas puntas de las hojas dobladas hacia arriba y clorosis... Creo que le voy a dar otra ración de BIO PK 5-8 OG Kush Auto - Está apilando cogollos de forma brutal. Increíble el olor y la cantidad de tricomas que está formando 😍 Día 74 (02/01) CBD Auto 20:1 #1 - Se empiezan a formar tricomas entre los incipientes cogollos OG Kush Auto - Una pena que se haya intensificado la deficiencia de CalMag en las hojas, porque los cogollos son gordos y densos, y cubiertos de tricomas Día 75 (03/01) CBD Auto 20:1 #1 - Voy a darle un boost para las 4 semanas que le quedan hasta la cosecha con SILICIUM FLASH Hago un pequeño agujero cerca del tallo, espolvoreo 25g de SILICIUM FLASH en el agujero, lo cubro de tierra. Riego con una solución de 2g de BACTREX por litro de agua. OG Kush Auto - Impresionante densidad de los cogollos que empieza a doblar las ramas 😍 La ventana de cosecha se acerca! 💥 Día 76 (04/01) CBD Auto 20:1 #1 - Investigando me doy cuenta de que lo que le pasa es quemadura de luz, ya que la parte externa de la planta sufre clorosis, y la parte interna (donde no alcanza la luz) está completamente verde Ajusto la lampara sobre esta planta para 40 DLI OG Kush Auto - Sigue poniendo los cogollos duros como rocas y muy llenos de tricomas! 😍💥 Día 77 (05/01) CBD Auto 20:1 #1 - On going OG Kush Auto - Empieza la senescencia en las hojas de abanico, acelerada por la deficiencia de CalMag que ha tenido. 💦Nutrients by Bio Tabs - www.biotabs.nl/en/ 🌱Substrate PRO-MIX HP BACILLUS + MYCORRHIZAE - www.pthorticulture.com/en-us/products/pro-mix-hp-biofungicide-plus-mycorrhizae "GDBT420" 15% DISCOUNT code for the BIOTABS Webshop https://biotabs.nl/en/shop/ With 2 x Mars Hydro FC1500 EVO Led Grow Light (2024 NEW FC 1500-EVO Samsung LM301H 150W LED) - https://marshydro.eu/products/fc1500-evo-led-grow-lights/ - https://www.amazon.de/dp/B0CSSGN5D8?ref=myi_title_dp
Likes
16
Share
Dam we got some frosty ladies developing here! Crazy sweet, jelly berry candy aromas busting out the tent. Had to lower the one light because of issue with power setting. The canopy is a bit of mess, but its expected when growing 7 different phenos. The plants also couldve gone into flower about week earlier. We just installed UVB bulbs for the last weeks, cannot wait to see what that does! Happy days, check yall next week.
Likes
102
Share
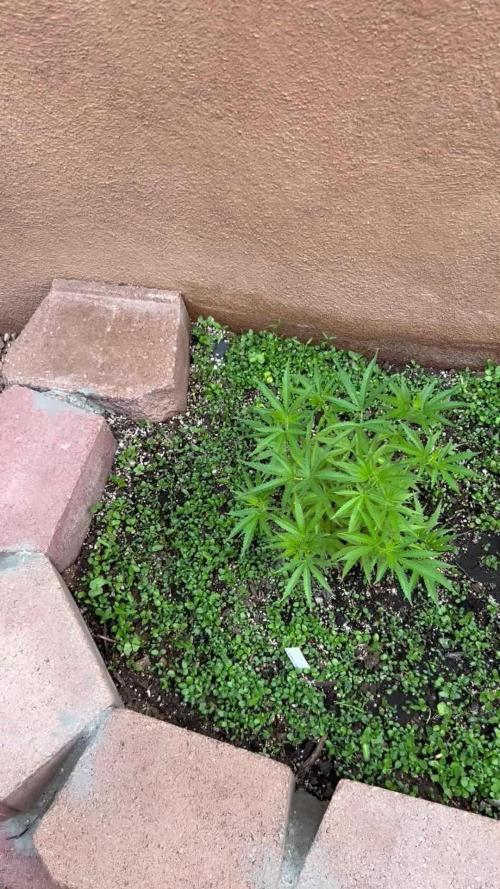
D13 - BOOM! The new #1 had made her modest appearance. Only the top of the seed is visible so far, but it's a start. :) #2 is moving along nicely, quietly doing her thing. D14 - #1 is still shy and hasn't fully emerged yet, but she is at least poking up more than yesterday, so there's progress at least. #2 is doing great, and I like her structure. Short and stout with large leaves and very short internodal spacing. She is 7 cm tall but already 11 cm wide. I also cut back the cover crop as it was getting a bit wild and partly overshadowed the girls. Since starting the grow, I have yet to water the girls properly, but they did get a little bit a couple of days ago when I had some extra after watering nematodes (against fungus gnats) to our regular houseplants. Better to be proactive than reactive ;) D15 - I started a simple compost tea consisting of worm casting, rock dust, algal limestone, bentonite, biochar, and molasses. I'll leave it brewing overnight, and then it's watering/feeding time tomorrow. D17 - No idea what is going on with the first girl, but it sure isn't much. The seed has maybe emerged for another two millimeters from the soil, but that is it. The seed hasn't cracked, and no leaves are visible. Hell, I can hardly see the stem. Yesterday, I gave each girl about one liter of the compost tea that I started a couple of days ago. Let's see if that helps, although, at this point, I kind of doubt it. As always, I completely forgot to check the pH of the tea. I have no idea why I keep forgetting that with my teas when I have no problem checking the pH when I use plain water. Oh well. Not the end of the world but something I need to keep in mind for the next tea in a couple of weeks. The second girl looks great, though, so that's something at least. D20 - Alright, it is official. The third girl died as well. The seed never cracked, and the stem went limp. I have no idea why this happened, and now I'm out of Colorado Cookies seeds, so that's that. I have already planted another seed to see if the problem persists with another strain. I will make a separate diary for that one, though. On the positive side is that the remaining girl looks strong and healthy. She is now 9 cm tall and 18 cm wide on this last day in week two of veg. Upwards and onwards!
Likes
21
Share
@Siriuz
Follow
Started Week 10 Day 64 Fed them some nutes Day 65 Looking good Day 66 Outdoors for 3 hrs in the morning due to blackout T_T Rested like 6hrs zZzz no lights Day 67 Back to 20/4 schedule Everything is good Day 68 Lil defoliation Got some pics and videos for you all Day 69 Cool Juicy Video Day 70 End of week 10 Overrall she is great! Plan on to give her last meal tomorrow Floranova bloom