
Likes
Comments
Share

@FatnastyzBudz
Follow
Day 120- Day 72- 11/11
- Still just giving that liter of plain, non pH'd RO water every morning.
- Again, not checking ppms in or out anymore, she's ready
Day 121- Day 73- 11/12
- Gave 1 liter of water
Day 122- Day 74- 11/13
- Gave her last liter of water this morning
- Tis her last day! Will cut this evening.

Likes
18
Share


@ADHDselfmedication
Follow
3 seeds from barneys farm : zkittlez Og auto.
Diary :
Day 1:
I dug a pit and cleaned my dirt with metal grid and a wheelbarrow & Installed the greenhouse.
Day 2 : I rotated my dirt and added universal soil. 4 x 70l to area of 6m2 . I also planted seeds in universal soil without sprouting first.
Day 3 :
I gave water and checked for sprouts. Bought moist meter and dripping hose.
Installed those and making the greenhouse more moisty now.
Putted seeds in small sprout basket for now.
Feeling : Verry happy for my first time. Lots to learn.. . Excited


Likes
29
Share


@THCeitor
Follow
Ya estamos a medio camino del proceso, las plantas se ven sanas y con una leve ventaja de la Red Strawberry Banana #2, la cual muestra una floración mas adelantada que la #1 como muestran los videos. Se nota un tono purpura mas oscuro en la R.S.Banana #2 y un tono mas claro en la R.S.Banana #1, la cual muestra un tallo de gran proporción quizás por un leve exceso de Nitrógeno.


Likes
14
Share


@iLoveGoodWeed
Follow
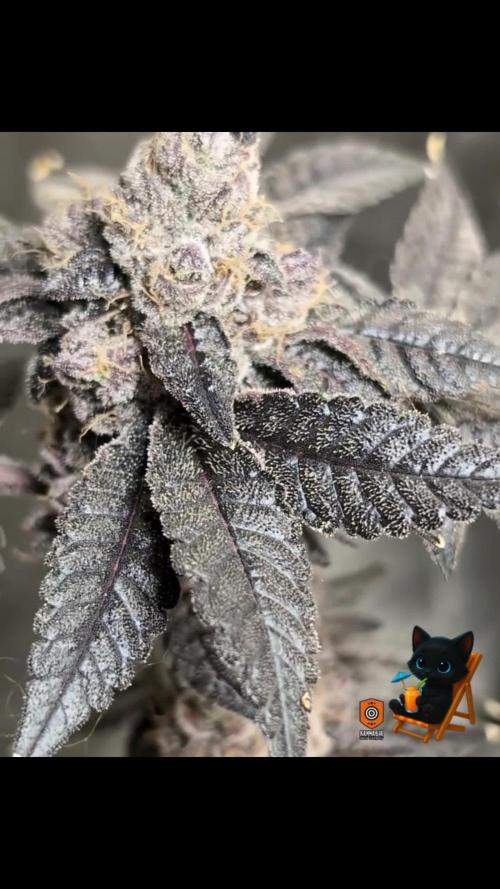
The buds are getting heavier and the stems want to bend. Two more weeks and she will be ready for harvest

Likes
52
Share


@TheDoctor
Follow
i know i know, i promised to harvest this week, but to me they just don't seem ready yet!
Although i harvested the main-buds from the LSD and put the other buds with the plant into a vase in order to let her ripe more, i want to harvest the other plants in one piece.
The Peyote Critical will be the next one, in three days or so, i'm just waiting for her to develop some amber trichomes and the lower buds should ripe some more.
The blue gelato could be harvested in a week or shorter, she seems damn sticky and rock solid!
Shiskaberry need a week or so, some pistils are still white and trichomes are pretty glassy at some points!
Srawberry lemonade will need one or two weeks, trichomes are glassy, but leaves are already yellowing, i think she will taste bests because she took so much nutrients and is now losing colour already!


Likes
19
Share


@eldruida_lamota
Follow
Vamos familia octava semana de floración de estás apollo black cherry de SeedStockers.
Que ganas tengo de ver el progreso de esta variedad, las plantas están sanas, se ven con buen color.
Ya estamos entrando en la recta final.
La cantidad de agua cada 48h entre riegos.
Esta semana quitamos ya los nutrientes de la gama Agrobeta.
Las plantas están bastante bien subió algo la temperatura esta semana pero por el momento no les afectó, a ver si consigo bajar un poco la temperatura estas próximas semanas y acabamos todo bien..
Estas próximas semanas veremos como avanzan, terminan de engordar y madurar las flores.
Mars hydro:
Code discount: EL420
https://www.mars-hydro.com/
Agrobeta:
https://www.agrobeta.com/agrobetatiendaonline/36-abonos-canamo
Hasta aquí todo, Buenos humos 💨💨

Likes
17
Share


@Dunk_Junk
Follow
She's doing well! Not long left. Maybe a week or so. Trichomes are still all clear, pistils are 80% brown.

Processing
Likes
13
Share


@RSAFirstOrganicGrow
Follow
We’ve had some nice weather this week. So far so good.
I just hope to get her through flowering, as she is supposed to be a very small plant.
Other than that the bottom leaves that may be dying I think she should be okay?
For now it’s just sticking to water + worm tea & a drop of Black Molasses.

Likes
50
Share


@DogDoctorOfficial
Follow
Week 5: Transplant Time & Root Power!
Oh man, this was one of those weeks! We transplanted all five phenos into bigger pots, and let me tell you, they’re thriving! (Check out the complete video episode for all the details 😉).
The girls are looking amazing, all pretty much the same size for now, so I don’t have any favorites yet—but let’s see what the future holds!
For photos, I used both my Nikon P900 and Sony A6000, with a bunch of lenses and filters to preserve the true colors—these LEDs are powerful!
Current Setup & Conditions
This week, they’re still chilling with their sisters in the big tent, but in about a week, they’ll be moving into the TrolMaster ecosystem for even better environmental control.
Watering: pH 6.06, EC 0.96
Temperature: A bit cold , but it is what it is. We’re facing some freezing outdoor temps (as shown last week in the frosty veggie garden pics!), yet these Runtz are holding strong like true champions. 💪❄️
Nutrition: Still on the Aptus Clean Program, with:
Regulator
System Clean
RO Water Conditioner
All-in-One Liquid
Root Development: The Real MVP!
Let’s go deep on roots! The mycorrhizae in the Pro-Mix soil has been working its magic, and I’m still boosting them further with a touch of Aptus Holland Mycor Mix. The root development on this transplant was insane—super white, healthy, and ready to explode with growth.
What Are Mycorrhizae?
The word “mycorrhiza” comes from Greek:
• Myco- meaning fungus
• Rhiza- meaning root
Mycorrhizae are a type of beneficial fungi that form a symbiotic (mutually beneficial) relationship with plant roots. These fungi extend far beyond the root zone, creating an underground network that helps plants absorb water, nutrients, and improve overall health.
This is not a single species but rather a whole category of fungi, mainly divided into:
1. Ectomycorrhizae – Live on the outside of plant roots, forming a sheath around them. Common in trees like pines and oaks.
2. Endomycorrhizae (Arbuscular Mycorrhizae, AMF) – The most beneficial for most crops and cannabis. These penetrate root cells, forming structures inside the roots that exchange nutrients.
Where Are Mycorrhizae Found in Nature?
Mycorrhizae naturally occur in forests, grasslands, and undisturbed soils worldwide. They play a crucial role in maintaining ecosystem balance by helping plants access nutrients from the soil.
In a natural environment, plants are constantly forming relationships with these fungi. However, in modern agriculture, excessive tilling, chemical fertilizers, and fungicides have reduced their populations, making supplementation necessary in many cases.
How Do Mycorrhizae Work?
Once mycorrhizae colonize a plant’s roots, they start forming an underground fungal network called the mycelium. This network extends the plant’s reach into the soil, acting as a second root system.
Benefits of Mycorrhizae:
✅ Enhanced Nutrient Uptake – Mycorrhizae help plants absorb phosphorus, nitrogen, and micronutrients that would otherwise be unavailable.
✅ Improved Water Absorption – The fungal network can reach deeper into the soil than roots alone, helping plants survive drought conditions.
✅ Stronger, Healthier Roots – They promote thicker, more robust root systems, reducing transplant shock.
✅ Better Soil Structure – They produce glomalin, a protein that improves soil aggregation and helps retain moisture.
✅ Natural Pest & Disease Resistance – Healthy plants with strong mycorrhizal relationships tend to be more resistant to soil-borne pathogens.
How Mycorrhizae Help in Cannabis & Gardening
In controlled growing environments, using mycorrhizae is a game-changer. Since cannabis relies heavily on phosphorus, the enhanced nutrient uptake provided by mycorrhizae is especially beneficial.
Best ways to apply mycorrhizae:
• At transplant – Dust roots with mycorrhizae powder or mix into soil.
• As a soil drench – Some liquid formulations allow fungi to colonize even after planting.
• Mix into your growing medium – Using pre-amended soil like Pro-Mix HP Mycorrhizae ensures roots have early access.
Pro Tip: Mycorrhizae need living roots to survive! Avoid using synthetic fungicides or excessive chemical fertilizers, as they can kill the fungi.
Think of mycorrhizae as a natural root booster. They’ve been around for hundreds of millions of years, helping plants thrive in all conditions. By using them in cultivation, you’re mimicking nature, ensuring your plants grow stronger, healthier, and more resilient.
When used correctly, mycorrhizae can increase yields, improve plant health, and reduce the need for synthetic inputs—making them a must-have for any serious grower!
Can’t wait to see how they’ll look in the next transplant!
I made a few changes to my improvised photo studio, including a pink background for now—because why not? Let’s keep things fun and full of color! 🌸📸
Massive gratitude to all our sponsors and of course, a special shoutout to Zamnesia, Plagron, and Grow Diaries for making this amazing cup happen. 🙌
And to the community—followers, supporters, lovers, haters—I love you all! ❤️ Let’s keep pushing forward, learning, and making this grow legendary!
Stay Tuned for More!
Next week, i may be moving them into bigger pots and getting them into their final environment. You won’t want to miss this next stage!
See you all next week—stay tuned, keep growing, good luck to all and let’s make history together! 🚀🌱
Genetics - Runtz https://www.zamnesia.com/6000-zamnesia-seeds-runtz-feminized.html
Nutrients - Plagron https://plagron.com/en/hobby
- Aptus Holland https://aptus-holland.com/
Controls - Trol MAster https://www.trolmaster.eu/
LED - https://www.futureofgrow.com/en
LED - https://www.thinkgrowled.com
Soil - https://www.promixgardening.com/en
Germination - Cannakan https://cannakan.com/?srsltid=AfmBOopXr-inLXajXu3QFgKXCXXos4F1oEvScjMKIB5MR5dk8-GJ-F49
DOGDOCTOR 15% off
Smoking Papers - https://ziggioriginal.com/
Terpene saver - https://grovebags.com/
As always thank you all for stopping by, for the love and for it all , this journey of mine wold just not be the same without you guys, the love and support is very much appreciloved and i fell honored with you all in my life
With true love comes happiness Always believe in your self and always do things expecting nothing and with an open heart , be a giver and the universe will give back to you in ways you could not even imagine so
As always, this is shared for educational purposes, aiming to spread understanding and appreciation for this plant. The journey with nature is one of discovery, creativity, and respect. Let’s celebrate it responsibly and continue to learn and grow together!
Growers Love To you All 💚
#EternityGrowCup #RuntzHunt #GrowersLove #CannabisCommunity #AptusHolland #ProMixSoil #TrolMaster #Zamnesia #Plagron #ZiggiPapers #Grovebags

Likes
33
Share


@Damonkey
Follow
Flushing and all going well. It looks like the flush could push up to 2 weeks.

Likes
50
Share


@BarrieGrower
Follow
Flushed one for a week and now into darkness. The last two that started flower under the cheap LEDs need a bit longer. They will need another three weeks.
The one plant looks really pretty and smells great. The upside is I don't have to trim them all up at the same time. Looking forward the the cure.
Cheers


Likes
10
Share


@WakeAndBake
Follow
I can't wait to try this big 😍 buds they smell nice and I'm pretty sure that the taste will be nice

Likes
11
Share


@ibbzy
Follow
[UPDATE] 18/07/24 (WEEK 4 & 5)
Continuation of week 4, will comeback and update this week with updates of plants recovery. Week 5 will be included with this update.
Replacement of drip lines to NetBow halo rings by Netafim for a more uniformed watering
Will be updating Germination week page with my current watering system set-up and it's upgrade next week along with EzRunOff Pump by The Bucket Company.


Likes
9
Share


@masterofsmeagol
Follow
6/15 Everything was dry this morning but the bags STILL had some heft. Much lighter though so I decided to water. I didn't realize how cold the hose is so I'll have to usecthe water inside or premix it. I watered everything at least a half gallon. Things are going great. I'll update as I go.
UPDATE: IM GLAD I WATERED. ITS 73° OUT AND NICE AND SUNNY.
6/16 Foggy morning has turned into a sunny day! Plants are doing amazing. So glad I watered. I took a shit ton of pictures but they don't seem to be uploading. VERY FRUSTRATING TO TAKE THE TIME TO TAKE PICS AND VIDEO ONLY TO HAVE IT NOT UPLOAD. It's working now. I canceled out after I uploaded everything. Trying to upload again now.
EDIT: EVERYTHING IS FIXED. I UPLOADED A BUNCH OF STUFF. PLANTS IN THE BACK AND THE FRONT SEEMED DRY AND LIGHT. I GAVE THE TWO 10'S AT LEAST A HALF GALLON. I GAVE THE THIRTY A GALLON AND SPLIT THE REMAINDER WITH THE 20'S. I MIXED UP 5 GALLONS. EVEN THOUGH THE PLANTS IN THE MIDDLE WERE DRY THEY STILL WERE FAIRLY HEAVY. IT IS SUNNY AND 80° WITH STRONG WIND. I'LL WATER THE OTHERS IF NEEDED BEFORE WE GET SOME RAIN. WE HAVE RAIN IN THE FORECAST SO ILL KEEP AN EYE OUT. IM VERY IMPRESSED WITH THE GROWTH IM SEEING. I NEED TO DO SOME MORE LST SOON AND PUT UP A TRELLIS.
6/17 I'm glad I watered those plants. Everything is looking GREAT! I didn't get pictures as I was in a hurry. The 3 plants in tje middle are dry on top bit about as heavy as the others. The wind doesn't go through them like the others. I would've watered but they looked happy and we are supposed to be getting rain. I'll be back over later and re-evaluate.
EDIT: I GAVE THE THREE IN THE MIDDLE ABOUT A HALF GALLON EACH. EVERUTHING IS LOOKING FANTASTIC. I LSTED SOME. ITS SUPPOSED TO RAIN TONIGHT AND A LITTLE BIT WITHIN THE DEW DAYS BUT NOT WHAT THEY NEED. IM JUST TRYING TO NOT OVER WATER. IM REALLY HAPPY WITH WHAT IM SEEING.
6/18 It's overcast with showers. Rained hard last night and it's been raining off and on this morning. I probably could've made it without watering the three in the middle but I didn't want to chance it. Plus the rain doesn't add up to much anyway. Plants were soaked this morning. Soaked me just shaking them off. I'll update later. This year has been really good so far.
6/19 Overcast and Maineing out (tiny sprinkles tuat appear intermittently). Plants love it. Apparently I've reached my photo limit. At least that's what the app says. AT least I got SOME of these pictures and the video up. I can't belueve the increase in size both vertically, laterally and width. Branches are long and thick. This rain, sun, rain, sun type weather is creating some monsters. Can't wait to see the result. Still on the fence about light depoing. One thing I DO need to do is put up trellises. It sucks if I can't upload anymore pictures or videos. If I see something great I'll just delete a dfferent picture.
6/20 Not raining but still overcast. 71° at 9:15. Plants are still doing amazing. I've dedoliated some damaged old leaves. I can see some plants have shot a few pistols but I don't think reveg will be a big problem. Some have no signs of reveg. A couple spit out a few three finger leaves but that could be from the environmental stressor. I kept my second mk ultra without topping or fimmed. It's stalk is enormous and just the LEAFLETS are bigger than my wrist. ENORMOUS fan leaves. I think this is going to be a great year.
6/21 It's about 80° and clear skies. Bags are a little warm. They still have some heft to them and it's going to rain tonight with showers tomorrow. Those 10's dry out quick so I split a gallon between the two as they were light as fuck. The rest of the front row was a LITTLE lighter than the rest (the big mk ultra in the 30 looked like it wanted some water) so I gave the other three in the front about a half gallon each. It's noontime. I know it's not the best time for watering but sometimes you need to do things when "you're" able to. Plants are looking amazing. Tried to stick a 10th planet branch under a support buf I took it back out. It wad way to kuchvof an angle and the plants will stretch during flower. I pulled it out and there's still a little bend in the stem but nothing that won't return to normal on its own.

Processing
Likes
19
Share


@Ferenc
Follow
It was easy to harvest she was very small jut cut it quickly without stalks the wet weight is 17 g of the buds. Smell is like spicy lemonish smell. This site has changed can not update and edit the comment section. The smoke is nice it is kind of relax and strong high. Not the best but not even bad. I like it.


Likes
20
Share


@BABS_Babies
Follow
This was my first time growing this Wedding Cheesecake Auto strain. It was easy to grow. I will order this strain again.