
Likes
Comments
Share

@Jardin33ro
Follow
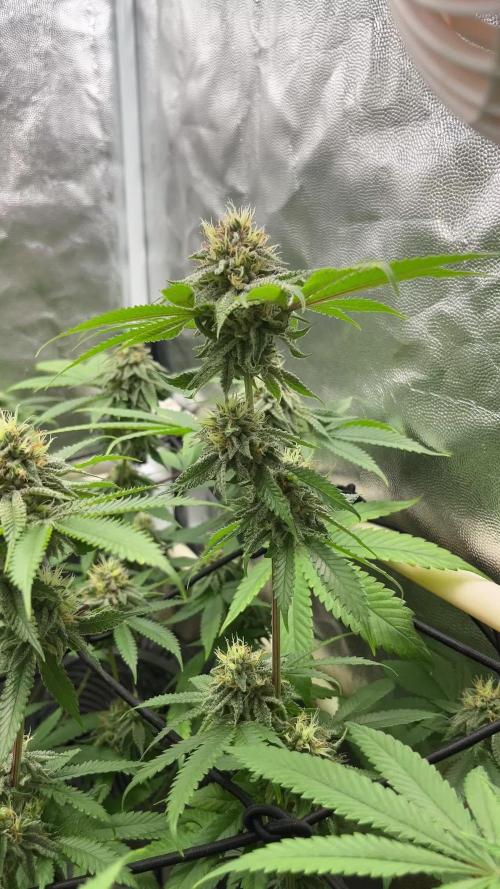
Buenas! Todos los sabados comienza otra semana, normalmente subo los martes. Pero me estoy haciendo un tiempito hoy para contarles como vienen los 4 clones de toronjaz-Blacktuna.
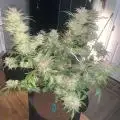
Esta semana ya se nota el engorde de la flor, ya los calices comienzan a tomar volumen. En cuanto a la resina, se ha formado bastante, en casi todas hasta hojas satelite. Mejoramos el color de las hojas, ya que veniamos alimentando muy de a poco y en estas semanas ya podemos apretarlas un poco. Seguimos igualmente de a poco, controlando de no exceder, siempre prefiero que falte a que se exceda.
En estas fechas comienza a elevar la temperatura, por lo que sin aire acondicionado en la pieza se puede llegar a complicar. Seguimos, cultivando y aprendiendo. Saludos, que tengan buenos humos 😮💨


Likes
6
Share


@WeedM8
Follow
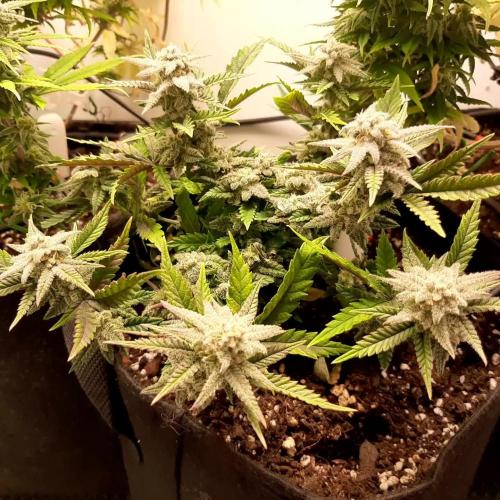
So beautiful looks its going vey well apart of thats its too hot the heat from the lights if there is no air circulation it gtes very humid and i have to leave the tent open

Likes
14
Share


@Terpyboyz
Follow
So this grow came to a finshed but I had a. Few issues that’s held me up from finishing up the diary, but in due time I will reupload it all in order soon. But over all I will also update with a final weigh in of each strain produced so stay tuned 🤙🏻🔥


Likes
39
Share

@MisterZ
Follow
Bonjour les amis. Cette semaine les fleurs ont pris du volume et surtout l'odeur est est nettement plus forte. Dès que j'ouvre mon placard une odeur terrible se répand. Ma femme est terrifiée. C'est la dernière semaine théorique mais il faut encore quelques jours, je pense récolter la semaine prochaine. Les 2 grandes plantes ont une forme et un volume normal, je vais les libérer de leurs liens très rapidement. La petite semble encore plus chargée en résine. Je n’arrose que à l'eau pH ~6.8. Led 80%. Bon grow à tous. M.

Likes
29
Share


@Sidbank
Follow
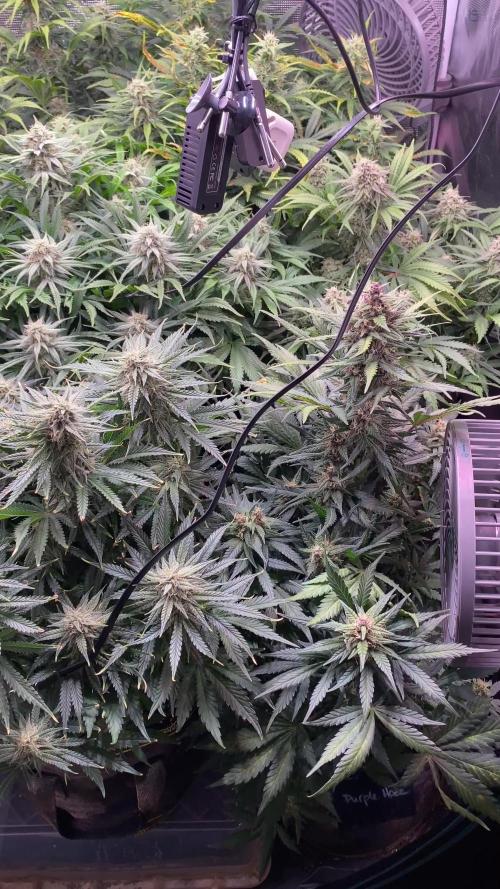
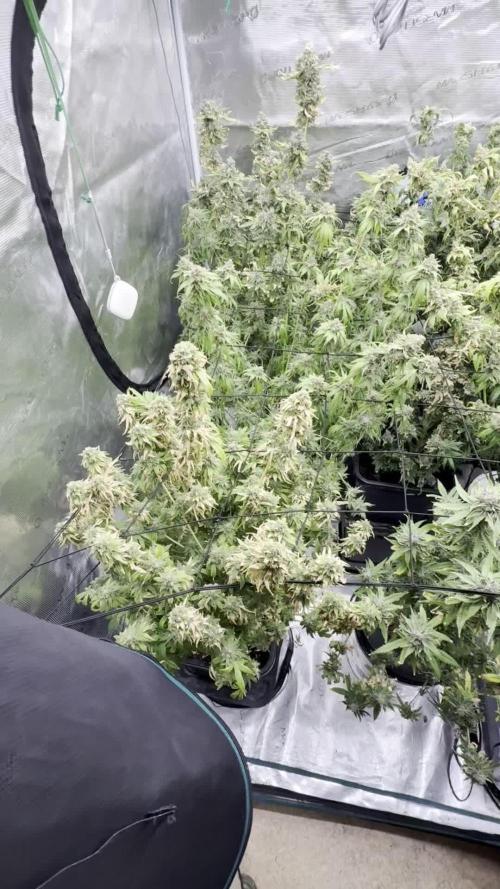
26.06 After connecting the air conditioner, the temperature stabilized and I have differences of about 7-8 degrees between day and night. Today I replaced one mixing fan, because the well-deserved Chinese one has already lost its power. He served almost 2 years, which is a really good result. I replaced it with High Pro, none of them lasted as long as the Chinese one. The plants look very nice, I haven't noticed excessive activity of Sciara militaris. Soil Attack and yellow sticks do the job. Humidity 53%
27.06 The stems have regenerated nicely, but I'm still going to hold the knees a bit to strengthen them. I added water from Soil Attack. They swell beautifully, the hair on the flowers is very long, which means good adaptation. Water 2L. Humidity 63%
2.07 I measured the amount of PPFD at peak places and they were too low. So I lowered the lamps. I added a small dose of Power Silica to strengthen the stems, because after super cropping the plants may have a problem with maintaining the top. The conditions are good. Day 28-29 degrees, night 19-21. Humidity from 54-63%. At this stage, I can easily maintain such humidity, especially since I have well-mixed air in the tent.


Likes
4
Share


@Organic473
Follow
So far she looks promising...I am extending her light hours with the solar power light. We are at the end of the rainy season heading into dry season.

Likes
22
Share


@Jwjoh
Follow
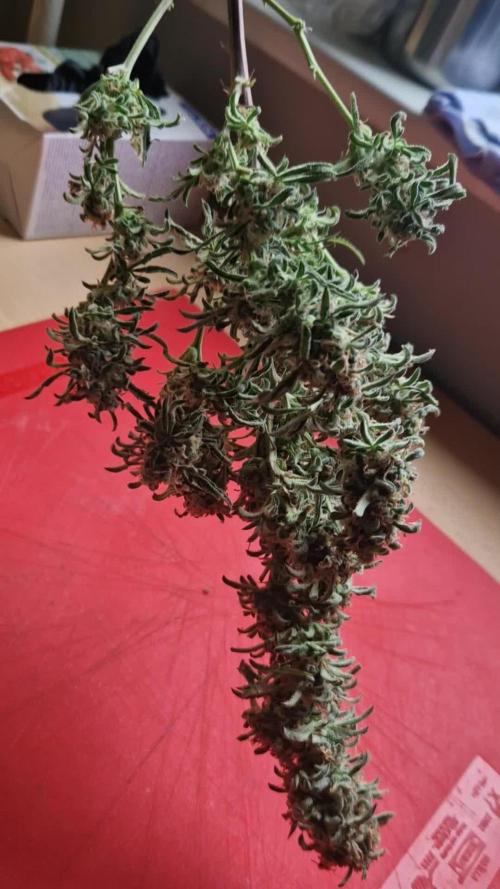
This was an interesting harvest. Everything was going great and the buds/trichomes were still piling on, when suddenly almost overnight plant "C" shifted to about 20% amber trichomes. So I harvested it, and because the other plant wasn't ready yet I decided to try water curing the first one for 7 days. Then at the end of the 7 days, I figured I'd hack down plant "D" and dry them both on the racks in the tent at the same time before moving into jars.
The water curing was a huge success! After the first day, the water was cloudy with a slight green tinge. Second day was about the same. Then the water was just a little cloudy each change, no green tinge. Compare it to the diary I just opened around water re-curing some cannabis I bought from the government store, where the water is diarrhea brown :O On day 7 of my water cure, the water was perfectly clear so I decided to hack down plant "D" and get them both drying on racks in the tent together.
While water-curing plant "C", I had its trim sitting in a bowl in the freezer. When I hacked down plant "D", I put its trim in the same bowl. After my typical wet-trimming, I hung up Plant "C"'s water-cured buds on the top rack, plant "D"'s buds on the 2nd rack for an old fashioned cure, and random trim from both plants spread out on the bottom 2 racks.
The water-cured buds dried within about 24 hours and went into a jar with a 58% humidipack. The buds are SUPER dense and potent! Nice clean high, doesn't kill my throat. The downside is that the taste is really weak and not that great. But everything has pros and cons. Almost no trichome loss in the bucket during the water curing as well -- I was really worried about that!
The other buds dried in about 36 hours and went into a jar with a 58% humidipack, where I burped it many times a day for a week. The smell and flavour are much more potent than the water-cured bud and it's a little harsher on my throat, but otherwise I'm not sure there's a detectable difference.
However, you can SEE there's a sharp visual difference between the water-cured buds and the jar-cured :) Of course the jar-cured will mature more with time as well.
Once the trim was completely dry, I put it in a bag in the deep freezer and dropped it to about -20. I didn't need to use a grinder this way -- I could just mash it all up in the bag with extreme ease! Sifted it through the kief screen, and pressed down 17 grams of lazy-man's hash!
After processing the trim through the kief screen, I decarbed in the oven at 200F for 1 hour (this converts THC-A into THC or something to that effect -- if you don't do this, the edibles won't get you very high). I put the trim into a big mason jar and back into the freezer along with my bottle of Everclear. Once they dropped somewhere down around -20, I poured in the Everclear, put the lid on, and shook as hard as I could, as often as I could, for 5 minutes or so. I noticed that as I shook it around, the contents inside would alternate between solid and liquid which was kinda cool :) Shake it one way and it freezes, shake it the other way and it thaws... or something to that effect, anyway. I was able to use a double-coffee-filter to extract about 2 cups of dragon tincture!
I threw everything in the coffee filter out -- next time I'm going to do a better job of it as there's a little pile of trichomes that forms at the bottom of the filter which I could put to use. Once I get that down next harvest, I'll have around 99% efficiency milking every last drop out of my harvests!
White chocolate is so yummy, as are candy canes... I wanted to combine the two to make some edibles. Looking around for candy cane crush, I decided to check out Amazon. They had the same candy cane crush I was looking at from popular stores, for only a couple dollars more, so I figured sure why not have it delivered. I was planning to get some white Baker's chocolate, but on checkout of the candy cane crush I got a deal for adding on white chocolate Lindt bars for $1.25 a piece LOL! So I bought 10 of those.
When the Amazon package arrived, I slowly boiled down 1/2 cup of my dragon tincture in a pot, then used a double-boiler setup to melt down 4 of the Lindt bars in the same pot. Once it was mixed well with the hash oil, I set it aside to cool for about 3 minutes before stirring in 1/8 cup of candy cane crush (plus I ended up adding maybe like a tablespoon more), pouring into a pan lined with parchment paper, and putting in the freezer for 30 minutes.
So now I have a nice big chunk of white chocolate candy cane crunch stuff where a piece the size of my thumb gets me super high for like 8+ hours; 17 grams of lazy-man's hash; and 88 grams of bud :) And still enough dragon tincture left over to make 3 more rounds of edibles -- not sure what I'll make next!
From now on I'm going to water cure a large portion of all my buds -- not just the ones I grow myself, but ones I buy from the Gummint too!


Likes
13
Share


@HIAZ_urbanbudfarmer
Follow
Hi gromies Ive missed updates over the last few weeks phone problem! But the girls are going great!👍 I'm at the end of week 5 of flower. I'm pretty happy with it for my first scrog grow, could have been better, was in rush to get something into flower, started flowering as soon as they started to grow through net. Should have veged them & trained through the net longer to completely fill net. Pheno 3 was half the size of the other 2. Have started some clones from flowering cuttings, Monster cropping , it works great for increasing yield & saves me from having to keep motherplants. Amazing progress, the roots you see were developed in 8 days! Will start to veg them in the 2nd tent & start the perpetual harvest process. Have continued to grow this strain as I don't have any other seeds at the moment, though it is a nice strain! Definitely time for a change, hint, hint original sensible seeds! Or any other seed companies 👍

Likes
6
Share


@BB_UK
Follow
loving the week past as flowers have started smelling so dank unbelievable smells of candyland, can literally smell the fruitiness spewing off it, it's so crazy alongside some pure tropicalness.... got a new camera so got high quality pics for you all

Likes
8
Share

@Alex_mir_doch
Follow
viel hat sich nicht mehr getan seit dem letzten eintrag. so richtig bernsteinig wollten die trichome nicht werden obwohl ich den pflanzen zwei wochen mehr zeit als geplant eingeräumt habe.
zum trocknen hab ich die nur grob getrimmt. die feinarbeit kommt nach dem trocknen.
da im zelt noch die white truffle stehen hängen die freaks erstmal im schrank.
die bedingungen zum trocknen sind wetterbedingt gerade sehr schlecht. bei 70% raumluftfeuchtigkeit wird so schnell nix trocknen.
vielleicht wird es ja doch noch sommer in den nächsten tagen.


Processing
Likes
19
Share


@lukavega
Follow
Day: 9 I'm considering replacing a cpl of these with different seeds. They are already behind schedule-1 OG Kush and the Gorilla Girl. Any tips varigation on leaves? I just gave them there first feeding of Big Buds and Blooms (N5) after the 24 hour Superthrive wait period. Both Superthrive and NPPK were used at 1/4th the strength called for on the lable. Nighty Night girls. Going to bed wet is not ideal but they needed a full watering bad..hoping I didn't over water (purified water) Some of the soil just does not seem to get wet in these pots. weak leggy blackberry kush has some wind tonite. Hoping to boost stem strength. they are trying to fall over from the weight.
Day 10: made little stakes from coated wire. Repositioned the Gorilla Girl for a third time. You can see that part of the stem looks white from being underground. Still gonna give it a little more time. Otherwise, all are seemingly fine after first feeding.
Day 11: applied SuperThrive and my Gorilla Girl turned yellow for a few hours. Glad she is resilient!!!
Day 12 thru 20. So my PH meter was wrong and I have been watering with 9+ water for the first 2 weeks. i had 2 ph meters in case this happened but one is for soil...new grower mistake. So...I've lost precious time on my aotos and my gorilla girl is ...lord help meh..she don't look too good. All are alive in spite of my noobness. I'll post some pics that should have a disclaimer stating this is not what your plants should look like at 20 days in. Also had to transplant into non-waxlined pots. This is not the best experience to show publicly but new growers can maybe learn from my mistakes.

Likes
29
Share


@CANNASIM
Follow
---GENERAL COMMENT---
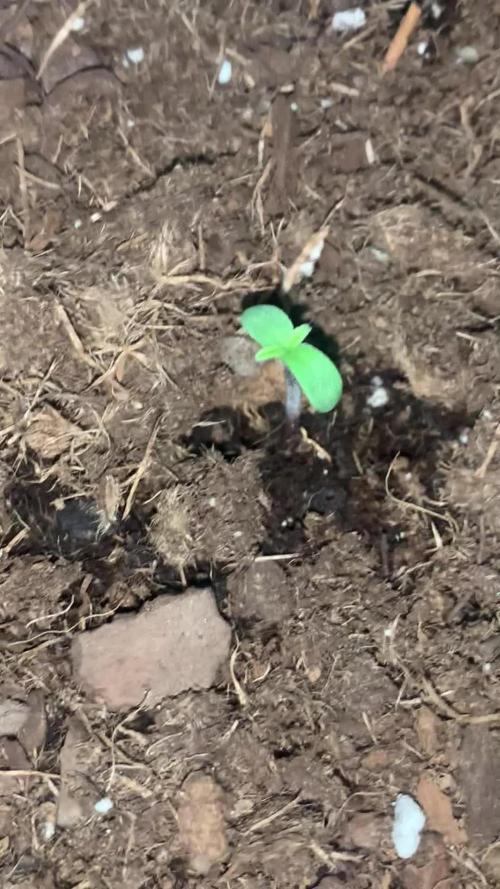
Girls are at day 4 technically, but i like to update Sunday always, so keep that in mind, is 1/2 a week now.
From germination to soil emerging took 3-4 days, no issues at all. 100% germination rate from multiple breeders till now.
I will try my best to do a stress free grow again, so will grow mainly naturally.
---RQS QUICK ONE---
She is tiny, tiny, tiny. The smallest seedling i ever have worked with. Hope she takes off soon!
---DAY 10 UPDATE---
over some days she got volume, just started to use RECHARGE, and wow, that thing works, 48H you could tell something is different, since watering with it the stem is thicker and is growing more vigorous, lets see how it will impact overall!
---DAY 14 UPDATE---
This is the last day of this week and this girl is showing some kind of wired markings since the beginning in the first sets of leaves, will do her anyways... She grew a lot, showing already the intension of shooting up more stems like her cousin. She will be on plain water and recharge till i stabilise and figure what is going on with her, at least for a week.
This strains tend to be easy and do well with low nutes, light and etc, really basic, i like to pay to see so i never give up from a pheno, but is not fun to have issues... No worries though there is always a crop after the other 😎👍. Lets see what happens next.