
Likes
Comments
Share

@loomerlope
Follow
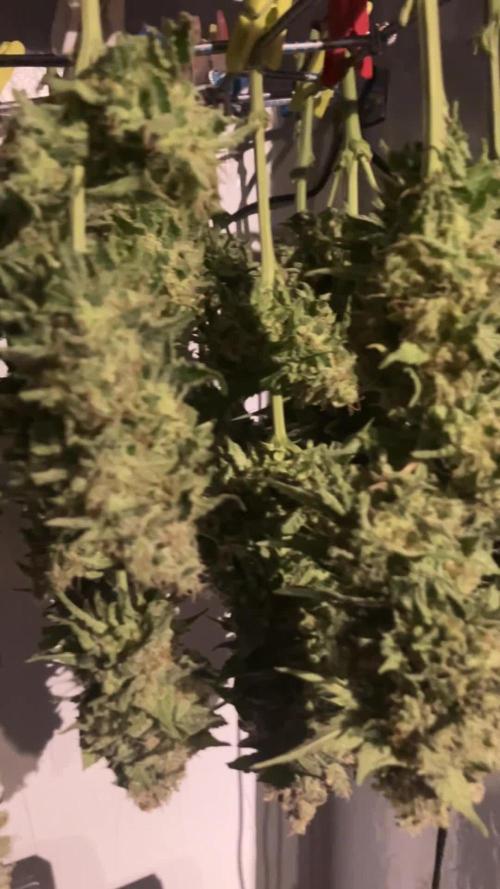
Did not measure wet weight. Harvest is done plants will dry the next 1-2 weeks. It took 67 bloom days until finish. Will update after drying is done.

Likes
20
Share


@DeepRootsGrowTrees
Follow
NORTHERN THUNDERFUCK AUTO / RQS
HARVEST WEEK
This lady produces some big dense heavy beautiful 😍 trichome covered buds she's really produces quality flower with a great relaxing smoke!
Thank you for stopping by and taking a look during the grow much appreciated!!
Thank you ROYAL QUEEN SEEDS!!
RQS / NORTHERN THUNDERFUCK AUTO

Likes
454
Share

@yan402
Follow
🌸🍏✨🍭🌸🍏✨🍭🌸🍏✨🍭🌸
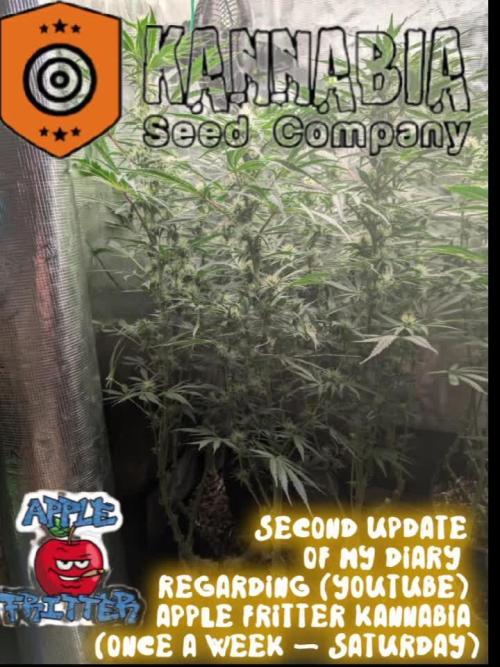
Hi and welcome to another Kannabia grow!
This time I’m running their Apple Fritter (feminized photoperiod). She’s going to veg under 24hr light and be manifolded.
Still cleaning the rest of my Candy Cream GF (11.04.25) — going to sow the seed tomorrow (12.04.25)
*been lazy, sowed on 14.04.25
🌸🍏✨🍭🌸🍏✨🍭🌸🍏✨🍭🌸
---
💭❗💭❗💭❗💭❗💭❗💭❗💭
❗Events & thoughts worth noting❗
💭❗💭❗💭❗💭❗💭❗💭❗💭
12.04.25 (GW1) – Cleaning + flushing the old coco coir. Might need to add another brick. *No new brick needed ✅
This is how I recycle my coco coir — fast, cheap, no BS.
🌿 Harvest plant
✂️ Chop roots small — they stay in for structure (organic perlite)
💦 Hot water rinse — remove salts & dust
🍶 Pre-soak with light feed:
Micro 10ml
Bloom 0ml
GreenBuzz 10ml
Cal-Mag 60ml
FFJ/FPJ 10ml (new disgusting batch)
pH down (citric acid)
♻️ Media stays — Roots stay — Back in service.
14.04.25 (GW1) – Planted seed in final pot ✅
16.04.25 (GW1) – Did last tent clean up + setup ✅📸
17.04.25 (GW1) – Seed germinated 🎉📸 — roughly 48hrs in final pot. Solid start👌♥️
23.04.25 (VW1) – Minimal burnt tips 📸 — not progressing, not a concern.
26.04.25 (VW1) – Started using the new batch of FPJ/FFJ
https://growdiaries.com/diaries/266849-grow-journal-by-yan402
30.04.25 (VW2) – Increased TriPartMicro & GreenBuzzBloom 10ml → 15ml
03.05.25 (VW2) – Increased TriPartMicro again 15ml → 20ml, topped the plant, and added final layer of clay pebbles around the base, trimmed side branches and did LST in preparation for "manifold" 📸
08.05.25 VW3 finished manifold📸
13.05.25 VW4 Increased TriPartMicro to 30ml and GreenBuzzBloom to 20ml.
15.05.25 VW4 Done defoliation and LST 📸
18-19.05.25 VW5 pruned all the shoots bellow my "mains" and did a full defoliation📸
24.05.25 VW6 increased GreenBuzzBloom to 30ml
04.06.25 VW7 did a cleanup📸
11.06.25 VW8 increase TriPartMicro to 40ml
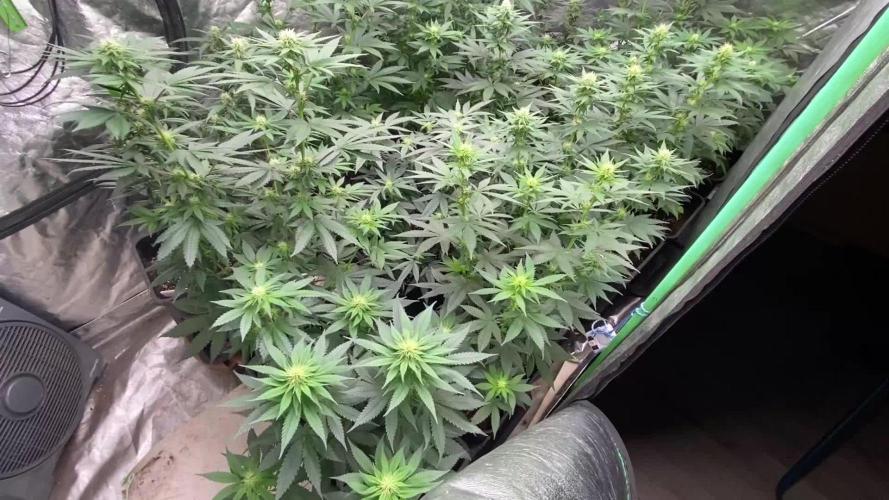
17.06.25 (VW9) – Final structure pass 💈🌿
Did a clean perimeter prune + removed weak shoots. Ended up with 12 tops, was aiming for less, but she made the call
Didn’t fight it, just shaped it the best I could
Airflow’s good, structure’s stable
🛑 No more cuts until post-stretch
Pics coming shortly 😘
Flip coming soon — we’ll see how she handles it.
20.06.25 VW9 Switched lighting to 12 hours, may the stretch begin 🤞
22.06.25 VW10 Did a good LST session,made some pics, and came to some conclusions and a small change of plans:
Originally planned for 8 mains — long, spaced colas and maybe a couple stronger “titans” if she wanted to go that way.
But she’s showing me something else, and I’m not here to fight her — just guide her.
Now after stretch, I’m keeping side shoots only if they: Fill real canopy gaps
Don’t crowd neighboring tops (minimum 15cm spacing)
Aren’t growing into walls or toward the next plant
Anything too close, too low, or heading into shade gets removed. No point forcing it.
Looks like I’ll finish with 14–16 solid tops, depending on how she settles.
I’m just trying to give each one enough light and space to stack properly.
No overcrowding, no larf — just letting her do her thing with a bit of structure.
Increased Tri Part Micro to 50ml as well.
28.06.25 VW11 one week since I flipped to 12/12 and she is stretching nicely, a bit shy in showing pistils compared to the Fantasy Feast regulars I have in the same tent.
29.06.25 VW11 increased GreenBuzzBloom 30→ 60ml
06.07.25 FW1 TriPart Micro: 50→ 30ml
TriPart Bloom: 0 → 20ml
Home-made FFJ/FPJ (Watermelon + Pumpkin): 10 → 30ml
12.07.25 FW1 GreenBuzzBloom 60 →40ml, TriPart Bloom: 20 → 60ml, fpj 30→60ml
19.07.25 FW3 Got some bleached tops, been out and about at job interviews and didn't notice a last minute stretch spurt 😭, should recover fine though plenty of time left 😁
22.07.25 FW3 TriPartMicro 30→20ml , TriPartBloom 60→80ml , GreenBuzzBloom 40→50ml
24.07.25 FW3 Cal-Mag 60→40ml
🌱💦🌱💦🌱💦🌱💦🌱💦🌱
🌿 Day to day tasks & actions 🌿
🌱💦🌱💦🌱💦🌱💦🌱💦🌱
19.07.25 FW2 – Fed 5l of #1 → 2l runoff
20.07.25 FW3 – Fed 5l of #1 → 2l runoff
21.07.25 FW3 – Fed 5l of #1 → 1.5l runoff
22.07.25 FW3 – Fed 5l of #1 → 1.5l runoff
23.07.25 FW3 – Fed 5l of #1 → 1.5l runoff
24.07.25 FW3 – Fed 5l of #1 → 1.5l runoff
25.07.25 FW3 – Fed 5l of #1 → 1.5l runoff
26.07.25 FW3 – Fed 5l of #1 50% strength→ 1.5l runoff
(*RUNOFF reused for tomato plants)
🍶💧🍶💧🍶💧🍶💧🍶
💧 Nutrients in 30L #1
🍶💧🍶💧🍶💧🍶💧🍶
💧 TriPart Micro: 10 → 15 → 20 → 30 → 40 → 50ml → 30 → 20ml (0.67ml/L)
🍶 TriPart Grow: 0ml (0.00ml/L)
💧 TriPart Bloom: 0 → 20 → 60 → 80ml (2.67ml/L)
🍶 GreenBuzz Bloom: 10 → 15 → 20 → 30 → 60 → 40 → 50ml (1.67ml/L)
💧 Cal-Mag: 60→40ml (1.33ml/L)
🍶 Home-made FFJ/FPJ (new batch): 10 → 30 → 60ml (2.00ml/L)
💧 pH Down: Citric acid (buxXtrade)
📦 TOTAL: 250ml per 30L
🔬 8.33ml/L
🍶💧🍶💧🍶💧🍶💧🍶
⚙️✂️⚙️✂️⚙️✂️⚙️✂️⚙️
✂️ Tools & equipment ✂️
⚙️✂️⚙️✂️⚙️✂️⚙️✂️⚙️
✂️ 2× MarsHydro SP3000
⚙️ MarsHydro 150mm ACF Ventilator
✂️ Trotec dehumidifier (big unit)
⚙️ Mini no-name dehumidifier
✂️ Kebab skewers (LST – stainless)
⚙️ Wire + roast skewers (LST assist)
✂️ Scissors (HST)
⚙️ Vacuum (for spills & cleanup)
✂️⚙️✂️⚙️✂️⚙️⚙️✂️⚙️✂️⚙️✂️⚙️
---
🍏🍪🌬️🍬🍏🍪🌬️🍬🍏🍪🌬️🍬
Apple Fritter (Kannabia Seeds)
🍏🍪🌬️🍬🍏🍪🌬️🍬🍏🍪🌬️🍬
Species: 50% Indica / 50% Sativa
Genetics: Sour Apple × Animal Cookies
THC: Up to 25%
Effect: Euphoric, relaxing, creative
Flavor: Sweet, fruity, pastry notes
Flowering: 56–63 days
Resistance: High
Indoor yield: 450–500g/m²
Outdoor yield: 600g/plant
Structure: Strong, bushy, dense buds

Likes
98
Share


@Tropicannibis_Todd
Follow
💩Holy Crap We Are Back At It And Loving It💩
👉WE R ALMOST THERE👈 3.5 GALLON POT CHOPPED ON DAY 65 👈
Growmies we are at DAY 70 and there just killing💀it👌 The Smell has kicked in and is wonderful 😀
👉We are in full out flowering 💐 and its looking great 👈
So Shit , I gave them just a tad to much nutes on the first few feedings 👈 But I have since fixed it
So I'm helping out with some low stress training 🙃 and some defolation 😳
Lights being readjusted and chart updated .........👍rain water to be used entire growth👈
👉I used NutriNPK for nutrients for my grows and welcome anyone to give them a try .👈
👉 www.nutrinpk.com 👈
NutriNPK Cal MAG 14-0-14
NutriNPK Grow 28-14-14
NutriNPK Bloom 8-20-30
NutriNPK Bloom Booster 0-52-34
I GOT MULTIPLE DIARIES ON THE GO 😱 please check them out 😎
👉THANKS FOR TAKING THE TIME TO GO OVER MY DIARIES 👈

Likes
3
Share

@420DeepGrow
Follow
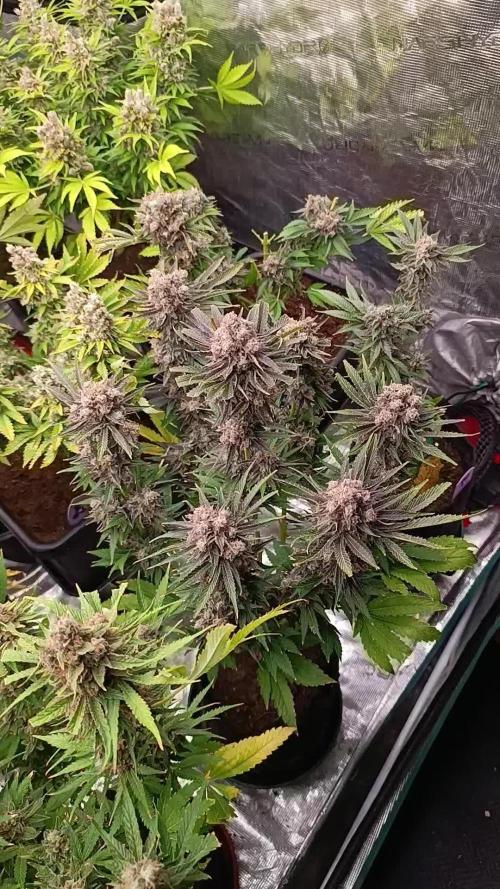
📆 Semana 11
Fase final en marcha, con cogollos muy duros y densos, terminando de afinar peso y compactación. La resina está en niveles muy altos y la planta empieza a mostrar tonos morados, señal clara de maduración avanzada.
Los tricomas se mantienen mayoritariamente lechosos con cada vez más ámbar, indicando una ventana de corte ya abierta. El aroma se intensifica y la planta consume sus últimas reservas, marcando el cierre del ciclo.
Cultivo estable y bien afinado, entrando en la recta final.
Seguimos creciendo fuerte 💪!


Likes
20
Share


@Threecube
Follow
Week 6 and they are still in the vegetation phase. Still growing it under 1 95w cfl 6500k. I really learned that leaving your plant in a small pot for too long can really stunt growth and slows down the whole process... It's growing pretty fast right now and every day i see how the plant is getting bigger. Did some LST to give new branches more light.
Leave any tips :)
Likes
33
Share


@cheetah844
Follow
She is lagging behind. I've been trying to grow an OG Kush for 3 seasons now. The first shipment I received they were all duds, the company sent out more seeds to replace those but the second shipment never arrived & now from a different breeder this one is a little droopy and sad.
Likes
6
Share


@HolisticCultivators
Follow
New home for the girls. In the tent with the light and fan going ! Just wanted to give you a heads up.... found a couple of spider mites on them this morning.... not sure if that came from your place or from mine. But take a close look at yours and lmk if you notice any damage/irregularities @gbagrow
The homie is popping like bacon on a Sunday morning. This is part of the game unfortunately, glad we are identifying issues early and eliminating them.

Likes
14
Share


@4F1M6
Follow
Oh my! Fast version indeed! These ladies are well stacked already. Just doing fantastic as they power their way through bloom. Definitely look like some whopper colas in the making! I'm fucking amped. Super healthy and super sexy. They are the furthest developed in this wave of flowering plants. Stead and speed baby!
They got treated with Dr zhymes as a preventative. That will basically wrap up their treatments ...possibly once more with lost coast.
Upped the pk intake as they are blooming strong now. Gotta keep those engines well fuelled. Response was stellar. Happy happy happy ladies.
Until next update. Happy growing and stay lit fam.

Likes
39
Share


@MyStery21
Follow
This Baby just can't stop grow. i wanna smoke this strain so bad so badddd.
To give you an example of why i'm telling you this, check this out.
i have my grow tent with the door open in my house with my infinity at maximum speed 10/10. AC ON 24/7. This days are really really hot over here and if i close the grow tent the Temp will raise up to 85%. Anyway.... 2 days ago i had a visit in home and i was a little afraid for the smell, turns that when they got here the first thing they ask for.... was the fruit that smell like that?. 😂😂
I said that i made a casquito de guayaba (that's a famous cuban dessert made from real guavas) smells very very sweet and taste asome.
This plant smells like that. Like a candy or a very sweet fruit But she's taking her time and im glad of that.
I want to tanks to @jinks101 @Trueorganics84 for the help they give me in this, my first grow. 🙏 thank you all guys...

Likes
28
Share


@Uwish
Follow
Day 49 to 56.
I'm not going to hide that I'm in a hurry to finish the run.
The mold arrived at the end of bloom because of me, it's depressing... Thanks for your comments these last weeks. :)
This 8th and last week of bloom for the Kum Zuat 1. I continued to rinse the plant all week with power clean at 5ml/l.
The Kum Zuat was harvested at 56 days of bloom with 1 week of rinsing. I still found some mold on some buds of several plants that I immediately removed. My yield will be affected, I still have this pretty Kum to cheer me up!
All the photos and videos on this update are about Kum Zuat 1.
The other plants have been fertilized normally for this 8th week, you will find them in pictures next week.
I enter the 9 th week of bloom and I have 4 plants left which will be all cut on day 63 of bloom also with 1 week of rinsing.
1 kum zuat
1 kosher cookies
2 gmo x animal cookies
Can't wait to start this new run.... I'll tease you a bit:
Sanlight of course <3
Ebb & Flow
Botafarm / Blueberry muffin
Advanced Nutrients
Are you interested in following this?


Likes
5
Share


@Deli_Weed
Follow
Va increíble, a pesar de que tardo para entrar en floración, nunca detuvo su crecimiento y logré hacer un LST super chingon de modo que logre que todas las puntas estén masomenos a la misma altura, así todas recibirán bastante luz y crecerán muy bien 🤤 ya me las imaginó 💪🏻🌲
Likes
6
Share


@Rugginho94
Follow
58 days of flowering: I started cutting the most mature apicals 42/57. I will wait for the remaining 7-14 days.
first 42: 370.5g


Processing
Likes
34
Share


@Trp24
Follow
Today is 48days to flower and 85 days to seeds
we are now at the end of this journey ... incredible how after eliminating rhinoskin from the nutrient solution the plants experienced greater heat stress. next time I will definitely buy the biggest solution! for the rest it seems to proceed in the normal way despite the high temperatures the blackdog holds on!


Processing
Likes
3
Share


@BirminghamGrowman420
Follow
Really good week she doubled in size, going to top her next week I’d rate her 8/10 right now

Likes
2
Share

@GingerGarageGrow420
Follow
Strain: Chill Out OG F4
Day 42 Flower
Day: 91 from sprout
Medium: Fox Farm Ocean Forest
Light: Vivosun VS2000 at 100%
VPD: 1.5 kPa
Light Distance: 12 inches
Watering: By hand, ~oz daily
Nutrients: pH Perfect Advanced Nutrition Grow, Bloom, Micro 3 ml / L, 2 ml / L big bud
Pistols turning red (20 %)
30 inches
Likes
25
Share


@HippyHemulen
Follow
She is still alive and very little bit growing in last few days, still making roots anyway so didnt wait any grow with this weather. Week was pretty cold night temps mostly 2-4 and day temps 11-14. Dont want to take it inside i just want to see how they react at outside.
Likes
247
Share


@PremiumBudsEU
Follow
Hello growmies 🙂
The flowers got a golden color,
it smells very strongly of lemon 🍋🍋 😍
This girls are very thirsty and hungry, i have to water them every 1-2 days.
I think they are happy for now so i will let It stay like it is until next Weekend.
Thanks for stopping by friends, I really appreciate your support, I hope you're doing well, stay healthy 🙏💚

Likes
8
Share


@Santica_Garden
Follow
Successful Germination 😎
So far so good, all 5 seedlings are looking healthy, could have let them stretch abit more but.... I don't mind their size at the moment 👍🏾
Really excited about this grow because I know what to expect already and it is AMAZING! 😁🔥😎