Likes
Comments
Share
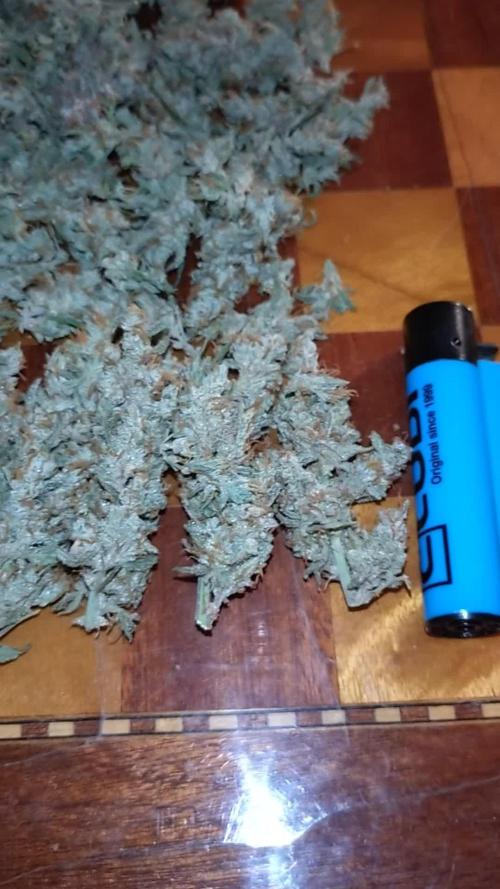
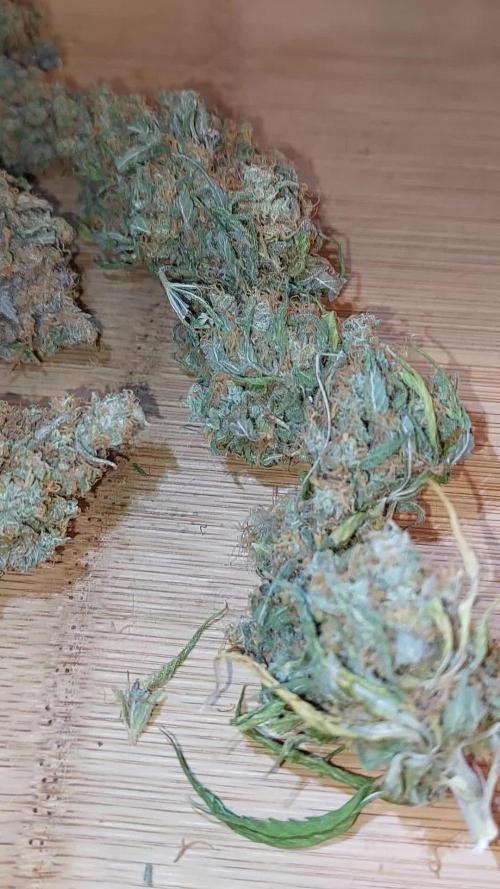
🍏🍌 Apples and Bananas – Harvest Update Two beautiful, healthy plants with very dense, chunky buds. I did run into some bud rot, but humidity wasn’t extremely high — it stayed around 60%. Most likely the issue came from insufficient air exchange, combined with how tight and compact the buds were. This has already been fixed with a ventilation upgrade, so the next run will have proper airflow. 🔥 Effects A very pleasant smoke overall. For me, this is a perfect afternoon/early evening strain. You come back from work, take a shower, relax on the couch, roll an Apples and Bananas… and everything just flows. It can easily pull you into a long gaming session — it takes you along for the ride. 😋 Flavour & Aroma I didn’t get a strong aroma from these phenos. Flavor-wise, one pheno gives some sweet touches, while the other has a slightly green/unripe note. Still, I can definitely imagine what this strain can become if you hit the right phenotype — there’s something promising underneath. With one month of curing, I’m sure the taste will be cleaner and more defined, so I’ll update again then. 🎁 Extra Note These seeds were a gift from Kannabia with my order — thank you very much!
Likes
92
Share
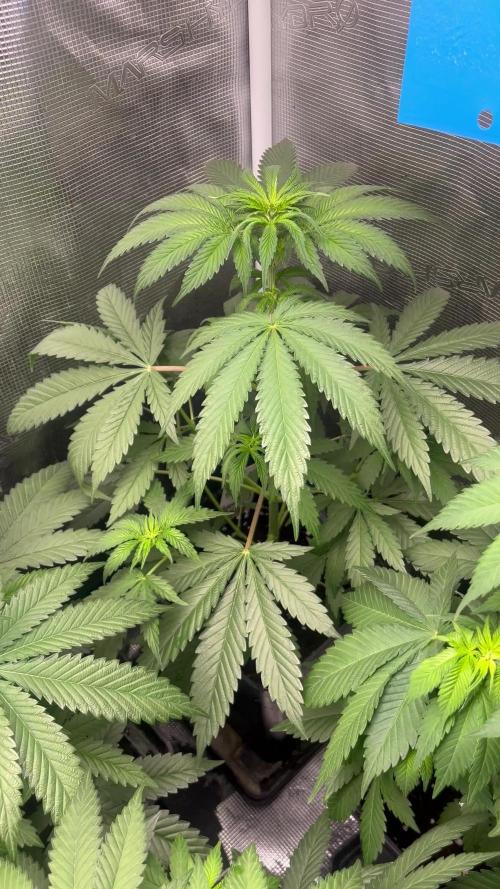
Thanks for stopping by.. Please hit the like button if you like what you see and ill be sure to check you out too Growmies 🌱 First of all would like to give a BIG shout out to my sponsors for providing me with the necessary items for this grow 👍 🌟🌟🌟🌟Mars Hydro FC4800🌟🌟🌟🌟 Powered By Samsung LM301B Diodes: The Mars Hydro FC 4800 480-watt LED grow light is installed with high-performance Samsung LM301B chips, the top-bin horticultural diodes, to provide a high Photosynthetic photon efficacy efficiency of 2.85 μmol/j and a long-lasting color rendering capability, supporting indoor plants to grow and thrive. High PPF Output and Uniform Light Distribution: FC4800 provides a high PPF of 1,366 μmol/S. The multi-light bar design and the dense diode layout facilitate an even distribution of grow lighting making PPFD optimized for Photosynthesis to achieve consistent growth in every part of the coverage range. Exclusive Recipe Of Full Spectrum Lighting: The full spectrum is enhanced with blue and red light, in which the blue light stimulates plant growth and promotes the accumulation of plant-based phytochemicals; the abundant red light improves the maturing process and flower quality of the plants. 🌟🌟🌟 Kannabia - Cherry Dream ⭐️ ⭐️⭐️ Chery Dream is an indica-dominant feminized cannabis seed that is designed for demanding palates always eager for new sensations. One of the priorities when designing this plant was to achieve a unique and different flavor that would appeal to cultured tasters. It’s our special “house dessert,” and it’s a limited edition, so be sure to order it while there are units left. To baptize it, we have combined the best of a pure Afghani Landrace from the 90s with a sweet Cherry that is full of flavor. The best of both worlds in one dish – this is how the best recipes come to be. One side brings to the table the autochthonous and authentic character and the other brings the perfect touch of distinction. The result is 70% indica dominant, making it resistant and easy to grow, with special growth patterns and a good yield. It reaches a THC of 19%, so the effect is remarkable —————————————————————————————— 👊👊👊👊Down to Business 👊👊👊👊 Week 4 from seed.. and as you can see she’s moving beautifully and is looking nice and healthy 👌 I will literally be flipping her to 12/12 tomorrow with the rest and am super excited for the flower cycle 😎 Thanks for stopping by 🙏🙏🙏
Likes
10
Share
@NSABND
Follow
Day 29... afternoon very sunny and warm temp 👍 Day 30 damn hot and full of sun 😎👍
Likes
28
Share
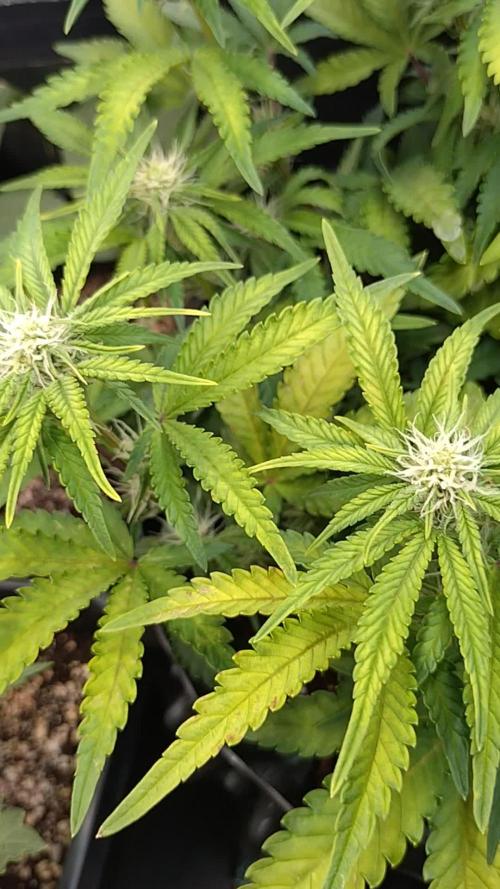
So, starting this week off with some TOP-ing news. The girls were topped, but only 5/7. 1x Purple Punch and 4x Honey Cream. The two Triple G's and one Purple Queen are struggling a bit with growth. I don't know what's wrong with them, because the other are growing like crazy. And those 3, eh, I don't know. If you know what could be causing the restricted growth, hit me up or leave a comment down below. 🙏🏻😁 I will apply a foliar spray with Green Explosion from TOP CROP and add some humic and fulvic acid to boost the root development and to kickstart the photosynthesis. So they start to eat 💪🏻😁 Rather than that, no other problems are present. The temp. is a bit high, 30⁰C but they are taking it like champs. Silica really does work wonders. 😅🙏🏻 I applied a full 3L feed for each plant, so the soil gets all wet through and plants can start growing new root shots. More roots, more fruits. 🌱 I'm planing on vegging them for 2-3 more weeks, so in total 5-6 weeks in vegetation. They have to come back from the shock that was caused by Topping. Every plant has around 6-8 new shots as you can see from the pictures. And this means more main "stems" or better to say more bud sites. 😎 I changed the MH bulb from 250W to 400W and will increase the wattage further to 600W in 2 weeks. They need more light. 😁☀️💡 Technical upgrade: 🎥 I bought a WiFi security camera. 😁 The thing is awesome. 😧 I can check the temp. any time and see the girls any time from anywhere on my phone. And I payed only 25€ for it 🤷🏻 It's a 1080P, 360⁰ camera. Any one should invest in some gadgets that make their job easier. 💪🏻 Ending this week with a smile 😉
Likes
Comments
Share
It training this week going to let he go do her thang. Light was a little to close so I raise it some
Likes
7
Share
@Jschnabs
Follow
This strain is amazing. Super frosty and the buds are rock hard. I suggest wait an extra week at the end of flower before harvest. The buds really pack on new large calyx the last week. The First smaller one yielded 3.68 oz including all the sugar leaf trim shown in the sticky note Pic. Second larger pot yielded..... I learned a lesson to use a bigger container for future grows. My smaller plant was small due to the 3gal container. My larger plant was in a 5gal and grew much better. My buds are much larger on the bigger container. I will be using minimum 7gal from now on. Smaller plant I harvested 2 weeks earlier and had 3.68oz dry. Larger plant 2 has wet weight of 630g. I pulled clones from the larger one before flower to test pure organic nutrients and soil I'm am building against advanced nutrients and happy frog soil. New diary to come in the future with the comparison.
Likes
69
Share
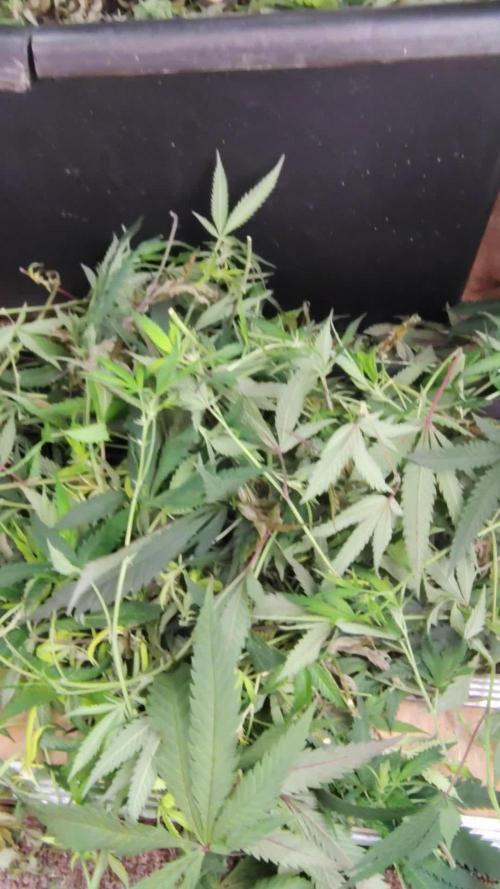
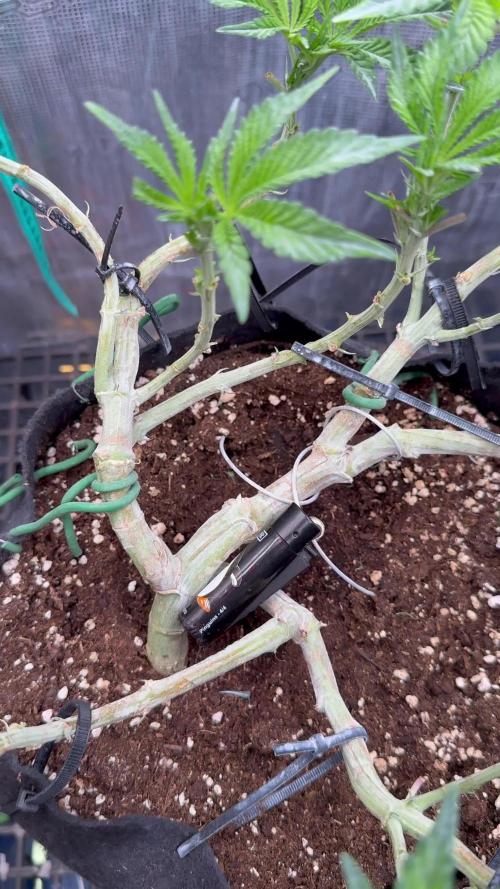
Eternity Grow Cup - Week 11 VEG Report This is a pivotal week in our Eternity Grow Cup journey as we wrap up VEG and prepare to transition into FLOWER. Our goal has been to ensure that the plants are thriving and optimized for the next phase. This report will detail everything that took place during this crucial week. Mass Defoliation & Structural Training We began the week with an extensive defoliation session. Every leaf with a stem was removed to clear space for optimal light penetration and airflow. This process was done mostly by hand, clicking them off in the opposite direction of growth, while some stubborn ones were snipped with scissors. By the end, it felt like we had taken out nearly half a kilo of leaves! The room now looks clean, structured, and ready to fill out the ScroggNet. To further enhance the plant structure, branches were attached to the pots, allowing for better horizontal growth. This technique helps maximize canopy exposure and prepares the plants for even light distribution once flowering begins. Defoliation before flowering is a key step as it reduces overcrowding, improves airflow, and sets the plants up for efficient energy use in the next phase. Light Schedule & Adjustments This week, we introduced a subtle but effective light adjustment. While still maintaining an 18-hour light cycle, we initiated a 15-minute delay with the whites, allowing the reds to start first. This gradual shift signals the plants that a change is coming. Similarly, at the end of the light cycle, the whites turn off 15 minutes earlier, leaving the reds on for an extended period. This strategy mimics natural sunrise and sunset, helping the plants transition more smoothly into flowering. Additionally, at the end of the week, we will be implementing 48 hours of darkness before the official flip to flower. This method has worked exceptionally well in past grows, helping plants recognize the transition and encouraging a strong start to flowering. However, it's important to emphasize that this is a personal technique and not a universal rule. Every grower should experiment with different methods to find what works best for their specific environment. Environmental Conditions & Challenges Currently, our temperature is at 27°C with 60% humidity, resulting in a VPD of 1.50. While slightly higher than the ideal for VEG, our CO2 levels are over 1000 ppm, and the light intensity is at 570 PPFD, making it a manageable balance. The solution pH is 5.79 (essentially 5.8), EC is 1.38, and water temperature is 17.7°C. One challenge we are facing is maintaining optimal reservoir temperatures. Currently, it's a bit low at 17.7°C, and we are exploring solutions to raise it slightly. However, the medium temperature sits at 22.2°C, which is a good range. The humidifier is still in use, though it struggles to increase humidity further, so we are working with what we have to keep the VPD in check. ICL-300s Integration The ICL-300 lights are now fully active. Unlike the last grow, where we introduced them later, this time they are on from the start of flowering prep. This adjustment is an experiment to see if the plants respond better to an early introduction. Learning is at the core of this journey, and each grow offers new insights. Whether this proves to be the optimal strategy or not, it will be a valuable lesson for future grows. TrolMaster Hub & Data Monitoring Throughout the week, we have been closely monitoring our grow using the TrolMaster App TM+. We are displaying some of the collected data for everyone to see the details. Stay tuned as we explore this further in the next report! As always, we want to extend a huge thank you to our sponsors and the amazing community. Special thanks to Aptus, Groovebags, Cannakan, Promix, Ziggy Papers, TrolMaster,and Plagron, Zamnesia and Grow Diaries for making the Eternity Cup possible. I apprecilove the support from all sides—lovers, haters, competitors, and fellow growers. The competition continues to push us to improve, and i am thrilled to see the incredible reports from others. This is a challenging yet rewarding experience, and i couldn’t be happier to be part of it. For those following along, we invite you to check out our YouTube channel, where we upload full 4K episodes showcasing the entire journey. Some episodes are too large to be uploaded directly to Grow Diaries, so YouTube is the best place to catch everything in high definition. This marks the end of VEG, and we are officially ready to flip to FLOWER. Next week, we will dive into the TrolMaster System in action, check the data insights, and monitor how the garden adapts to the shift. Stay tuned! Growers Love to all, happy growing, and best of luck to all competitors! See you all in the next update! Genetics - Runtz https://www.zamnesia.com/6000-zamnesia-seeds-runtz-feminized.html Nutrients - Plagron https://plagron.com/en/hobby - Aptus Holland https://aptus-holland.com/ Controls - Trol Master https://www.trolmaster.eu/ LED - https://www.futureofgrow.com/en LED - https://www.thinkgrowled.com Soil - https://www.promixgardening.com/en Germination - Cannakan https://cannakan.com/?srsltid=AfmBOopXr-inLXajXu3QFgKXCXXos4F1oEvScjMKIB5MR5dk8-GJ-F49 DOGDOCTOR 15% off Smoking Papers - https://ziggioriginal.com/ Terpene saver - https://grovebags.com/ As always thank you all for stopping by, for the love and for it all , this journey of mine wold just not be the same without you guys, the love and support is very much appreciloved and i fell honored with you all in my life With true love comes happiness Always believe in your self and always do things expecting nothing and with an open heart , be a giver and the universe will give back to you in ways you could not even imagine so As always, this is shared for educational purposes, aiming to spread understanding and appreciation for this plant. The journey with nature is one of discovery, creativity, and respect. Let’s celebrate it responsibly and continue to learn and grow together! Growers Love To you All 💚 #EternityGrowCup #RuntzHunt #GrowersLove #CannabisCommunity #AptusHolland #ProMixSoil #TrolMaster #Zamnesia #Plagron #ZiggiPapers #Grovebags
Likes
7
Share
Die Tripse sind verschwunden aber ich habe die Pflanzen strapaziert die letzten 2/3 Wochen erholen und nichts mehr tun außer buds zu dicken. Ich habe es kühl und feucht gehalten und mit Gegenmitteln alles organisch bzw nicht schädlich oder keine Chemie aber dennoch ist es nichts für mich denke das nächste Mal direkt weg den die Arbeit ist zuviel vor allem wenn's wie bei mir dann immer auch zusätzlich juckt dennoch R.I.P Tripse 😅😅😅
Likes
Comments
Share
Alright so we're moving along as best we can with some weird looking growth but it's still growth lol. We started the Athena blended line this week but it's still early so we'll see how they look after this week. I'm hoping they grow out of this weird looking foliage. Other than that we're doing great and in a couple more weeks we'll transplant the photos and put them in flower.
Likes
4
Share
Very good and healthy looking i think stretch is kinda over and i can clean her up in few days ao she is ready to start pump those flowers lets gooooo
Likes
9
Share
Starting off week 7. Gotta love the holidays! Good to catch up with family, but sucks when you can't get time to water. Water deprived 2 more times this week. Also had several bleached buds on various plants and my favorite light was now done with the other tent, so swapped it over now. led. Spaectra has much better even par distribution than my king leds. Got about a month or so to go. Still not bad given the neglect and over use of light they've recieved over last couple weeks. Hoping to get everything dialed back in for the remaining month.
Likes
16
Share
@Ensign420
Follow
Introduction - Week 14|07 Summary - Ensign's log, stardate 9437.65, Great week of growing! Wow what a good week! Growth in the main tent has all around been incredible! Submitted my first submission to the Global Grow Cup! Filmed a video of the solo cup container (marked with the ticket/order number) that will be used for the competition. Also had to fill and prove the solo cup holds 2 cups of soil. Now I need to root a clone (for the first time), transplant her into this cup, and submit my 2nd entry before the 30th of this month. As far as my first attempt at cloning, have already begun the rooting process! Managed to take cuttings from 3 out of the 6 phenos in the main tent (the first cutting was also my first time topping). Soaked the cuttings for two days before planting them into Coco Coins. So far everything has gone surprisingly well! The clones are now rooting under the propagation dome with the vents fully closed. Will check for roots soon! At the end of the week, growth was just raging! Was planning on flipping to flower in a week, but decided to begin the first week of flower next week! Thus this is the last week of veg. Plan to flip to 12/12 next Monday! Onwards to next week! [START OF WEEK 14|07] ========================================================== Garlic Budder #1 - WEEK 14|07 - Full Veg Wk5 Garlic Budder #2 - WEEK 14|07 - Full Veg Wk2 Garlic Budder #3 - WEEK 07 - Full Veg Wk5 Garlic Budder #4 - WEEK 06 - Full Veg Wk4 06/03/24 → 06/09/24 This Week's Estimated Goals ---------------------------------------------------------------------------------------------- DLI: ~26 mol/m²/d PPFD: ~400 μmol/m²/s VPD: ~1.0 kPa This Week's Meter Readings & Averages [Lights On: 16:00 - 10:00] ---------------------------------------------------------------------------------------------- DLI: 24.56 mol/m²/d PPFD: 379 μmol/m²/s VPD: 0.91 kPa Soil %: [32.7, 37.6, 37.9, 34.1] ========================================================== Day 01 - Monday - 06/03/24 - Total Days: 098 ----------------------------------- Daily Averages [~23:00] - Temps: 80.7°F [27.1°C] - Humidity: 74.4% - VPD: 0.90 kPa - Soil %: [31, 34, 39, 35] ----------------------------------- - [09:57]: Quick morning check! --- #1 is looking a bit droopy, but almost lights off (at 10:00) so not concerned. --- Nice! Mainly wanted to check on #4 and she is looking great! She’s perked back up and looking good! - [23:08]: Evening check. --- Wow! It’s a jungle in here! --- #1 has gotten too big? Nah!? Keep on growing girl! --- #2 is growing and definitely getting bigger! Growth just looking really weird. --- #3 has continued to get larger and is looking quite uniform in growth! --- #4 is growing and looking perky again! --- Even the original #1 and #2 phenos (in the back) are looking good! --- Wow! #4 is really getting close to the light. - [23:14]: Checked down both fill tubes. --- Both reservoirs were completely dry! - [23:27]: Checked the Ecowitt soil moisture sensor data: --- 30% - [CH01 EB1 - Garlic Budder #1] --- 34% - [CH02 EB2 - Garlic Budder #2] --- 39% - [CH03 GFP - Garlic Budder #3] --- 32% - [CH04 FPT - Garlic Budder #4] - [23:32]: Poured 4 cups of distilled water down EB1’s fill tube. --- Poured 2 cups of distilled water down EB2’s fill tube. - [23:38]: Checked the humidifiers. --- Refilled the 4X4’s humidifier with distilled water. --- Tomorrow, plan to defoliate and start cloning for the first time! --- Going to take multiple cuttings from both #1 and #4 for sure, but still deciding on the rest. --- Getting hyped! Day 02 - Tuesday - 06/04/24 - Total Days: 099 ----------------------------------- Daily Averages [~23:00] - Temps: 81.4°F [27.4°C] - Humidity: 74.3% - VPD: 0.93 kPa - Soil %: [29, 35, 38, 32] ----------------------------------- - [11:59]: Time to film the first entry for the Global Grow Cup! --- Going to be using BuildASoil 3.0 potting soil. --- Filming the video using a stand and my phone. --- This video is mainly to establish the container that the plant will be grown in. Also to prove that the container is a 16oz container and that it can hold 2 cups of soil. --- The ticket (order) number also had to be written on the cup. - [12:36]: Done! --- The video had to be done in one continuous shot with no edits (my original submission does not have the logo). --- There was also a photo that needed to be shot which shows the cup filled with 2 cups of soil (just like the video, the original image submission did not have the logo). --- I think I did everything correctly, but also sent an email for verification of submission and validation. --- Getting hyped! --- [*smokes a bowl] --- Going to defoliate today along with for the first-time, going to take cuttings for clones! --- After a bit of online research, decided to split the cloning process into two days. --- Today going to take cuttings and will soak them in a solution of aloe for 24hrs. Afterwards will change the water out and use straight distilled water. --- Then in a couple days, plan to transplant into coco plugs (Coco Coins) for rooting. --- For optimal results, also be using a rooting hormone (Clonex). --- Well.. Here goes nothing! - [17:01]: Evening check. --- Wow! #1 is looking huge! Her main top is stretching above the lower canopy which is continuing to bush out. --- #2 is growing along. Growth is gnarly and a bit droopy, but she’s getting taller! --- #3 is looking great! Still a bit small, but she is continuing to get larger. --- #4 looks like she needs a watering. --- Both plants in the back are also looking surprisingly great as well! - [17:05]: Checked down both fill tubes. --- Both reservoirs were completely dry! --- As far as today's defoliation, going to leave #2 and #3 alone and will focus my defoliation and cloning on the rest of the plants. --- This will be my first attempt at cloning, also going to try topping for the first time today. --- No pressure Ensign. What can possibly go wrong right? - [17:27]: Time to start the cloning and defoliation process! --- Filled a measuring cup with 3 cups of distilled water. ------ Added 3/4tsp of Horticultural Aloe ------ Added 1 more cup of distilled water --- Mixed the solution and poured an even amount into three separate solo cups. --- Made sure to mark two of the cups (#1 and #4). The unmarked one will be for any other clones from amongst the 6 phenos (if any at all). - [17:43]: Time to top and defoliate #1! --- Using a pair of brand new trimmers (AC Infinity), --- Gently cut the main stalk to even out the canopy. --- Then trimmed and cleaned most of the nodes leaving the top node or two. --- Also trimmed the leaf fingers a bit before placing the top cutting into the cup of aloe solution. --- Now for the rest of the cuttings! --- [~45 minutes later] - [18:32]: Managed to finish defoliating and cutting the rest of the clones. --- Took two more lower cuttings from #1 (3 clones total). --- Took 3 lower cuttings from #4 --- While defoliating, decided to try and clone the original #2 pheno as well. Took 4 small cuttings. --- Similar to the top cutting, trimmed and cleaned each lower node for each cutting before placing them into the cups. --- Before finishing up the 2nd cutting, I noticed the first cutting (the top cut that was also trimmed) was drooping. --- So I did not trim and the leaf fingers for the other cuttings. --- In total there were 10 cuttings taken for potential clones. --- My main focus was to take cuttings and to clean up all the lower growth from both #1 and #4. --- Defoliated and cleaned up the back original phenos as well (also trimmed back the cover crop). - [18:35]: Temporarily placed the cuttings onto the floor of the 4x4 tent. --- Took the trimmings (about 3 cups) and spread them onto the top mulch of #1 and #2. --- Time to set the environmental controls for the 3x3 veg tent. - [18:43]: Within the AC Infinity App, --- For the Veg Tent [3x3] controller, --- Adjusted the 'Vegetative [18/6]' Schedule for the grow light. ------ Set the Mode to ‘On Mode’ ------ Set the START/END times to 04:00PM/10:00AM ------ Set the MAX to 1 --- The IonBoard S33 is now utilizing around 60.8W (at intensity 1 out of 10). --- Adjusted the 'Vegetative [18/6]' Schedule for the exhaust fan. ------ Increased the Humidity’s HIGH trigger value from 81% to 87% --- Adjusted the 'Vegetative [18/6]' Schedule for the humidifier. ------ Decreased the VPD target value from 1.5kPa to 0.8kPa - [18:52]: Moved the cuttings into the 3x3 veg tent. --- It begins! I think. --- Going to let these cutting drink some aloe for a day before switching to straight distilled water. --- Hmm. Could be the white floor of the 3x3 veg tent, but have noticed the S33 has a whiter spectrum whereas the FC-6500 seems to be warmer in color. --- Anyways, - [18:58]: Poured 4 cups of distilled water down EB1’s fill tube. --- Poured 2 cups of distilled water down EB2’s fill tube. - [19:06]: Filled a pump sprayer with 5 cups of distilled water. --- Focused mainly on the straw mulch of #4. --- But also misted the straw mulch for the rest of the plants a bit. - [19:12]: Checked the humidifiers. --- Refilled the humidifiers with distilled water. - [19:44]: Going to be using Clonex rooting gel before planting the cuttings into Coco Coins (pre-soaked with microbes and aloe). But before that begins, going to transfer the Clonex gel into a squeeze bottle. --- Gently peeled back the seal on the original Clonex bottle. Just enough make a tiny opening, --- Then slowly and carefully poured the gel into an empty squeeze bottle. --- Also removed the sticker from the original bottle and placed it onto the new one. - [19:54]: Perfect! --- Instead of applying the gel to the cutting, going to be applying the gel to the Coco Coin. --- This squeeze bottle will make applying the gel a lot easier. --- Will take PPFD readings tomorrow. --- Also will change out the aloe solution to distilled water. --- I really hope I didn’t screw things up before they could even begin. --- Don’t die on me ladies! --- Please. Day 03 - Wednesday - 06/05/24 - Total Days: 100 ----------------------------------- Daily Averages [~23:00] - Temps: 81.9°F [27.7°C] - Humidity: 75.5% - VPD: 0.90 kPa - Soil %: [29, 36, 38, 36] ----------------------------------- - [09:40]: Quick morning check! --- #1 is looking a bit droopy, but looking okay. Topping is a high stress technique so going to take some time to recover. Don’t plan on flipping the main 4x4 tent to flower for a good week or so which should be enough time. --- #4 looks great! The defoliation seems to have no effect on growth. Nice! - [09:41]: Also quickly checked on the 3x3 veg tent, --- Nice! The cuttings are looking great! --- No yellowing and they all seemed to have turned up towards the light. --- So far so good! - [22:53]: Evening check. --- #1 is continuing to dominate this grow! She has spread wide and looking incredible! --- #2 is looking gnarly, but getting there. --- #3 is getting larger! But still a runt. By far, her leaves are the darkest of the bunch, but she is still growing! --- #4 looks happy and growing along beautifully! Wow! - [22:55]: Checked down both fill tubes. --- Both reservoirs were completely dry! - [22:59]: Poured 5 cups of distilled water down EB1’s fill tube. --- Poured 2 cups of distilled water down EB2’s fill tube. - [23:05]: Checked on the 3x3 veg tent. --- Ooo yea! The cuttings are still green! Nice! - [23:07]: Took PPFD readings. --- The cuttings were around 121 μmol/m²/s which gives a DLI of 7.84 mol/m²/d --- Nice! These levels are on the lower range for seedlings (~100-300), perfect! I think. - [23:14]: Swapped the aloe water out to straight distilled water. --- Going to let these cuttings soak for one more day before planting. --- Please don’t die girls! - [23:15]: Checked the humidifiers. --- Refilled the humidifiers with distilled water. --- Ooo yea! --- Tomorrow is the big rooting day! Day 04 - Thursday - 06/06/24 - Total Days: 101 ----------------------------------- Daily Averages [~23:00] - Temps: 81.9°F [27.7°C] - Humidity: 75.2% - VPD: 0.91 kPa - Soil %: [32, 38, 38, 34] ----------------------------------- - [16:20]: Evening check. --- #1 is a bit droopy, but growth is looking green and healthy. --- #2 is looking bigger! She’s also looking sort of droopy. --- #3 is growing along nicely! Looking good girl! --- #4 is looking great! A bit droopy but plan to water today. - [16:23]: Checked down both fill tubes. --- EB1's reservoir still has some water. --- EB2's reservoir was completely dry! - [16:23]: Checked the Ecowitt soil moisture sensor data: --- 28% - [CH01 EB1 - Garlic Budder #1] --- 36% - [CH02 EB2 - Garlic Budder #2] --- 37% - [CH03 GFP - Garlic Budder #3] --- 30% - [CH04 FPT - Garlic Budder #4] - [16:30]: Using a pump sprayer, --- Misted the straw mulch of #4 with 6 cups of distilled water. --- Focused mainly on the straw mulch. --- Also misted the straw mulch of #3 (in the grassroots fabric pot) a bit. - [16:43]: Poured 5 cups of distilled water down EB1’s fill tube. --- Poured 3 cups of distilled water down EB2’s fill tube. - [16:52]: Checked the Ecowitt soil moisture sensor data: --- 56% - [CH01 EB1 - Garlic Budder #1] --- 44% - [CH02 EB2 - Garlic Budder #2] --- 40% - [CH03 GFP - Garlic Budder #3] --- 45% - [CH04 FPT - Garlic Budder #4] - [17:01]: Took general PPFD readings. --- #1 was around 379 μmol/m²/s which gives a DLI of 24.56 mol/m²/d --- #2 was around 333 μmol/m²/s which gives a DLI of 21.58 mol/m²/d --- #3 was around 293 μmol/m²/s which gives a DLI of 18.99 mol/m²/d --- #4 was around 378 μmol/m²/s which gives a DLI of 24.49 mol/m²/d - [17:09]: Took the weekly height and light distance measurements. --- #1 was about 21" tall. --- #2 was about 13.5" tall. --- #3 was about 9.5" tall. --- #4 was about 19.25" tall. --- Hmm.. - [17:19]: Adjusted the right oscillating fan a bit. --- Re-angled the CloudRay S6 oscillating fan upwards. Been noticing that the air has been hitting the tops of the plants so easing off a bit (#1 is still getting hit, but she’s huge so not too worried). - [17:23]: Back to the measurements! --- #1 was about 9.5" away from the grow light. --- #2 was about 17" away from the grow light. --- #3 was about 17.5" away from the grow light. --- #4 was about 11.5" away from the grow light. - [17:46]: Checked on the 3x3 veg tent. --- Cuttings are still green! They do look a bit droopy but no signs of yellowing. --- Okay! - [17:55]: Time to begin the rooting process! --- For my first attempt at rooting, going to be using Coco Coins pre-soaked in saponins, microbes and aloe. --- To further help with rooting, going to also be using Clonex rooting gel. --- Filled a measuring cup with 4 cups of distilled water. ------ Added half of 1/64tsp of Quillaja Saponaria Extract [60] ------ Added 1/16tsp of Horticultural Aloe ------ Added 1/8tsp of Mycrobe Complete --- Mixed the solution thoroughly. --- Time for the Coco Coins! --- 10 cuttings means 10 Coco Coins. - [18:09]: Dropped 10 Coco Coins into the measuring cup. --- The coins immediately started to expand. --- A bit too much.. Oops! --- Poured the solution and Coco Coins into a pitcher. --- Added 2 cups of distilled water to the solution (now at 6 cups). --- Great! The coins are pretty much fully expanded, but going to wait a bit longer to fully saturate each coin. --- [~20-30 minutes later] - [18:42]: Great! --- Took the seedling and flood tray from the AC Infinity propagation dome and placed all 10 Coco Coins into the slots. --- Gave each Coco Coin a quick shake to remove excess solution. The coins were not dripping with solution but still pretty saturated. --- Arranged them into 3 groups with the cuttings in mind. --- Also tried to keep the pre-made holes intact. --- Time to inoculate the Coco Coins! - [18:54]: Using a squeeze bottle, --- While keeping the nozzle from making contact with the coco, gently filled each pre-made hole with Clonex rooting gel. Just enough gel to fully cover the hole of each coco coin. - [19:00]: Time to plant the cuttings! --- Gave each cup a misting of distilled water. Focused on wetting the top growth with water. --- Okay! --- To avoid mixing cuttings up. - [19:01]: Starting with the original #2 pheno cup, --- For each cutting, --- Using a pair of clean trimmers, made a final 45° cut about 1/2" from a bottom node. --- Then stripped away and scared the protective membrane below the node before planting. --- Made sure the node was about 1/2" below the surface of the coco. --- To help with planting, while inserting each cutting, gave the Coco Coin a gentle squeeze to loosen the coco. This also helped to ensure the coco and gel was in good contact with the cutting. --- Once the cutting was planted into the Coco Coin, made sure to place back in the same spot (made sure to keep the cuttings in their groupings). --- Once a cup was complete, made sure to keep the label with the group. --- Re-misted the top growth as needed to keep it wet. --- Also wiped the trimmers with isopropyl alcohol in between cuttings (plan to use 10% bleach solution for next time). --- Repeated this process until all 10 cuttings were cut, planted, and in the tray. --- The coco coins fit perfectly into the tray and don’t reach the bottom. Nice! --- The bottom air gap is important. --- Poured a bit of distilled water through one of the empty slots into the bottom of the tray. Just enough to fill the bottom of the tray, but not enough to reach any of the Coco Coins (~1/4cup). - [19:35]: Placed the propagation tray with cuttings into the 3x3 veg tent. --- Placed the first layer of the propagation dome on before giving the sides a misting of distilled water. --- Also sprayed the top of the propagation dome before covering the cuttings. --- Vents are all fully closed. - [19:40]: Placed the bar lights onto the top of the dome before configuring the controller. ------ Set the START/END times to 04:00PM/10:00AM ------ Set the bar light’s intensity to 2 (out of 10). --- Also made sure the propagation light controller’s time was in sync with the Controller 69 Pro. - [19:47]: Took PPFD readings. --- The cuttings were around 136 μmol/m²/s which gives a DLI of 8.81 mol/m²/d --- The PPFD levels are similar to the floor. --- Perfect! --- Going leave the IonBoard S33 on during this rooting process. --- Will check back tomorrow to cycle the air under the dome. - [19:56]: Checked the humidifiers. --- Refilled the humidifiers with distilled water. - [20:17]: Quick night check! --- Ooo yea! Growth is raging and looking perky! --- Mainly checked on #1 and #4 which were looking incredible! --- Keep on growing ladies! Day 05 - Friday - 06/07/24 - Total Days: 102 ----------------------------------- Daily Averages [~23:00] - Temps: 82.7°F [28.2°C] - Humidity: 76.2% - VPD: 0.89 kPa - Soil %: [37, 40, 38, 35] ----------------------------------- - [10:03]: Decided to increase the ambient temp in the 3x3 veg tent. --- Within the AC Infinity App, --- For the Veg Tent [3x3] controller, --- Adjusted the 'Vegetative [18/6]' Schedule for the heater. ------ Increased the Temp target value from 78°F to 82°F --- Hopefully this will help to keep the veg tent at a more consistent temp. - [22:26]: Evening check. --- Ooo yea! The garden is looking incredible! --- #1 is looking perky and just bushing out! Wow! --- #2 is getting big! Growth is weird and leaf fingers are huge! Just going to let her grow. --- #4 is looking happy and growing along like a champ! Nodes are starting branch out and she is turning into a bush! - [10:28]: Checked down both fill tubes. --- Both reservoirs were completely dry! - [22:33]: Poured 5 cups of distilled water down EB1’s fill tube. --- Poured 3 cups of distilled water down EB2’s fill tube. - [22:40]: Checked on the propagation dome (inside the 3x3). --- Ah yea! Looking great ladies! --- Lifted the top of the dome to let some fresh air in for a bit. --- Wow! --- Leaves still look nice and green! --- So far everything looks great! --- Just going to continue on! - [22:53]: Checked the humidifiers. --- Refilled the humidifiers with distilled water. - [11:01]: Decided to adjust the humidifier for the 3x3. --- Within the AC Infinity App, --- For the Veg Tent [3x3] controller, --- Adjusted the 'Vegetative [18/6]' Schedule for the humidifier. ------ Increased the VPD target value from 0.8kPa to 1.5kPa --- The higher VPD level will essentially turn the humidifier off. --- I won’t be needing the humidifier for a good week so might as well save the water. Day 06 - Saturday - 06/08/24 - Total Days: 103 ----------------------------------- Daily Averages [~23:00] - Temps: 81.6°F [27.6°C] - Humidity: 74.9% - VPD: 0.91 kPa - Soil %: [35, 40, 37, 31] ----------------------------------- - [07:40]: Quick morning check! --- #1 and #4 are looking perky and happy! --- Also checked on the propagation dome, --- All cutting still look green! Hyped! - [20:02]: Evening check. --- Wow the garden is raging with growth! --- #1 has blown up! She has clearly recovered and growth is ramping up again! --- #2 is stretching upwards! --- #3 is now the smallest of the 4, but still getting larger! --- #4 is looking incredible! Wow! Growth looks perky and happy! - [20:05]: Checked down both fill tubes. --- Both reservoirs were completely dry! - [20:10]: Poured 6 cups of distilled water down EB1’s fill tube. --- Poured 2 cups of distilled water down EB2’s fill tube. - [20:16]: Checked the Ecowitt soil moisture sensor data: --- 35% - [CH01 EB1 - Garlic Budder #1] --- 40% - [CH02 EB2 - Garlic Budder #2] --- 36% - [CH03 GFP - Garlic Budder #3] --- 27% - [CH04 FPT - Garlic Budder #4] - [20:19]: Using a pump sprayer, --- Misted the straw mulch of #4 with 5 cups of distilled water. --- Focused mainly on the straw mulch. --- Also misted the mulch of #3 a bit (in the fabric pot). - [20:27]: Checked propagation dome (in the 3x3), --- To cycle the air under the dome, lifted the top off for a bit. --- Ooo yea! Everything is still green and looking great! --- Keep on rooting ladies! --- Oops! - [21:45]: Checked the humidifiers. --- Refilled the humidifiers with distilled water. Day 07 - Sunday - 06/09/24 - Total Days: 104 ----------------------------------- Daily Averages [~23:00] - Temps: 81.5°F [27.5°C] - Humidity: 74.8% - VPD: 0.91 kPa - Soil %: [36, 40, 37, 36] ----------------------------------- - [08:18]: Quick morning check! --- Nice! The main tent is looking great! #1 and #4 are both raging with growth! --- Checked on the propagation dome (inside the 3x3) and the clones are still looking green! --- Wow! Everything is going almost too well! Just keep on growing! - [19:08]: Evening check. --- Garden is just exploding with growth! Seems everyone has fully recovered from the defoliation and topping! --- Wow #1 is bushed out and looking incredible! --- #2 is growing really starting to get large! Growth still is funky, but stoked none-the-less. --- #3 is starting to fill in the pot! Getting larger! --- Wow! #4 is getting taller and looks healthy and green! - [19:12]: Checked down both fill tubes. --- Both reservoirs were completely dry! --- Wow the canopy is really starting to get taller and closer to the light. May need to raise it up soon. --- Absolutely surprised how low the light levels have been throughout this entire cycle. Barely moved the light and have not increased the intensity past 2 (out of 10). Less is really more. --- Anyways! - [19:18]: Checked the Ecowitt soil moisture sensor data: --- 36% - [CH01 EB1 - Garlic Budder #1] --- 41% - [CH02 EB2 - Garlic Budder #2] --- 37% - [CH03 GFP - Garlic Budder #3] --- 34% - [CH04 FPT - Garlic Budder #4] - [19:19]: Poured 6 cups of distilled water down EB1’s fill tube. --- Poured 3 cups of distilled water down EB2’s fill tube. - [19:24]: Checked propagation dome (in the 3x3), --- To refresh the air, lifted the top off for a bit. --- Sweet! Still green! Wow! --- Using a spray bottle, misted the top growth with distilled water. - [20:35]: Checked the humidifiers. --- Refilled the humidifiers with distilled water. --- Wow what a week! --- Growth has been just insane in the 4x4 tent! All plants have fully recovered and have just exploded with growth. --- I think it’s time to flip to flower! --- Also, I’m absolutely baffled about how well the cloning process has been going. --- So far no issues! --- Not complaining, but just surprised. Keep on growing ladies! --- If all goes well, should have fully rooted clones soon ready for transplanting (into solo cups of course). --- Absolutely hyped for next week! --- Maximum warp Ensign, Engage! [END OF WEEK 14|07]
Likes
9
Share
@Chubbs
Follow
420Fastbuds FBT2308/Week 7 What up grow fam. Happy Easter to all. Weekly update for these two stunning girls. Where in the 3rd week of Flower and they are swelling up nice. I did notice some fad in the leafs so I upped my nitrogen a little and it seemed to stop the problem. All in all Happy Growing
Likes
6
Share
5/4 I stupidly watered everything this morning. They were pretty much perfect weight for transplant......then I watered them. Oh well. If that's the worst mistake I make I'll be ecstatic. Went back over and found my 1 gal and 2 of those wierd slanty airports that tapers and holds like a gallon and a half and washed them. I mixed up 12 gallons of soil in a garbage bag and mixed it thoroughly with my gloved hands. It's mixed good. Looking at my plants in sadness thinking, "today could've been the day" and noticed a Special Kush of average size I didn't water that weighed in the 220's. I was happy. I filled the pit arpund a cup before removing it leaving the perfect hole. Mykos and water were poured in. Plant came out of the cup REALLY easy. Suprisingly easy. This wasn't totally dry. I was amazed it came out so easy so I kinda rolled it around looking at the roots. I started lowering it in the hole and I felt something break away but it webt DIRECTLY into the hole made for it. I tucked some soil around it but it was pretty tight from packing it around the empty cup. Didn't take a picture but the plant is fine. That was an average size plant too. So I may have to give some of the strains I popped later a little longer before I transplant. After everything's been transplanted I'll need to change lighting again. I think I'll open the window and use the hps and the l.e.d on the days and nights cThat's these girls won't be hardening off. I so wanna go plant those others but my intuition tells me to wait until morning and it's been serving me well. A couple can stay in cups longer. Not much longer but still. 5/5 Transplanted everything but two this morning into 1 gals with 1/2 happy frog half ocean forest. Mykos and water used during transplant. Found put the l.e.d was on for 24hrs for a while. I made sure the timer switch was ON but it was a different cord plugged in. Oh well. All transplants went perfect. I'm picking up an adapter for the outlet so I can plug the power strip into the timer and only use one timer. I had to hang the 150watt hps back up with the 1,000 watt equivelant 105 true watts. I hope this lighting setup works. Chemdog #4 and One MK Ultra will be transplanted later today or later in the morning. I also opened the shade to the south facing window. Shits getting real. EDÌT: I FINISHED TRANSPLANTING THE LAST TWO PLANTS AND PICKED UP THE ADAPTER SO I COULD HANG THE HPS NEXT TO THE L.E.D. THEY WERE FIBE WHILE I WAS GONE. EASIEST TRANSPLANTS EVER. THEY ALL LOOKED PERKY AND HAPPY SIX OR SEVEN HOURS POST TRANSPLANT. I OPENED THE CURTAIN TO (SOUTH FACING WINDOW) BUT I MADE SURE THE PLANTS WEREN'T IN THE DIRECT LIGHT. EVEN THOUGH IT WOULD PROBABLY BE FINE. LAST TIME I HAD SEEDLING IN DIRECT LIGHT. I'LL PLAY IT BY EAR BUT IM HAPPY. EDIT 2. Went back over to meditate by the stream and do my qigong. It's 75 and BEAUTIFUL today. The girls will be going out for a few hours on days like this. Anyway when I went in I was surprised to see everything looking nice and happy with praying leaves. Nothing is in direct sunlight but damn that window let's in a lot of light. 5/6 Girls LOVED the transplant! They seem to be all happy. No stress. Easiest transplant I've done. Leaves are praying upwards so I think the lights are approx tje right distance. They'll be going outside soon to harden off. It's been in the 70s but it's rainy now. I'll play it by ear according to weather. I'll continue to monitor lighting and I may lower the hps. 5/7 The soil was super dry when I went over this morning. Everything looked awesome though. I used about a half gallon watering. I don't want to water to run off. I want to keep the nutes IN the soil. It's also easier to fix an undet watered plant than an over watered one. It came out to about a half gaterade bottle on the biggest and half that on the smallest. I'll gradually increase water after I monitor the response. The water sat on the soil for quit a while so they definitely needed it. Looking good so far. 5/8 Soil lookeddry this morning. I think I'm going to up the water. Last time I dod seeds I gave like a pink. Some plants still had a little dampness where I watered that I could see. Others looked dry but happy. I gave the REAL dry bigger ones a small circle around the rootball. Just in case. I'm thinking of lowering the hps slightly so it's at least level with tje L.E.D. That window being open gives tons of light. If u moved them slightly left they'd get DIRECT sun most of the time. I'll be bringing them outside soon to start hardening them off. EDIT: WENT TO CHECK THE GIRLS AT 5 TO MAKE SURE THEY WERENT DRIED OUT. THESE GIRLS ARENT JUST GETTING BIGGER BY THE DAY THEYRE LOOKING BIGGER FROM MORNING TO NIGHT! ITS BEEN RAINING LIKE CRAZY BUT WE WILL HAVE GREAT WEATHER NEXT WEEK AND I'LL BE BRINGING THEM OUTSIDE. I'M SUPER HAPPY WITH GROWTH SO FAR. ILL PROBABLY HST (TOP/FIM) AT THE NEXT NODE. I WANT THEM TO SETTLE IN NICELY BEFORE STRESSING THEM. 5/9 I may have stupidly uploaded doubles of pictures from today. Soil LOOKED real dry. I gave the plants their first real watering. I still went light. Almost a gallon with all plants. I know many say I should be watering to runoff but I want to keep the nutes in the soul as long as I can I don't want to overwater. I always start out careful. Once they show they xan tolerate it I'll increase water next time. This weekend it will be raining but after that we are getting some real good weather and I'll he taking the girls out to begin hardening off. I also need to take a look and top/FIM the plants now that they are settled. Also need to wash grow bags and sanitize outside. 5/10 It's pouring out. Horrible night and morning but this is about cannabis. After the watering ALL the plants shot up in size! Substantially. Leaves are over the sides of containers. I think I'm somewhere close with the watering schedule. I may bring the hps light down a little. I also NEED to start HST. I need to FIM and/or top these girls. Unfortunately I've been dealing with medical problems of my wife so I haven't got to it. If I get some sleep I may do something this morning or in the afternoon.
Likes
20
Share
Gracias al equipo de Divine Seeds, Marshydro y XpertNutrients sin ellos esto no seria posible. 💐🍁Fractal: La semilla de marihuana Fractal es una cepa especialmente psicodélica que Semillas Divinas desarrolló para experiencias esotéricas y místicas, meditación y creatividad. La potente y vívida Skunk#1 fue cruzada con una pegajosa Afghani Indica, y el resultado es ahora conocido como Fractal. Este exótico híbrido es resinoso, picante y productivo. La mejor opción para el cultivo comercial: un compromiso entre mayores rendimientos y maduración rápida. En interiores se espera una altura de 1,70 m, en exteriores las plantas crecen hasta 2 m. Fractal se adapta a todo tipo de entorno de cultivo: cajas de cultivo, instalaciones hidropónicas o aeropónicas, plantaciones exteriores, balcones, terrazas e invernaderos. Para un mejor rendimiento se recomienda entrenar a las plantas de Fractal para ampliar su estructura y limitar su crecimiento vertical. Usar ScroG o SoG, LST, FIM o topping. Fractal tiene una inmunidad inherente al moho y a las plagas de insectos, pero como sus colas son gruesas, proteja sus plantas del aire viciado. También durante las semanas de lluvia su plantación puede necesitar ser cubierta. Listo para la cosecha al aire libre en octubre. Grandes y densos cogollos. Los cogollos de marihuana de la variedad Fractral huelen a hachís y algo a tierra, desprenden cedro y notas afrutadas al romperse. Mida su porción con cuidado: su potencia está por encima de la media. Con Fractal experimentas un apedreamiento general que te hace sentarte o frena tu movimiento. Perfecto para pasar una noche junto a una hoguera. Es mejor consumirlo por la noche. 🚀🌻 Consigue aquí tus semillas: https://divineseeds.net/es/fractal-fem/ 💡FC6500: Eficiencia líder en el mercado: la lámpara de cultivo LED FC-E6500, que ostenta un estatus líder en el mercado, es una solución rentable con un PPE de 2,8 µmol/J y un rendimiento máximo de 2,5 g/vatio. Ofrece un PPF alto de 2026 umol/S y es adecuada para una cobertura de vegetación de 1,50 m x 1,50 m y una cobertura de flores de 1,20 m x 1,20 m. Iluminación versátil y uniforme. https://marshydro.eu/products/mars-hydro-fc-e-6500-730w-commercial-led-grow-light/?gad_source=1&gclid=Cj0KCQjw1qO0BhDwARIsANfnkv9IIrYSbmJqz8PqpJOIyWwJfp5bc3SGJgUV68USLQ4tjmXDYwoBuAsaAue3EALw_wcB 🚥 MarsHydro ADLITE UV/IR/RED: Para lograr un crecimiento óptimo de las plantas y maximizar los rendimientos es un arte simple que depende en gran medida de las condiciones ambientales adecuadas. Reconociendo las limitaciones de la iluminación natural y las soluciones de iluminación tradicionales para satisfacer estas necesidades únicas, lanzamos ADLITE. Estas luces especiales UV, IR y roja están diseñadas para llenar áreas del espectro, proporcionando las altas longitudes de onda que las plantas necesitan para un crecimiento y desarrollo óptimos. Consigue aqui tu Adlite: https://marshydro.eu/collections/adlite-supplemental-lights/ 🏠 : Marshydro 1.50 x 1.50 x 1.80, carpa 100% estanca con ventanas laterales para llegar a todos los lugares durante el grow https://marshydro.eu/products/diy-150x150x200cm-grow-tent-kit 🌬️💨 Marshydro 6inch + filtro carbon para evitar olores indeseables. https://marshydro.eu/products/ifresh-smart-6inch-filter-kits/ 🍣🍦🌴 Xpert Nutrients es una empresa especializada en la producción y comercialización de fertilizantes líquidos y tierras, que garantizan excelentes cosechas y un crecimiento activo para sus plantas durante todas las fases de cultivo. Consigue aqui tus Nutrientes: https://xpertnutrients.com/es/shop/ 📆 Semana 1 Un comienzo explosivo en solo 3 dias que llevan en floracion gracias a la nueva iluminación de mi patrocinador Marshydro, gracias al Adlite y como no a la gran gama de nutrientes de XpertNutrients. Continuo con las dosis de nutrientes recomendadas por el fabricante, esta vez el olor es penetrante y eso que todavia no tiene desarrollada las flores. En algunos ejemplares se pueden apreciar lindas preflores hembras.
Likes
19
Share
@RFarm21
Follow
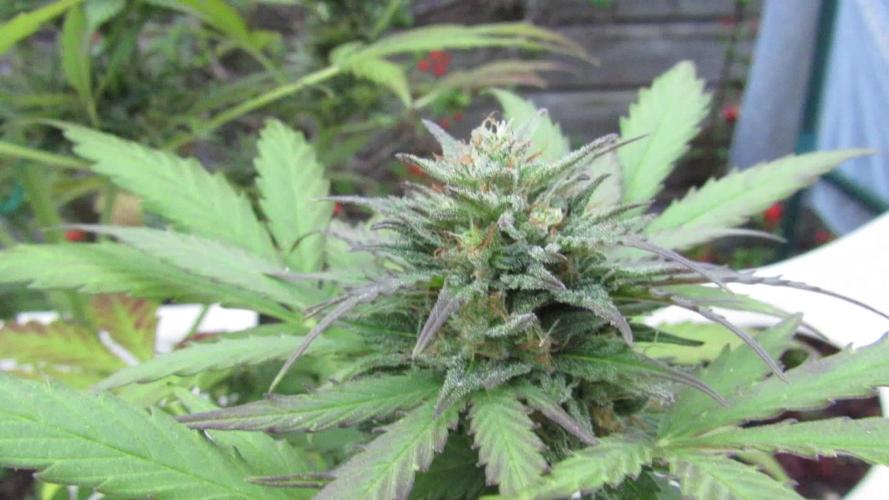
Bom ano novo! Foram alimentadas a 30 dezembro e 6 de janeiro. À espera de encontrar os primeiros tricomas castanhos para começar o flush.
Likes
Comments
Share
Cultivo de Ethos, semillas asequibles -más con el multipack- y genéticas muy recomendables.